LSIrish.com now offers over 550 pages of free, online projects and patternsfor wood carving, relief carving, whittling, wood burning, pyrography, painting,paper crafts, quilting, and gourd art. Many of our free craft projects have multiple pages, please Book Mark our site for your convenience.
Art Designs Studio is Lora S. Irish’s wood carving, pyrography, and crafts patterns web store with over 2500 patterns and designs, ready for you to download today. Line art, shaded drawings, and patterns for wood carving, pyrography, leather carving, applique quilting, paper crafts, scrap booking, gourd art, and so many more.
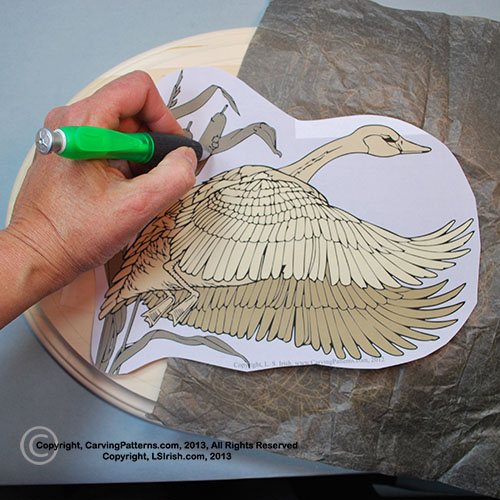
Wood carving is one of the few hobbies that does not require a large investment of money into tools and supplies to get started. With a few basics you are ready to begin your first project. Below is a peek into a simple beginner’s tool kit. These are all items that you will be using over and over again in your wood working.
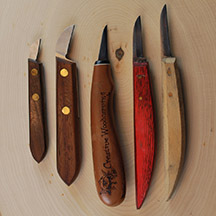
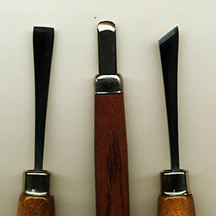
The most important tool to the relief carver is the bench knife. This will be used constantly during carving to create stop cuts and score lines. At the right the top red handles tool and bottom white handled tools are bench knives. The center tool is a large chip carving knife.
Choose a high quality bench knife as your first investment.
The second most important set of tools will be your sharpening stones and strop. No matter what quality a knife or gouge is, or how much you paid for it, it is only as good as the honed edge.
At the right you will see a honing strop, brown coarse sharpening stone, white fine sharpening stone, and rouging compound.
This is a sample of the many excellent beginner’s sets of carving tools available today. This six piece set includes a deep gouge, a shallow gouge, a v-gouge, a straight chisel, a bent chisel, and a skew chisel.
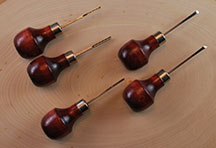
As your enjoyment of wood carving increases you may wish to add the following specialty tools to your kit. Shown here are a bent spoon, back bent spoon, a set of tools for use with a mallet, and two dog leg chisels.
The bent spoon is excellent for removing large amounts of background wood. The back bent spoon and dog leg chisels are made to reach underneath the joining edges of the design.
My tool kit also includes a set of twenty micro tools for extremely fine carving.
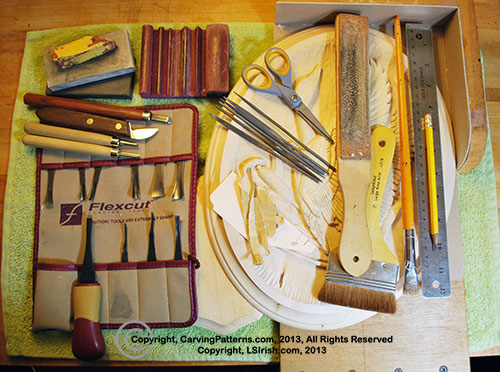
This is a sampling of the miscellaneous items that will eventually find their way into your tool kit. Included here are two depth gauges, an exacto knife for pattern cutting, a compass, a set of fine files and rasps, a brass wire brush, an old tooth brush, a triangle, fine sand paper, wood glue, and scissors.
You will also want to throw into the box some tracing paper, tape, onion skin paper, a bracing board jig, a ruler or measuring tape, and an old terry cloth towel for easy clean up.
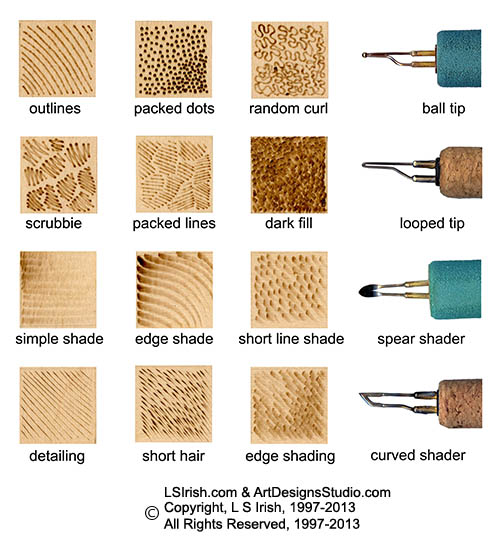
There are so many stroke, pattern, and fill textures that you can create in your pyrography, your burning palette is almost unlimited. When we add the tonal value changes – pale cream through chocolate black – and how open or tight each stroke pattern is worked there is no design or pattern that can not be accomplished with our wood burning pens.
The wood burning stroke guide, above, shows just a very few of my favorite texture, fill, and stroke patterns. Every pattern shown can be used to create smooth graduated shading, solid fill, and detailing lines. This practice board is divided into the patterns or strokes that each of our pen tips make.
The sample squares that are shown were worked with an extra-open stroke pattern so that you can clearly see how each pattern fill is created.
Each pen tip profile makes a specific stroke pattern
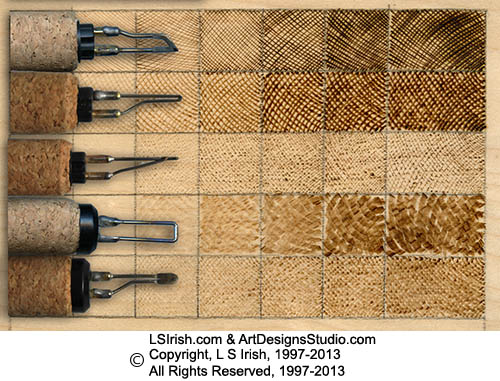
The pen tips, above, are manufactured by Colwood. Pen tips top to bottom: curved-edge shader, looped tip pen, micro-loop pen, square shader, and the spear shader. Each manufacturer names their pen tips a number or name unique to them. Please visit your wood burning manufacturer’s website for their specific, proprietary name.
Thin line fills are best created with a ball tip or loop tip pen. These two pen tips burn a slightly wide, even line so they are perfect for tight scrubbie stroke fills, solid touch-and-lift dot pattern fills, and packed line shading.
The spear-shaped shader has a spoon or spear shaped burning tip that is bent at an angle from the pen handle. This places the flat, wide area of the shader directly onto the board for long, pull shading strokes. You can use this pen tip on its edge, giving you a wide area of the tip for your burn strokes. As you pull the spear shader edge across the board it naturally starts the stroke at a dark tonal value that slowly pales as you pull away from the starting point.
The curved-edge shader has a thinner metal tip than the spear shader. Used along the wide edge of the belly of the curve, this shader also creates easy-to-make graduated wide, shaded line strokes. Hold this pen along the sharp, pointed edge of the pen and you can burn extremely thin lines, even cutting and sculpturing the wood.
The square shader is a specialty pen tip that is a joy to use in any of your wood burning projects. This tip has a thick wire, bent at right angles, to place a large amount of hot metal directly onto the wood. It burns wide, even colored strokes that fill large areas quickly. Worked on one edge of the tip you can burn long, thick-to-thin grass and hair strokes.
LSIrish.com now offers over 550 pages of free, online projects and patternsfor wood carving, relief carving, whittling, wood burning, pyrography, painting,paper crafts, quilting, and gourd art. Many of our free craft projects have multiple pages, please Book Mark our site for your convenience.
LSIrish.com now offers over 550 pages of free, online projects and patternsfor wood carving, relief carving, whittling, wood burning, pyrography, painting,paper crafts, quilting, and gourd art. Many of our free craft projects have multiple pages, please Book Mark our site for your convenience.
Art Designs Studio is Lora S. Irish’s wood carving, pyrography, and crafts patterns web store with over 2500 patterns and designs, ready for you to download today. Line art, shaded drawings, and patterns for wood carving, pyrography, leather carving, applique quilting, paper crafts, scrap booking, gourd art, and so many more.
As a beginning carver, the choice of carving tools available can be overwhelming. Which tools you really need to learn this craft and which tools you really will use can be a hard decision. There are several basic tool shapes that are standard to this hobby. The primary carving blade is the bench knife.
The bench knife has a thin blade that will be about 1 3/4 inches to 3 inches long, and tapers to a point at the tip of the blade. The entire straight faced edge of the blade is sharpened to provide you with an ability to cut lines into the wood and to whittle away long slivers of excess material. Short blades are usually referred to as bench knifes where a longer style blade will be called a Sloyd knife. Bench knife styles are also marketed under the names of ‘detail knives’, ‘whittling knifes’, and ‘straight knives’. Of all the tools that you will purchase, this one is the main stay of your kit and it is worth the investment for any beginner to begin with an excellent quality of blade. There are many fine examples of detailed carving that are done using only the bench knife.
Round Gouges
The second style of tool that you will be using is the gouge. Where the bench knife tapers to a point, the gouges end with a blunt cut. The full length of the blade is either rounded for c-curve gouges, tightly rounded for u-curved gouges also called veining tools or parting tools. The final edge of the blade is sharpened to slice out the wood. Gouges remove great quantities of wood at a time and so are used to do the rough cutting in carving.
V-Gouge Chisel
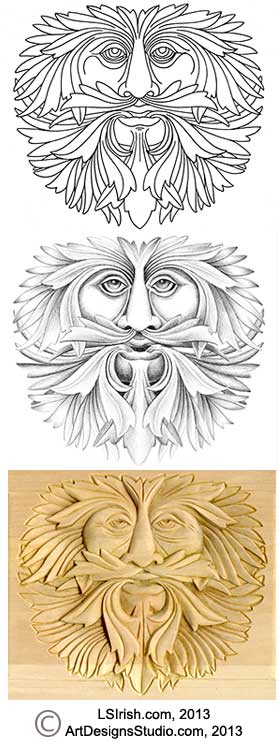
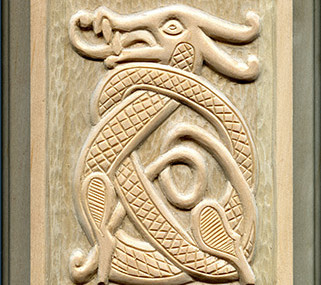
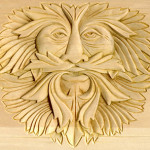
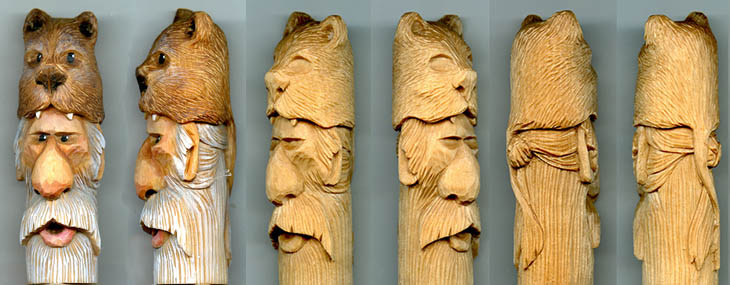
This tool comes to a sharp “v” point at the tip creating a deeply scored line in the wood. “V” gouges are available in a variety of angles from very tight “v”s to widely open “v”s. Use this one to carve along joint lines in the design and for detailing as the beard and hair in a North Wind pattern.
Straight Chisels
Chisels also have only the final edge of the tool sharpened, however the end will be cut in a flat end or angled end. These flat blades are used for the stop cut in relief carving, for removing large areas, and for crisping corners. They are also excellent for scraping the final surface of your work to leave a clean smooth finish. Chisels cut at an angel are called “Skews”
There are many specialty carving tools that have been developed over the years. For undercuts and removing the background areas in tight corners you might want a dog-leg skew. There are also bent gouges, backbend gouges, spoonbit, and fishtails available for your use. As your craft is developed, like most carvers, you tool kit will increase with a variety or knife shapes. Tools also come in a variety of widths from the micro carvers that are used for very fine detail and miniature works to the large fish tail gouges and awls that remove great quantities of wood with one stroke.
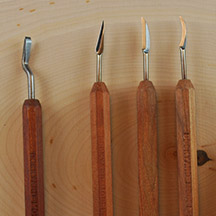
Specialty Knives
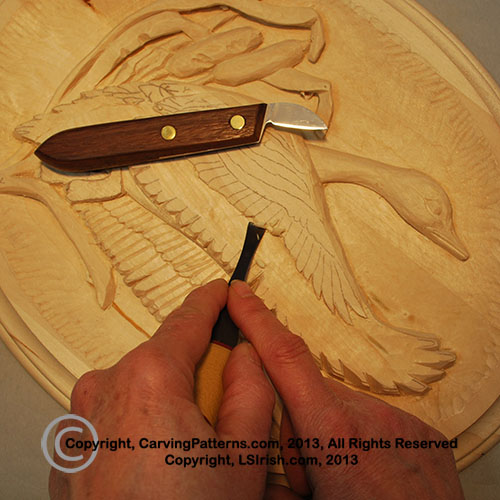
There is a wide variety of specialty knives available to the relief wood carver. This photo shows just a few in my tool kit. To the left is a dog leg chisel used to clean the background wood under deep ledges or undercuts. The three knives to the right are detail knives for fine line work and for cutting into small, tight areas.
Tool Pattern Cuts
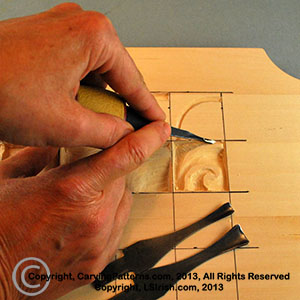
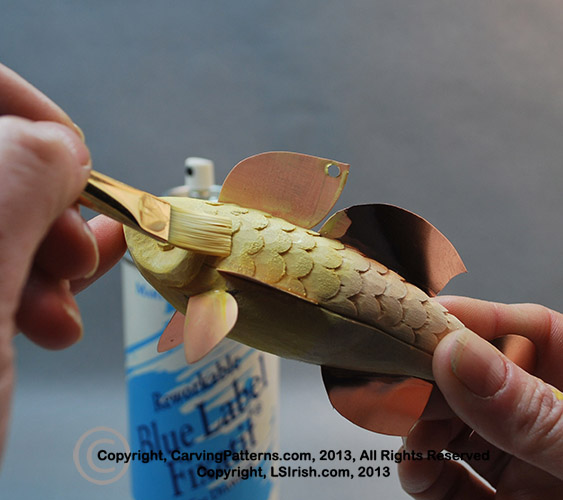
Each tool creates it’s own pattern of stroke in the wood. Use a scrap of softwood to practice and explore each of your new knifes. Remember also that each individual blade style can create a variety of strokes depending on the depth of the cut and the angle of the blade entry into the wood. A c-curve gouge will make a beautiful tear dropped shape stroke that both tapers into the cut and then back to the surface of the wood. Yet if you hold it upright at a very slight angle and push into the carving you can make fish and dragon scales with the blades imprint.
From your left to your right in the image above the patterns have been made with the following tools; bench knife, chisel or skew chisel, gouge, v-gouge or v-point chisel, and u-gouge or veining tool.
There are three basic styles of wood burning tools – one temperature units, rheostat temperature units, and variable temperature units. In this article by Lora S. Irish, we will look at each style, how each wood burning tool controls the tonal values of your burnings, and which style is best for you.
Introduction
Wood burning can greatly enhance your carving project. Used to create fine line detailing or sepia tones of shadowing, with just one tool and a few basic strokes this craft will open a new dimension to your finished work. There are two styles of wood burning tool – the one temperature tool and the variable temperature tool. In this tutorial we will take a brief look at both styles.
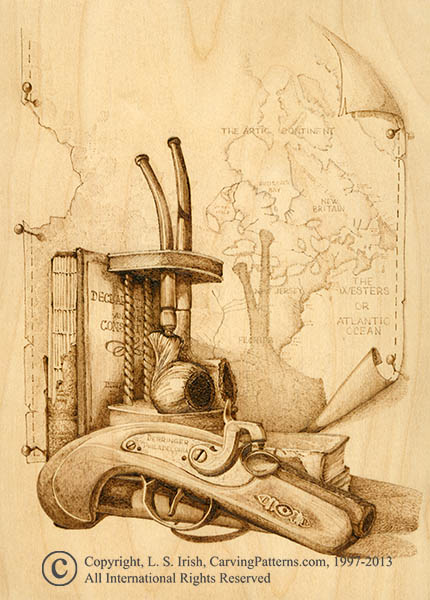
Once you catch the “burning bug” you will soon discover that the complete design can be created using just this tool. Wood burning is a lot more than just dark brown outline on a piece of wood. From pale golden shading to dark textured areas, there is a wide range of coloring that the burner will make.
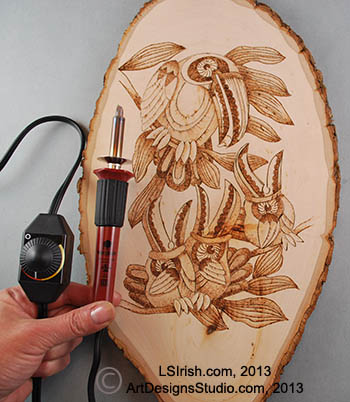
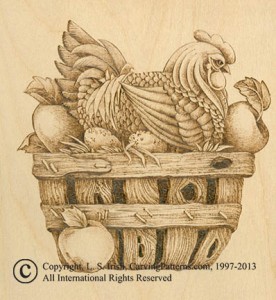
The Toucan Family burning, right, is a fun beginner’s project and is worked using a Walnut Hollow Versa-tool and an end grain basswood plaque. This rheostat tool has a full range of temperature settings from very pale cream tones to chocolate black.
A wood burning is created with five elements – the wood burning unit, the pen tips, the media on which you are working, the pattern or design you will burn, and the art style you will use to create the design. Lets look at the pyrography systems first.
Choosing your first wood burning tool
There are three styles of wood burning units – one temperature tools, rheostat-controlled tools, and variable temperature tools. Which you chose depends on both your interest in this craft and your pyrography budget.
One temperature burning tools
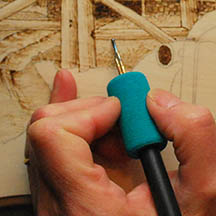
One temperature burners are very similar to soldering irons. The solid interchangeable tips are made from brass and screw into the front end of the burner. When this tool is plugged into the wall outlet it heats to a single temperature – high. The most used solid brass tip is called a universal tip. This is the tip shown on the burner, shown below, and can be used for both fine line work and shading work. The other common solid tips that are available for this style of wood burner are the calligraphy tip used for lettering, the flow tip used for large area fills, the cone tip used for detailing, and the large shading tip used to add shadows.
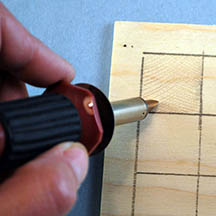
Rheostat burning tools
Walnut Hollow has taken their one temperature burning tool and added an adjustable temperature rheostat to the cord. This tool uses the same interchangeable brass tips as the one temperature tool which can be used to shade and detail any pattern or design. With the rheostat you can control the heat settings from very pale cream tonal values to dark chocolate blacks. The rheostat dial uses a color code for your heat settings from pale yellow to dark red.
Variable temperature burning tools
Variable temperature burning tools use a thermostat controlled base unit into which a pen cord is attacked. The burning pens – either fixed tip or interchangeable tip pens – are then attached to the cord. This places the thermostat unit on your work table, leaving you to hold just the weight of the actual pen. Variable temperature units have a very wide range of heat setting, well beyond what we commonly use in our pyrography.
Celtic One Celtic knot patterns, Celtic animal patterns, Celtic corners, and of course the Celtic cross, contains line designs, centerpiece motifs, corner patterns, arches, and even the Celtic cross.
Enjoy the free, online teaching, tutorials, projects and patterns created by Lora S. Irish which focus on wood carving, relief carving, pyrography, paper crafts, quilting, painting, and general fun art ideas.