Uncategorized

Stop Cuts and Rough Out Steps in Relief Wood Carving

The stop cut is a two-stroke bench knife cut that frees a v-shaped trough along a pattern line. A round, flat, or bull nose chisel is then used to cut the wood in the lower level of the design, sliding the chisel into the stop cut. When the chisel edge meets the stop cut a clean sliver of wood is released without damaging the higher level. Today we are going to look at the steps used to create a stop cut and to do basic rough out work in your relief wood carvings.

Stop Cuts in Relief Wood Carving
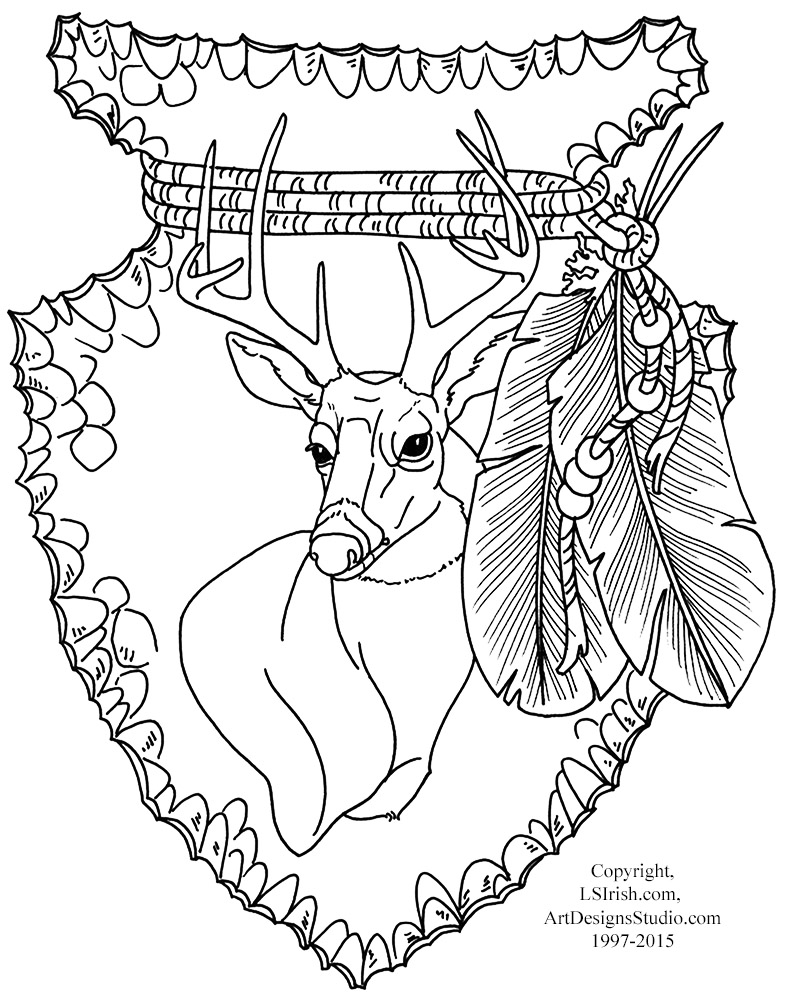
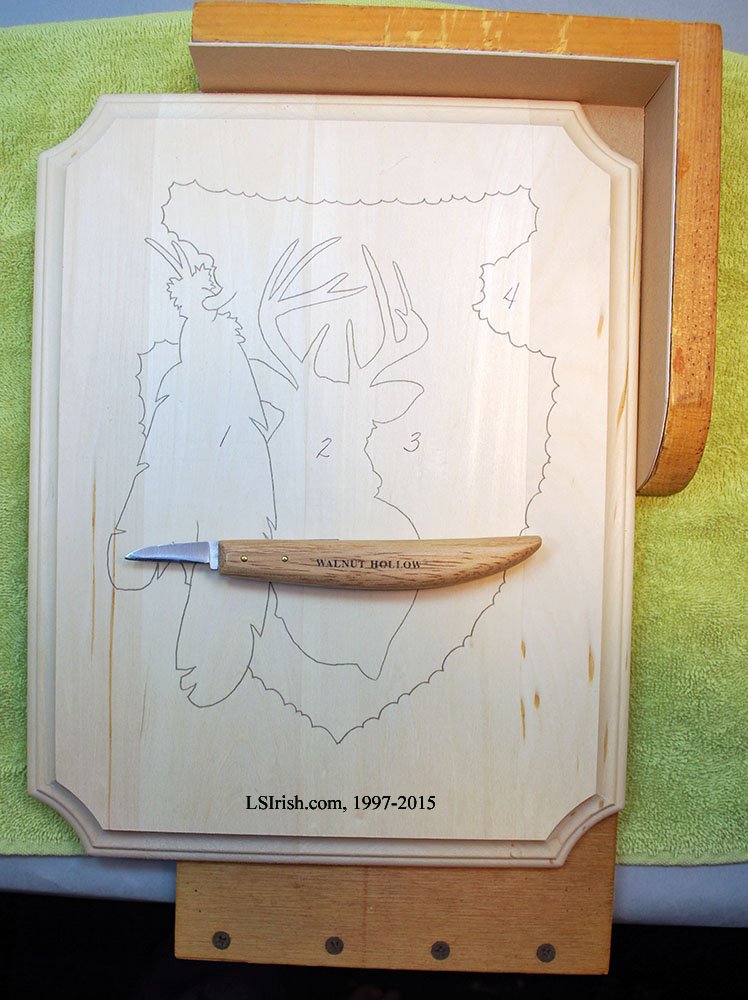
Begin by tracing your pattern to the wood blank. Because you will be cutting away background wood and dropping areas of the pattern into different levels or depths in the blank you need only trace the outlines of each area. All detail tracing will be lost during the rough out stage.

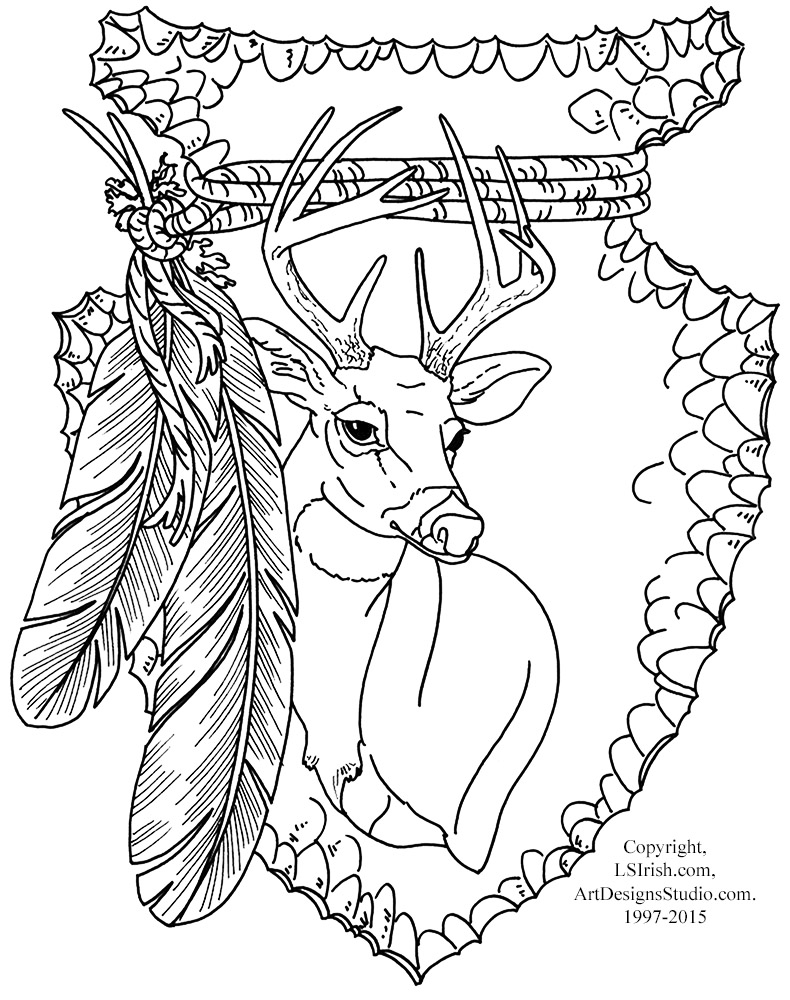
The pattern shown here, the Mule Deer Buck, is an in-depth tutorial that is posted at FamilyWoodworking.org and WoodworkingChat.com.  These are two great, online message boards where wood carvers and woodworkers can share their ideas, experiences, and techniques.


Stop Cut

The two strokes of a stop cut in relief wood carving
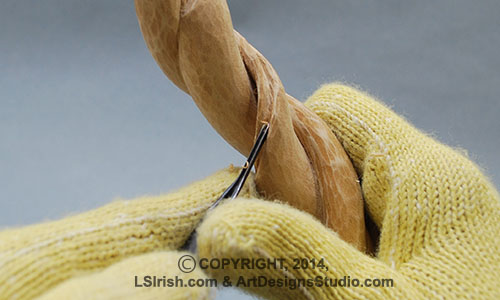
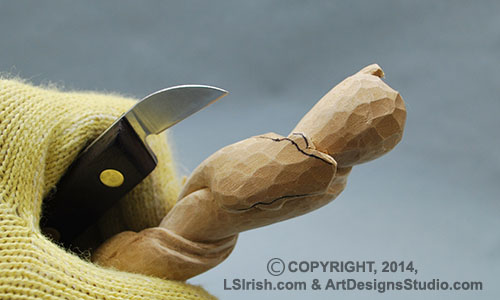
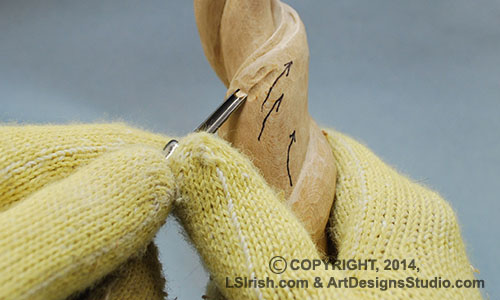
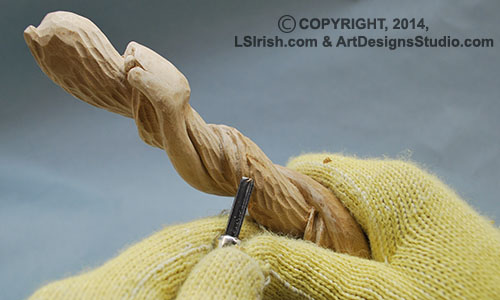
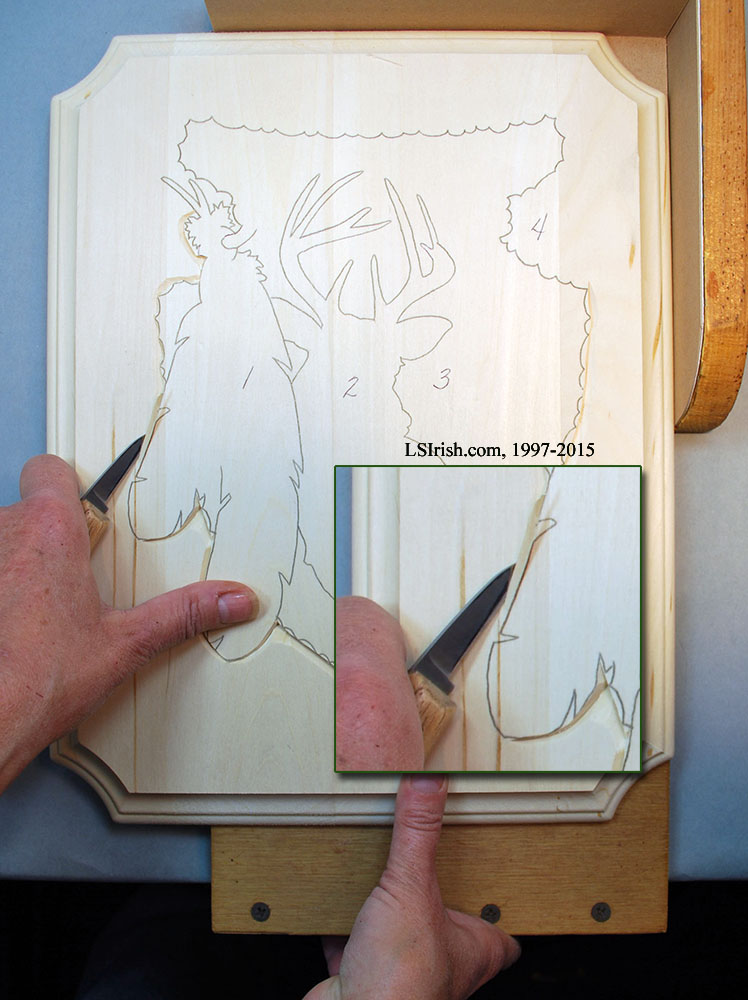
1.  The stop cut is a two-step stroke.  Begin by laying your bench knife vertically along the outside edge of your pattern line.  Pull a shallow cut following the pattern line.

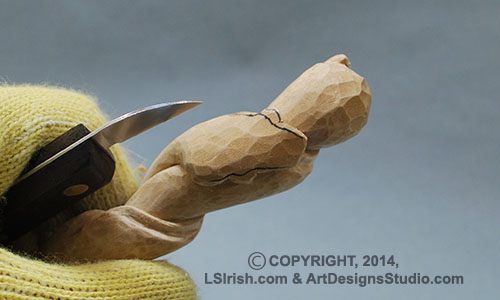
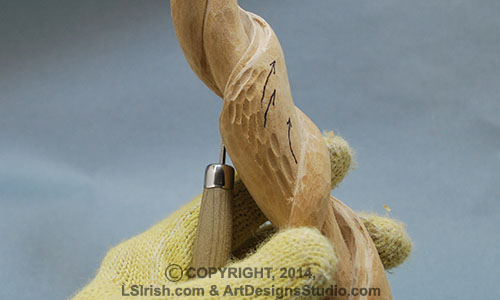
2.  Move the tip of your bench knife a small amount of space away from your first cut.  Angle the knife tip towards the first cut.  Pull a shallow cut, maintaining that small space between the knife tip and the first cut.

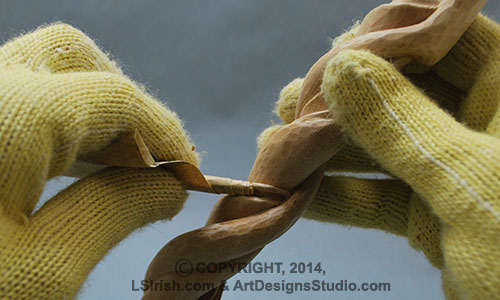
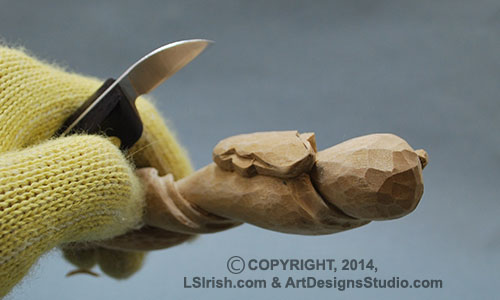
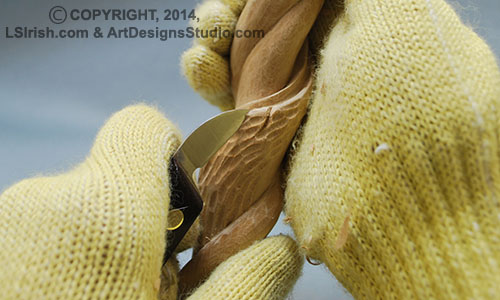
3.  The two cuts will release a thin, shallow v-shaped chip of wood.  The chip will leave a straight wall along the pattern line and an angled wall in the background area of the pattern.


Stop cuts in relief wood carving
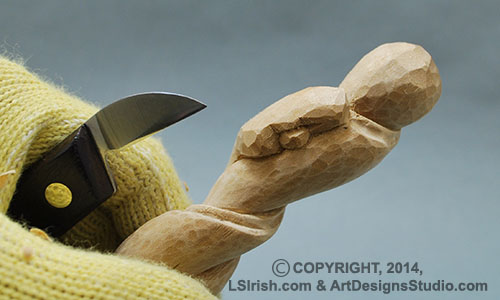
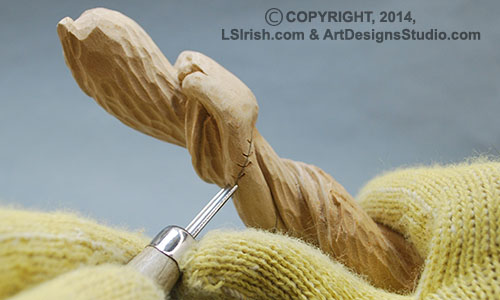
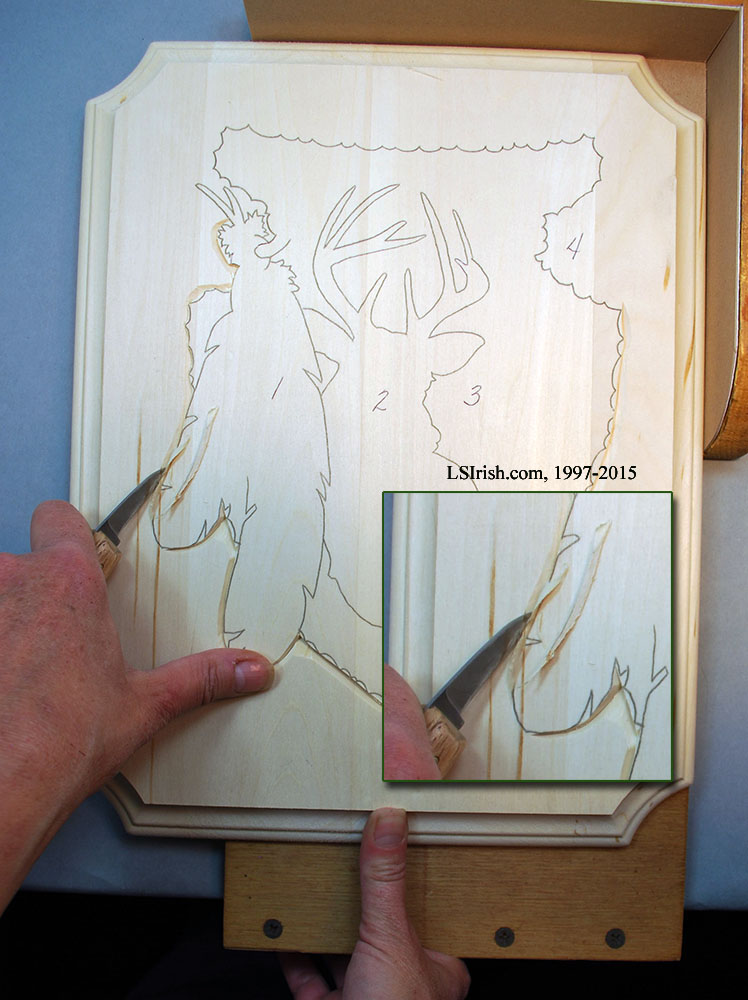
4.  You can deepen a stop cut by re-cutting, using the same steps, several times.  This ‘walks’ the v-shaped trough deeper into the wood.

5.  Stop cuts may also be created using a v-gouge.  The v-gouge makes both the straight wall cut and the slanted side cut in one stroke.   The g-gouge works exceptionally well when you are creating stop cuts that flow with the grain of the wood.  For tight areas in a pattern, as the small openings in the feathers in the pattern shown, you may find that the bench knife will provide more control.


Rough Cutting into a Stop Cut

Wide Sweep Gouge in Rugh Cutting a Wood Carving
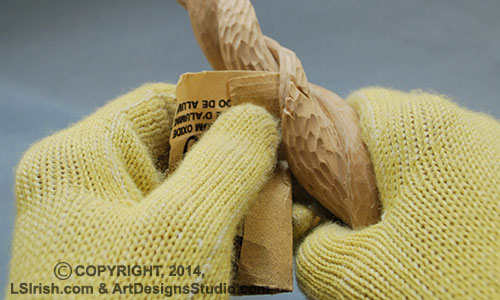
1.  You can use a round gouge, straight chisel, or bull nose chisel to rough cut a background area that has been stop cut at the pattern line.  I prefer a large, wide-sweep round gouge for my first rough-out cuts.  The wide-sweep takes a shallow but wide chip of wood with each cut.  That allows me to slowly drop the depth of an area while taking a large chip of wood with each cut.

2.  Start you cut about 3/8″ to 3/4″ from the stop cut in the background area.  Move the chisel or gouge edge towards the stop cut, slowly deepening the cut as you work.  Stop when your gouge reaches the stop cut.  I usually cut a series of gouge cuts, that slightly overlap.


Releasing a rough cut gouge stroke with a bench knife.
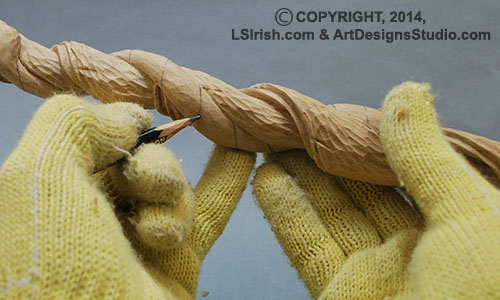
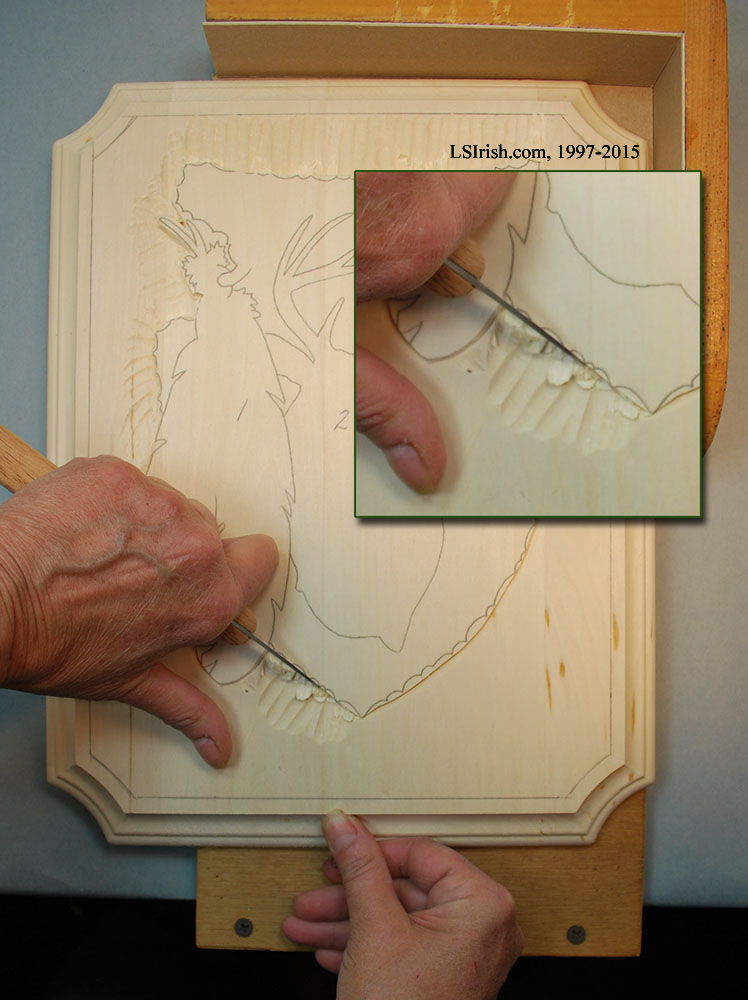
3.  Make a shallow, vertical cut, using your bench knife along the pattern line to release any gouge chips that are still connected to the wood.

4.  Alternate your stop cuts with your gouge rough-out cuts to slowly drop the background area to your desired depth in the wood.

5.  The background area that has been gouge rough cut will at this stage will slowly taper from the original level of the wood at its most distant point in the cut from the pattern line to the your desired depth at the stop cut.  Later in any relief carving you can work the remaining background areas down to the same depth.

Practice Board Exercise

Relief wood carving knife cuts
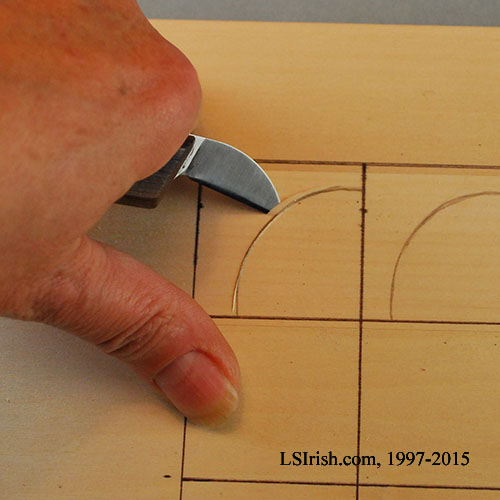
1.  Practice boards allow you to try, learn, and experiment with new cuts before you use them in your latest projects.  In this sample the reverse side on an older basswood plaque was used as my practice board.  I marked the board into 1 1/2″ squares, creating small spaces to experiment with different relief carving cuts.  For the stop cut and rough out practice I used a medicine jar cap to draw a half-circle as my pattern line. Begin your practice square by making the two-stroke stop cut using a bench knife or a large chip carving knife.


Stop cut made with a bench knife3.  You can see in the sample photo how this two-stroke cut releases a long v-shaped wood chip.


Freeing a rough cut chip from a stop cut.
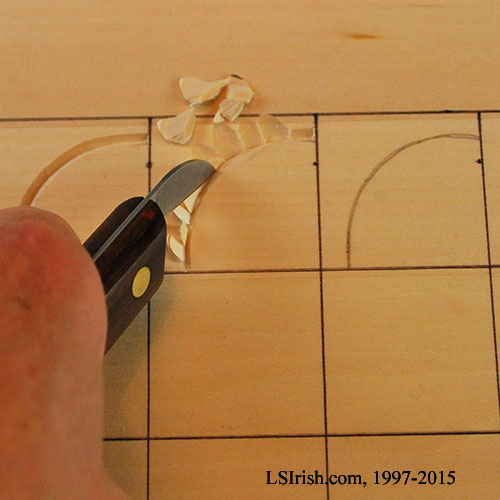
4.  Use your round gouge, straight chisel, or bull nose chisel to begin removing the wood in the background area of the design, working from the outer edges of the wood blank into the stop cut line.  With your bench knife cut along the stop cut, holding the knife in a vertical position, to free any rough cut chips.

Alternate making stop cuts and working rough out cuts to slowly drop the depth of the background elements in the design.


practice pattern for stop cuts in relief wood carving
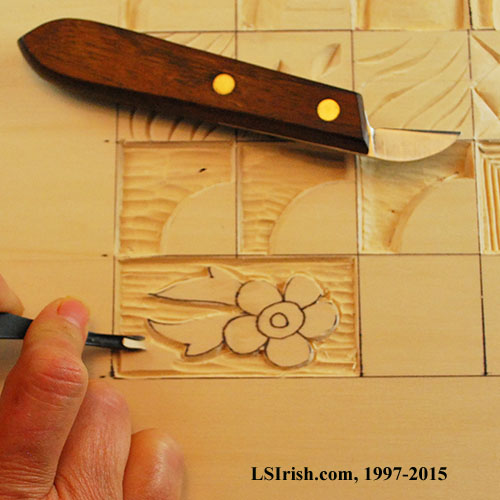
5.  Here is the stop cut and rough out cuts used in a small practice pattern.


Stop Cuts and Rough Out Steps in Relief Wood Carving Read More »

Mule Deer Relief Carving Project

Today I am posting the free wood carving relief project patterns for this Mule Deer Buck Relief Carving.

Free Lora Irish Mule Deer Carving PatternFree Lora Irish Mule Deer Carving PatternClick on the patterns above, which will open the pattern in a new window.  You can Click and Save these patterns to your desktop.

This project is posted here on my blog at Mule Deer Relief Carving.  If you would like to interact with this project and me, please visit FamilyWoodworking.org and WoodWorkingChat.com.  This project is being posted on these two great carving message boards where you can sign-up, post questions, add photos of your own carvings, and share your joy of wood carving with other hobbyists.

Free Carving Patterns by Lora Irish

And … We have a new freebie pattern package posted on our pattern website, Art Designs Studio.  The download link is on our home page!


Mule Deer Relief Carving Project Read More »

free carving seminar by Lora Irish

Februray Happenings

February Happenings Around the Studio
Cabin Fever Sale
New Freebie Pattern Package
Free Online Relief Carving Mule Deer Seminar


Complete Pattern Collection on Thumb DriveThe Complete Collection on Thumb Drive
Every pattern package on our website – 136 Packs
Wood Carving – Wood Burning – Arts & Crafts
Free Shipping – US Priority Mail
Plus – Easy Steps to Sharpening E-Project
Plus – Introduction to Pyrography E-Project


Complete Pattern Collection by DownloadThe Complete Collection by Download
Every pattern package on our website – 136 Packs
Wood Carving – Wood Burning – Arts & Crafts
Download Today, Carve and Burn Tonight!
Plus – Easy Steps to Sharpening E-Project
Plus – Introduction to Pyrography E-Project

Free Carving Patterns by Lora IrishIrish Free 2015 Pattern Pack
Download is on our Web Store Home Page

11 Free 100 dpi Lora S. Irish Patterns
Wood Carving – Wood Burning – Arts & Crafts
Discover if our patterns will work for your craft.
Click here for free download zip file.
(Please let your friends know about this new freebie!!!)


free online carving seminar by Lora Lora is teaching this relief Mule Deer Buck carving
Step-by-step instructions, lots of photos,
and two free patterns.

Later today, Monday, Feb. 2nd.
Lora is this seminar at
FamilyWoodworking.org
and
WoodworkingChat.com

The supply lists and free pattern have been posted.

Join me in this interactive online, step-by-step
relief carving seminar!

Februray Happenings Read More »

free e-project with any purchaseFree E-Project with any purchase at ArtDesignsStudio.com

A $12.95 value

Creating pristine, sharp, crisp cutting edges for our carving tools is so important that Lora is giving away her newest e-project with any purchase – a 38-page, in-depth e-project that takes the guesswork out of carving tool sharpening, by Lora S. Irish, available only at ArtDesignsStudio.com.

Easy Steps to Sharpening, by Lora S. Irish

Lora takes you through the basic steps to sharpening both double-edged bench knives, and single-edged round gouges, v-gouges, and chisels. Learn how to work you tool to create the bevel on the course sharpening stone. Move on to creating the sharp edge on the fine sharpening stones, and then discover the tricks to working with a leather strop and honing compound. Lora will teach you how to use newspaper to give your cutting edges that final bright polish!

Put Easy Steps to Sharpening E-Project in your cart, go shopping for great carving and pyrography pattern packs or another e-project, then type   free e-project in the coupon code window. 

This coupon works with our package discount coupons! The more you buy, the more you save!


Read More »

Twistie Stick Snake Cane Carving, Day 4

Today we will deepen the honeysuckle twine area, shape and detail the snake’s head, add texture to the Sassafras bark, and do a general clean-up of the cane work. So, let’s begin having more fun!

Day 1 Twistie Stick Snake Cane Carving
Day 2 Twistie Stick Snake Cane Carving
Day 3 Twistie Stick Snake Cane Carving
Day 4 Twistie Stick Snake Cane Carving
Day 5 Twistie Stick Snake Cane Carving

Walking Stick Joinery
Walking Stick Wood Species – Harvesting Your Sticks
Walking Stick – Adding Extras
Walking Stick – How to Clamp Your Handle

Free Mountain Man Cane Carving Pattern


Step 13: Very small, tight-arced round gouges are called veining tools. This tiny round gouge makes straight-walled, round bottomed troughs, which are perfect for deepening our honeysuckle stem area.

using a veining tool in wood carving

Similar to the veining tool is the checkering tool used in gun stock carving. The checking tool comes with either a small round gouge or v-gouge, plus it has an adjustable l-shaped arm. You make your first cut line in your checkering pattern. Then adjust the l-shaped arm to the distance you want between the rows. Drop the arm into the first cut row, and it controls the distance between the rows as you cut the next.

I note the checkering tool here because while you may not ever try gun stock carving, those checkering tools make wonderful backgrounds for your relief work.

carving a Sassafras twist stick
Tear a small square of 220-grit sandpaper from the large sheet and roll it tightly into a tube. Use the tube to sand the honeysuckle trough area along the top of each Sassafras twist.

Step 14: It’s time to shape the snake’s head. To begin this area, I re-marked the outline and eye placement of the snake with permanent marking pen. Since we will carve this area, any pen markers will quickly be worked away.

carving a twisted snake walking stick

Cut along the outer edges to reduce any excess wood from the head.

shaping a snake head in wood carving

Cut along the edge of the eye area with a stop cut to lower the eye slightly on the head.

shaping a snake head in wood carving

Step 15: Round over the eye area, using the bench knife.

shaping a snake head in wood carving

Make a small, slice in the head at the outer corners of the eye, to emphasize the eye, and to create the impress of the jaw and cheek.

wood carving a snake cane

A Quick Reminder – I am posting  this Twistie Stick Snake Cane each day on my favorite carving forums.  Stop by, join up, so that you can post your questions and photos!!!!  Carving forums are like potato chips … just one is never enough … Grin!

FamilyWoodworking.org at Twistie Stick Snake Cane Thread

WoodworkingChat.com at Twistie Stick Snake Cane Thread

And while you wait to get started, visit Roy’s relief Carving Class thread – See our widgets in the right hand nav bar and on both forums!!!!


Step 16: Texturing the Sassafras bark is done with both the veining tool and your small round gouge. Cut small, shallow tear-shaped gouge strokes in the bark area using the small round gouge first.

round gouge wood carving

Note in the photo that I am making the bark twist by angling my strokes with the curve of that twist area. Do a few veining tools cuts to add smaller texture strokes.

round gouge carving bark texture in wood carving

With the bench knife, make a few stop cuts along the top edge of the bark in the twist areas. These stop cuts make the bark appear cracked or split – a natural occurrence for any Sassafras stick.

round gouge carving bark texture in wood carving

Step 17: Bark, literally, lies on top of the wood of a stick. To emphasize that the bark and the wood are two different areas or elements, use your v-gouge to cut a small, thin trough where these two areas meet. You can also use your bench knife to make a few, shallow undercuts into the bark to make it appears as if the bark is slightly peeling.

round gouge carving bark texture in wood carving

A little more sanding … These cleaning steps are technically called ‘dressing out’ the wood and used to catch those little imperfections while you have them in your sights.

sanding your wood carvings

Step 18: There are many, many ways to work the scaling of the body of a snake, lizard, or dragon. What I am using here is the most simple and fool-proof that I know. In working my snake, I lost just two scales – two that ‘popped’ out during the cut and my solution to those two was to simply ignore them. Mistakes happen and sometimes trying to fix a mistake just makes them worse.

Begin by marking parallel lines along the snake body lightly with pencil. Also take a moment a re-fresh the edge of your small round gouge on your honing board or leather strop.

creating round gouge snake scales in wood carving

Up-end your round gouge, which means to hold the gouge at a 90 degree angle to the wood so that the cutting edge is go straight into the wood. Gently push the gouge into the wood to cut a half-circle profile cut. Lift the gouge straight out of the wood. This is a simple push and lift stroke.

creating round gouge snake scales in wood carving

I worked several up-ended small round gouge profile cuts along the guidelines to set the spacing of the rows. Then I worked off of that center cut to create the other profile cuts in the row.

creating round gouge snake scales in wood carving

Some of the profile cuts made with my small round gouge were slightly lifted from the snake’s body. To ‘heal’ them I rubbed the wooden handle of my gouge over the snake, moving from the head towards the tail. This light pressure sets the scales back against the wood.

Healing can be done at anytime in a carving. Example, if you make a stop cut that is slightly too deep, after the second stroke is complete, turn your bench knife upside down and place the blunt side against the deep cut. Use a medium pressure and pull the blunt side down the cut to ‘heal’ it back together. Work carefully! Remember, in this example, that cutting edge is now facing towards your hand!

creating round gouge snake scales in wood carving

This style of scale creation will leave a very light, gentle impression of scales along the body. They become more outstanding when you add the linseed oil finish later.

Step 19: At this point the work on the snake is complete, and the Sassafras carving is complete, except for adding the honeysuckle vine into the trough. This is a great stopping point for the weekend.

Sassafras Twisted Snake Cane Wood Carving

So, using your roll of sandpaper, rifflers (small, profiled files), and your bench knife take a little more time to dress out your cane. Next Monday we will begin work on carving the frog that holds onto the top of the stick, creating the joints for the cane and stick, and on the finishing oil steps.

Sassafras Twisted Snake Cane Wood Carving

But right now … you are ready to go make a bunch of twistie stick key chains for your family and friends as Holiday presents!!!! And, if you have questions, comments, or want to share your twistie stick carving, now’s the time.

Sassafras Twisted Snake Cane Wood Carving

Twistie Stick Snake Cane Carving, Day 4 Read More »

Scroll to Top