Arts and Craft Show Sales Ideas found below the project instructions.
I am also looking for new idea that can inspire our next wood carving, scroll saw, or pyrography project. I came across this idea, Yarn Tassel Maker, on Temu, loved it. The original was cut from 1/2″ board and is for sale at $5.95.
I think we can do better on the wood layout design and have fun adding a decorative wood burning! This is literally a ten minute project for the scroll saw cutting, sanding, and glue steps. Add another 10 minutes for the pyrography sets.

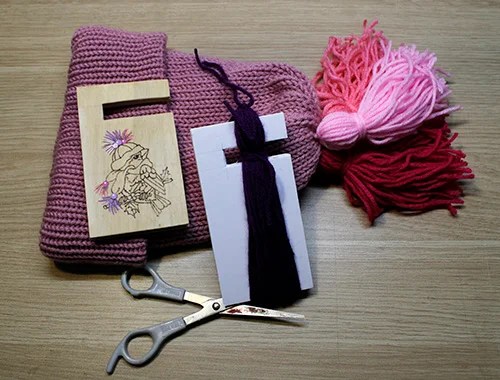
The knitters, crocheters, and weaver in your family are just going to love you when you gift them this tassel maker. As a crocheter, when it comes time to make a tassel I am scrambling for scraps of cardboard, thick enough to hold up to the yarn wraps, but thin enough to cut with my scissors.

My version is made with 3 pieces of 18″ plywood for strength, features a slot to accurately wrap a gather yarn for the top of the tassel and the gather yarn for the bottom of tassel ball, plus has a slot between the plywood layers at the bottom of the tassel maker where you can insert you scissor blades for easy cutting.

Supplies:
3 pieces of 1/8″ plywood that measures 3″ wide x 5″ long
wood glue
masking tape
ruler
scroll saw or coping saw
graphite tracing paper
pyrography pen
paste wax finish
yarn
crochet hook or a large yarn needle
scissors
NOTE: I made my first tassel maker to create a 5″ long tassel, but you can adjust the height of your tassel maker for 3″, 4″, and even extra long at 8″
NOTE: I went right for my pyrography pen for the decoration, but you can leave your tassel maker un-decorated, add decorative stickers, and even use scrapbook stamps to add a small design.

How to Create the Tassel Maker
1. My prototype was worked form 1/8″ foam core board.
On your 1/8″ plywood, make the outside dimensions for your tassel maker with a pencil – 3″ wide x 5″ long. Mark a line 3/4″ down from the top. Make a second line 1/2″ from the line above. Mark a line 3/4″ in from one side of the board. This makes the slot area of the tassel maker.
Gang cut the three pieces of plywood, following along the pencil lines.
Cut 1/4″ from the bottom edge of one plywood piece. This piece will become the center of the three layer stack. By removing a 1/4″ from that piece you create the slot so that the scissors can easily slip above the yarn for cutting.
Note: If you are working with foam core board, cut each piece individually. Use an exacto knife and hold the knife at a low angle to the board. Drop the cut slowly, using two or three cuts for each line. My foam core board prototype is as sturdy as my plywood project!
2. Sand the edges of the plywood with 220-grit sandpaper. Foam core board can be sanded with a fine-grit nail file, working each filing stroke in one direction.
3. Stack the pieces with the 1/4″ short plywood in the center, aligning the yarn slots. Use carpenter glue to glue the three layers together. Use masking tape to tightly hold the three pieces as the glue dries. For the foam core board prototype I used hot glue.

4. In the finished prototype, above, you can see the scissors slot.

How to Use the Tassel Maker
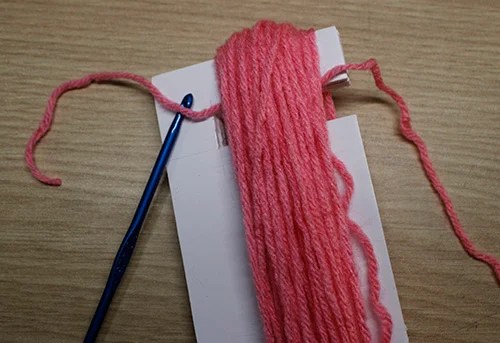
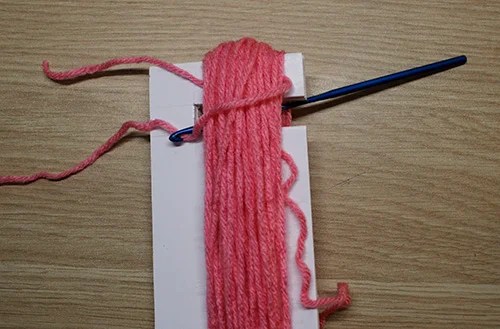
5. To create a tassel, hold one end of your yarn at the bottom of the tassel maker. Wrap the yarn over the full height of the tassel maker between 35 – 50 times depending on how thick a tassel you want.

6. Use your crochet hook to pull a 9″ piece of yarn under the wrapped yarn at the very top of the tassel maker. Make several loops, pull tight, and tie off. This yarn is used to secure your tassel to your hat or scarf.

7. Cut a 9″ length of yarn. Slide the yarn into the slot at the top of the tassel maker. Use a crochet hook to pull the yarn out of the slot on the opposite side of the wrapped yarn. Lay the yarn over the wrapped yarn and repeat this step several time. Pull the yarn tight and tie off. Use you crochet hook to pull the ends of the center wrap yarn behind the wrap, down into the tassel area.

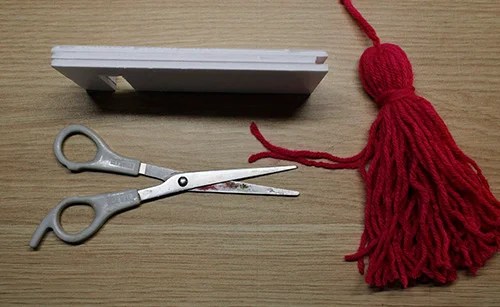
8. Slide your scissors through the bottom slot of the tassel maker and cut all of the wrapped threads.

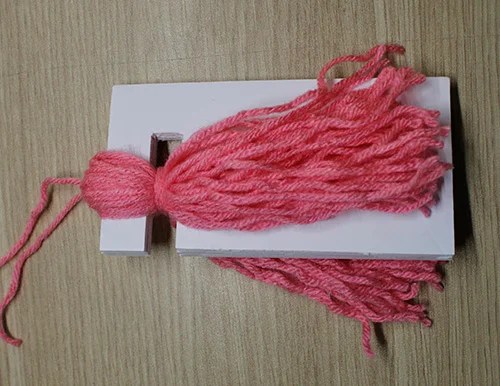
9. Slide the tassel off the tassel maker! You can use your scissors to trim up the tassel ends as needed.

10. The tassel maker is quick and easy to make, fun to use, and let’s you make as many tassels as you need that are all the same size.

Arts and Craft Show Ideas!
I did the Craft Show circuit for many years and was always looking for that ‘show stopper’ idea that caught the someone’s attention enough to tease them off the walkway and bring them up to my booth or table.
There are several things that I learned early and worked over and over again.
1. You never make a sale unless you can get your customer into a conversation.
2. A customer will browse over your booth from a distance if you only have high priced items. They will approach your table if you have some inexpensive items out at the front of the table.
3. The little items bring them your table where you can start that selling conversation that will then bring their attention to your higher priced items.
4. At a craft show you are competing with every other crafter for that one lump sum of money that they are willing to spend at the show on a high priced purchase, while a customer often makes multiple lower priced purchases.
5. You won’t get sales if you have to convince your customer that they need or want your products. But you almost always get the sale if you simply let them convince themselves that they need what you are selling.
6. Looking at the photo above, this display would be on the front of my table, about one or one and half feet from where I would be standing. Why? Because that little distance lets them approach without feeling that they will be ‘pounce’ on by my sales pitch. But they are well within talking distance when they reply to your “good afternoon, are you enjoying the show?”
7. Behind that display would be my selling basket for the tassel makers with several different sizes of maker, tassel makers with different designs, and with ribboned sets of 3″, 4″ and 5″ tassel makers.
8. Color sells, and most wood carvings, wood burning, and scroll saw projects don’t have color. But those tassels do, the knit hat does, and so do the brightly colored ribbons that are wrapped around the sets.
8. Again returning to the photo, the display visually shows the customer exactly what that ‘thing’ is, what it does, and how it works. They don’t have to ask you anything, but they will tell you … grin … what it does and why they just must have one.
9. Even my display scroll saw tassel maker has a designs that clearly shows ‘this is a tassel maker’, which emphasizes this is what you can make with it, and here is where you can use the tassels you make …
You have brought them into your booth and let them make the sale.
I really good you sell dozens of these little tassel makers at your next show!!!

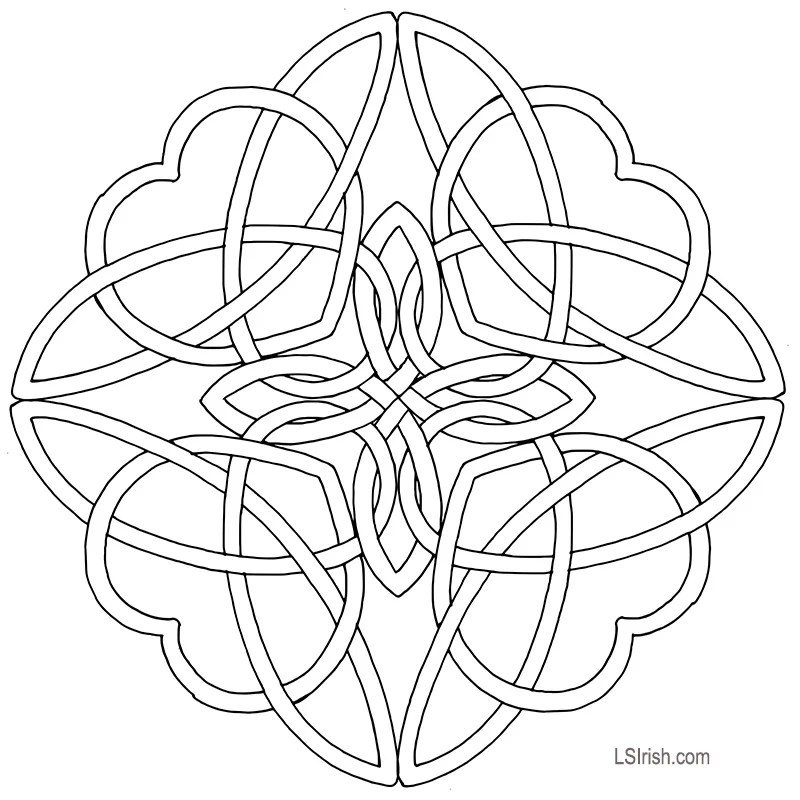 Free Celtic Circle Pattern
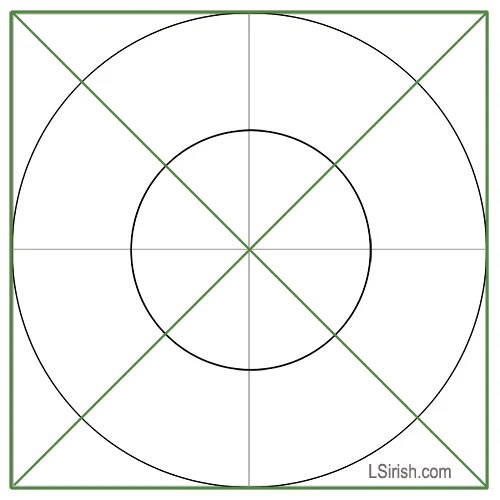 Fig. 1

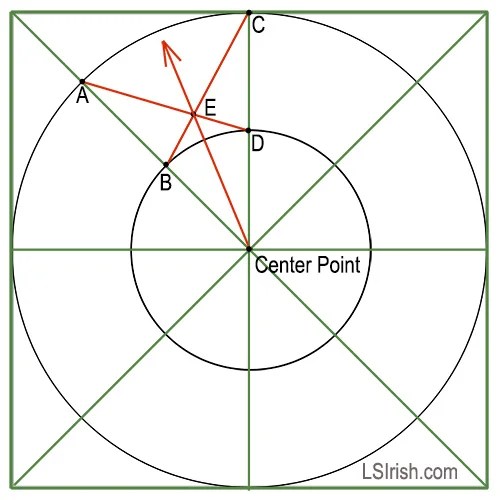
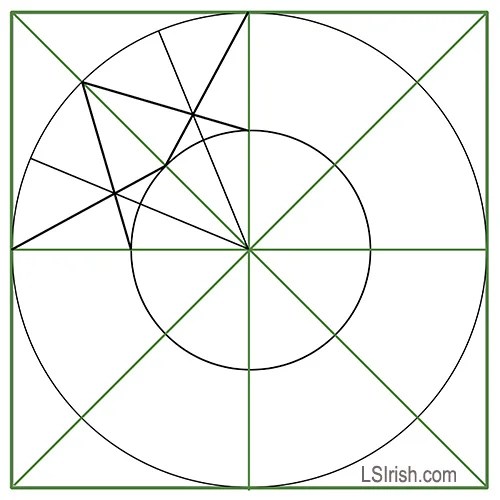 Fig. 5 creates an eight section circle grid.
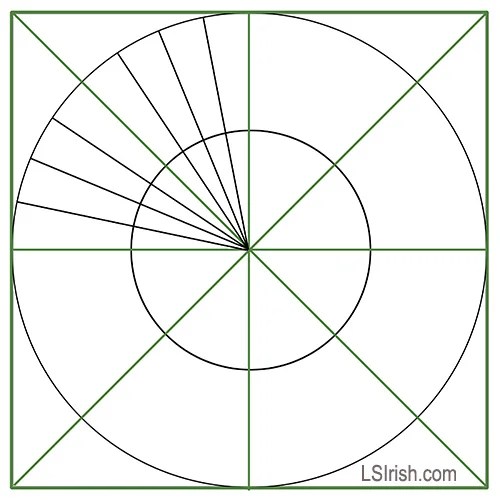 Fig. 6 will establish a 32 section circle grid.
 Fig. 7 Protractor Chart