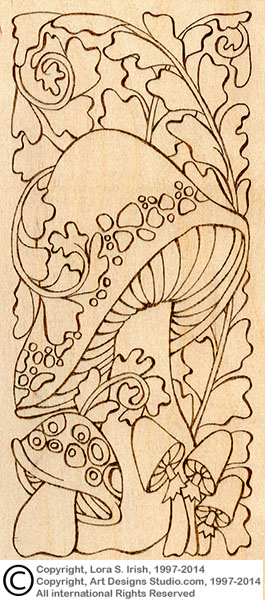
Today we will fill the top of the mushroom cap with a large doodle pattern, then adding graduated shading to the cap. Please drop by our carving and pyrography pattern website, Art Designs Studio, to get your free mushroom pyrography patterns that complement this project. The pattern package is on our home page. The links to the previous posts for this free project are below.
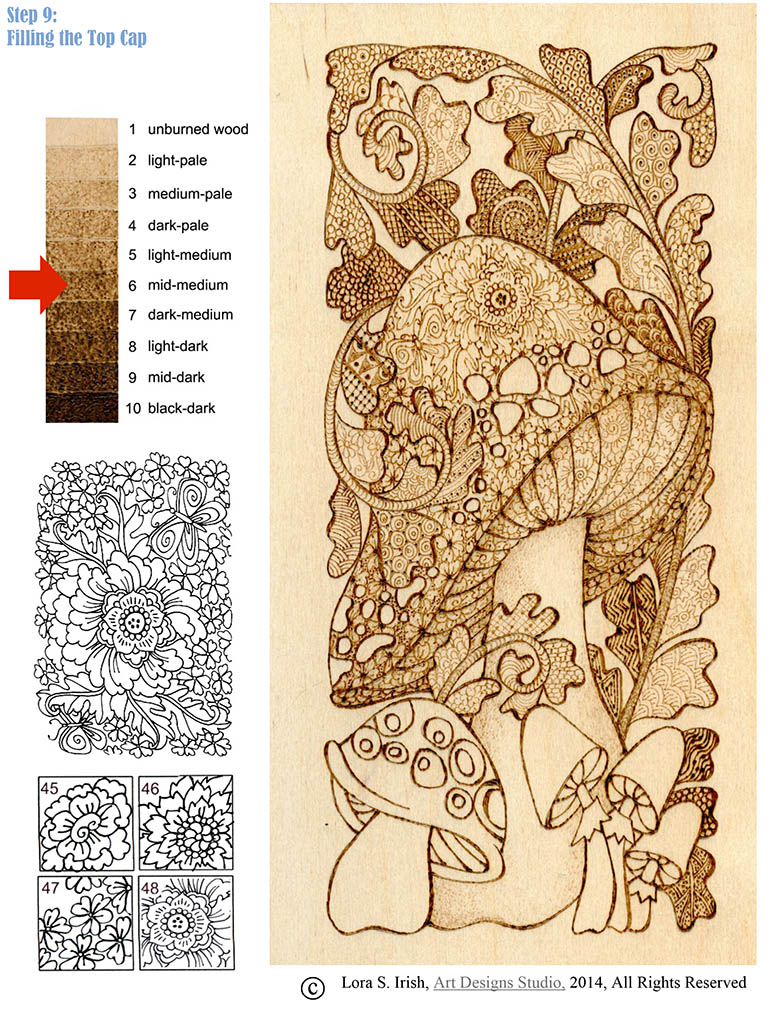
The pattern on the mushroom cap is a very large flower pattern with long leaves, butterflies, and small daisies. Begin the large flower at the top of the mushroom cap. As you work the doodle pattern towards the outer edges of the mushroom cap begin filling using small daisies. Add as many butterflies as you would like.
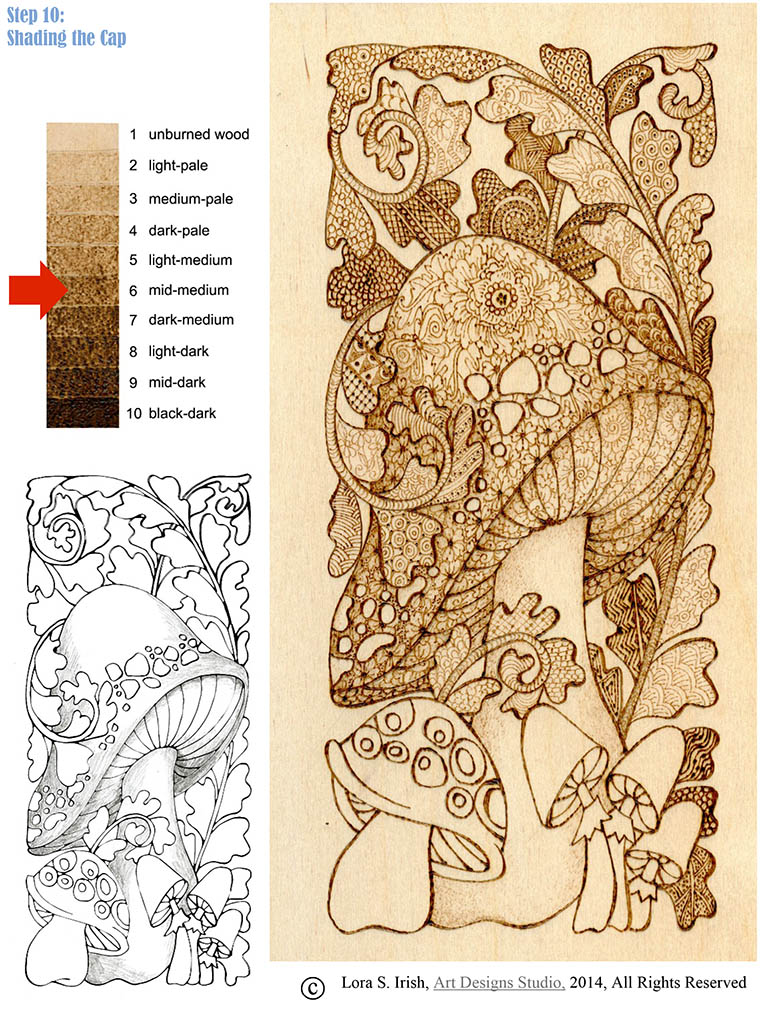
Step 10: Shading the Cap
A second shading is worked over the entire large mushroom to deepen the tonal value along the outer edges and behind the leaf curl. Leave the mushroom spots unworked, the white of the wood.
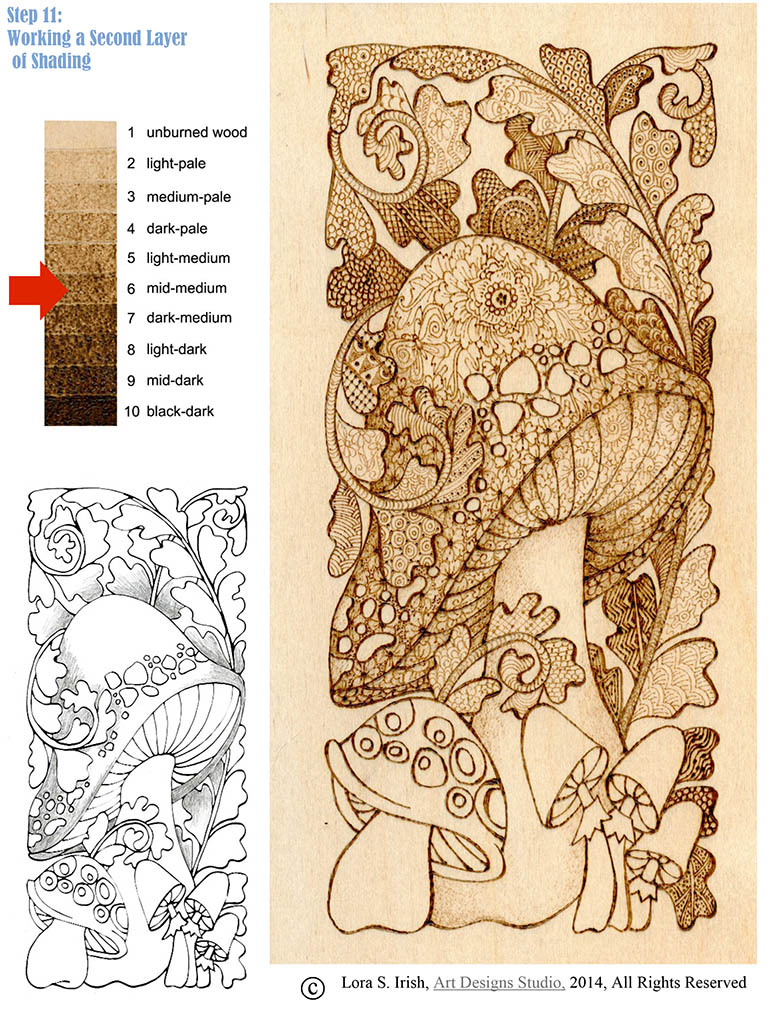
Step 11: Working a Second Layer of Shading
To push the background leaves even deeper into the design, a third layer of shading is added. Please follow the shaded drawing guide for your shading placement.
Please remember these are large images that you can right-hand click and save to your desktop.
Small doodle patterns can be used to create the fill textures inside the sections of any pattern, adding delightful little designs to your work. Those doodles can be repeat patterns, random fills, or large, fully complete designs. In today’s step we will work a large floral pattern in the underside of our mushroom cap.
To provide a clear, easy-to-follow, easy-to-print image, the photos on this page are fairly large. Please be patient as they load to your browser. Click on any of the images to open them, full sized, in a new window. Right hand click on the image and save it to your desktop.
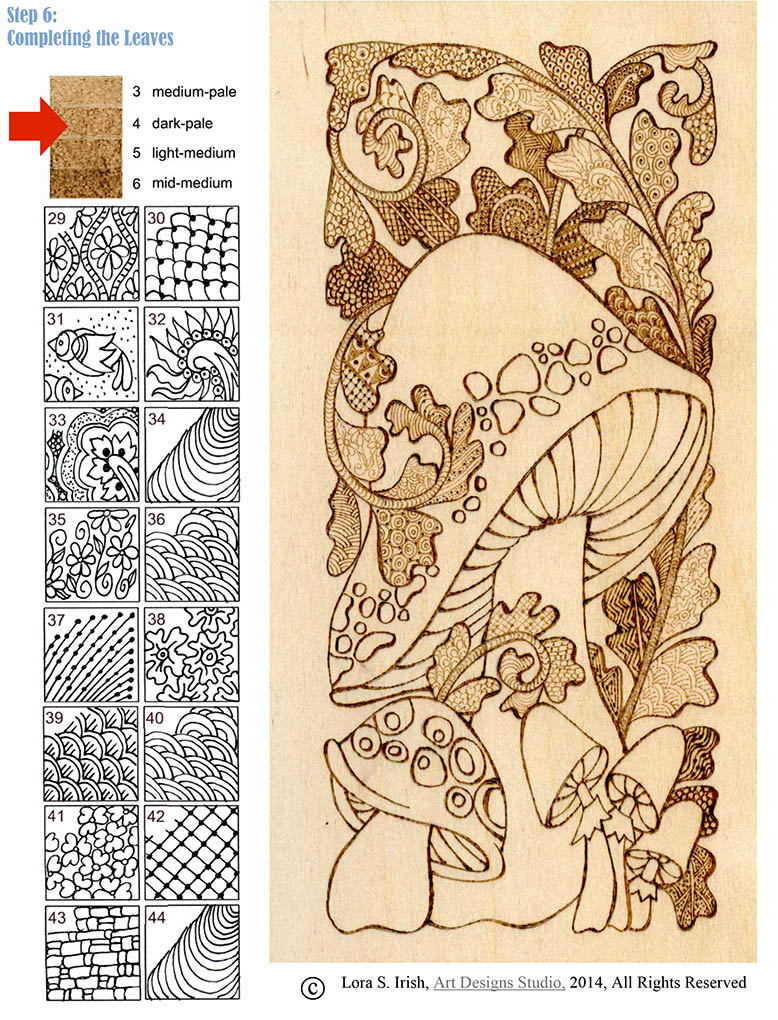
Step 6 Completing the Leaves
To create more tonal values in the overall mushroom design, turn your temperature setting down to a dark-pale setting. Work the doodle fill patterns into each section, following the pattern guide. Note that the designs and patterns of the doodles are still strong even though they are worked at a pale value.
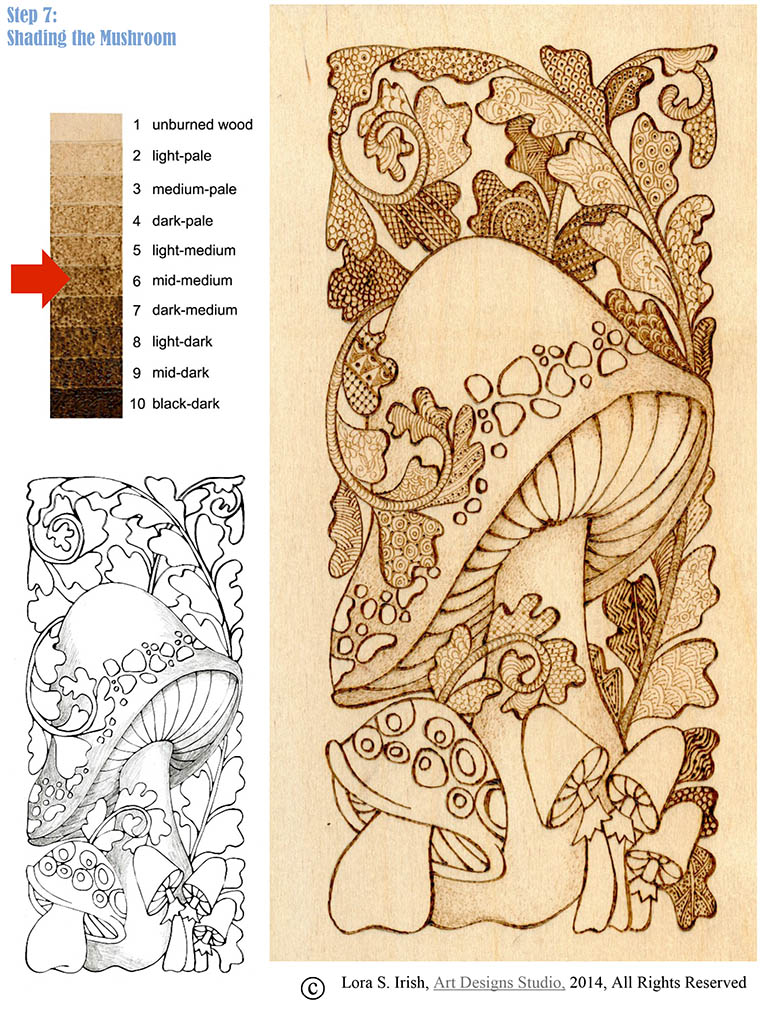
Using a common fill pattern, shade the mushroom cap, underside, and stem. Work the shading on the left side of each area, with the darkest tonal values along the outer edge of each area. Follow the shaded drawing for placement.
Step 8: Fill the Underside of the Cap
Fill the underside of the mushroom with the large flower pattern shown on that step page. This pattern features a double scroll center with an inner ring of five petals and an outer ring of scalloped petals. Add more scalloped petals between the flowers to fill the space between each flower.
The images on this page are sized to print an 8 1/2″ x 11″ guide sheet which includes your sepia temperature setting, a close-up of the burning, the pyrography shading guide, and the doodle patterns used in that step. Please be patient as the image loads. Click on the image, allow it to load in a new window, right-hand click on the image, and choose Save to your Desktop.
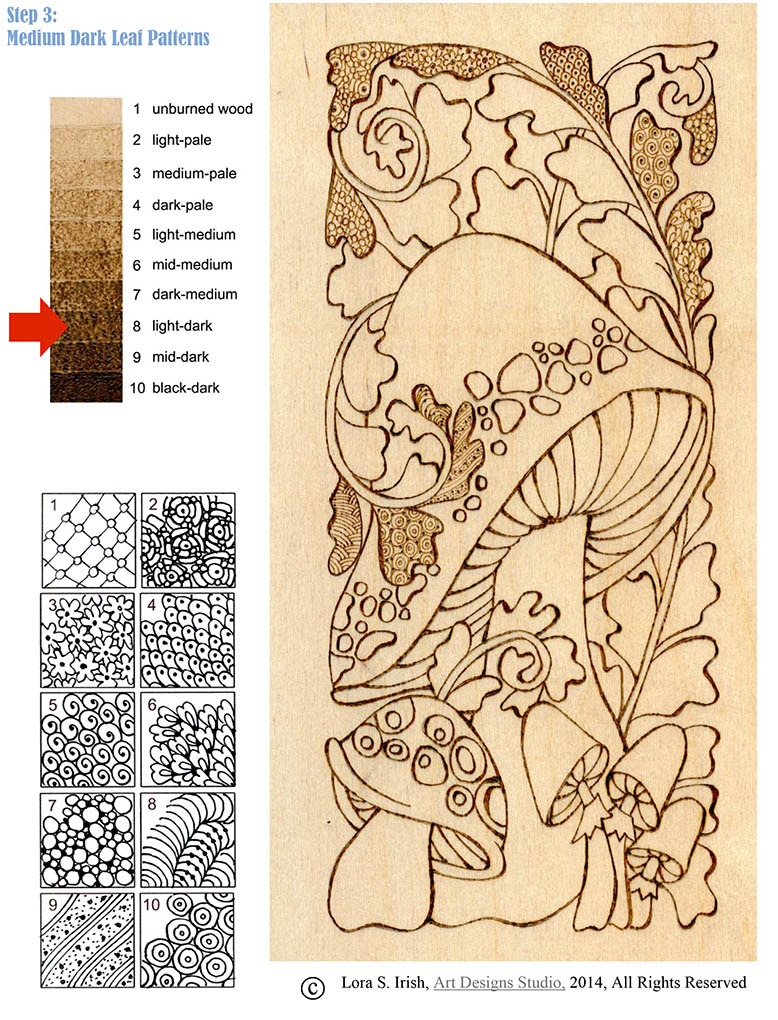
Step 3: Medium Dark Leaf Patterns
To establish the mid-range of your tonal value, begin your pattern burns using a medium-hot setting on your tonal value scale. Each fill pattern is a complete, small design within the boundaries of that section of the larger pattern. Work the patterns with a fine line tip – either a ball tip or looped tip pen. Work the patterns right to the edge of each section to give the impression that were the outlines not there the pattern would continue into the background.
For the first doodle patterns, shown in this step, I used simple repeats of small flowers, scales, and spirals.
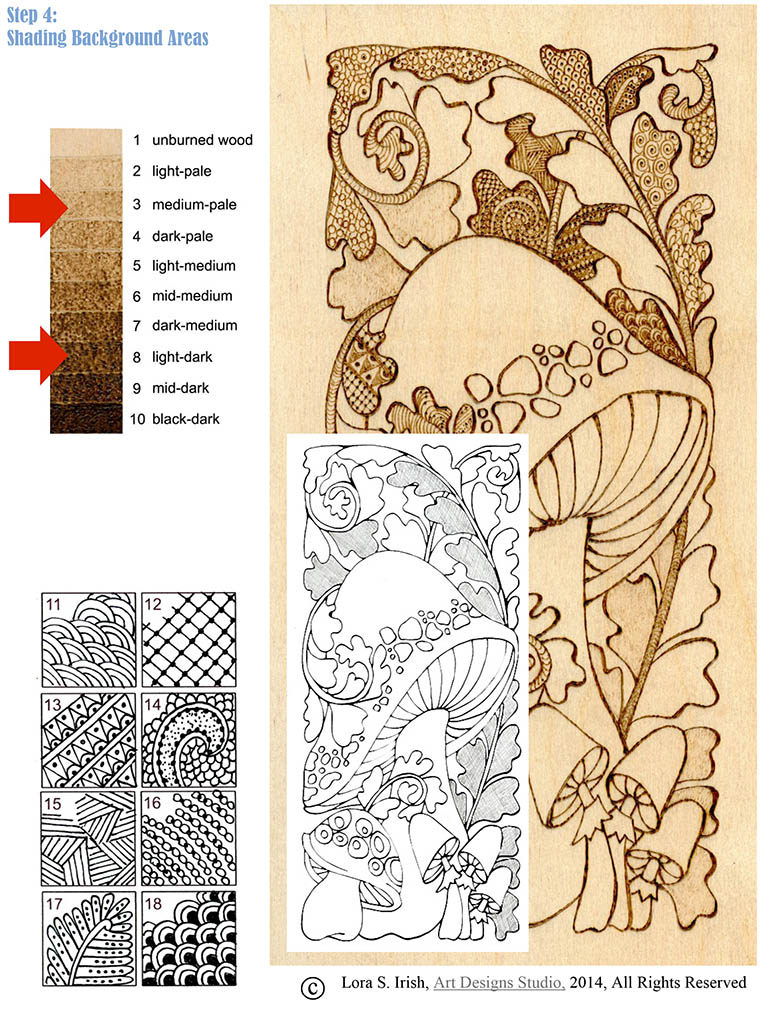
Step 4: Shading Background Areas
An unshaded background for your pattern fills allows the white of the wood to show through your line work. You can work a common, shading fill over a section first, then lay your pattern work over that shading to darken the tonal value of the entire section. This technique allows you to have a mid-toned background with a dark line doodle.
You can also burn your doodle pattern first then shade over that section to darken the total tonal value of that section. This technique will darken both the background and the line doodle.
After these sections are shade the dark fill leaves are worked at a medium-hot setting to create the tonal value of pattern fill at the same color depth as the outlines of your pattern.
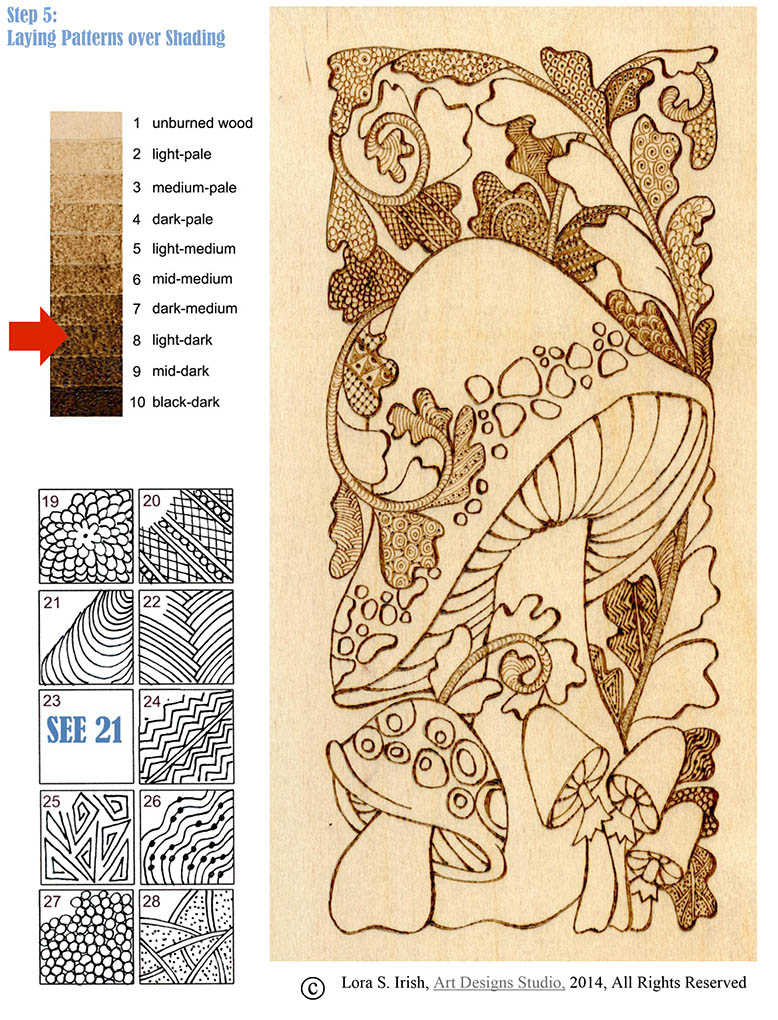
Step 5: Laying Patterns over Shading
Continue your pattern fill doodles over the shaded leaf sections noted in this step. Work towards creating even thickness lines and consistent tonal values.
We will continue our Pyrography Mushroom Doodles on Monday, see you there and then. We will continue to fill this mushroom pyrography doodle pattern with fun and easy to create doodle designs. Please slip over to our craft, carving, and pyrography patterns website, Art Designs Studio, to get your free patterns for this project. The download link is on our home page.
The traced pattern lines of your pyrography pattern can be approached in several ways. Let’s look at a few ideas before we begin the next step of the Mushroom Pyrography Doodle Project by Lora S. Irish.
If you are just joining this free online pyrography project please slip over to our craft, carving, and pyrography patterns website, Art Designs Studio, to get your free patterns for this project. Its the Spring 2014 package in the right hand navigation widgets. The download link is on our home page.
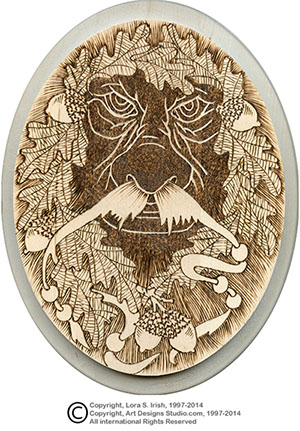
A simple outline burning along the tracing lines will define the pattern for you, but it can give your finished project a stiff, rigid look. In the Green Man burning, right, all of the tracing lines were burned at a hot temperature, using an even, thin line. This pyrography was worked to create a wood cut effect. The entire burning was worked at one temperature setting, limiting the tonal values to just two tones – the white of the wood and the black of the burned line.
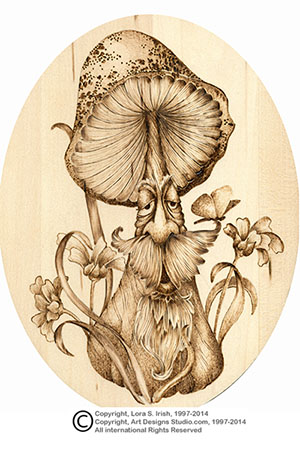
The traced lines of your pattern are just guide lines and do not need any burning. You can define an area, without outlining it, by bringing your shading up to the line. In this mushroom sample the shading touches the pattern line. Where the shading stops defines the boundary of that area. The few outline strokes in the finished work are accent lines only.
For our Mushroom Pyrography Doodle project we are using a full outline for all of the pattern lines. This will create a boundary line around each of our doodle fill patterns. To make that outline more interesting the line is worked in a thin to thick to thin width, changing the weight of the line as it moves through the pattern.
Temperature Setting and Pen Tips
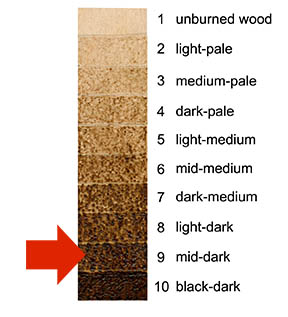
Each variable temperature wood burning unit has its own settings for the different temperatures used to create your tonal values. Create a sepia scale tonal value chart, using your burning unit and your pen tips, to establish the exact settings your unit used. To learn more about tonal values please go to Wood Burning Sepia Values.
For the outline burn that we will be working I have set my temperature setting to a high or hot setting. I want a setting hot enough to burn a rich, dark brown line but not so hot that the pen tip scorches the wood outside the line. If your pen tip is creating a light brown halo outside of the line, in the background area against the line, your burning unit is set to high.
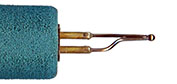
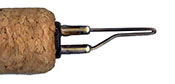
Pen Tips for Fine Line Burning
I have two favorite tips that I use for my line work. One is a medium-sized ball tip pen and the second is a medium-sized loop tip pen. Both work excellently at any temperature setting.
Keep your pen tip clean of any carbon build-up as you work. A clean, bright tip burns a thinner, more even line. Use a leather or synthetic strop and honing compound to clean your tips.
Step 2: Burn the outlines of the pattern tracing.
Using your finest line burning tip, set your temperature setting to a hot setting.
Burn along all of the pattern lines to set your design. You want a dark, even line.
Work a second burning over the pattern lines to create a thick to thin effect in your outlines. This adds strength to the outline, giving the line extra emphasis in the finished work, as well as interest in the changing dimensions of the line. A close-up of the thick to thin outline is shown in the header image in this post.
Using the fine nail sanding board, lightly sand over your board to remove any rough areas caused by the hot temperature burn. Wipe the board with a clean cloth to remove any dust.
You know you do it! In fact, anytime you are on hold on the telephone, or as you are talking to your kids, or even when you are just thinking. If there is a pen or pencil and a piece of paper near by, you are doodling. As kids, you always knew who was going to grow up to be a creative person because their denim notebook was covered with tons of little doodles.
So, let’s have some fun and bring those creative doodles to our favorite art form, pyrography. Over the next few days I will be posting an in-depth, step-by-step tutorial for this Mushroom Doodle Pyrography Project. It will include the pattern, the doodle fill chart, and lots of photos so that you can complete your own desktop cork board note pad or kitchen recipe holder.
We will be working an outline burn around each element of the pattern. Then, instead of fill those areas with graduated shading, we are going to use our favorite doodle patterns. Each area of the pattern can feature lines, swirls, spirals, daisies, butterflies, checkerboards, and even full designs of flowers, leaves, and stems. Anything goes when you are doing a pyrography doodle.
Take another look at the top header image for this post to see a close-up of a few doodle patterns that we will be working.
Supplies: 12” x 12” x 1/4” birch plywood 12” x 4” x 1/4” basswood variable temperature unit ball tip or loop tip pen 220-grit sandpaper fine-grit nail sanding foam board graphite paper 12” x 12” x 1/4” cork board yellow carpenters glue 4 yards of sea grass twine hot glue and glue gun spray sealer
Please slip over to our craft, carving, and pyrography patterns website, Art Designs Studio, to get your free patterns for this project. The download link is on our home page.
Today we will work through the preparation steps. Tomorrow we will begin the pyrography steps. So, please, bookmark our blog and share our link with your pyro friends.
1. With 220-grit sandpaper, sand the front surface of your birch plywood. Work your sanding with the direction of the wood grain to avoid scratching the surface. Remove all sanding dust with a dry, clean cloth.
2. Print a copy of the outline pattern. Tape the pattern to the right side of your board, 3/4” from the edge.
3. Using graphite paper under the pattern, trace along all of the pattern lines. Remove the pattern paper and graphite paper.
4. Using your finest line burning tip, set your temperature setting to a hot setting. Burn along all of the pattern lines to set your design. You want a dark, even line.
5. Work a second burning over the pattern lines to create a thick to thin effect in your outlines. This adds strength to the outline, giving the line extra emphasis in the finished work, as well as interest in the changing dimensions of the line.
6. Using the fine nail sanding board, lightly sand over your board to remove any rough areas caused by the hot temperature burn. Wipe the board with a clean cloth to remove any dust.
So, go grab your freebie pattern package which features three patterns – our mushroom design, a sunflower, and a chicken. Gather up your wood burning tool kit and let’s get ready to burn!


 Step 9: Doodle the Top Cap