Pyrography Doodle #7
Today we will put our Mushroom Pyrography Doodle project together to create a desktop note board. The finished project also makes a great recipe holder for your kitchen. If you are just joining this project, please follow the links below for the free step-by-step insturctions and pyrography pattern for this free Lora S. Irish wood burning pattern.
Pyrography Doodles
Pyrography Doodles #2
Pyrography Doodles #3
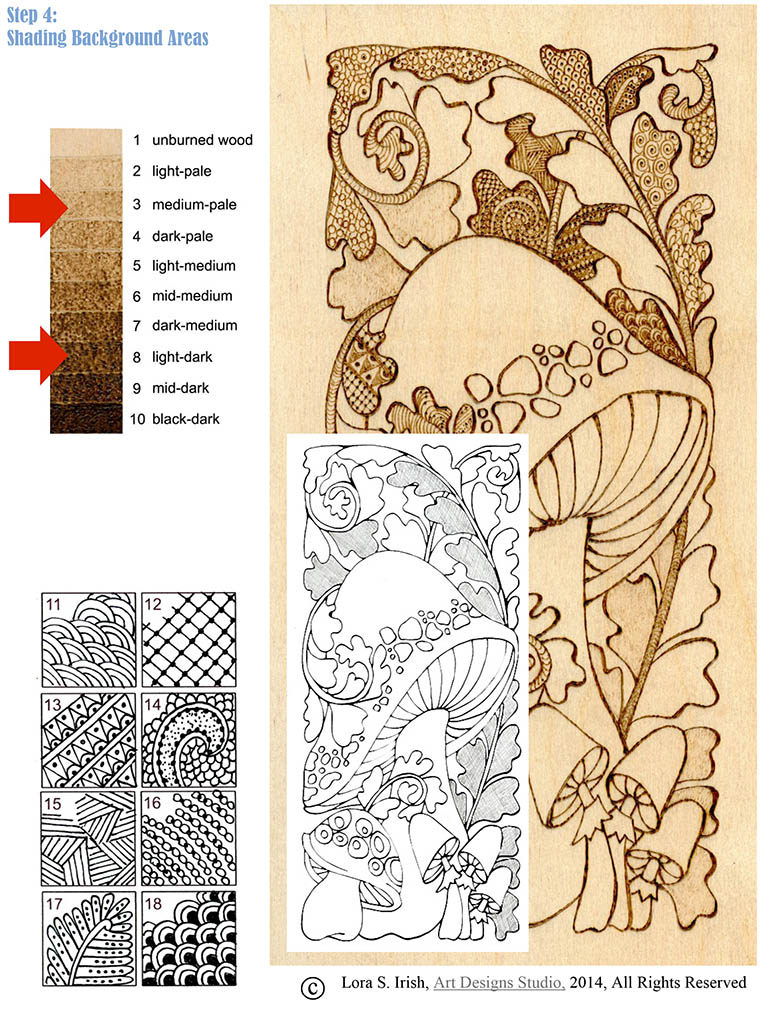
Pyrography Doodles #4
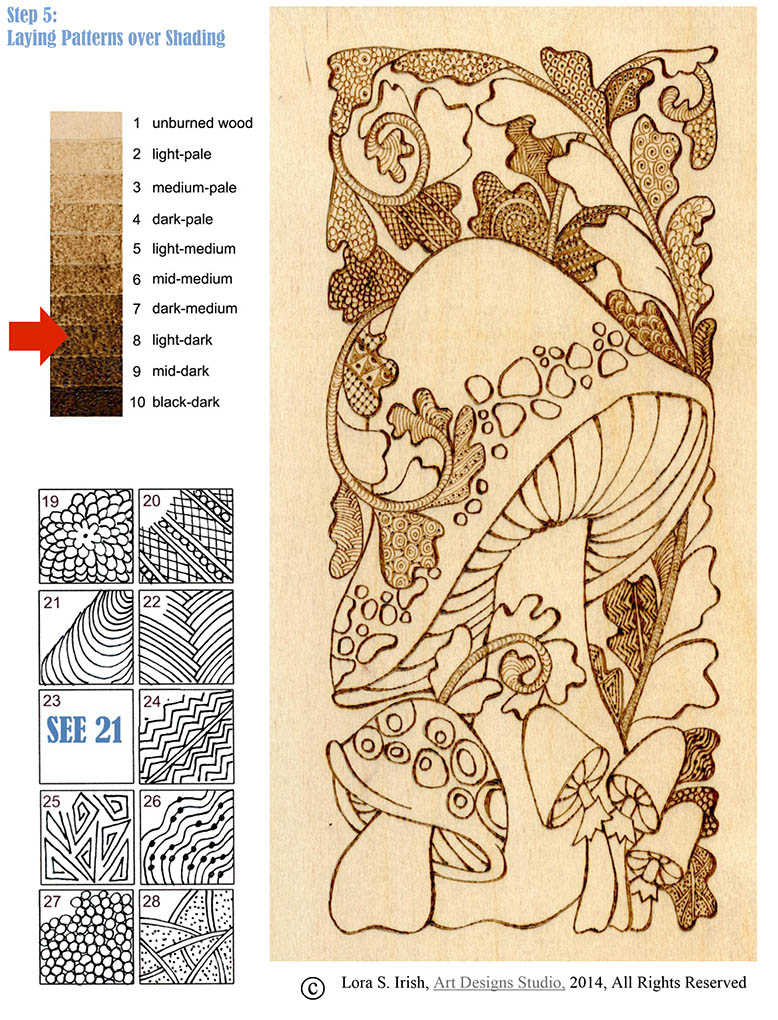
Pyrography Doodles #5
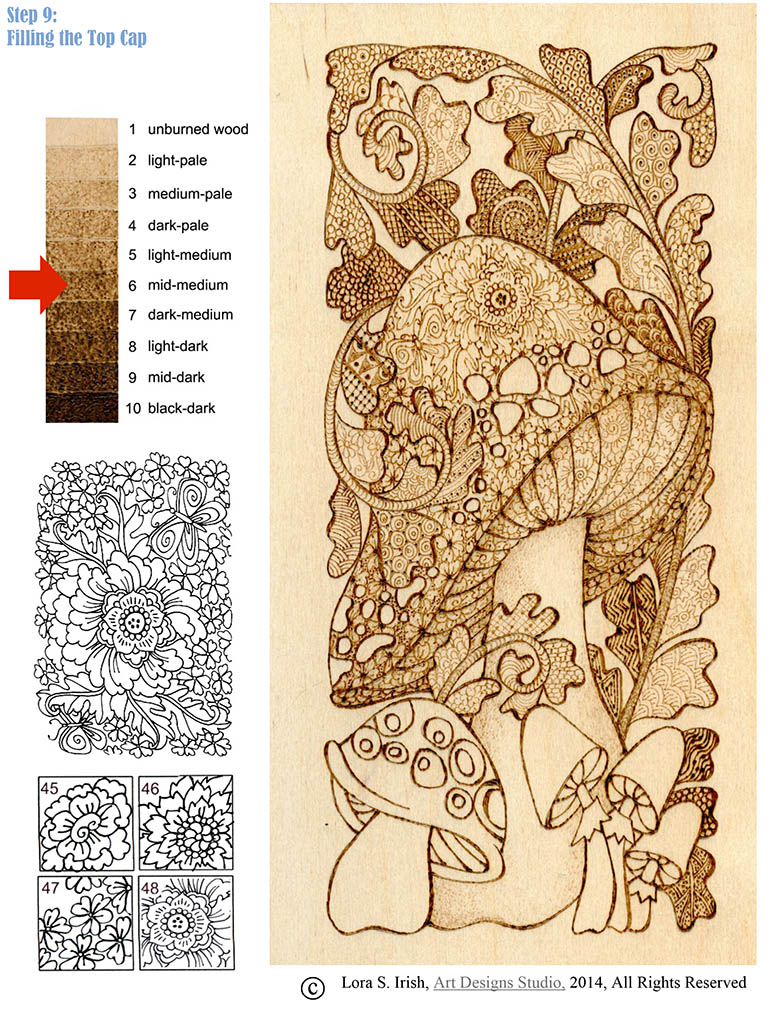
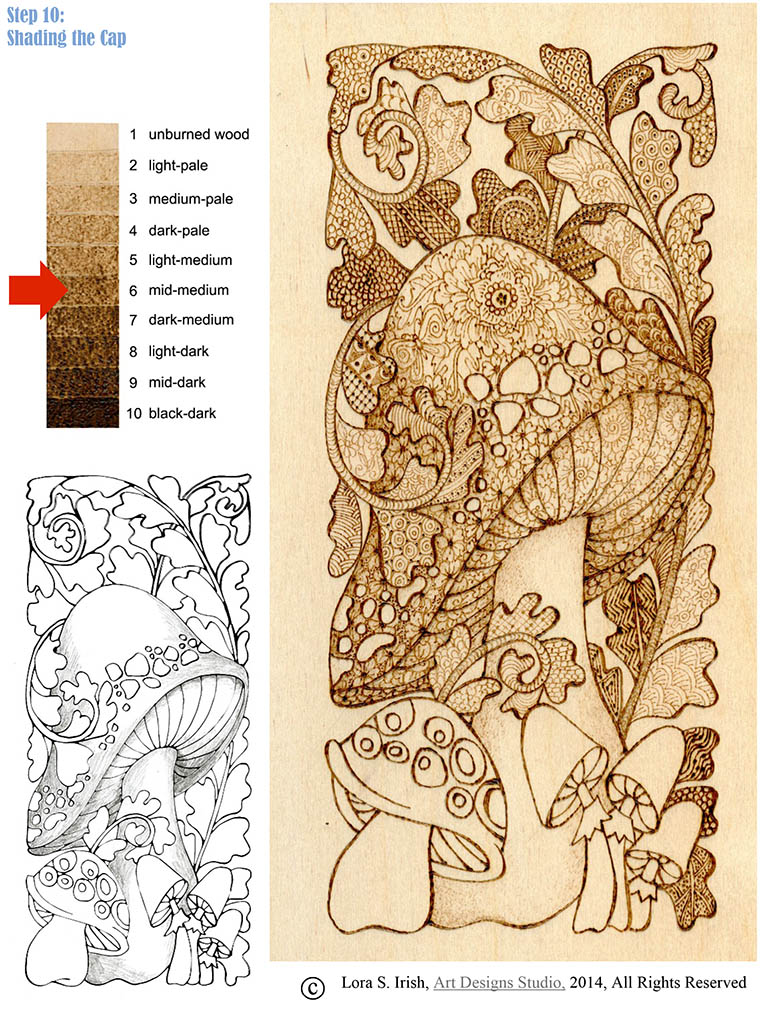
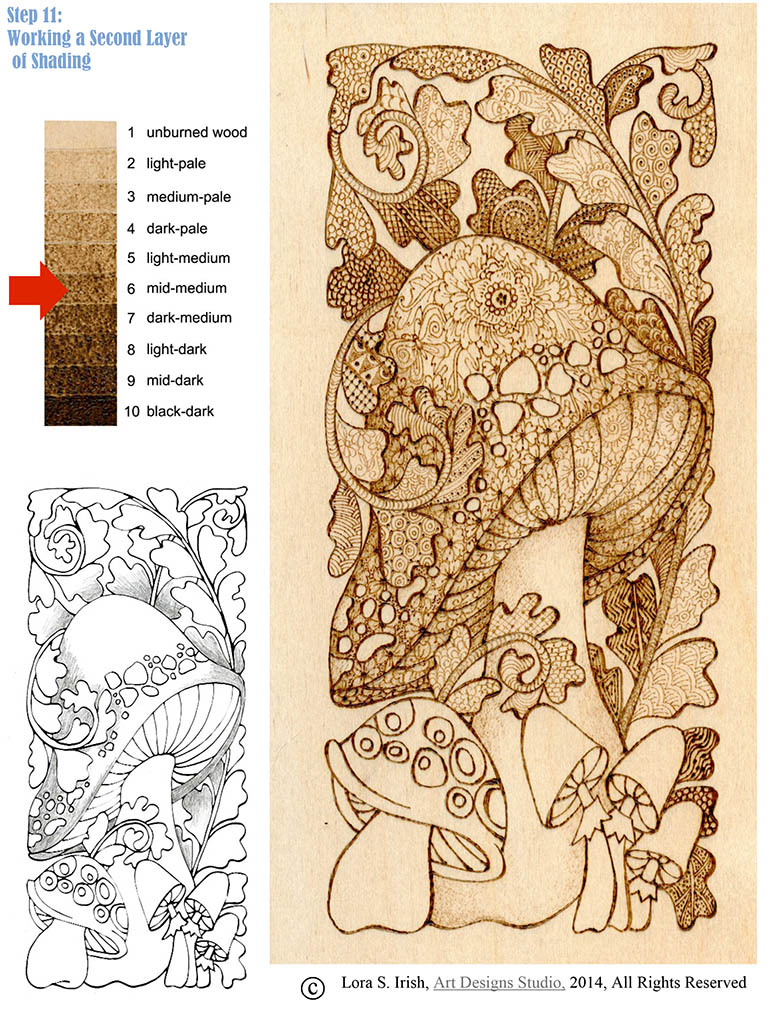
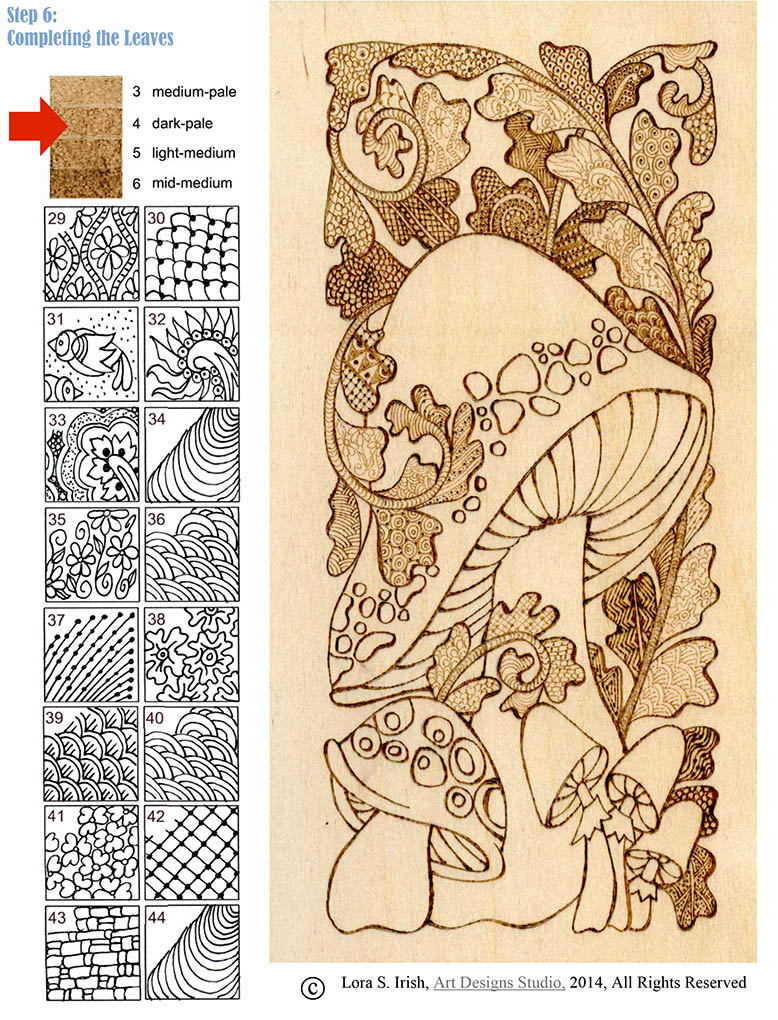
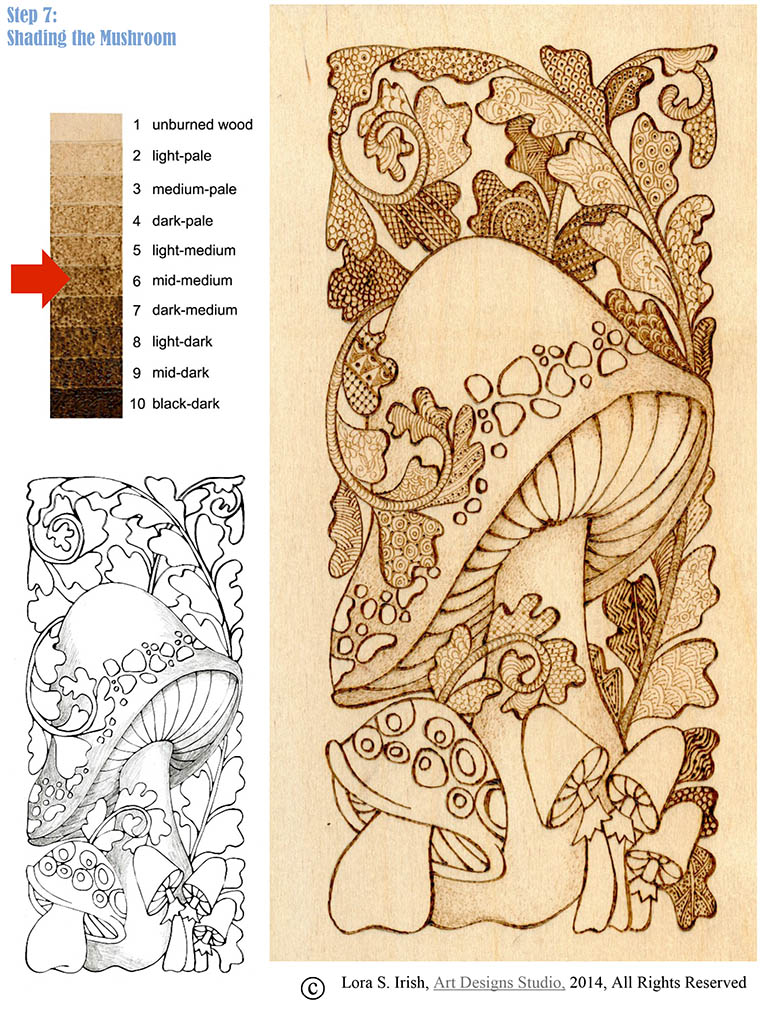
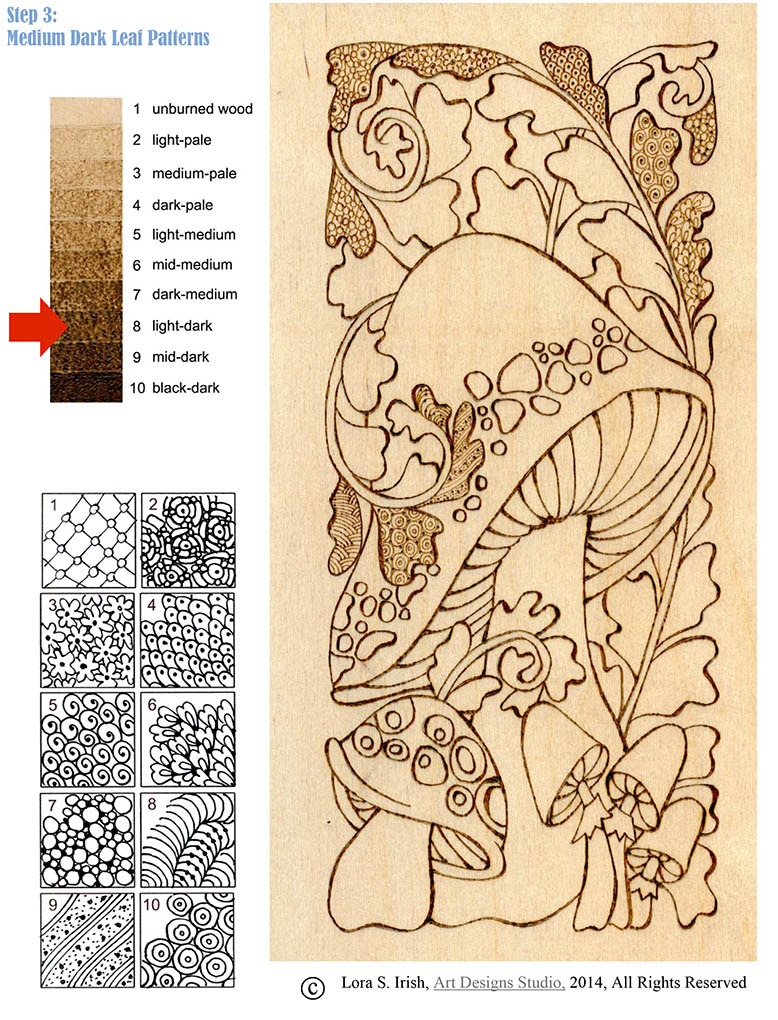
Pyrography Doodles #6
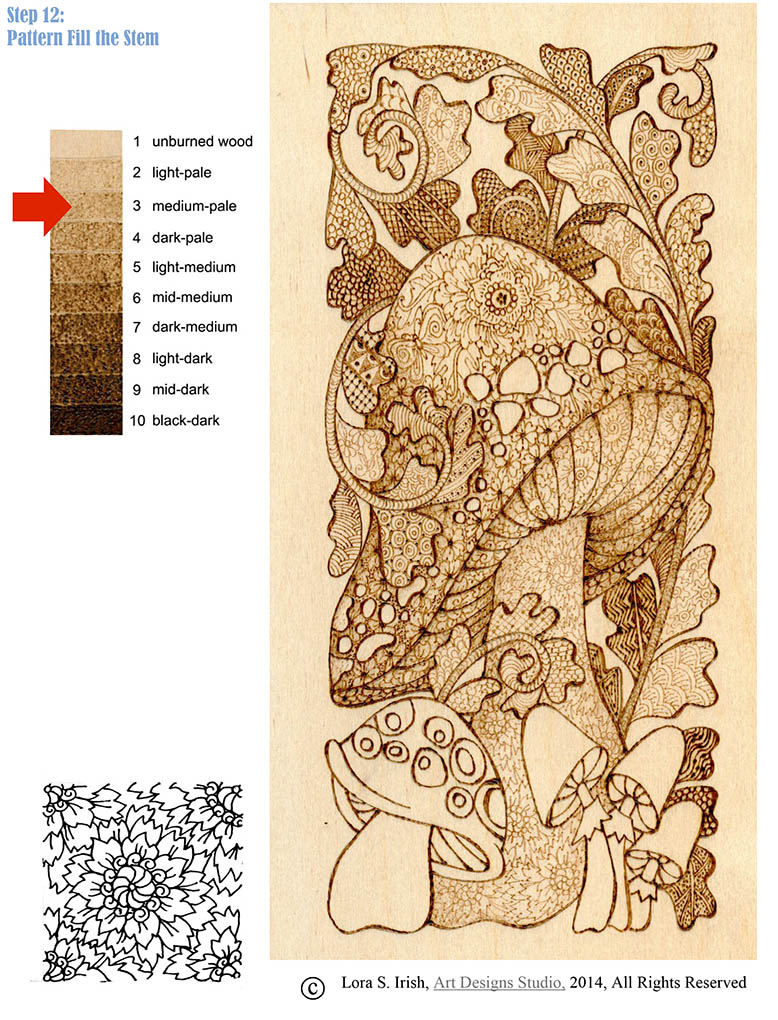
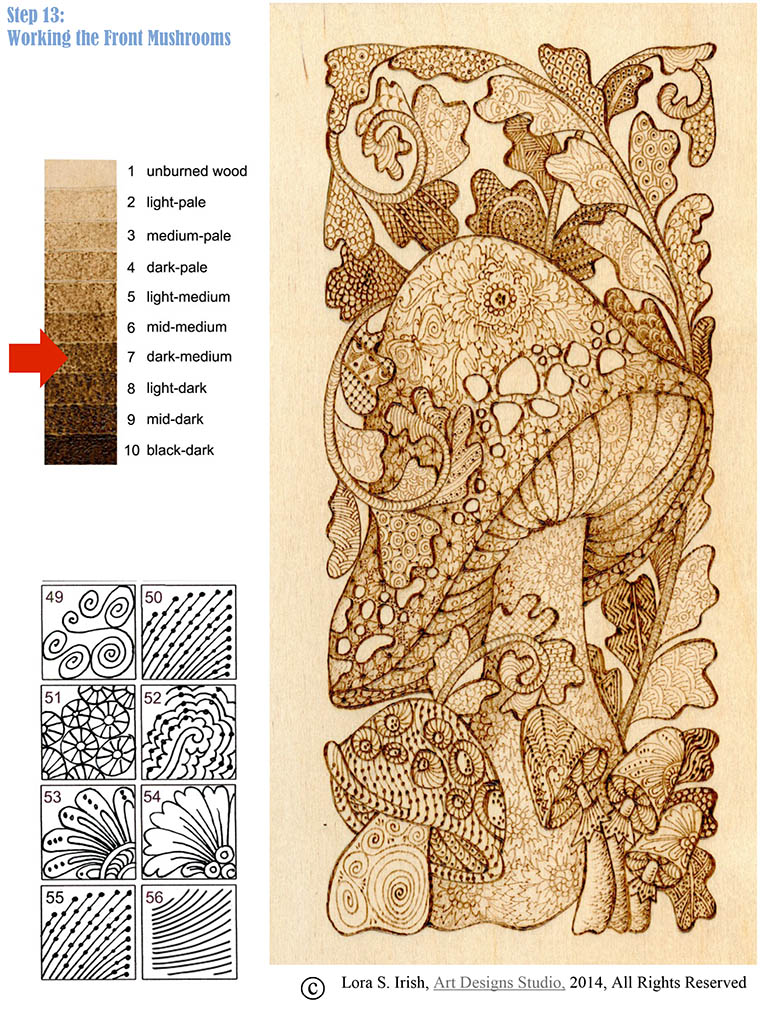
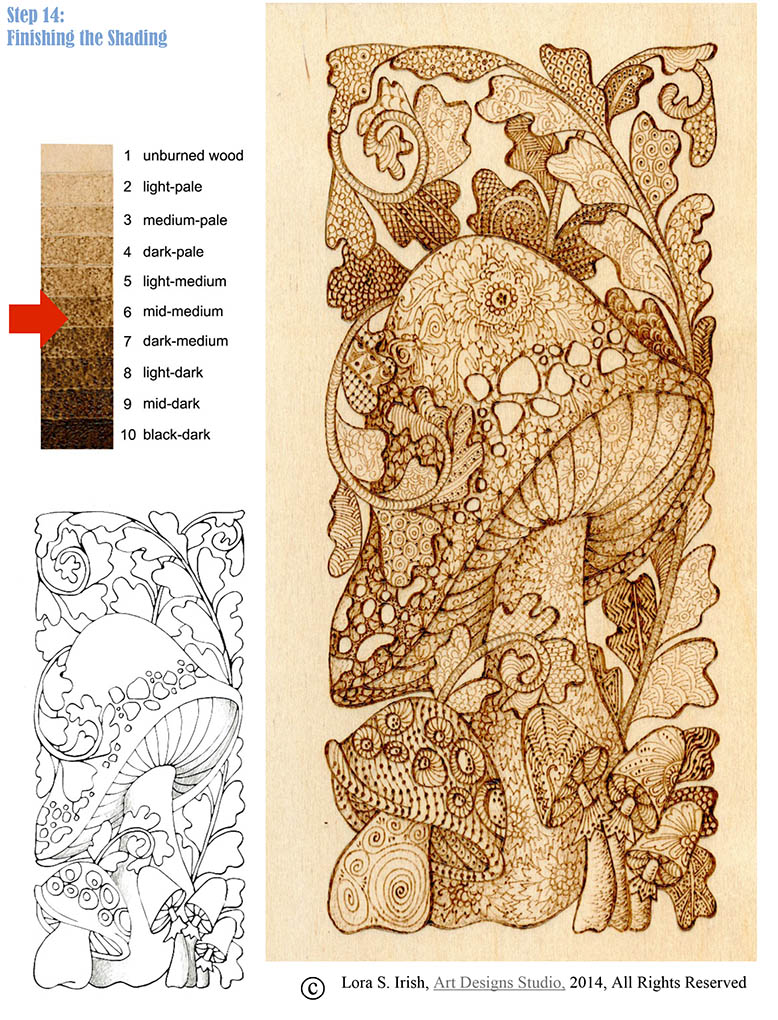
Pyrography Doodles #7
Please drop by our carving and pyrography pattern website, Art Designs Studio, to get your free mushroom pyrography patterns that complement this project. The pattern package is on our home page. The links to the previous posts for this free project are below.

 Step 15:Finishing Your Project
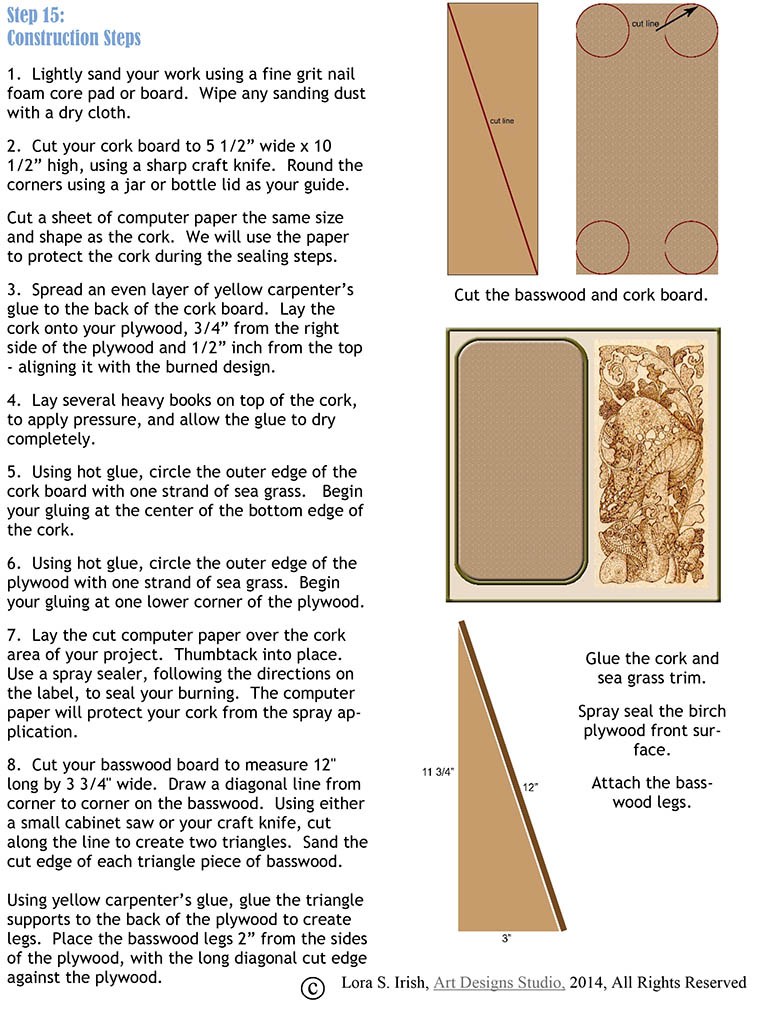
1. Lightly sand your work using a fine grit nail foam core pad or board. Wipe any sanding dust with a dry cloth.
2. Cut your cork board to 5 1/2” wide x 10 1/2” high, using a sharp craft knife. Round the corners using a jar or bottle lid as your guide.
Cut a sheet of computer paper the same size and shape as the cork. We will use the paper to protect the cork during the sealing steps.
3. Spread an even layer of yellow carpenter’s glue to the back of the cork board. Lay the cork onto your plywood, 3/4” from the right side of the plywood and 1/2” inch from the top – aligning it with the burned design.
4. Lay several heavy books on top of the cork, to apply pressure, and allow the glue to dry completely.
5. Using hot glue, circle the outer edge of the cork board with one strand of sea grass. Begin your gluing at the center of the bottom edge of the cork.
6. Using hot glue, circle the outer edge of the plywood with one strand of sea grass. Begin your gluing at one lower corner of the plywood.
7. Lay the cut computer paper over the cork area of your project. Thumbtack into place. Use a spray sealer, following the directions on the label, to seal your burning. The computer paper will protect your cork from the spray application.
8. Cut your basswood board to measure 12″ long by 3 3/4″ wide. Draw a diagonal line from corner to corner on the basswood. Using either a small cabinet saw or your craft knife, cut along the line to create two triangles. Sand the cut edge of each triangle piece of basswood. Using yellow carpenter’s glue, glue the triangle supports to the back of the plywood to create legs. Place the basswood legs 2” from the sides of the plywood, with the long diagonal cut edge against the plywood.
Thank you for joining me in this fun pyrography, wood burning project.
 That’s it!!! If you are ready for more great patterns and designs that you can use in your pyrography doodle projects please see our new Lora Irish pattern package, Pyrography Doodles at Art Designs Studio. This exclusive package includes 300 doodle designs that you can use in your pyrography, 26 carving and pyrography patterns, 10 finished doodle samples, and 3 border patterns.