Its that time of year, time to start our Free Online In-depth wood carving Winter 2014 Seminar, taught by Lora Irish, wood carving and pyrography book author and line art pattern maker.
For this year’s seminar I have chosen Chip Carving, also called Spoon Carving! This wonderful style of wood carving uses geometric and free form cut chips to create intricate designs. This free seminar is only being offered here on my blog, so please lets your friends and fellow carvers on your favorite message boards know! Post a link today.
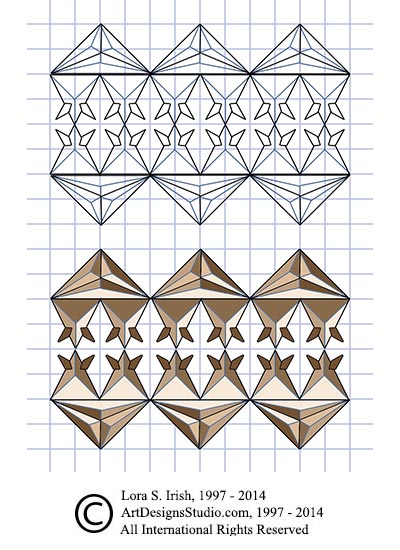
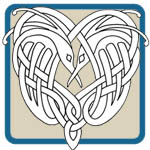
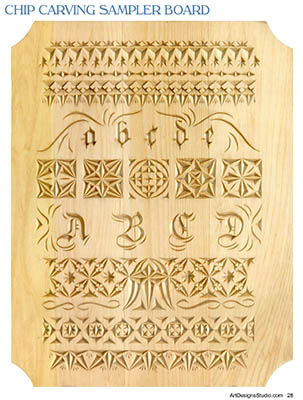
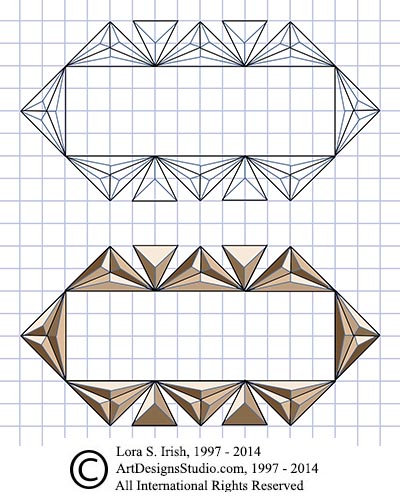
Over the next week or so we will take an in-depth look at this wood carving technique, create several chip carving practice boards, and take a close look at a classic needlepoint sampler layout, shown above, that you can use to carve multiple chip carved projects. The pattern and photo sampler for this Needlepoint Layout is available in both our new Chip Carving Pattern Package and in the Chip Carving E-Project.
We will explore:
Supplies needed for chip carving Creating basswood chip carving practice boards Wood preparations Knife sharpening Transferring a chip pattern to your board Knife angle Common problems Positive and negative space How to cut the different styles of chips Learn triangles, square, straight-wall, curve-edge, free form, and accent chips Using chip styles in your patterns Work a set of chip progressions How to turn a corner
To get ready for this seminar you will need the following supplies:
basswood practice boards – 3″ to 4″ wide x 18″ long, 1/4″ basswood is available at most hardware stores
11″ x 14″ basswood plaque – needlepoint sampler pattern
14″ x 14″ basswood plaque – chess game board pattern
large chip carving knife
stab chip carving knife
detail wood carving bench knife
sharpening stones and leather strop
graph paper
removable spray adhesive
pencil
320-grit sandpaper
white artist eraser
boiled linseed oil
turpentine
paste wax finish
Class begins Wednesday, January 15th! I’ve saved a chair at the teaching table just for you!
It’s snowing here in Mount Airy, Maryland. We already have 2″ and it is suppose to snow for the rest of the day. So, it’s time to break out the hobbies and craft supplies and have a little fun.
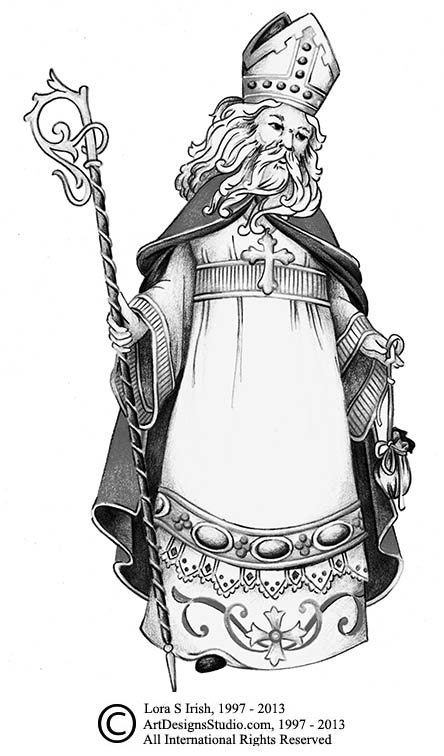
And, just for extra fun here is a free printable Old World Saint Nicholas – pattern and drawing – for your wood carving, wood burning, or scroll saw work. Click on any image on this blog for a larger, full sized pattern or photo.
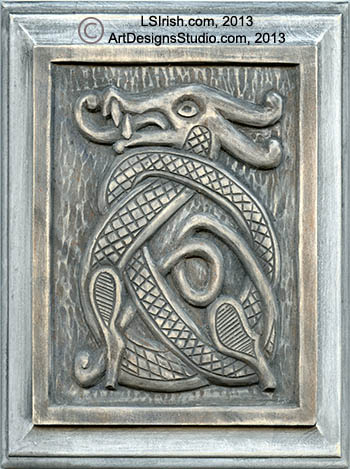
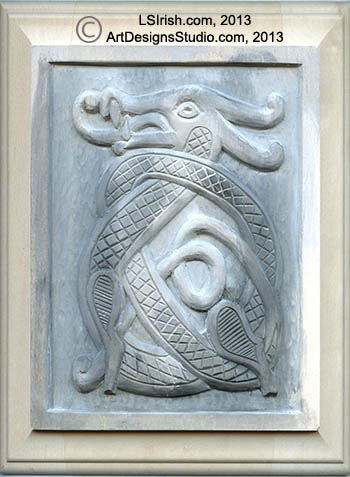
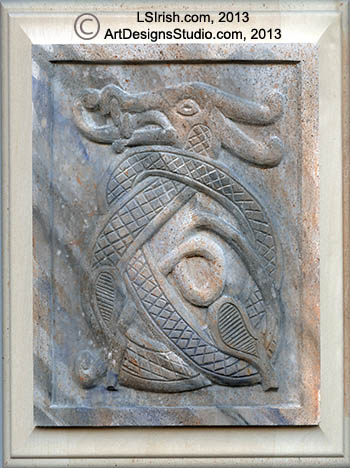
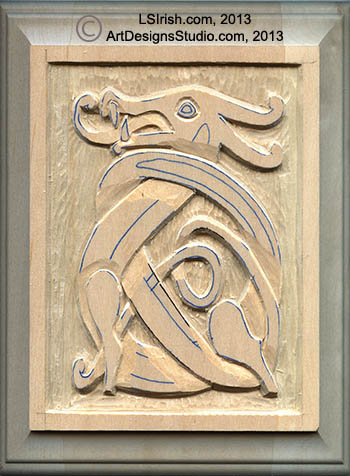
Over the last two days we have worked on a relief wood carving project featuring a Celtic knot dragon pattern. Today we will walk through the simple and easy painting steps to give this basswood carving the look of stone.
14. Basswood is an easy to carve wood that has a very clear, white coloring. Because basswood is very porous it is does not take oil based stains well without the use of a pretreatment sealer as polyurethane or spray sealer. For our project I used acrylic craft paints to create the stone effect.
Supplies:
Acrylic craft paints in: Titanium White Carbon Black Payne’s Gray Burnt Umber Burnt Sienna Driftwood oil stain Water bowl Glass tile, palette paper, or tin foil Paper towels Clean, soft cloth Assorted soft-bristle paintbrushes Splatter brush or old toothbrush Masking tape or painter’s tape 220-grit sandpaper Polyurethane spray sealer
15. Begin by using painter’s tape along the uncut 1/4″ margin surrounding the carving. Cut long pieces, place into position, and press firmly. The painter’s tape will protect these areas from coloring.
Place a small amount of titanium white, Payne’s gray, and burnt umber on a glass tile. Thin each color with an equal amount of clean water.
Brush two wash coats of titanium white on the carved area of the plaque. Because you mixed equal parts paint and water, this coat will not give full, solid coverage.
While the titanium white coats are still damp, pick up a small amount of Payne’s gray and mix it with the titanium white on your tile. Working along the diagonal of the plaque, brush a few random strokes of the gray/white mix over the white background. Pick up a little more Payne’s gray, mix it with the titanium white on your tile, and apply it to the carving.
Next, add a small touch of burnt umber to the gray/white mix and repeat. Add a small amount of burnt sienna to the mix and repeat. Your background should now contain many shades of white, gray, and brown. Allow these coatings to dry for about half an hour .
Splatter the carving with fine paint dots
16. Clean your glass tile, and then place a small amount of each paint color on the tile. Do not thin these colors with water. Working one color at a time, use an old stiff toothbrush or splatter brush to splatter a coat of each color on the carving. Do this by picking up a small amount of color on the end of the splatter brush. Hold the brush a few inches from the surface of the carving, and pull your thumb across the top of the brush. This action will spray a fine mist of paint drops over the carving. Thin the paint with a few drops of water if you wish to create a fine spray with small droplets.
Painting the routed border
17. Remove the tape from the edges of the carving. Brush two thinned wash coats of titanium white on the routed border edges of the plaque. Streak this area with a mix of titanium white and Payne’s gray, just as you did with the center of the carving. Allow the carving to dry overnight.
Creating a vintage look to your painted carving
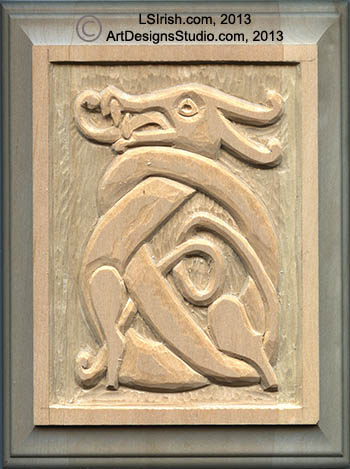
18. After you have completed the painting steps and allowed the paint to dry , sand the carved areas, background, and routed edges of the plaque using 220-grit sandpaper to remove some paint from the high areas of the carving. Sand lightly in some areas to remove one or two layers of color; in other areas, sand the carving back to the raw wood. Clean the dust from the board using a soft, dry cloth.
Seal the work with two coats of polyurethane spray sealer. Allow the sealer to dry thoroughly. Following the manufacturer’s instructions to apply an oil-based stain to the carving . Wipe away the excess oil stain with a soft, clean cloth. Allow the stain to dry overnight. Seal the work with one to two light coats of polyurethane spray sealer. Remember to sign and date the back of the plaque when finished.
I hope you have enjoyed this in-depth step-by-step free relief wood carving project and will take the time to browse through the other free online relief carving projects by Lora Irish that we have posted on our blog.
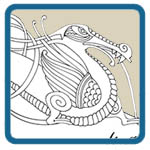
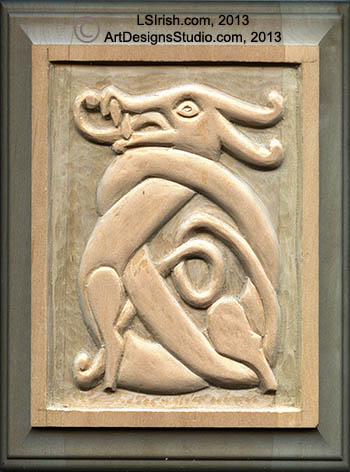
We are working on a beginner level relief wood carving project with a free Celtic knot dragon pattern by Lora S. Irish. Yesterday’s post worked through the basic tool kit, preparing your basswood board, tracing your pattern, and rough cutting the background area using a bench knife stop cut and the round gouge.
Today we will work on the general shaping steps, how to smoothly contour the dragon body, and using the bench knife to cut detail lines into the relief wood carving.
5. Any celtic knot pattern is created with a line that is knotted in an up-then-down pattern. The line crosses over itself multiple times. In our Celtic Knot Dragon pattern, by Lora Irish, the body of the dragon goes from the head under the tail, behind the front leg, under the tail again, behind the back leg, under the tail a third time, then it becomes the tail section that crosses over the body at the neck.
6. On your pattern, with a pencil, mark each of the cross-over areas of the dragon body.
7. Using either the bench knife or v-gouge cut a v-trough in the area of the dragon along the cross-over lines, in the background or under-tucked area of the body. Example, where the tail crosses over the neck, the neck area is cut with the v-trough.
General contouring with a straight chisel
8. With a straight chisel or skew chisel, cut along the outer edge of each body area of the dragon. You are carving away the sharp edge of the wall to begin giving your dragon body a curved contour.
Work with the grain of your wood as you shape the outer edges of each area. Begin the cutting stroke so that the tool runs parallel with the grain and cuts away from the open ends of the grain line. Turn your board as necessary. More about Working with the grain of your wood.
Work the eyes, tongue, and teeth in the same manner.
A v-gouge is used to cut a v-shaped trough along the pattern line that separates one area of the relief carving from another.
Hold the straight chisel at an angle along the straight wall edges of each element. Cut a thin slice. Work with the grain of the wood to create the cleanest cuts.
Lay the chisel with the angle of the cutting edge against the wood for thin slices. For deep, thick slices use this tool with the angle of the edge up.
Smooth the dragon body into a clean, even curve.
9. To smooth the dragon’s body use your straight chisel or skew chisel held at a very low angle to the wood. Dropping the chisel as close to the wood as possible allows you to shave extremely thin slices of wood. Work this step until all of the wood in the dragon has been shaved, do not leave any area uncut or at the original wood plaque surface.
The original wood surface has a different texture and feel than those areas that we have cut. This difference will visually show after the work is complete and can create a problem during the painting and staining steps as each area will accept coloring in a different way. Make it a habit to cut the entire wood surface during the smoothing steps.
10. Basswood has several outstanding qualities that make it a great beginner carving wood. It is a tight, even grained wood that has a clear, white coloring. Although it is classified as a hardwood it is easy to cut and take the finest detailing well. This means that you, as a beginner, have the opportunity to learn how to use your tools, how to make your relief carving strokes, and how to work through the level changes of a relief carving.
Because basswood is an easy cutting wood it often leaves small fiber of loose wood grain after the cut is complete. I call them Fuzz Bunnies! To remove these left-over wood fibers re-cut where necessary with your bench knife or chip carving knife.
11. Using 320-grit sandpaper lightly sand your carving to give a final, smoothing to the work. You can also use rifflers, small profile-shaped files that fit into the deep edges, sharp angles, and undercuts of a relief wood carving. Wipe any dust from the carving with a clean, dry cloth.
As your hobby grows you will advance into other woods as maple, walnut, and mahogany. Because these woods are harder surfaced they seldom need intense sanding, the shaving steps give a clean finish to the work.
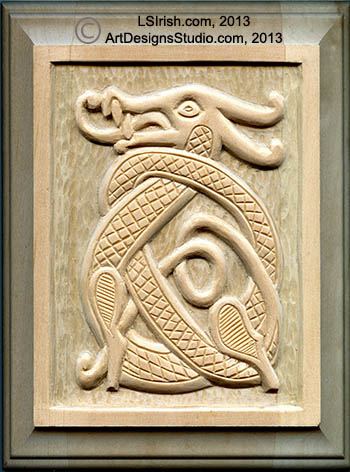
Adding the detail lines to the dragon
12. With a pencil mark the areas from the pattern onto your dragon carving for the inner detailing. You can cut your pattern into small pieces. Tape those pieces into position on your carving and slide a small piece of graphite paper underneath to make the tracing.
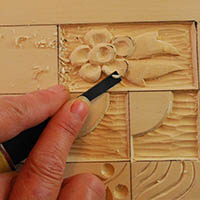
13. Using either the stop cut made with a bench knife or the v-gouge, cut along the traced inner detailing lines. If you chose the v-gouge cut the v-trough detail line in several light, shallow passes. This slowly lowers the line and avoids the corners of the cross hatched areas to chip out.
14. Chip outs happen. If your tool lifts a corner of wood or complete pops the corner off the board, reset that chip by licking up a small amount of yellow wood glue on the end of a toothpick. Place the glue dot onto the wood where the chip came off, and place the chip into position. With a water damp brush clean up any glue that seeps from underneath the chip. Allow the glue to dry for about 15 minutes. You are ready to continue carving.
Shaving can be done using a straight chisel or round gouge. Hold the tool low to the wood to cut very thin slices of wood.
Check your carving for any loose wood fibers, rough cut corners, and harsh contours. Use 320-grit sandpaper to lightly smooth the finished carving.
A v-gouge is used to cut thin, detailing lines into your carving. Use light pressure and recut the v-gouge lines as necessary to slowly drop the depth of the lines.
The woodcarving steps for this Celtic Knot Dragon pattern by Lora Irish are complete. You can leave your carving in the wood finish coloring or join me tomorrow as we work though the painting technique to create a stone-look to this relief carving. Thank you for joining me today, Lora Irish.
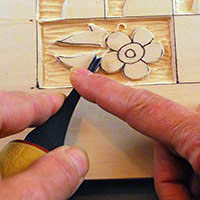
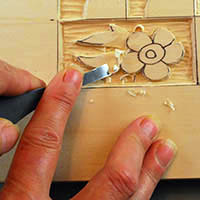
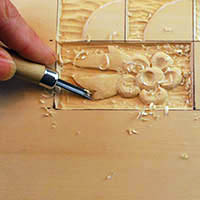
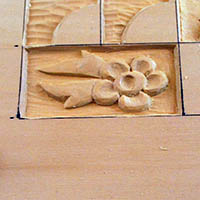
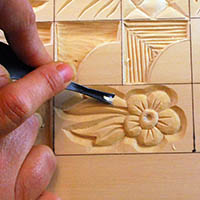
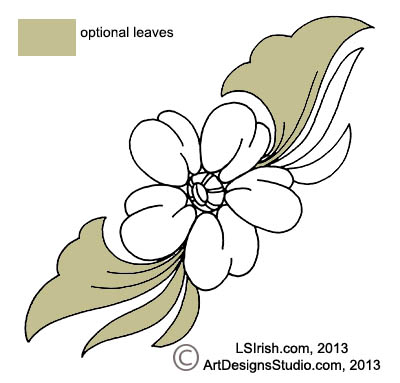
While you wait for tomorrow’s post, here is the practice flower pattern that you can use in your free relief wood carving project.


 To get ready for this seminar you will need the following supplies: