Walnut Hollow Woodburner Detailer – 2

Henna Tattoo Moon Face PlaqueHenna Tattoos

Please click on any image for a full-sized photo.

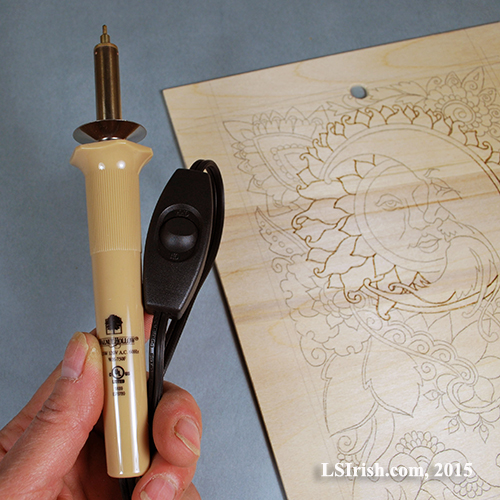
I love creating realistic, highly detailed, finely shaded images with my pyrography.  The introduction of affordable hot tipped pen woodburners to the craftsman, over the last few decades, has opened a new avenue, allowing many of us to bring our fine art skills to new medias as wood, leather, watercolor paper, and even fabric.  Hours and hours of carefully pulled strokes, layered shading, and fine line detailing can create images that are almost photographic.

But once in a while I just want to kick back, relax, and have a little fun with a pattern or design where I don’t have to be so very careful or absolutely accurate.  Once in a while I just want to play with my wood burning!  Henna tattoo patterns are just perfect for a play session of burning.

Quoting from Wikipedia: “Henna has been used to adorn young women’s bodies as part of social and holiday celebrations since the late Bronze Age in the eastern Mediterranean. The earliest text mentioning henna in the context of marriage and fertility celebrations comes from the Ugaritic legend of Baal and Anath, which has references to women marking themselves with henna in preparation to meet their husbands, and Anath adorning herself with henna to celebrate a victory over the enemies of Baal. Wall paintings excavated at Akrotiri (dating prior to the eruption of Thera in 1680 BCE) show women with markings consistent with henna on their nails, palms and soles, in a tableau consistent with the henna bridal description from Ugarit. Many statuettes of young women dating between 1500 and 500 BCE along the Mediterranean coastline have raised hands with markings consistent with henna. This early connection between young, fertile women and henna seems to be the origin of the Night of the Henna, which is now celebrated worldwide.”

Henna Tattoo Patterns by Lora IrishWhy use Henna Tattoo patterns in our pyrography?

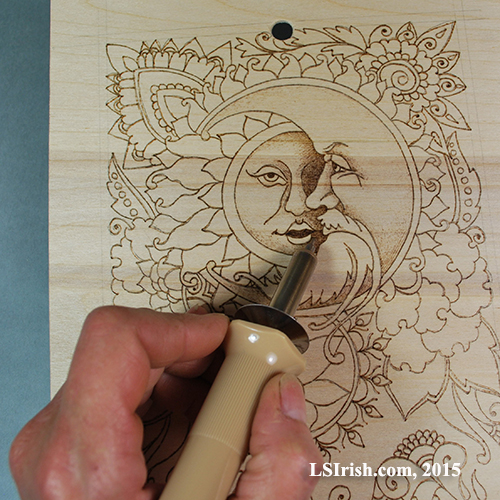
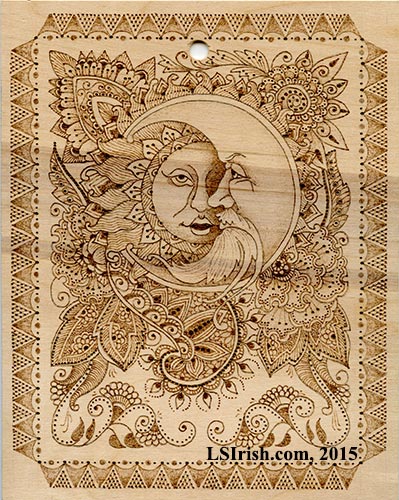
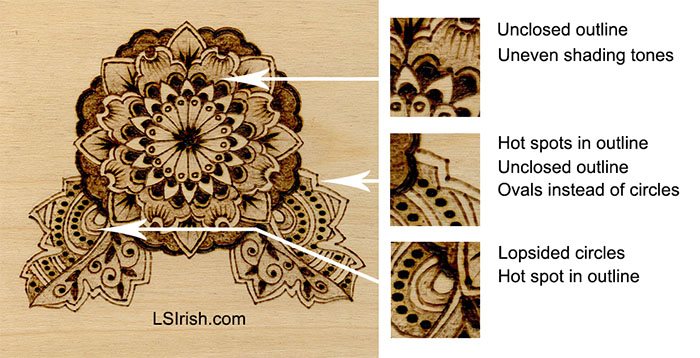
Fine line henna designs as body art dates back to the Bronze Age.  As we work through today’s steps in our Henna Moon plaque pattern, we are following in the foot steps of an art style that is at least 4000 years old.  These simple line patterns are hand created on a flexible, moving surface – skin.  They are seldom perfect either in the execution or in the repetition of a pattern element.  Circles are not perfectly round, lines often wobble, and some flowers may have eight petals while the next repeat of that flower has only seven.

This makes Henna Tattoo patterns perfect for the beginning pyrographer – you can’t make a mistake working a Henna design!  You are guaranteed success because you are following the hand-crafted look of the real tattoo. You can practice pulling long curved lines with your pen tip, adding light shading, and controlling the depth and tonal value of your burn without worrying about being accurate and true to your pattern lines.

For the advance wood burner, Henna patterns give you a chance to relax while working a image.  Photo-realism is often the goal of an advanced burner, but that style of work is executed with intense concentration and tight muscle control over the pen tip movement.  Henna patterns remind you, the advanced pyrographer, to relax your hand and muscle control, to re-experience free flowing motions, and to ‘just let the pyrography happen’.

henna-2

RELAX!

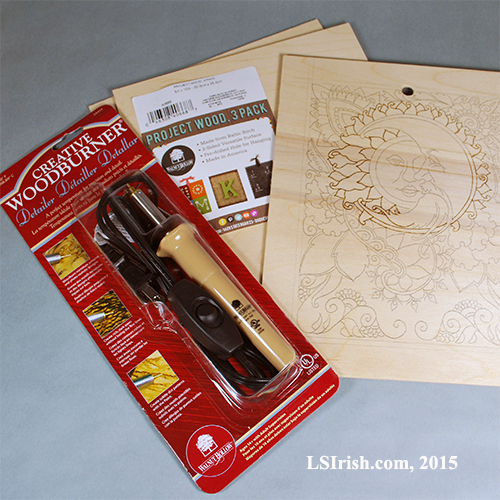
As we work through the Henna Moon plaque I will be reviewing the performance of the Walnut Hollow Woodburner Detailer.  I will also be focusing on how a relax hand position, and a relaxed attitude during any burning session makes your line work smoother, more even, and more alive. For my beginners, remember that you just can’t make a mistake with a Henna Pattern.  The worst that can happen is that you drop your hot pen tip and it rolls across the face of your plaque leaving a long smug mark.  And if that happens, fear not!  I will be teaching you how to give your finished work a vintage/antique look that will make that accident into a wonderful finished effect!

So, lets begin with preparing your board and tracing your pattern in the next post to this free pyrography project.

Disclaimer: I am not associated with nor work for Walnut Hollow.  I am receiving no financial compensation for this post. My review of their product, the Walnut Hollow Woodburner Detailer, is just my personal opinion and experience in using this tool.


Walnut Hollow Woodburner Detailer – 2 Read More »

Free Pyrography Wood Burning Project by Lora Irish

Walnut Hollow Woodburner Detailer

Walnut Hollow Woodburner DetailerA little history

Please click on the images in this posting for a full-sized photo!

Henna Moon Pyrography Project
Walnut Hollow Woodburner Detailer – Introduction
Walnut Hollow Woodburner Detailer 2 – History of Henna Tattoos
Walnut Hollow Woodburner Detailer 3 – Tracing the Pattern

Let’s take the Walnut Hollow Woodburner Detailer out for a test drive by working through two step-by-step free pyrography wood burning projects featuring Henna Tattoo designs.

I began my wood burning passion over three decades ago when I purchased my first Walnut Hollow burner.  That first burner was a one-temperature tool with five interchangeable brass tips.  You plugged it into your wall socket, waited a few minutes until the tip got hot, then did your project.  Around 2005 I purchased a second Walnut Hollow burner.  There was nothing wrong with the one that I already had, I simply wanted to have two different tools, each with its own tip, to make it easy to change tip profiles without unplugging, waiting for the tool to cool, then changing out to the new tip.

Walnut Hollow Woodburner DetailerThen about six years ago I got my first Walnut Hollow Versa-Tool that features a rheostat temperature dial control on the cord.  I still actively use all three burners even though I do own a Colwood, RazorTip, and Optima – full temperature, high-end, total-control machines.  For quick burns, adding a touch of detailing or lettering, adding an accent border around a relief carving, or for burning away the fuzz bunny wood fibers in my wood carving, this style of burner is perfect.

For someone just starting into Pyrography I always recommend that you start with a Walnut Hollow.  They are extremely reasonable in price, give you a nice range of burning tips, and are available at most large craft stores.  If you come to love pyro as I do you can always invest in a high-end burner, but I promise you will return to your Walnut Hollow often.

Now, owning two one-temperature Walnut Hollows, one Versa-Tool, and three high-end full temperature control machines I really didn’t need another wood burner!  But … in browsing through Michael’s not long ago I noticed a burner I had not yet seen – the Woodburner Detailer.  I admit I was curious as to why another would want a one-temperature burner that has only one fine ball tip when the Versa-Tool was hanging right next to it on the display.  So, of course I bought a Detailer, brought it home, and put it to the test!

Walnut Hollow Woodburner Detailer

The package says that the Detailer is “A perfect temperature for precision and detail” and shows that the one-temperature setting for this tool is a 120 volt, 16.5 watt, 750 degrees F (398.89C) unit. In comparison the Versa-Tool uses 120 volts, 25 watts, and reaches 950 degrees F.

It has one brass interchangeable tip that is a 1/16″ wide x 3/16″ long ball tip profile.  It has the classic Walnut Hollow styled handle with the hand guard flare, but is a beige color instead of the tradition burgundy of the Versa-Tool.

The cord is very flexible and measures 56″ long.  About 19″ from the end of the handle, the cord has an in-line on/off switch.  I have been working with this burner for about a month now and have not once found myself out of reach of my project, or having to fight the cord to get the tip into proper position.

Now, owning three other Walnut Hollow I have a large assortment of interchangeable tips, all of which fit the Detailer.  So any tip that I commonly use with my Versa-Tool I can use with my new Detailer.  If you are just starting out and want to give the Detailer a try yourself, pick up a set of Special Technique Points I and/or Special Technique Points II to give yourself a wide range of burning tip profiles.

Why?  Why would I want another Walnut Hollow?

Free Pryography Henna Moon Face Plaque ProjectThat’s the question that we are going to explore over the next few days as we work through two step-by-step pyrography projects using the Walnut Hollow Woodburner Detailer.

Henna Moon Plaque Supply List:

Walnut Hollow Woodburner Detailer
8″ x 10″ Birch plywood plaque
Soft #4B to 7B pencil
White artist’s eraser and a Document Cleaning Pad

Henna Moon Spell Book Journal Supply List:

6″ wide x 16″ long vegetable-tanned leather
1/4″ leather hole punch
2 yards of black waxed linen cord or heavy twine
Walnut Hollow Woodburner Detailer
Special Technique Points I or your interchangeable tips from any other Walnut Hollow burner

Walnut Hollow Wood Burning ToolSneak Preview!

When I began working with the Detailer I really thought it was going to be ‘just another’ woodburning tool that would end up on my craft shelf …. Boy!  Was I wrong !!!!  I was just going to give it a try but by the time I made myself put the Detailer down I had finished the Henna Moon plaque, two large gourd winter roosting houses, one gourd art miniature gourd ring box, two leather and lace wrist bands, and a Vintage Gryffindor-styled Leather Spell Book. I will be posting the photos of the other finished projects throughout this project.

The Walnut Hollow Woodburner Detailer does exactly what it advertises – it holds a perfect temperature for precision and detail wood burning.

So, get your supplies together.  Tomorrow I will be posting the free pattern to these two projects and begin the step-by-step photo instructions.

Walnut Hollow Woodburner Detailer Read More »

Free Scroll Saw Patterns

Scroll Saw Patterns at Art Designs Studio

A Lora Irish FaceBook follower asked to try one of the patterns from my scroll saw books, North American Wildlife Patterns and World Wildlife Patterns for the Scroll Saw.  Since I am sharing it with him, I thought I would share it with everyone.  Both patterns below are full-size, 100 dpi, 8 1/2″ x 11″ patterns, just like every pattern on my pattern website Art Designs Studio.

Simply CLICK on the pattern image.  A new window will open with the full-sized pattern.  RIGHT HAND CLICK and SAVE to your desktop.  They are ready to re-size in your graphics program or just print for the large image.

Hope you enjoy them, and if you do, the books are available at Amazon.com.


North American Wildlife Patterns for the Scroll Saw by Lora S IrishNorth American
Wildlife Patterns
Scroll Saw
World Wildlife Patterns for the Scroll Saw by Lora S IrishWorld Wildlife Patterns
for the Scroll Saw
by Lora Irish

Lora Irish scroll saw patternsClick on the image above for a full-sized,
100 dpi, 8 1/2″ x 11″ free
Lora Irish Scroll Saw Pattern


Lora Irish scroll saw patternsClick on the image above for a full-sized,
100 dpi, 8 1/2″ x 11″ free
Lora Irish Scroll Saw Pattern

For my applique quilters, try these two patterns with our free e-project Summer 2013 Quilt Project at ArtDesignsStudio.com .

Free Fretwork Butterfly Quilt Project by Lora IrishPlease LIKE us on FaceBook!

Scroll Saw Patterns at Art Designs Studio Read More »

Dried Art Gourd Bee Houses

Craft Art Gourd Bee Houses

Bee, Bug, and Seed Gourd House Roof Decorations

Begin this free, online dried craft gourd art project with our Basic Constructions step-by-step page.  Then enjoy how to create your roof accents on our Bee House Roof Accents page, and the Bee House Gallery page.

Free Craft Gourd Art Bird House Project

This project began as an experiment and practice piece in creating a large, roofed bird house gourd.  I wanted to work out how to add a wooden roof before I began the cutting steps on my large kettle gourd.  As I worked I became more and more delighted with the nest egg and small bottle gourd houses that I used as my practice pieces.  Adding a few dried, natural accents was logical next step to change them from just experiments into Bee, Bug, and Seed Houses that I could use for my fall decorations and in my autumn flower gardens.

Free Craft Gourd Art Bird House Project

Have fun creating your own gourd art, miniature bird houses for your garden, autumn wreaths, and Christmas presents.

Please share this link of FaceBook, Pinterest, and Reddit !!!!

Craft Art Gourd Bee Houses Read More »

Bee Houses

Basic Construction of a Bee, Bug, or Seed Gourd House

Free Bee and Bug Gourd House ProjectAs summer slips into those first cool days of autumn, it is time for me to prepare my flower gardens for the winter months ahead.  The gourd bird houses that I made last spring need to be cleaned and checked for needed repairs, the fallen leaves needed to be raked and moved to the compose pile, and its time to harvest the flower seeds for next year’s plantings.

This year I am adding a new little project to my autumn list – Bee Houses!  My region has lost most of its honey bee and other insect populations because of the intensive use of pesticides and herbicides.  More and more I depend on our native wild bee population to pollinate my gardens.   There are several excellent articles on the net for creating wild bee homes, that offer other, fun ideas that you can do along with this Nest Egg Gourd Bee House project.

The original idea behind this project was to make a few simple, quick bee and bug houses that I could place throughout my garden as winter nests – miniature bird houses.  I wanted them to be as biodegradable, eco-friendly as possible, so I chose to use some of my thinner shelled, small craft gourds and dried plant materials from my yard for accents.

READ MORE

If you enjoy our free, online projects and tutorials, please share this project with your friends and family on FaceBook, Pinterest, and Reddit!

Bee Houses Read More »

Scroll to Top