First Pyrography Project – 10 – Sanding

GRAIN DIRECTION

The direction of the wood grain for your pyrography blanks is determined by the direction in which the slab was cut from the original log. A tree adds a new layer of growth each year, made up of vascular bundles which are similar to open drinking straws that move the fluid through the tree. How those vascular bundles are aligned on your blank determines the wood grain direction.

The grain direction of your wood blank does affect your pyrography strokes and tonal values.
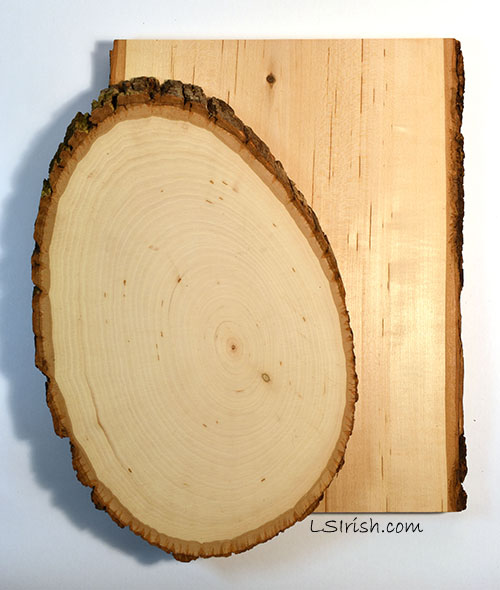
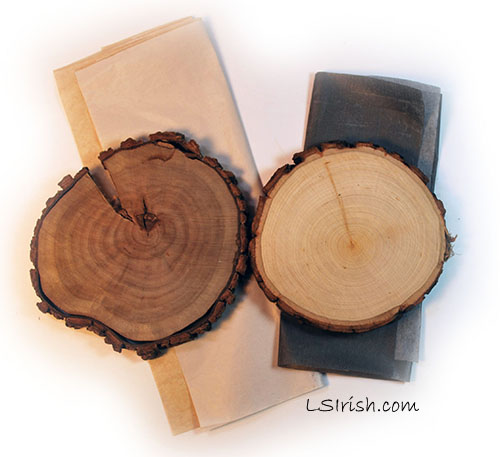
End-grain cuts, as the top oval, often burns unevenly because of the open grain and growth rings.
The rectangular slab, shown in the back, is cut with the grain of the wood,
making it perfect for fine detailing and multiple tonal value work.

The top, oval basswood board is an end-grain slice that is cut across the circumference of the log, cutting all of the vascular bundle straws. Imagine looking straight down onto a hand full of drinking straws. What you see is the cut, open tops of those straws. End grain burns can appear spotty, and have irregular fine line detailing because of the end grain and growth ring openings.

The background board is cut with the grain of the wood, meaning that the tree was milled vertically from root to tip. Here you would see that same hand full of drinking straws from the side, showing the full, long length of the outer straws.

Both samples shown are called live-edge or live-bark cuts, meaning the outer, newest growth rings and the bark have been left on the board as a decorative frame for your work.


SANDING THE WOOD BLANK

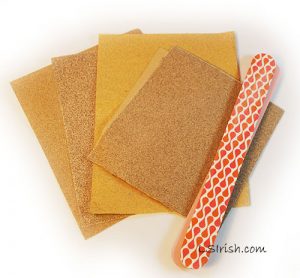
Sand paper from 220 to 320 grit
Sanding pads

Foam core fingernail files
Heavy brown kraft paper
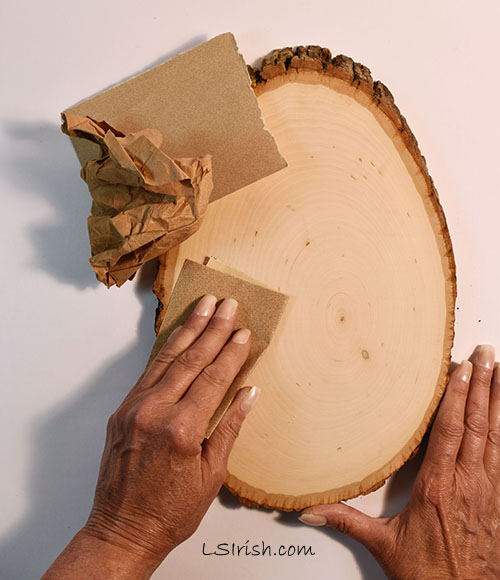
The smoother your wood surface the finer and straighter your detailing lines
can be worked. Always sand with the grain of the wood using progressively finer grit papers.
End with a good polishing of the wood surface using heavy-weight kraft paper.


Your wood surfaces will need a light sanding to create a smooth surface for the burning. Use fine grit paper, 220 to 320 grit, to remove the fine ridges and loose fibers on the wood. Coarser sand paper, lower than 220 grit, can leave sanding lines that can affect how the quality of your burn lines. Even fine ridges will cause your tool tip to skip or move as you pull the stroke resulting in uneven or non-straight lines.

Sanding pads have a foam core and are flexible making them great for curved surfaces as on a wood plate or the routed edge of a plaque. Available at your local drug store foam core fingernail files are a nice addition to your tool kit. They come in a variety of grits and are excellent for working deep carved detail areas of a wood shape. Foam nail files can also be used to clean your one temperature brass tips.

Bring with your coarse sand paper and work through to your finest. Always work any sanding device or tool with the grain of the wood to avoid creating fine scratches in the surface. For our photo sample the wood is being sanded in a circular motion to match the growth rings of the end-grain slab.

Heavy brown kraft paper as a large grocery store paper bag makes an extremely fine grit sanding tool and is often my final sanding media. Remove all the sanding dust with a clean, lint-free cloth before you begin your next steps.


First Pyrography Project – 10 – Sanding Read More »

First Pyrography Project – 9 – Cleaning Tips

CLEANING YOUR TIPS

The best burned strokes are made with a clean, bright tip.
As you burn the tips of your pens will begin to collect resin residue from the wood sap and carbon build-up from the burned wood. The tips can become so coated with carbon that they take on a black, crusted finish.

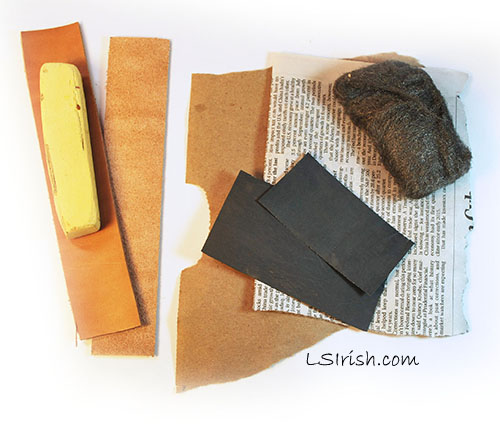
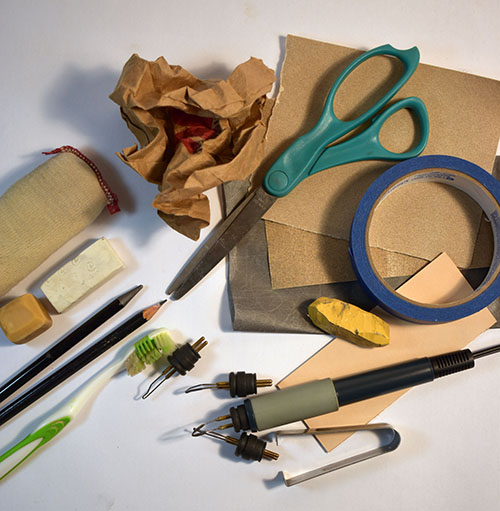
Shown above, from left to right: yellow oxide rouge,
tanned leather, raw leather, heavy kraft paper, newspaper, emery cloth, and fine steel wool.

That black carbon can even be transferred to your project and appears a long, thin dark gray streaks in the work. Carbon can cause your tip to lose heat or to create uneven distribution of the heat to your tip.

I use two methods for cleaning my pen tips – emery cloth and a wood carving strop with aluminum or red oxide rouging compound. I also clean my tips often, long before the carbon build-up becomes too intense.

The first important step in cleaning your pen tips is to unplug your burning unit and allow the pen to fully cool. A hot pen tip can burn both emery cloth and leather strops.

1500-grit or finer emery cloth, which can be purchases at your local hardware store, can be used to clean badly encrusted tips. Fold the emery cloth into quarters, small enough to secure all sides with your fingers. Gently pull the tip of the pen over the cloth. Use as little pressure as possible as you clean the tip to avoid distorting or bending the burning wire of the tip. I use this method on my one-temperature brass tips.

Fine-grit steel wool also works well for your interchangeable brass tips and can return those tips to the bright yellow-orange coloring of the metal.

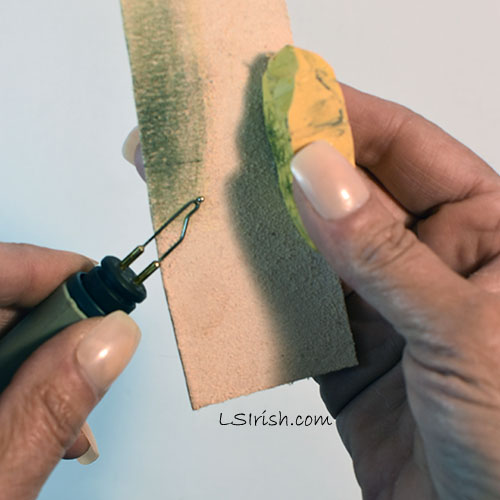
For wire tips I use a leather or synthetic wood carving strop. The strop is first prepared with a coating of either aluminum oxide powder or a fine grit rouging compound.

Raw side of your leather strop with rouging compound.

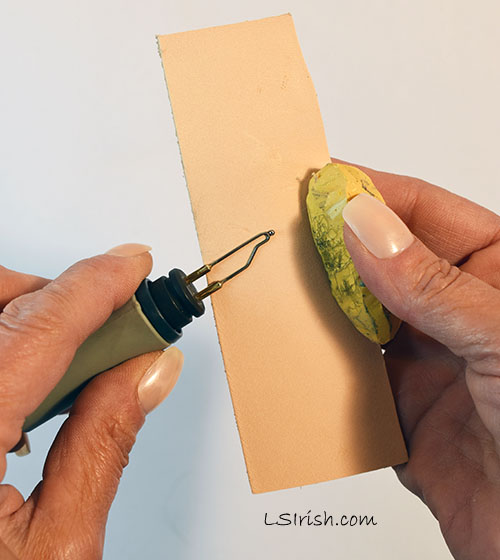
The tip is pulled across the strop using gentle pressure until the tip returns to its bright color tone of gunmetal blue. Work your tip over the raw leather side first then polish the tip on the tanned leather side.

End either style of cleaning with a brightening of your tips using heavily printed newspaper or heavy-weight brown kraft paper.
After your pen has been brightened, wipe it and the pen shaft with a clean, dry cloth to remove any remaining carbon particles. You are ready to return to your project.


Polish your tips to a bright shine using the tanned side of your strop.

First Pyrography Project – 9 – Cleaning Tips Read More »

First Pyrography Project – 8 – Supplies

GENERAL KIT SUPPLIES

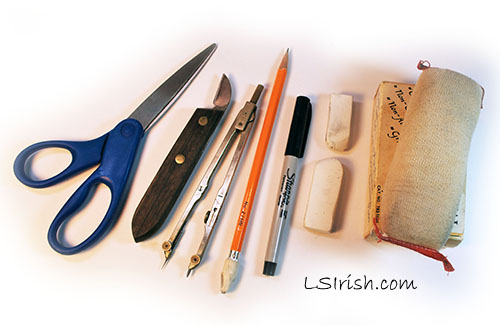
white artist eraser
gum eraser
architect’s eraser pad
transparent tape
low-tack painters tape
dusting brush
old tooth brush
assorted soft painting brushes
ceramic tile or wood palette
rulers and straight edge
t-
square or right angle triangle
cardboard
canvas stretchers
long quilter’s straight pins
bench knife or utility knife
x-acto knife
small round gouge


Also found in my kits are white artist erasers. Please avoid pink erasers as they can leave pink streaks of color on your work surface that is not easily removed. The white eraser cleans up any left over tracing lines and any oil or dirty from your hands that builds up during a burning session.

Architecture eraser pads are also excellent for cleaning graphite, pencil rubbings, pencil lines, hand dirt, and even fine fibers that may have risen from the burning process.

Large dusting brushes are excellent to remove the dust created during the preparations stage of sanding your wood surface. Old tooth brushes can also be used; they also are useful in removing any excess rouge from your tool tips during the tool cleaning steps.

Transparent tape, straight edges, rulers, t-squares and drafting right angle triangles are used to correctly align and secure your pattern to work surface.

If I will be adding paint to my finished burning I will need an assortment of soft bristle brushes, a paint palette, water pans and, of course, the thinning media which fits the type of paint I have chosen to use.

Bench knives or x-acto knives can be used to carefully carve away small mistakes in my burning and to cut fine highlight lines into an area that has already been burned. Some wood burners also use them as scrappers to clean the tool tips.

When I am working on cotton canvas I want several sheets of heavy cardboard and long quilter’s straight pins to secure my cloth so that I am working on a tight, non-moving surface. Canvas stretchers can be purchased at your local art store so that you can secure large pieces of canvas fabric.

First Pyrography Project – 8 – Supplies Read More »

First Pyrography Project – 7 – Media

WOOD BURNING MEDIA

Any natural surface can be used for pyrography including wood, gourds, paper mache, cotton and linen cloth, watercolor paper, and vegetable tanned leather.

Avoid any material that has been chemically treated or painted as the high temperatures of the tool tips will release the chemical fumes of these materials during the burning process.

Avoid using any media of ‘unknown origins’ as palette wood or unidentified scrap wood as you have no knowledge to what treatments it may have been subjected.

Avoid any material that has evidence of mold, mildew, or water damage as all of these can cause health problems with contaminated fumes.

The natural coloring of your wood species will directly affect the range of tonal values you can burn.

WOOD

Soft woods as basswood and poplar develop dark tones at very low temperatures. So you do need to watch your temperature settings so that you do not go too quickly to very dark tones. Mahogany tends to burn at a medium temperature range and the birch and black walnut need hotter temps.

From Pyrography Style Handbook, by Lora Irish

The natural color of the wood effects the color ranges that you will be able to see in your burning. Obviously the poplar and basswood, as both are white woods, are going to show a very wide range of pale value burns. The African mahogany and the black walnut probably will not show the burning until you reach a mid-tone or dark toned burning.

Pre-manufactured shape as wooden boxes, plaques or canisters can be purchased at the larger craft stores and supply houses. As your skill in wood burning grows you can also consider unfinished furniture as your work surface. Whichever wood or surface you chose please consider basic safety procedures. Do not burn any surface that has been painted, sealed or oiled. Safe wood burning is done on untreated, raw wood only.

LEATHER

Leather is an extremely versatile surface for any pyrography project. It can be cut into any shape, created into wallets, book covers, bags and even saddles. It can be molded and sculptured. Pre-cut kits leather kits that include tools, needles, lacing and instructions are available through leather work supply house. You can also purchase leather in half side hinds ready for you to cut into your own leather craft project.

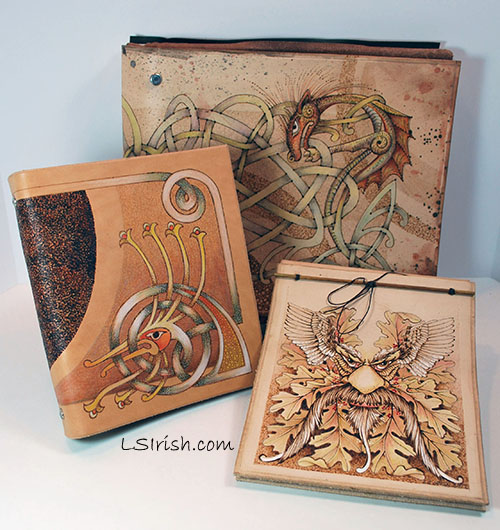
Patterns are found in the Great Book of Celtic Patterns, Expanded Edition

There are several methods to tanning leather and vegetable tanning is the safest method for a piece to be used for wood burning. Avoid leathers that have distinct textures, brightly dyed colors or rough suede surfaces.

Leather burns quickly and easily at low temperature settings. In the higher temperature range you can develop strong dark tones and even use your wood burning tool tip to sculpture the leather surface creating a three dimensional look to your work.

GOURDS

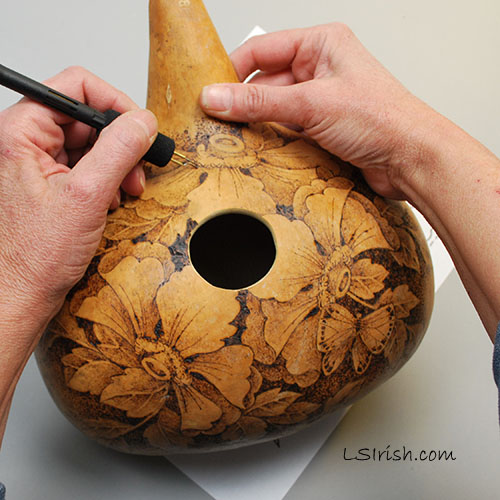
Dried gourds with their densely packed wood-like fibers provide the burner with interesting shapes for their pattern decoration. Easily cut, the gourd can become a bowl, sand candle cup, vase, lamp and, of course, a delightful bird house.

Pattern in Arts & Crafts Pyrography, by Lora Irish

Not all gourds come pre-cleaned and you may need to remove the skin from the outer surface. As the gourd dries the skin becomes black with mold. Wear a dust mask whenever working the preparation steps. Latex or rubber gloves will protect your skin for the dust. Soak the gourd in a warm water bath that has several tablespoons of Clorox added. Depending on how thick the skin layer is this bath may take up to one half hour. Roll the gourd often so that there is an even layer of water on its outside.

With a plastic kitchen scrubby gently work the skin off. I often find that I need to soak then scrub several times to remove this entire layer. When you have the shell area exposed, allow the gourd to dry well. You are ready to cut the gourd with a sharp bench knife, a wood carving tool, or with a strong utility knife and to scrap out the seeds from the inside area.


COTTON FABRIC

Cotton canvas items as totes, book bags and aprons can be added to your idea list when considering your next project. A fabric burning can create tonal values from very pale soft browns to rick dark russet tones. Any cotton fabric can be wood burned but the thickness of the canvas weave makes it the ideal fabric. Also consider working a wood burn design on pale colored cotton blue jeans.

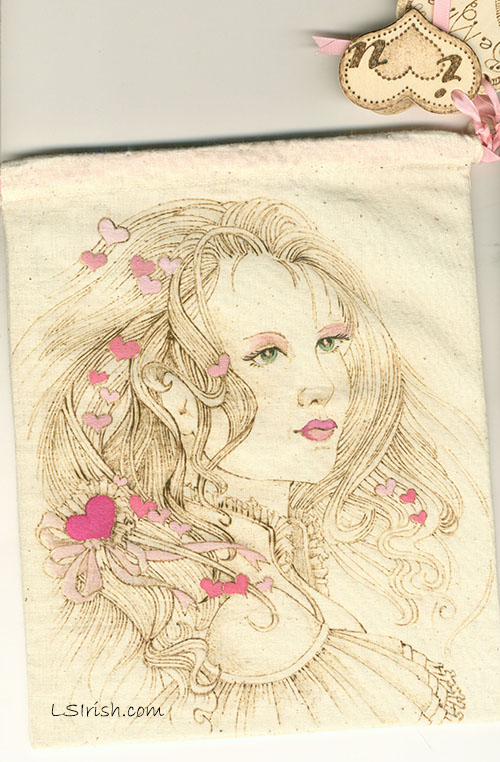
Pattern is in Arts & Crafts Pyrography

Any fabric should be pre-washed first to remove any sizing or starch. Blot off the excess water with a thick towel so that your project is slightly damp. You can now stretch the fabric over several layers of cardboard, pinning it in place with long quilting pins. When the fabric completely dries it will have pulled taught to the cardboard making it easy to work.


ARTIST PAPER

Rag content artist papers come in several styles and weights. You can find papers with a very smooth toothed surface, light texture up to a deep pebbled texturing. For wood burning a smooth or light texture works well as the pebbling can distort your lines as you burn. Paper weight ranges from a light weight of 90 pounds to over 300 pounds; the higher the weight the thicker the paper.

From Arts & Crafts Pyrography by Lora Irish

Watercolor pads or blocks are perfect to use. The paper, up to 22” x 30”, is stacked then glued along the four outer edges making the stack into one strong board. As you work the paper can not buckle because of the heat of the pen. When the burning is finished the top paper that you have worked is cut free from the block and the next paper on the block is ready to use. You can also find pre-cut greeting cards and envelopes that make wonderful presents in watercolor rag content paper.

Paper mache is a favorite wood burning surface for me. Made from shredded craft paper and glue the paper mache can be pressed into a wide variety of shapes from flower pots, kitchen canisters, gift boxes and even scrap book covers. It is inexpensive and requires no preparation steps.

From Arts & Crafts Pyrography, available on Amazon


First Pyrography Project – 7 – Media Read More »

Update on Your First Pyrography Project

Update on Your First Pyrography Project Read More »

Scroll to Top