
We are experiencing technical difficulties and working furiously on getting them repaired.
If you are finding broken links, please go to our Sitemap page
which is shown in the top nav bar on your right.
Thank you for your patience.
Celtic knot work patterns are easily adjusted in size and shape by using a simple grid-work chart.
The following classic Celtic Knots are shown first in their single unit, and then in combination, ready for you to save and use in your Celtic designs.
This is a five part series that will be expanding over the next few days.
Part 1, How to create and divide your circle grid
Part 2, Sample Circular and Square Grids, ready to print and use in your pattern work
Part 3, How to convert a linear pattern into a circular design
Part 4, Four free circular Celtic Patterns
Part 5, Sample single Celtic pattern motifs to trace
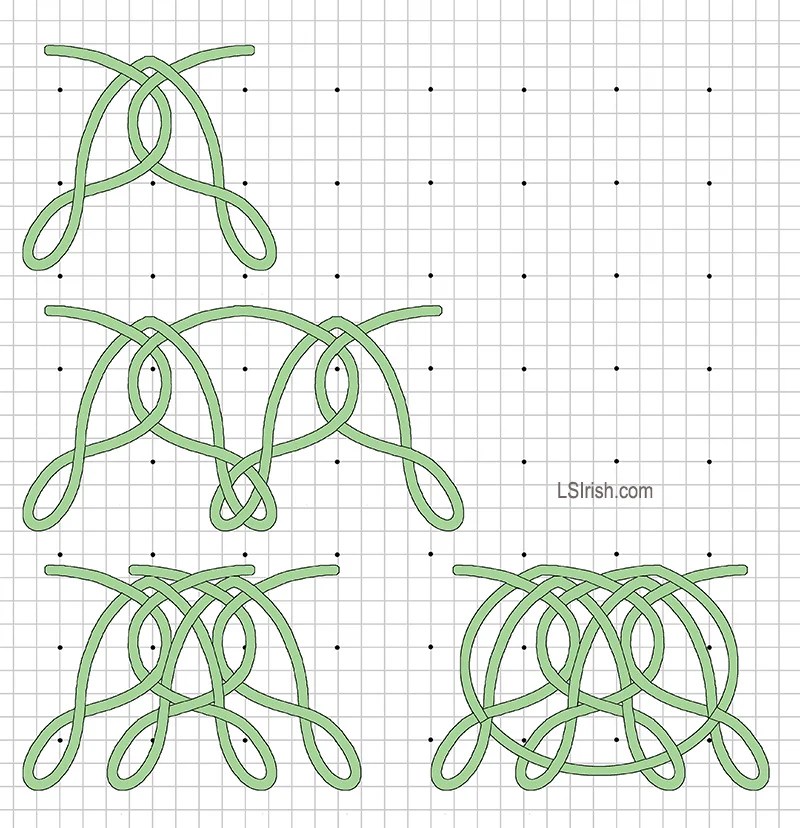 Long loop extensions at the bottom of this single motif creates a series of loop that can be used to thread a new circular line to lock the loops into the knot work.
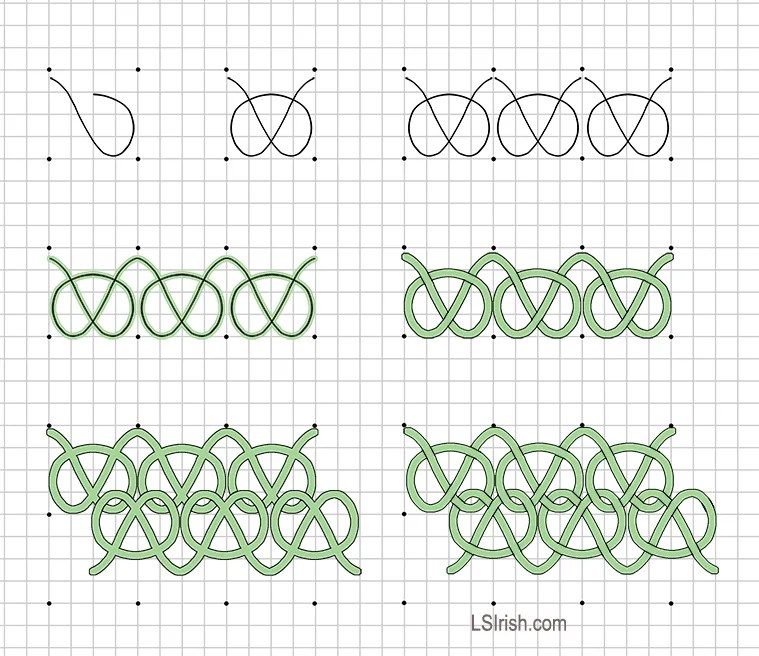 This single motif is a pretzel twist that can be used in a two line motif that interlocks the top of the pretzels in the bottom row with the bottom loops of the pretzels in the top row.
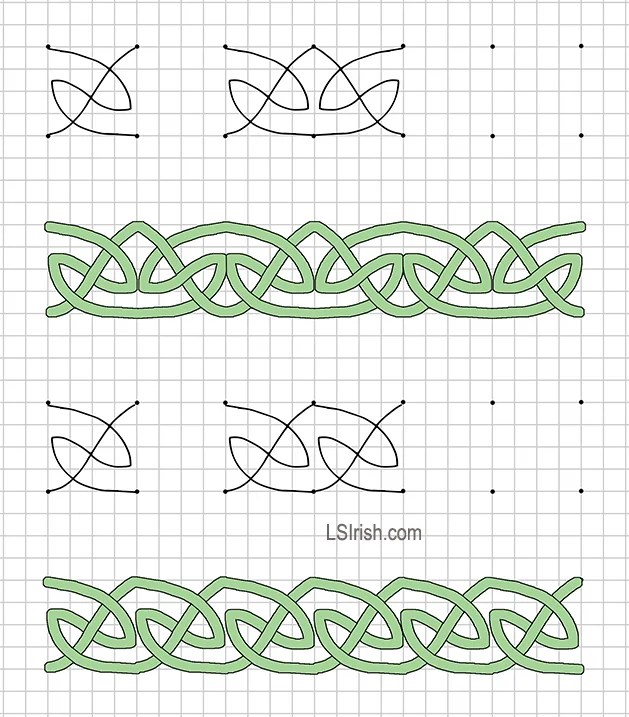 Turn-back loops can be smooth curves or sharp points. For this single motif the loop is worked in a point to give an angular effect through the middle of the design.
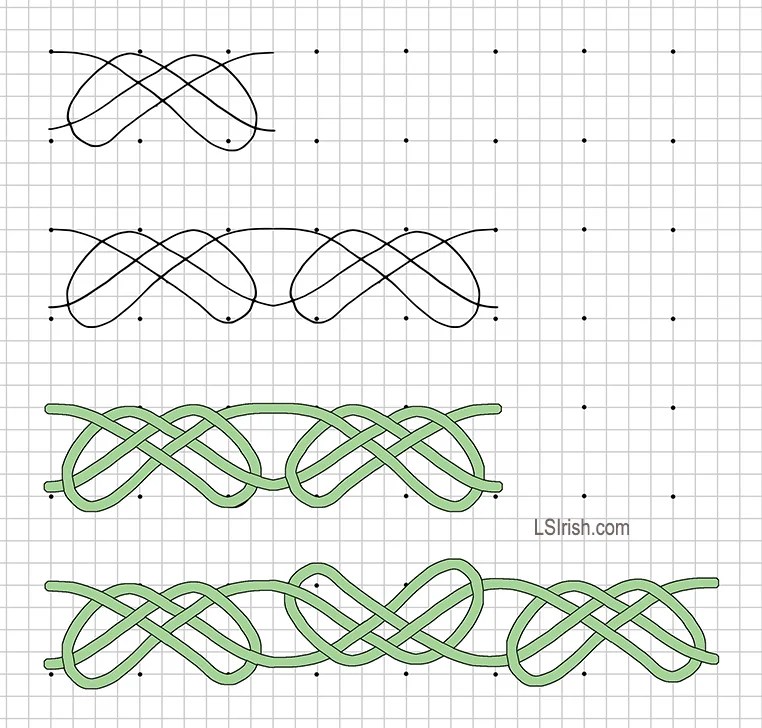 This motif features a lattice center where the lines cross each other on a 45 degree line.
Five complete pattern packs, over 100 designs and motifs, for the low price of only $22.95

How to Create Celtic Patterns, Pt. 5 Read More »
Circular Celtic Pattern Layout Ideas
Circular Celtic patterns do not need to be one flowing line of Celtic motifs. As you work to create your own patterns consider these designing options.
This is a five part series that will be expanding over the next few days.
Part 1, How to create and divide your circle grid
Part 2, Sample Circular and Square Grids, ready to print and use in your pattern work
Part 3, How to convert a linear pattern into a circular design
Part 4, Four free circular Celtic Patterns
Part 5, Sample single Celtic pattern motifs to trace
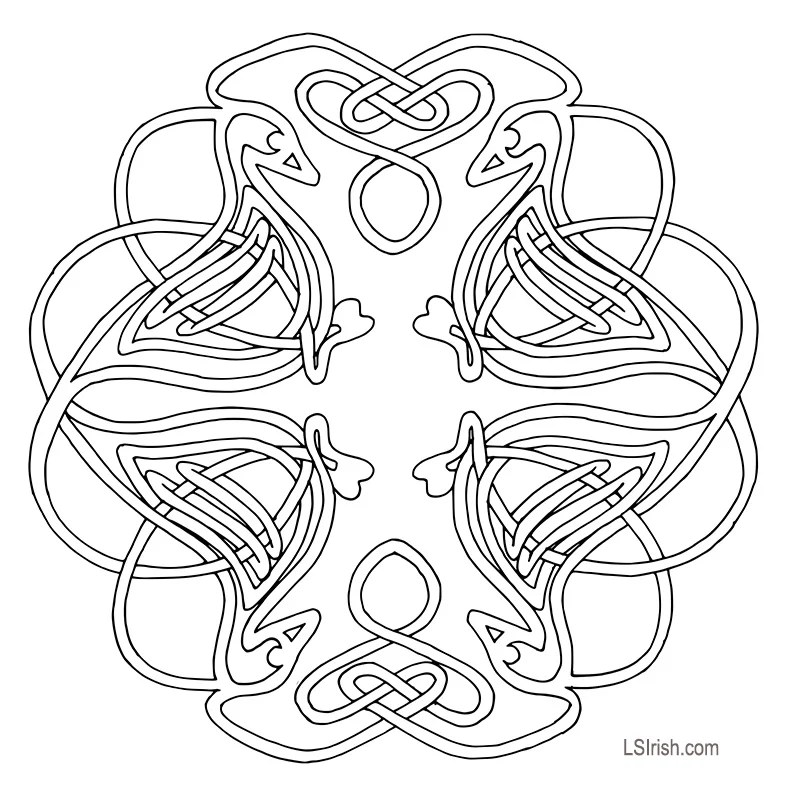 Free Mourning Doves Celtic Pattern uses two Celtic pattern motifs – one is the dove and the second is the Celtic knot shown at the top of the circle. This pattern was worked inside of one quarter of the circle grid, then flipped both horizontally and vertically to create the four mirror sections of the tracing pattern.
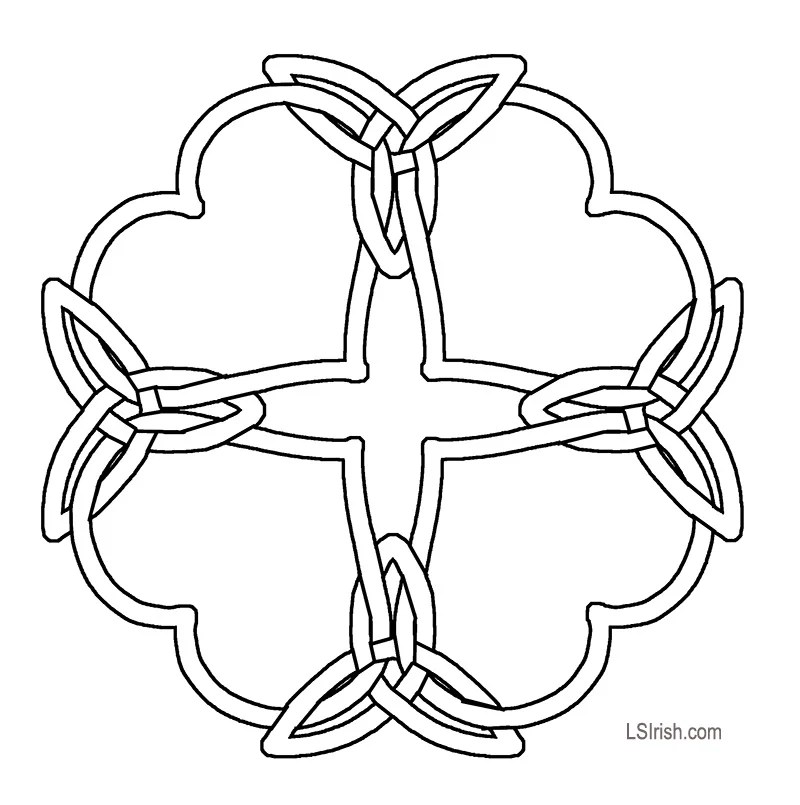 Free Four Hearts Celtic Pattern features a large open space inside of each of the heart designs. Here you can add a new design as flowers or four-leaf clovers, initials, or even a small landscape pattern.
 This free Five Sectioned Cross Celtic pattern uses an outer border to divide the circle into the five pie-shaped parts. Once the border has been worked you can use any small Celtic pattern motif as the filler design.
 Free Celtic Stars and Clover Pattern places a motif along each radius line of an eight-section pie shaped circle. They are connected using just one line the follows the outer edge of the circle.
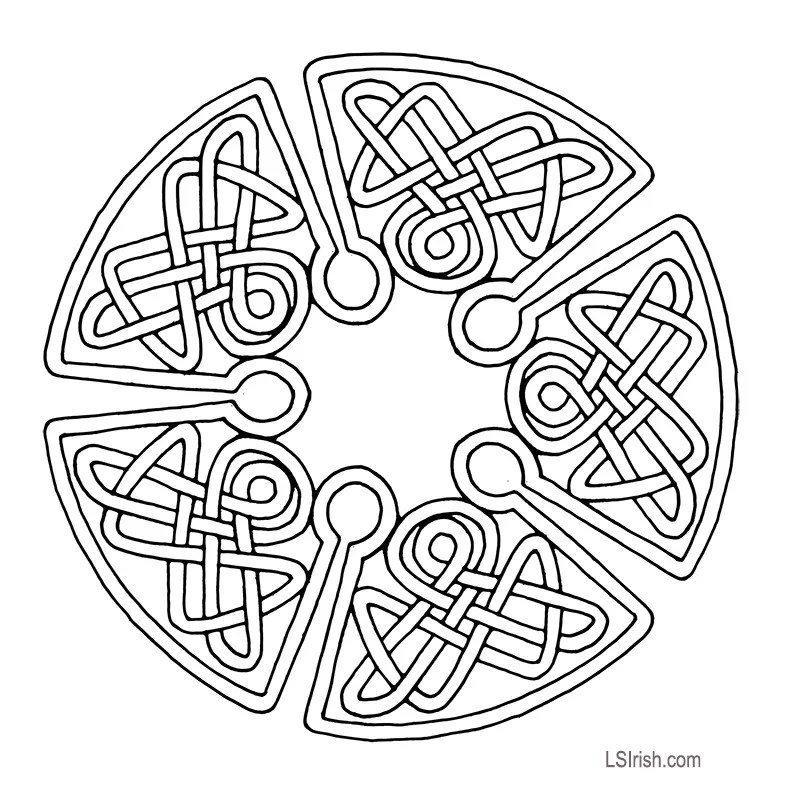
 Celtic Thunder Storm pattern uses two motifs that are interconnected through the line work. The center points of each motif touch the outer edge of the original circular grid. To emphasize the circular idea behind this design two circular lines were added to the knotting pattern, threading through each motif line.
Five complete pattern packs, over 100 designs and motifs, for the low price of only $22.95
How to Create a Circular Celtic Pattern, Pt. 4 Read More »
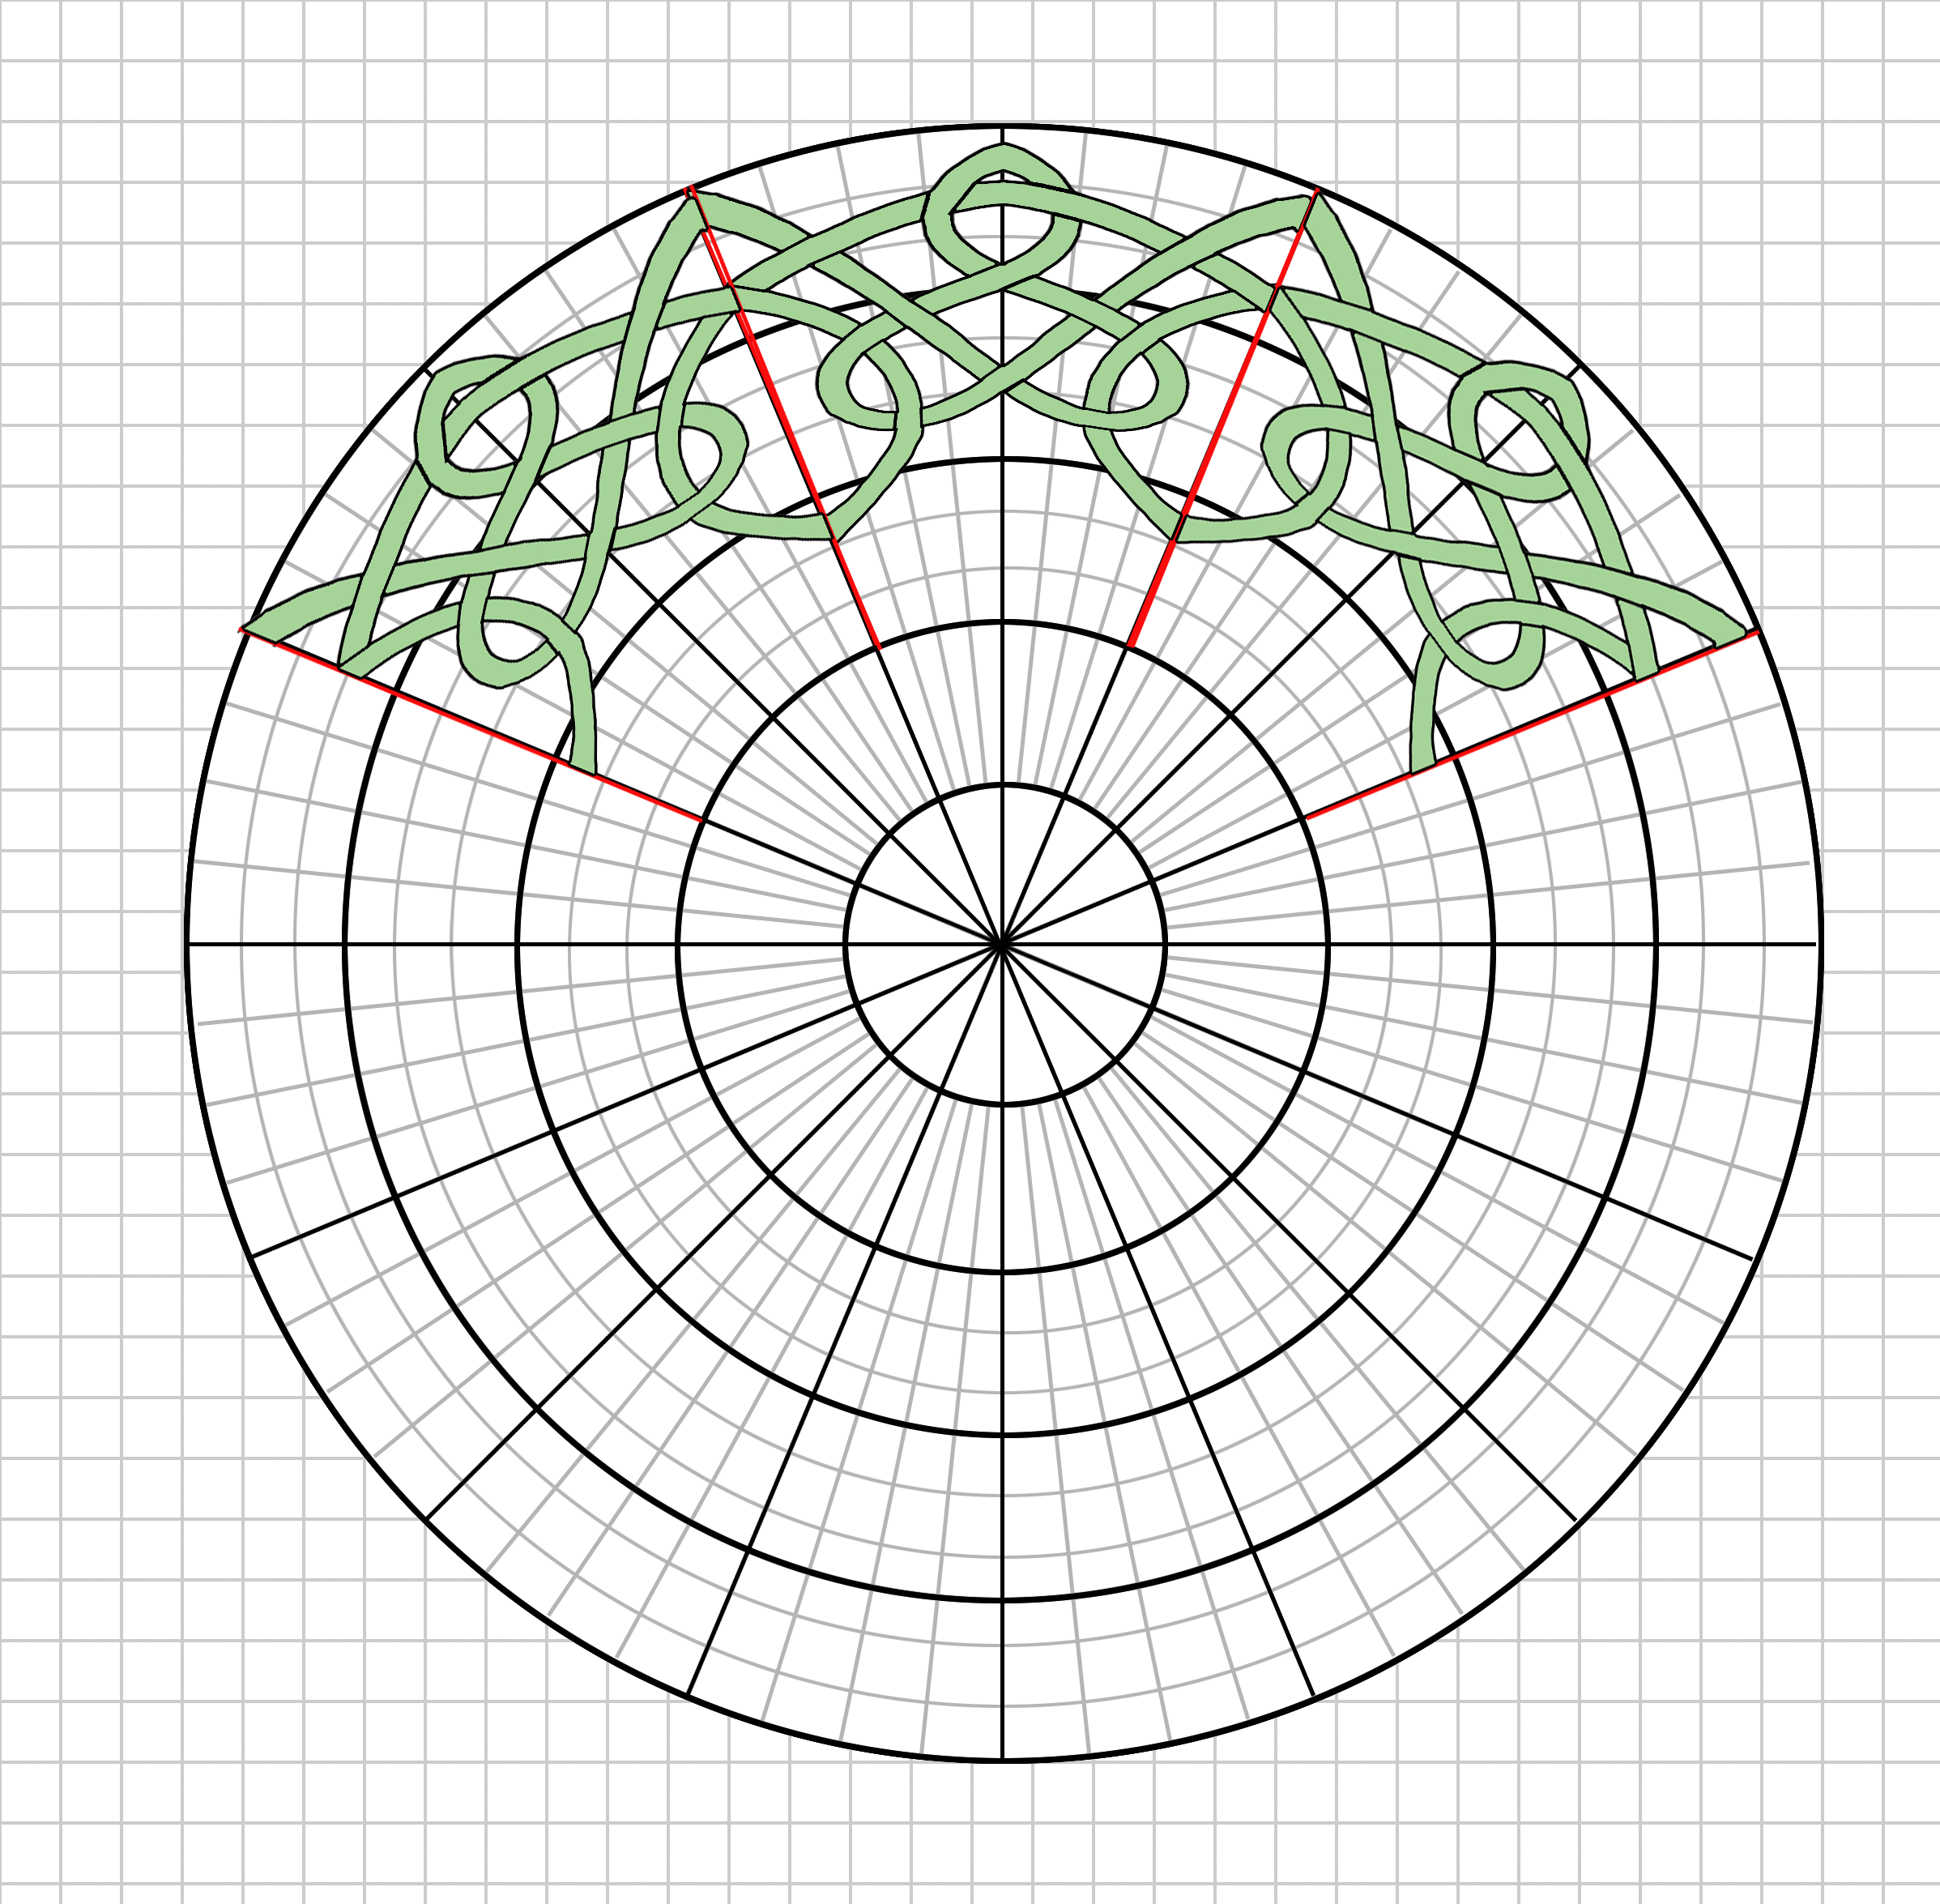
How to Convert a Linear Pattern into a Circle Design

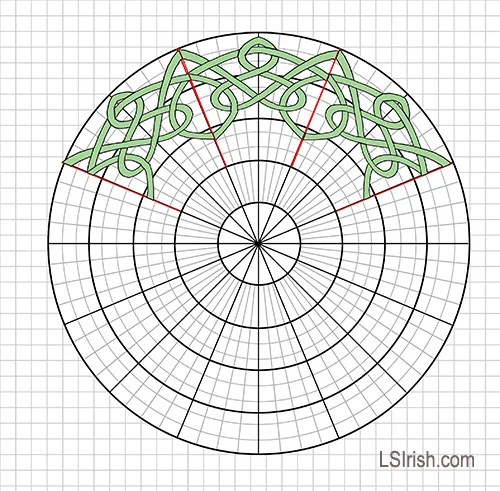
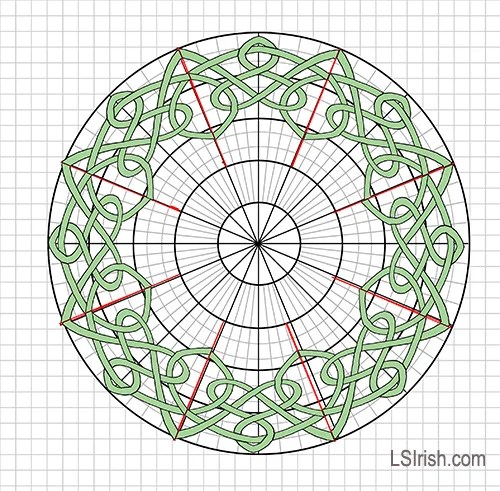
Free Pattern Celtic Crown of Thorns Motif
This is a five part series that will be expanding over the next few days.
Part 1, How to create and divide your circle grid
Part 2, Sample Circular and Square Grids, ready to print and use in your pattern work
Part 3, How to convert a linear pattern into a circular design
Part 4, Four free circular Celtic Patterns
Part 5, Sample single Celtic pattern motifs to trace
Linear patterns can be transformed into round designs by using a circular grid.
1. Begin by isolating the individual motif of your line design. It is far easier to adjust one motif and then repeat that adjustment around the circle then to try and adjust an entire line of motifs.
Isolate one linear motif to use as your template for your circular design. Center the motif onto the top center of the circle grid.
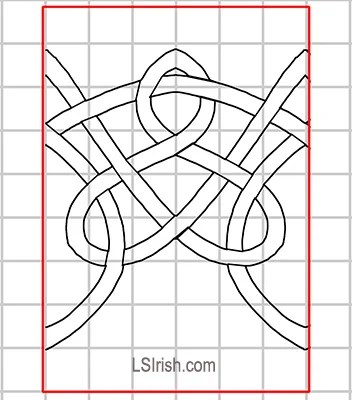
Center that motif onto the circular gird at the top of the circle.
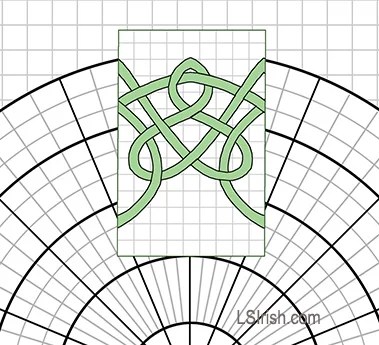
For this sample the circle has been divided into twelve equal parts, with the motif overlaid on two parts.
2. Chart your motif exactly as you would any other pattern. Note that because the circle is wider along the outer edges but narrower at the inner area, the units are not the same size.
As your transfer your motif the outer edge of the design will become stretched while the inner area becomes compressed.
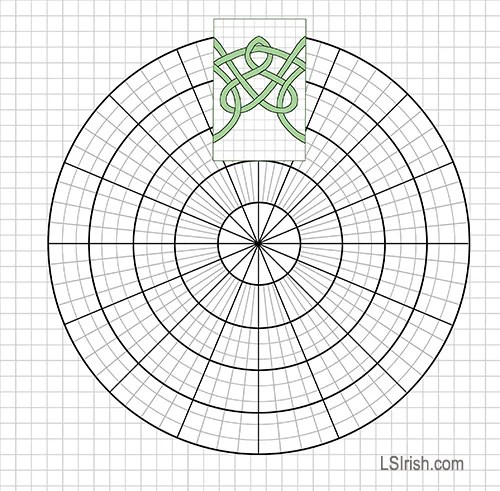
The graphed pattern will automatically adjust to the shape of the two pie sections as you work the graphing steps.
Now trace the newly graphed motif into the next set of two pie shaped sections.
3. When the first motif has been graphed you can trace that graphed pattern into the next two sections of your circular grid.
If your home print also has scanning capacities, you can scan your first motif onto your computer. Next print multiple copies of that scan.
Cut out the motif from each printer page and tape them into the circular pattern. Now you have a quickly made design, ready for tracing.
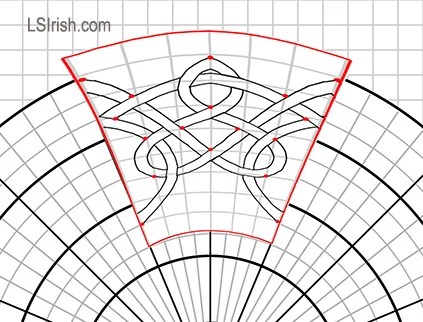
Adjust your two section motifs as necessary to insure that each edge touches correctly to the adjacent tracings.
4. If you are working your circle with paper and pen, the completed tracing may need some minor adjustments. Check that the edges of one motif aligns with the edges of the next motif.
5. Determine how thick you want your knot lines to be, and mark the pattern accordingly.
Establish the one-over-one under knot line pattern.
6. Your finished design is ready for tracing.
 Free Pattern Circular Celtic Crown of Thorns Pattern
Five complete pattern packs, over 100 designs and motifs, for the low price of only $22.95
How to Create a Circular Celtic Pattern, Pt. 3 Read More »
Here are three circular grids and one square grid that can be used to create your own Celtic patterns, ready for your to save to your desktop.
This is a five part series that will be expanding over the next few days.
Part 1, How to create and divide your circle grid
Part 2, Sample Circular and Square Grids, ready to print and use in your pattern work
Part 3, How to convert a linear pattern into a circular design
Part 4, Four free circular Celtic Patterns
Part 5, Sample single Celtic pattern motifs to trace
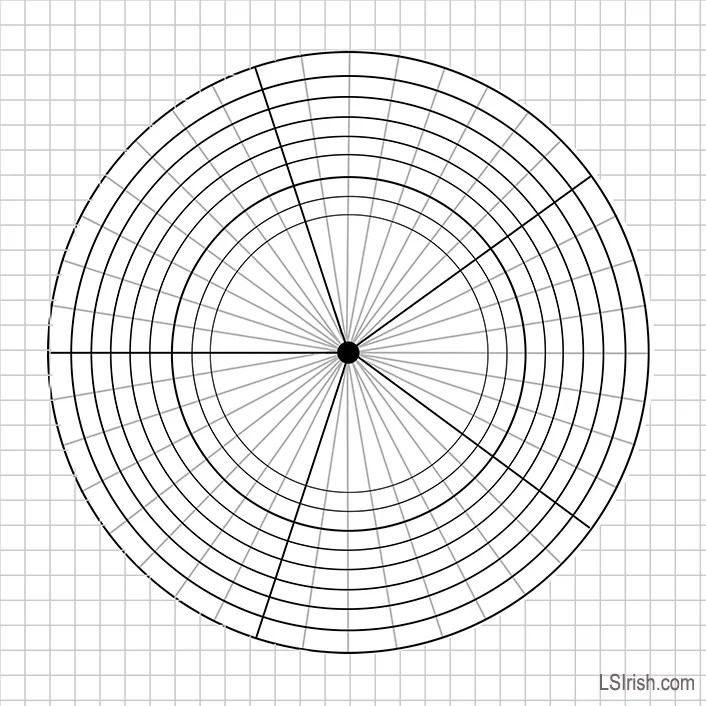
 16 Section Circular Celtic Grid Layout
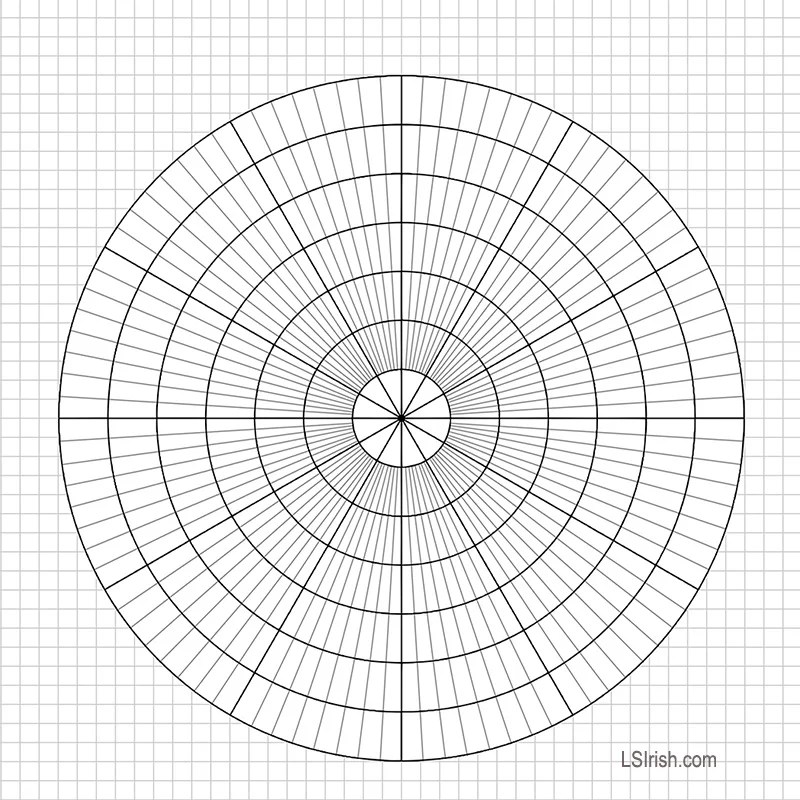 12 Section Circular Celtic Grid Layout
 5 Section Circular Celtic Grid Layout
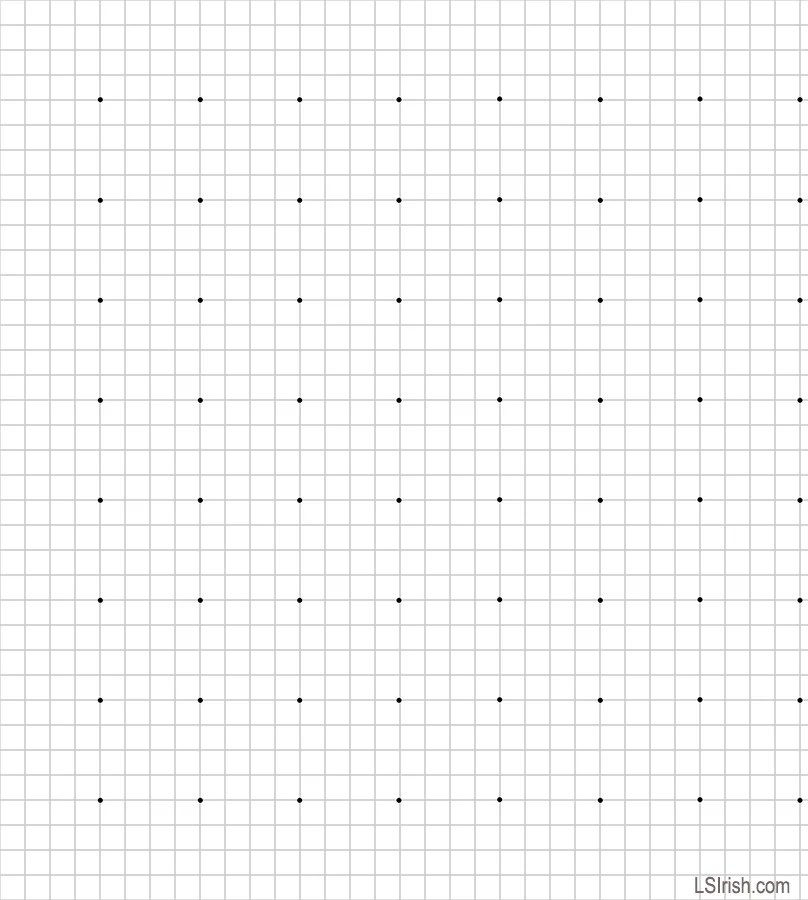 Square Grid Celtic Pattern Layout
Free Circular Celtic Pattern
Five complete pattern packs, over 100 designs and motifs, for the low price of only $22.95
How to Create a Circular Celtic Pattern, Pt. 2 Read More »
