
String House Gourd Art
String House Decoupaged Gourd Art

Sometimes I love being concise, careful, and controlled in my art … and then sometimes I just want to get down dirty, messy, slimy, anything goes, and hands-on. This String House is one of those ‘dirty up to the elbow’ fun projects from my newest book, Crafting with Gourds.
Introduction
Any natural fiber material can easily be collage to the surface of your gourd using archival white water-based glue. This fun bird house uses paper coffee filters, cotton cheese cloth, burlap, garden twine, and cotton cord to create a riot of texture. When the collage work is dry we will use oil pastels to brightly color the high ridges of the texture.
Preparation
Wash, clean, and cut a 10” high, 8” diameter, 23” circumference kettle gourd following the general preparation instructions.
 Supplies
10” high, 8” diameter, 23” circumference kettle gourd
#2 to #6 graphite pencil
wax-coated paper cups
archival white water-based glue
plastic mixing spoon
bowl of water for dipping
large #6 to #12 square brush
latex gloves
coffee filters
cheesecloth
burlap
assorted string, cords, and twine
scissors
Acrylic craft paint
dark brown – bird house
black – mobile
set of 12 to 24 oil pastel sticks
spray sealer
 Step #1 Divide the gourd into three sections.
Divide the outside of your gourd house into three sections using a pencil to create the guidelines. The top section will be worked with coffee filters, the second section with cheesecloth, and the bottom section with burlap.
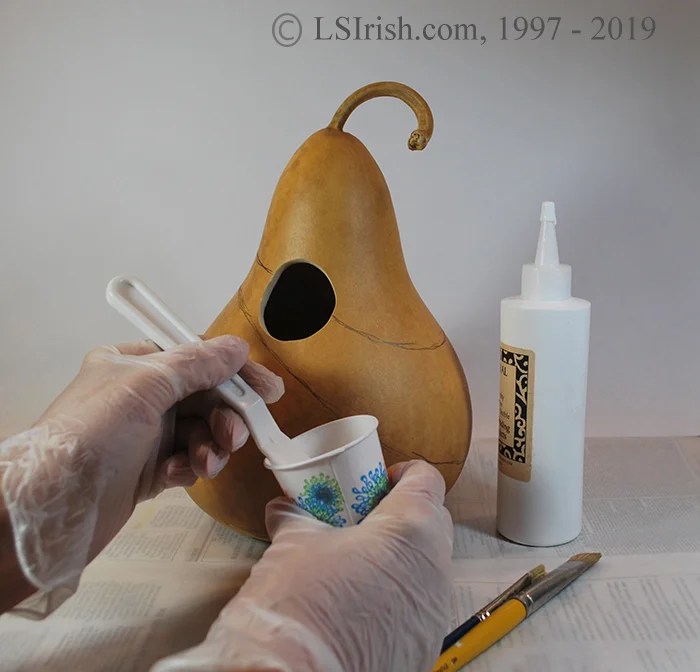
Step #2 Mix your glue
In a wax-coated paper cup mix three tablespoons of archival white water-based glue. Add one tablespoon of water, mix well.
Work the top section with coffee filters.
Work one coffee filter at a time. Dip the filter into clean water, then wring out any the excess water. You want the filter damp, but not dripping.
 Step #3 Gluing the coffee filters into place
Apply one coat of glue mix the top section.
With a large square brush, apply one coat of the glue mix to the top section of your gourd. Place the filter onto the glue and press firmly with your brush.
Add more glue if needed. Apply more glue with your brush to the filter as necessary to secure the coffee filter into place. Use the palm of your hand to press the thickest wrinkles into place.
Step #4 Add the cheesecloth
Work the middle section with cheese cloth.
Mix a second batch of archival white water-based glue if necessary. Cut your cheesecloth into small 3” to 4” squares. You can work several overlapping layers of cheesecloth at a time to increase the texture for this area.
Dip the cheesecloth squares in clean water, then blot well on paper towels. Brush a coat of the glue mixture to the central area of the gourd. Place several layers of cheesecloth onto the glued area and use your brush to press it into place.
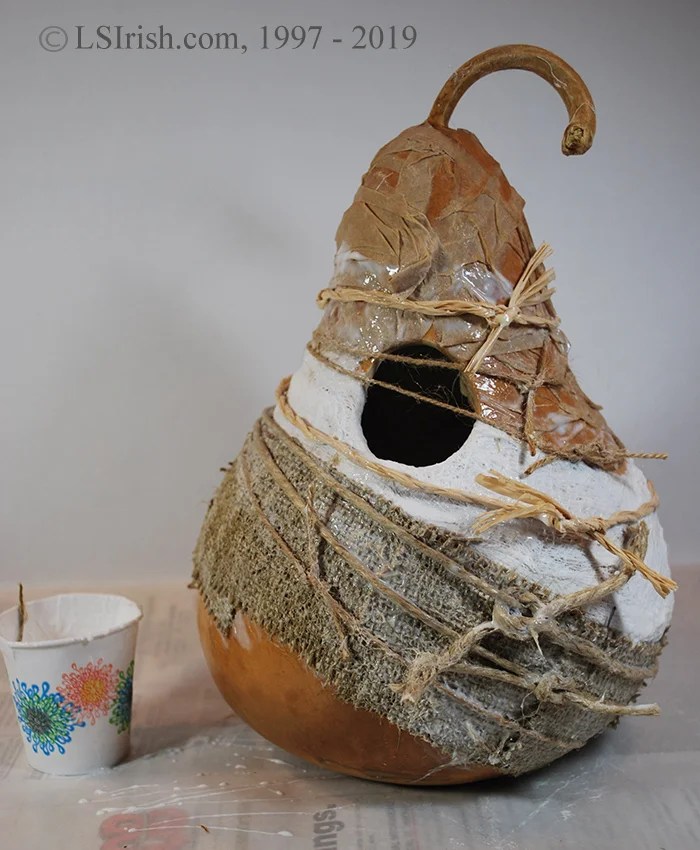
 Step#5 Work the top half of the bottom section with burlap.
The bottom section of the gourd is covered with 3” squares of burlap. Dampen and blot the burlap pieces on a paper towel. Coat the bottom section of the gourd with your glue mix. Lay one piece of burlap onto the gourd and apply a second coat of glue mix over the burlap. Continue working along the pencil line for this section, overlapping each new burlap piece on the last piece applied. Work just one ring of burlap pieces along the bottom.
Step#6 Leave an area of the gourd un-worked.
Visual contrast is important when you want to artistically emphasize texture. The un-worked bottom area for this bird house gives your eye an area of smooth gourd surface to compare to the textures you have created.
 Step #7 Gather a variety of cotton and twin strings.
While you can use just one type of string, using a variety adds to the textured effect of this collage.Cut and tie a string at each intersection of the textures.
Lay a long piece of twine around your gourd. Move the twin to an intersection between two of your textured areas. Tie a square knot and cut the excess twine from the knot to about 1” long. Brush a generous coat of the glue mix to the twine to hold it into place. The twine wrapping does not have to fall exactly on the joint, let it fall where ever it may.
Let your strings go over the bird house hole as you add then. Glue the string, including that area that is over the hole. After the glue has dried overnight you can cut the small sections of the string that cover the hole without effecting the string at the hole sides.
 Step #8 Add one more, even coat of glue mix.
Let your gourd dry for about an hour, then apply one more glue and water mix to all of the textured areas. Dry overnight. Even though the glue is well dried it will have a slightly tacky feeling to the surface. This will diminish with the spray sealer step at the end of the project.
Apply one to two coats of burnt umber brown or black acrylic paint to the entire surface of the decoupaged gourd. This creates a dark background for the color that will lie on the high texture in the next step.
 Step #9 Playing with oil pastels.
Oil pastels are ground pigment that is compressed in an oil-based stick. They are available in set that have a full color range.
Using one oil pastel stick at a time, rub your pastel over one of the textured areas. The pastel will adhere to just the highest areas of your texture, leaving the deep areas in the dark brown paint.
Although not shown in this project you can blend oil pastels by laying one color over another lightly. This lets a little of both colors show and creates the new blended color.
You can clean off any pastel color that has gotten into the next area by rubbing the area with your fingers.
 Step #10 Apply oil pastel to the strings.
Use contrasting colors for your strings by rubbing the oil stick along the top edge of the string.
Finish this bird house with two to three light coats of spray sealer.
 Step #11 Making a wind chime
Shown in the top photo
 Crafting With Gourds, by Lora S. Irish
Available at Amazon.com
String House Gourd Art Read More »
