Wood Carving and Wood Burning
By L. S. Irish


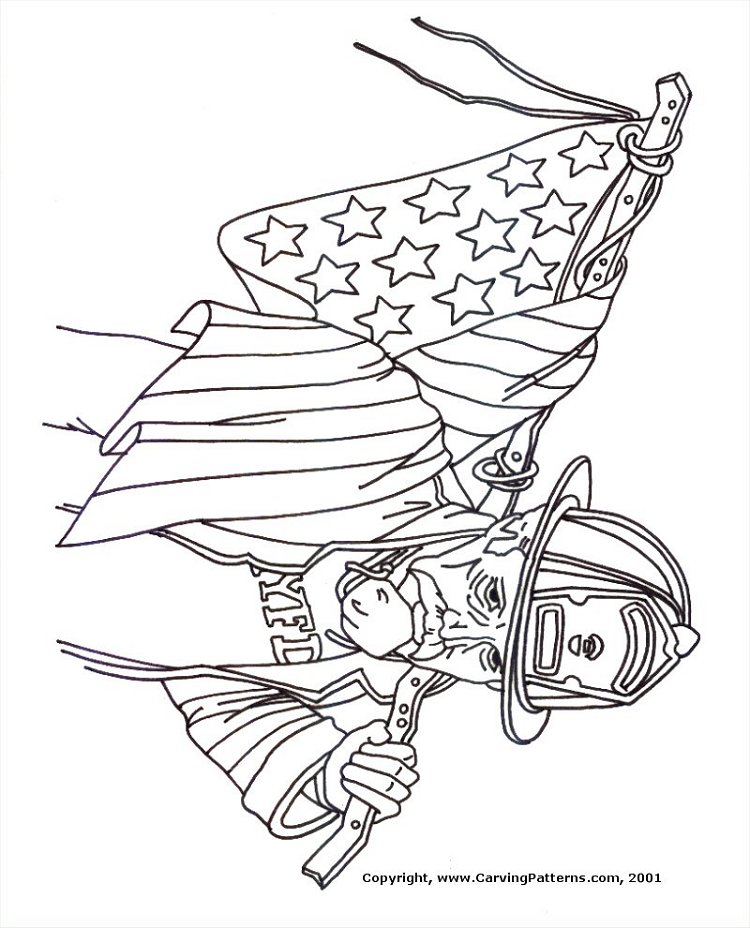
ESTABLISHING THE PATTERN DETAILS
With scissor cut your pattern into sections according to the Levels that you have established. Also cut some scrap carbon paper that will fit these sections. Use masking tape to secure the pattern piece and carbon paper to your work. Trace along the detail lines of the design.

ROUGHING IN THE DETAILING
I have always preferred to use “the worst first” method of carving. This means that what ever area of the design seems the hardest, well, that’s the area that I begin working. For this piece it is the face.
I will return to the face area over and over again as I work each level. This allows me to slowly define this area. Here I have established the eyes, nose, and cheeks into their general forms. The inside of the eye, or eyeball area for a small carving can simply be a very deep cutout. This lets a dark shadow form that implies the iris to the eye.
On the face the side areas of the cheeks tuck back deeply against the coat collar. The inside of the collar has a very steep slope. This makes the face tuck into the coat.
The tip of the nose is slightly behind the front of the dust mask, the mask being the highest point in the facial features.

After the face has some general shape move on to the outer areas of the design. I am using the small round gouge and bullnose chisel for the basic sculpturing. The v-gouge laid on it’s side so that you use the tips of the “v” instead of the point is excellent for walking into the deep edges.
Here the stars are defined by lightly deepening the flag around them. The stripes are denoted with the v-gouge. I have done a little more work on the face at this stage.

I have moved into the hat area. Here the hat rounds over to the sides with the badge area the highest. The brim also is round so that the highest edge of the brim is directly over the Fireman’s nose, the rest of the brim falls away from this point. Once again I return to the face for refining.
The depth of the inside corner of the eye has been dropped slightly, the mustache corrected, and the cheek better defined.
(See how much easier this would have been if I was working on a 12″ x 18″ blank …sigh!)

The hand and arm are finally roughed in by tapering this unit toward his body at the elbow. His hand is the highest area for this level. There is a deep cut area on the inside of the coat cuff to visually allow room for the arm to enter the coat.
Yep! Back to the face area one more time. The eyes have been softened so they no longer have that ‘Egyptian look’. The wrinkles in the face have been rounded over for a softer look.
Once the rough out sculpturing is completed I return to each area and redefine the detailing. Undercuts have been added along the collar areas where the face comes in contact with the coat, along the shoulder area where the flag folds over the body, and along the wires that hold the flag to the iron rod.
At this time I will lightly sand the work to remove any “dust bunnies” or fine fibers that have not been teased out of the work.
You will note that I have left the work fairly coarse, many of my chisel and gouge lines remain. Because of the topic and theme of this carving the roughness, I believe, adds to the design. The chiseled edges and hardness of the look of the carving adds to the intensity of the moment captured by the pattern. Even if this design have been carved in a much larger size, I would chose to leave the work with many of the chisel strokes showing.
You can, of course, continue with the work at this point for a smoother, more finished look if you chose. Simply begin again with your chisels and gouges. This time use them with a very light touch to shave over the rough areas. Lightly sand a second time.

To add to the roughness of the pattern theme I have chosen to stain the carving with walnut oil based wood stain. Apply one liberal coat to the entire piece, then immediately wipe the stain from the work. This will remove much of the staining from the high areas of your carving while leaving the deep areas and background dark.
If you wish to remove even more stain from the high areas, dampen a rag with turpentine, wrap it over your finger then wipe along the areas to be lightened.
Once the piece has dried for several hours I lightly sanded (yes … I said sanded) over the ridges of the flag on his shoulder, the stars in the flag, the top side of the dust mask, the brim of his hat, and the cuff on his sleeve. The stain soaks deeply into the wood allowing for this light sanding to emphasize these areas.
Let your piece dry thoroughly and seal with two coats of Danish Oil Finish.
