Today we will be taking a quick look at The Art of Spoon Carving. This is a quick look because I simply do not have the time or room on a blog to post what we can cover in a full, 156 page book. This is a condensed project from The Art of Spoon Carving, by Lora S. Irish – twelve step-by-step projects, 57 unique spoon patterns, and lots of photos.
Previous Posts in this Spoon Carving Series
The Art of Spoon Carving
Discover why I carve spoons!
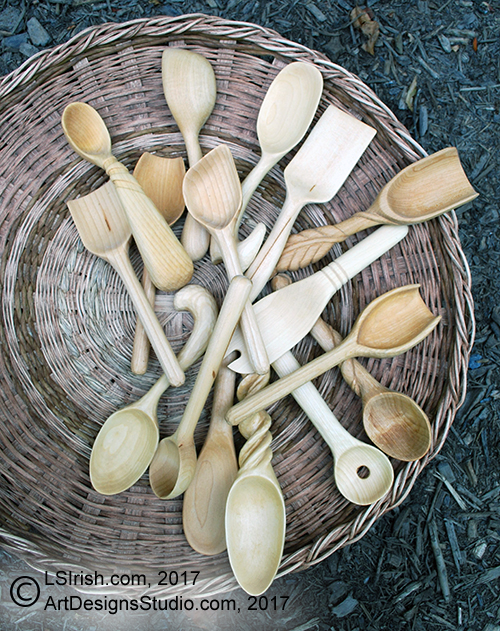
Spoon, Fork, and Ladle Styles for Wood Carving, Traditional Spoon Styles and Shapes.
Four Methods to Cutting a Spoon Blank
Wood Carving a Basic Wooden Spoon
Supply List – Four Methods to Cutting a Spoon Blank
The Art of Spoon Carving by L S Irish
10″ length Coping Saw
Coping Saw Blades
Clutch Style Bar Clamp
Heavy Duty Anti-Slip Mat
Flexcut 3″ Straight Drawknife
Cut Resistant Gloves
Wood Carving Chisel Tool Set (8 Pcs)
Ryobi 16 in. Corded Scroll Saw
Pin End Scroll Saw Blade Assortment
PFEIL “Swiss Made” Made Roughing Knife
Flexcut Carving Tools, Carving Knife Set, Set of 4
Extra Supplies for Avid Spoon Carvers
Morakniv Wood Carving 164 Hook Knife
Morakniv Wood Carving 162 Hook Knife
Hooked Push Knife
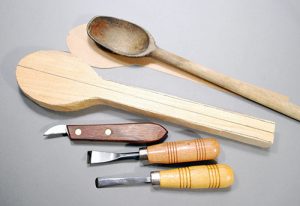
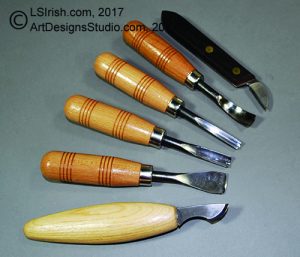
Shown in the photo below, from top to bottom: Large chip carving knife, 1/2″ bent round gouge, 3/8″ v-gouge, 3/8″ straight round gouge, 5/8″ wide sweep round gouge, and a hooked push knife.
Step 1 – Tracing and Creating the Blank
Begin by tracing your pattern onto your wood blank. This basic wooden spoon is worked on a 12″ long x 1 1/4″ thick x 3″ wide basswood blank. There are four basic methods that you can use to create your rough blank – bench knife, coping saw, scroll saw, or draw knife.
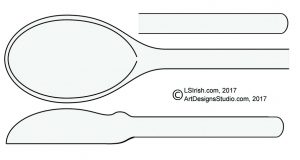
Please click on the pattern below for a full-sized printable image. Since I find that I use a spoon pattern many time I begin my project by tracing the pattern onto a sheet of chipboard to create a reusable tracing template. An empty, large cereal box works very well. You can see my chipboard template in the photo above, under the original antique spoon at the top.
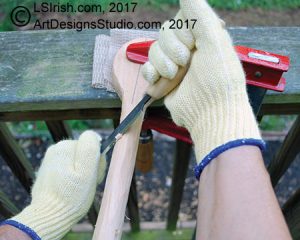
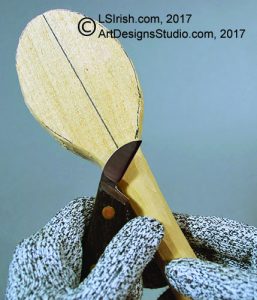
For my rough-cut wood blank I used a draw knife. Please visit Four Methods to Cutting a Spoon Blank for the step-by-step instructions to rough cutting your spoon blank.
Step 2 – Finding the Grain of Your Spoon Blank
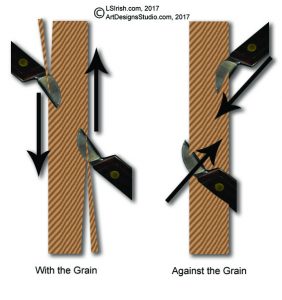
Please click on the image below for a full-sized drawing. Spoons have rounded handles, rounded bowls, and both convex and concave curves within the bowl. As you carve you will need to adjust your carving strokes often to keep your knife blade working with the grain of the wood.
Pulling the blade down the grain ends slices those ends into thin slivers. Pulling or pushing a knife blade into the grain of the wood will cause the cutting edge to follow the grain lines, slicing deeply into your blank. This can cause a deeply cut dent in your blank or can cause a long sliver of wood to split out of the spoon.
As soon as you note that you are cutting into the grain, back the knife blade out of the cut. Turn the spoon 180 degrees, and re-cut the are working with the grain direction.
Step 3 – Rough Out
The shaping for your spoon begins with a bench knife or large chip carving knife. Spoon carving is a perfect project for working in your lap. You will want carving gloves both for protection and to give a more secure hold to the wood as you work your knife. A large, folded terry cloth towel, laid in your lap, will catch the chips and can be used to hold the spoon bowl during the bowl cutting for added protection.
Step 4 – Push Cut
The push cut is made by pushing the cutting edge away from you. You holding hand is below or behind the knife stroke. Work the push cut with the grain of the wood.
Step 4 – Pull Cut
The pull cut moves the knife-edge towards your body, again working with the grain of the wood. Your holding hand is behind the knife-edge for protection.
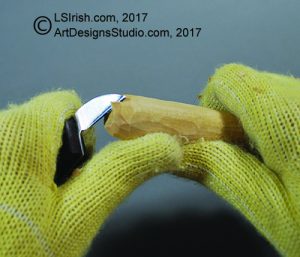
As you rough cut and shape the handle of your spoon you will use both the push and pull cuts. Cut the handle area into the rounded shape.
Step 5 – Cutting the Bowl and Handle Joint
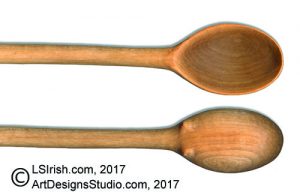
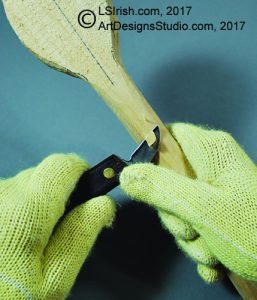
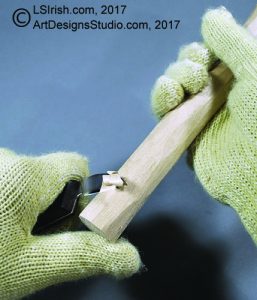
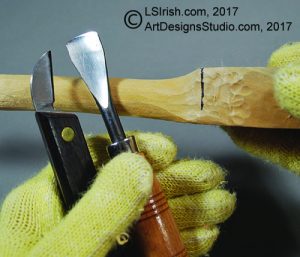
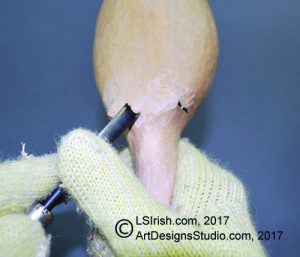
The joint area where the bowl transitions into the handle is a great place to add a little extra something to your spoon. For our example I am carving ears into the back side of the joint. Those ears keep the spoon from rolling or rocking when it rests of the kitchen counter.
With a marking pen, draw a line across the joint area of the bowl and handle. The ears will fall on this line. Using a wide sweep round gouge roll the wood from the back edge of the spoon into the rounded shape of the handle, working the cuts from the ear line. Taper the sides of the handle area as well.
Step 6 – Tapered Bowl and Handle Joint
For most spoons, as common stirring spoons, the top side of the handle and the top side of the bowl are on the same plane. The back side of the handle is tapered down from the bottom of the bowl. When you spoon is complete the bowl area will be thicker in measurement than the handle area. This centers the leading edge of the bowl directly under your hand.
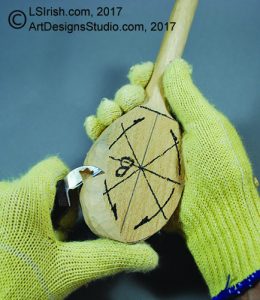
Step 7 – Marking the Grain of the Back of the Bowl
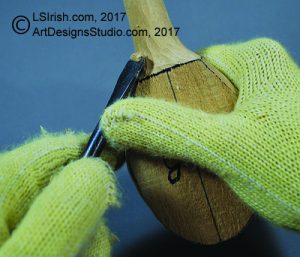
The direction of your grain will change as you work around the oval shape of the bottom of the bowl. As a general habit I mark the bowl bottom with a marking pen to remind me of the direction in which I want to cut in each quadrant of the back. I also mark the center point of the bowl back at the point that I want to be the deepest area in the bowl.
As I carve these marking lines will be cut away. Those marking lines also help me to quickly see what areas of the bowl back I have and have not worked. If there are marking pen lines in any area then I, obviously, have not shaped that area.
Step 8 – Bench Knife Shaping the Back of the Bowl
Use your bench knife or large chip carving knife to shape the back of the spoon bowl. Slowly work from the sharp outer edges of the back towards the center point of the bowl. Roll the bowl smoothly so that it does not have a square walled shape with only rounded corners – the entire back area should be worked.
Step 9 – Defining the Ears on the Bowl Back
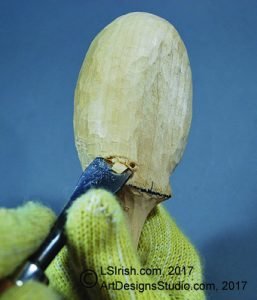
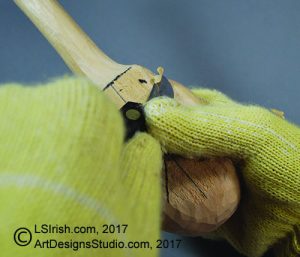
Use your wide round gouge to curve a line between the ear marking line and the bowl back. This is a light indent that will later visually separate the ears from the bowl. Each time you re-work the bowl to create its full round shape, rework the ear separation area.
Step 10 – Checking the Round of the Bowl
Check your shaping several times during the process of cutting the spoon back to insure that your sides are evenly curving away from the front bowl edge. You can see at this stage in the shaping that my spoon bowl remains very square in shape with just the edges rolled.
As an easy option to cutting ears you can leave a small central section of your spoon back flat – at the original plane of the wood blank. That flat area only needs to be about the size of a small coin to work nicely and prevent your spoon for rocking.
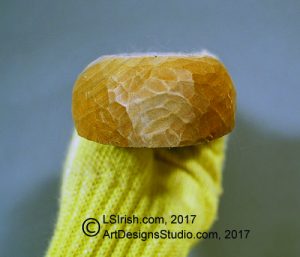
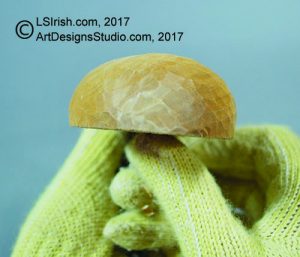
To see that you have completely rounded the back of the bowl, hold the bowl up to eye level with the front of the bowl horizontal to the floor. You can glance across the top edge of the bowl back and see exactly where you need to do a little more work. In my photo you can see that I still have a high area just to the right of center that needs a touch more shaving.
Step 11 – Shaping the Inside of the Spoon Bowl
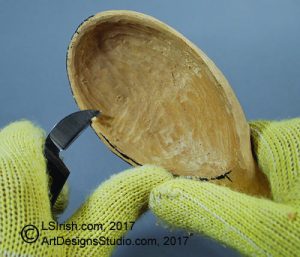
There are several specialty tools, in the supply list above, that you can purchase just for creating the curve inside of your spoon bowl. If you plan on creating a lot of spoon carvings they are well worth the investment. I personally prefer using both a wide sweep straight gouge and a bent round gouge.
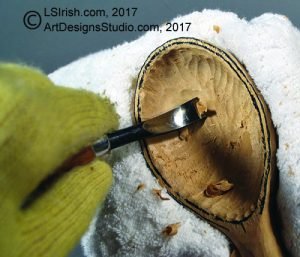
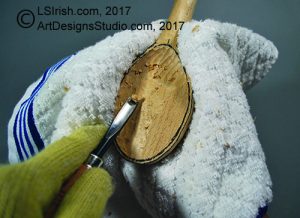
Before you begin carving the inside of the bowl, wrap the bowl in a thick terry-cloth towel. Note in the photo below that I am using carving gloves and then holding the spoon inside the towel. As you work the inside of the bowl there is always the chance of the gouge slipping out of the cut and into the palm of your hand. Even the best carving gloves can not prevent a cut every time. Adding that towel layers gives you a firmer grip of the spoon bowl while adding several layers of terry cloth between you and your gouge blade.
Step 12 – Mark a Line Along the Outer Edge of the Bowl
Use a marking pen to create a line about 1/8″ from the edge of the spoon bowl. Begin your bowl cuts along that line. Work from the outer edge of the spoon bowl towards the center of the bowl with your straight round chisel.
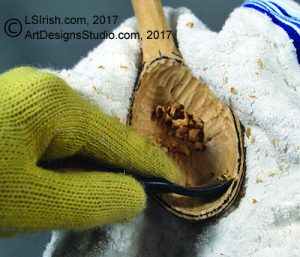
Step 13 – Using the Bent Round Gouge
As you work deeper into the bowl area change to your bent round gouge. Again work from the outer edge of the bowl in towards the center.
Step 14 – Begin Shaving with the Bent Round Gouge
Shaving strokes are simply very shallow cuts that dramatically reduce the gouge ridge lines left from the rough cutting. Although we will be sanding this spoon at the end of the carving session, the finer the shaving cuts that you make now will help the overall evenness and smoothness of the bowl inside area.
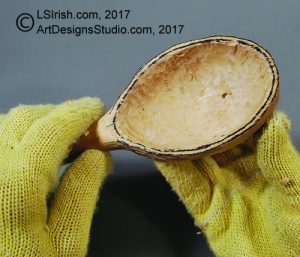
Step 15 – A Quick Check of the Inside Bowl Shape
Check your bowl for even thickness along the top edge of the spoon, and a general evenness to the curve going into the center of the bowl. Rub the flat of your thumb over the inside of the bowl, working from the center of the bowl towards the edge. You will be able to feel thick or raised areas easier than you might visually catch them.
Step 16 – Separate the Bowl Back Ears
Use your straight gouge to carve a downward curve between the two outer points of your ear line on the back of your spoon. This separates the two ears. Round the sides of the ears slightly into miniature legs.
Step 17 – Round the End of Your Spoon Handle
With your bench knife round over the end of the spoon.
Step 18 – General Shaving and Fine Shaping Step
The basic shaping to the spoon is complete. Use your bench knife, chip carving knife, and round gouges to shave the entire surface of the spoon. Remove any high ridges left from previous cut strokes, refine the edge along the spoon bowl, and gently smooth out the inside of the bowl. Again, shaving is making the same cuts that you made before but with very light pressure and at a very shallow depth. This takes thin, paper-like slivers of wood, removing the rough look of the carving.
Step 19 – Sanding
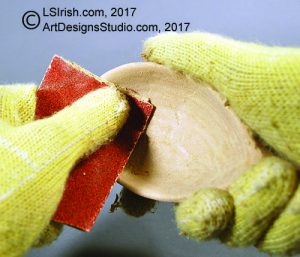
I use a progression of sandpaper for my spoon work, beginning with 100-grit sandpaper for the inside of the bowl, then to 150-grit for the inside and outside of the bowl areas, and then onto 220-grit sandpaper for the entire spoon. Sand with the grain of the wood in long, straight line strokes to avoid creating fine incised lines that can come from curling the sandpaper.
Check you sanding by running your fingers over the areas that you have worked. Often you will feel the areas that need more work that you might not be able to see. Finish your sanding by crumbling a large piece of heavy paper bag into a hand sized roll. Rub the paper bag over the entire spoon; this gives an extra-fine sanding and removes any remaining wood splinters or fibers. Remove the dust with a lint-free cloth.
Step 20 – Mineral Oil Finish
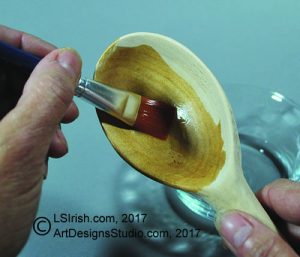
Mineral oil is a food-safe oil finish that can be used to give your spoon a slight sheen and to seal the wood for use. Apply one coat, directly from your jar or bottle. Allow that coat to rest for about five minutes on your spoon and then wipe the spoon down with a dry, lint-free cloth. Repeat … and your spoon is ready for us.
Thank you for reading! Please share this Lora S. Irish free online project with your family, friends, and fellow carvers.
