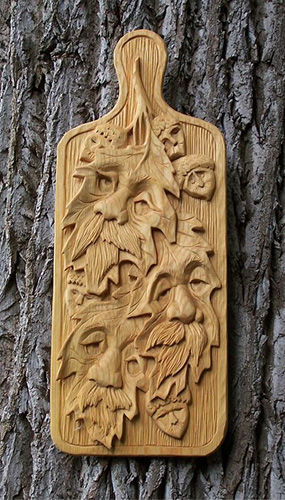
This in-depth look at the basics to relief wood carving are available for free to read here on our site or you may download our free e-project version to print and take to the workshop.
Download Free E-Project PDF file Here
Your First Carving by LS Irish
Learning the Terms
The steps, techniques, and skills used in relief wood carving are easy to learn and will give years of satisfying rewards. In this free online eBook we will look at some of the common beginner techniques that you will use to create your own wood spirits, landscapes, signs, and wall decor.
Lets begin by looking at the words and terms used in relief wood carving.
Understanding the words used in any written set of instructions will make your first carving a more successful project. In this eBook on Relief Wood Carving we will explore the following topics:
Basic termsWoods used in relief carving
How to transfer your pattern
Band saw cutting your blank
The basic tool kit
Five Stages of relief carving
Basic tool cuts
Simple flower carving
Hand carving
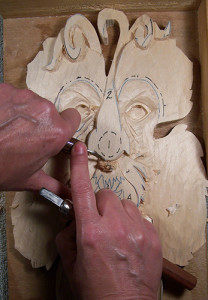
This is my style of carving and the focus of our blog, LSIrish.com. The pressure that is applied to move the cutting tool comes from holding the tool in your hands. A two handed grip is the most common with one hand holding the handle, giving the pressure, and the fingers of the second hand guiding the tool along the cutting line.
Hand carving can be done in your workshop, rec room, and even watching TV with the family in the living room. You can work a soft wood as basswood on your lap or coffee table top.
Mallet carving
For harder woods and larger carving you may want to do mallet carving. The cutting tools for this style have heavier shafts and wider cutting profiles. The cutting tool is placed against the wood then hammered on the handle with a wood or leather mallet on the end of the tool handle to move the cutting edge. Mallet carving is sometimes referred to as Old World Carving.
Mallets come is several weights with heavier weights used to remove more wood or work hardwoods. The mallet is held with one hand and the carving tool the other. A carving that will use a mallet and tools needs to be secured to a work bench so that the carving blank does not move, walk, across the work surface. There are plans available on the net for carving tables, carving racks, and carving horses that are made specifically towards securing your relief carving during work.
Power carving
Power carving has come into its own as a specific style of wood carving in the last few decades. Small, high speed, hand-held power tools that use steel, ruby, diamond, and even titanium bits can be used for the three main steps of carving – rough out, shaping, and detailing. Higher quality cutting bits are more expensive, but still well within a hobbyist’s budget and give a much finer, smoother finish.
Power carvings can leave a slightly rough texture if done with medium quality bits but can easily be dressed-out – smoothed – using hand carving tools and sand paper. While I am not a power carver I do keep one in my tool kit as it makes roughing out the first levels of a relief carving quick and easy.
Router carving
Wood working routers are great tools for those relief carvers that have a home workshop. The router can be set to a specific depth and used to drop each level of the pattern into the wood. There is a wide variety of router bits that make this task quick and easy. Once the rough out routing is complete the edges of each area can be rounded over either with a small bit or by hand to shape the elements of your pattern, turning your work into a low relief carving. You can also go to hand tools or mallet tools to create full 3-dimensional contours for a realistic effect.

