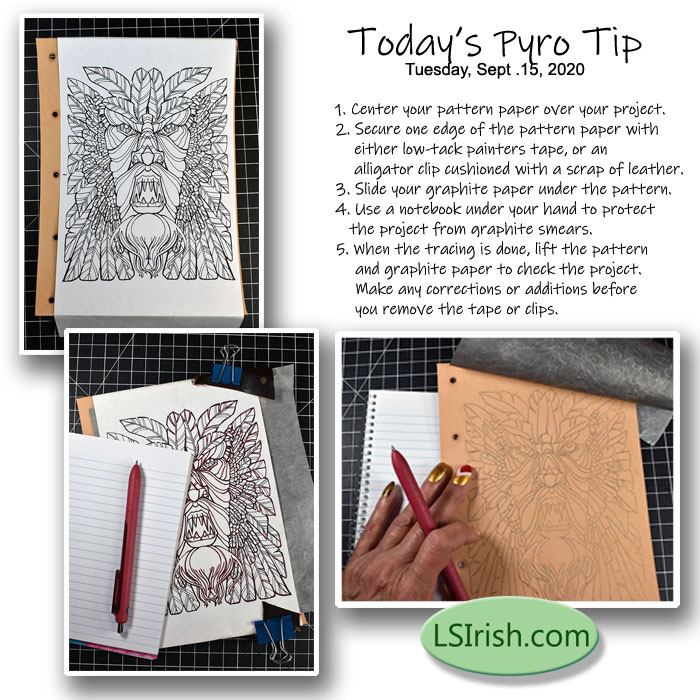
This morning I am working on getting your supply list ready for the Feathered Green Man Leather Journal Pyrography Project and came across a few photos on how to clean the graphite tracing lines from your wood burning project that I thought I would share.
I prefer to either use a graphite tracing paper or graphite pencil lead rubbed over the back of my pattern my paper as my tracing media. Graphite leaves a pale to medium gray line on our working surface that has no oil or wax, and therefore is not a permanent marking.
I do like to remove those tracing lines as early in the burning as is reasonable and will even do an extremely pale tonal value burned line before any shading work is done just so that I can erase the graphite right away.
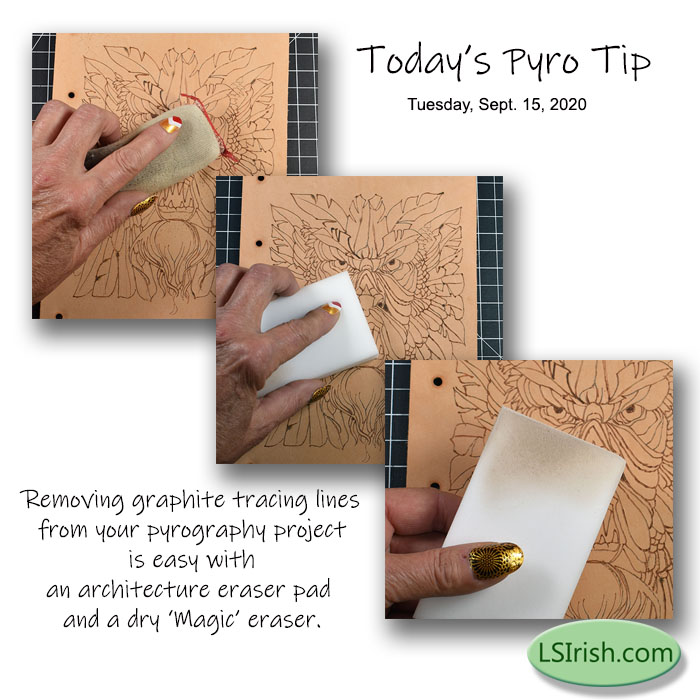
A white artist eraser works wonderfully for wood and gourds. These are our rougher wood burning surfaces. Do not use an eraser that has any coloring ( that pink one on the end of your bright yellow #2 pencil) to it as the color dye can rub off onto your project.
An architect’s eraser pad – a fine mesh cloth bag filled with eraser grindings – is perfect for our finer medias as paper, leather, and chipboard (paper mache). Since the eraser bag is flexible it works well for wood carvers that want to remove any carbon build-up from their wood burning details on the carving.
A dry ‘Magic’ eraser not only removes the graphite lines from your leather or wood project, it also picks up any oil and dirt that has been left from moving your hand across the surface.
In the photo sample above, Feathered Green Man Leather Journal Pyrography Project, I first cleaned the graphite tracing using my Architect’s eraser pad. Then I followed up with a light cleaning using the dry ‘Magic’ eraser … and,wow!, was I surprised at how much more dirt I picked up …
That ‘Magic’ eraser is now a permanent addition to my pyrography tool kit.
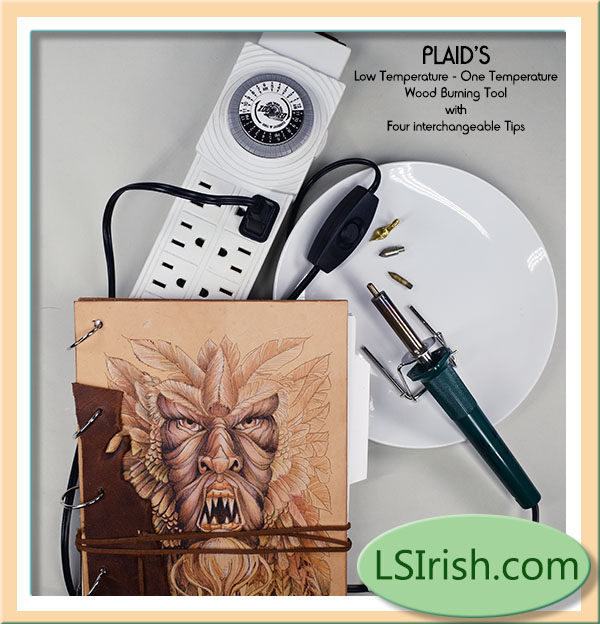
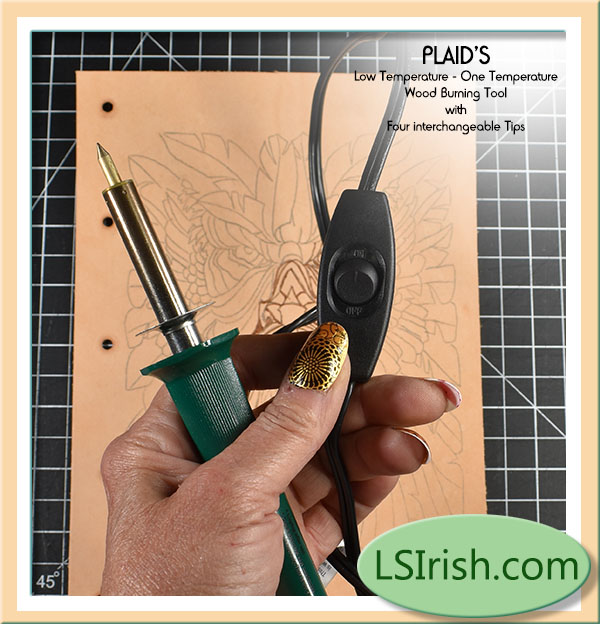
Plaid was kind enough to send me a sample wood burner the other day … like I need another wood burning unit to add to my dozen plus one temperature, soldering style wood burners that I have collected over the 25 years of being a wood burner …
Well, I didn’t know it, but I did!
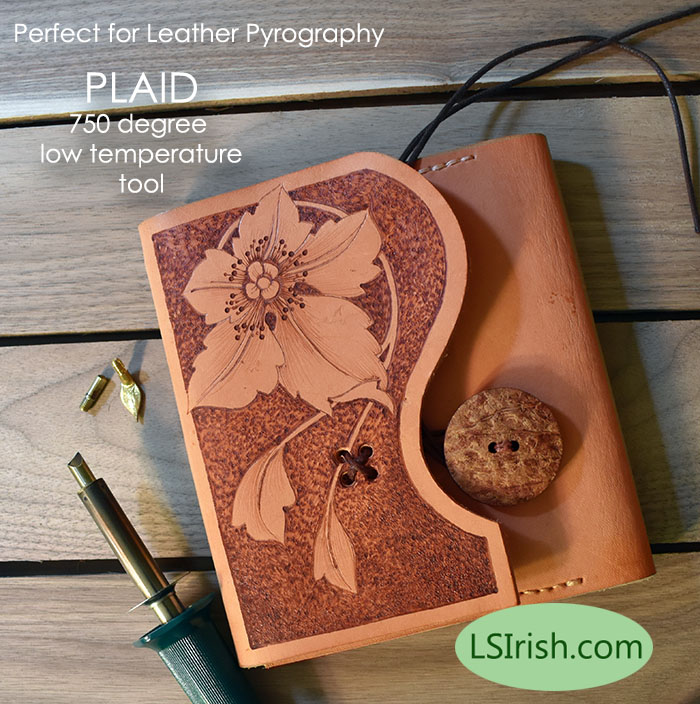
This is a one temperature burner that is pre-set at the low temperature of 750 degrees – 200 degrees lower that the average pre-set unit, which makes it perfect for leather burning pyrography.
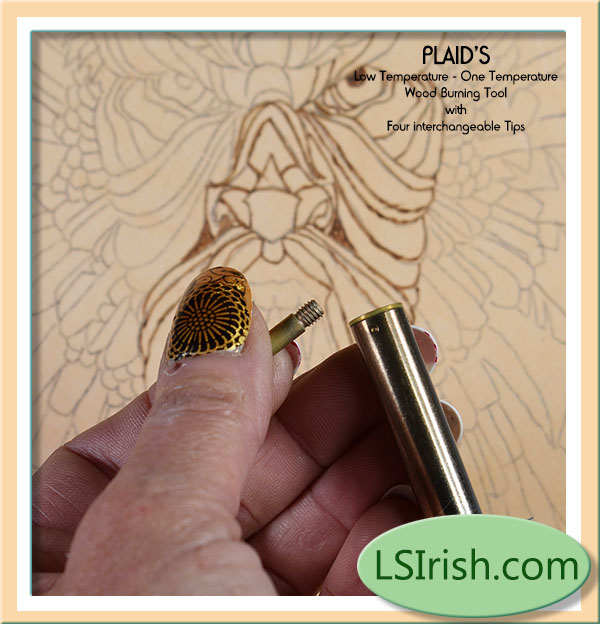
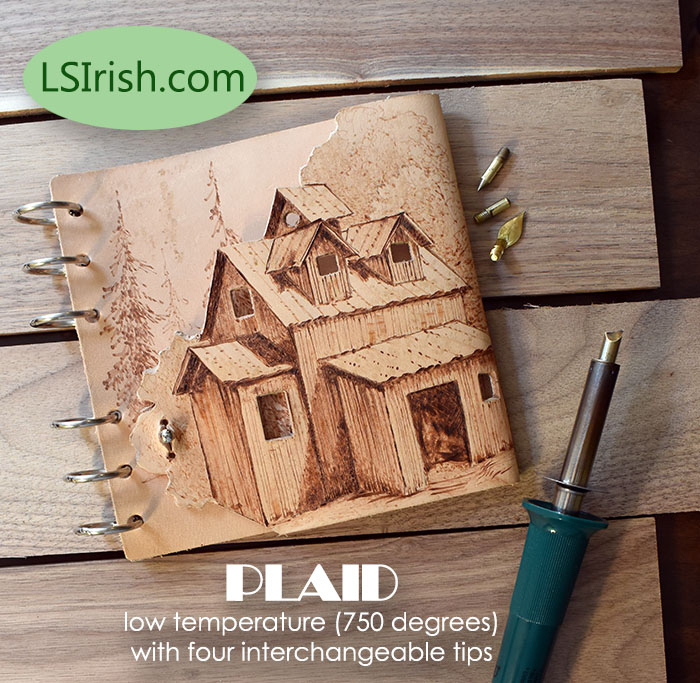
Plus … it has the standard four interchangeable tips that we all know and love that are available with most one temp tools.
I already have several low temperature, soldering style tools that I often use for my leather crafting. Each of those comes in the package with only one, cone point tip for fine line work.
Plaid has included the universal writing tip, leaf shading tip, the fine point cone tip, and the wide ball tip, all for under $17.00.
Plus Plaid’s low temperature leather burning tool has an on/off switch right on the cord and a handy little stand for safety.
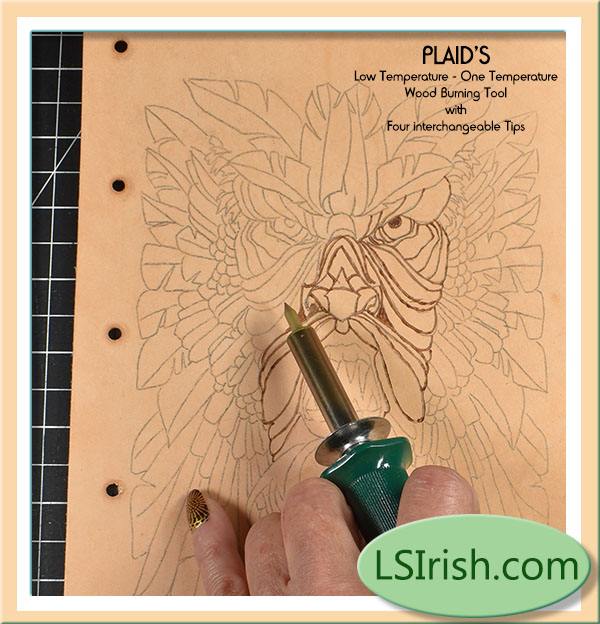
I happened to have a sample journal cover that I could grab as a practice board … It has been quite awhile since I have used the soldering style pen and every pen, no matter who manufacturers it, needs a little practice time to get your correct grip, pressure, and movement.
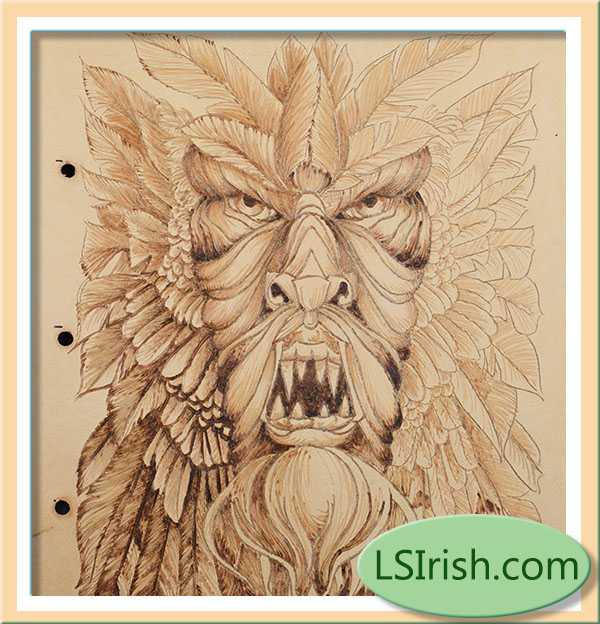
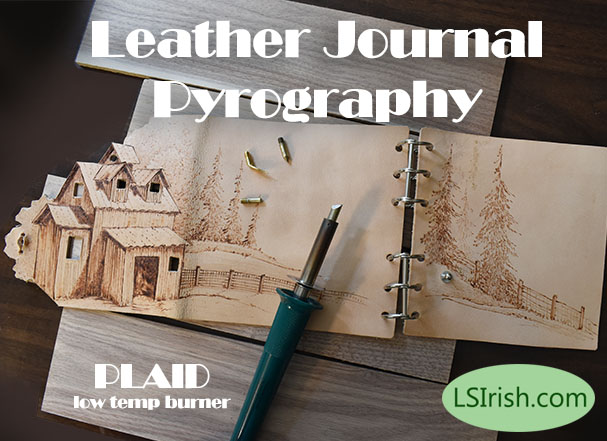
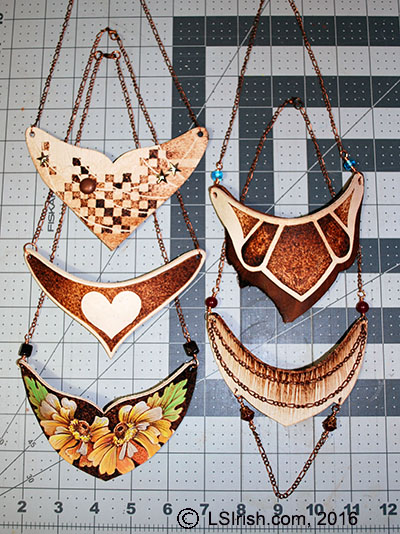
So, here is my first using the Plaid one temperature leather burning tool – feathered green man journal cover. Pale tones are created using the cone point tip and a light hand pressure, wide strokes are made with the universal tip and medium hand movement. The darkest tones were made with the wide cone tip and a simple touch-and-lift stroke. The tip of the leaf spear shader is wonderful for thick-and-thin line work as in his beard.
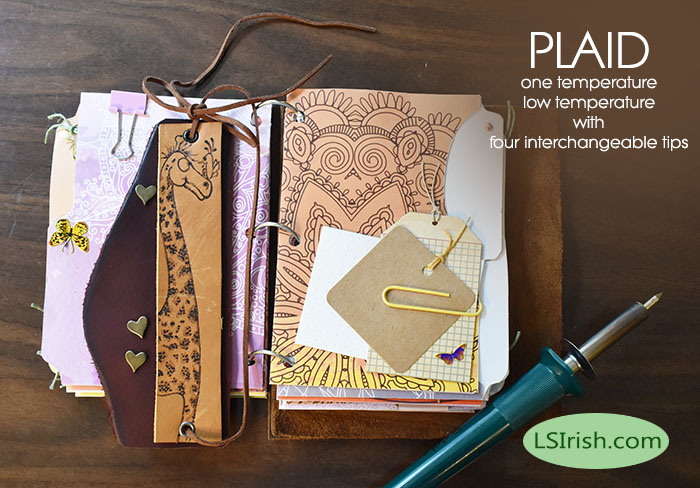
And then I did this one … a giraffe leather journal keeper with suede cord.
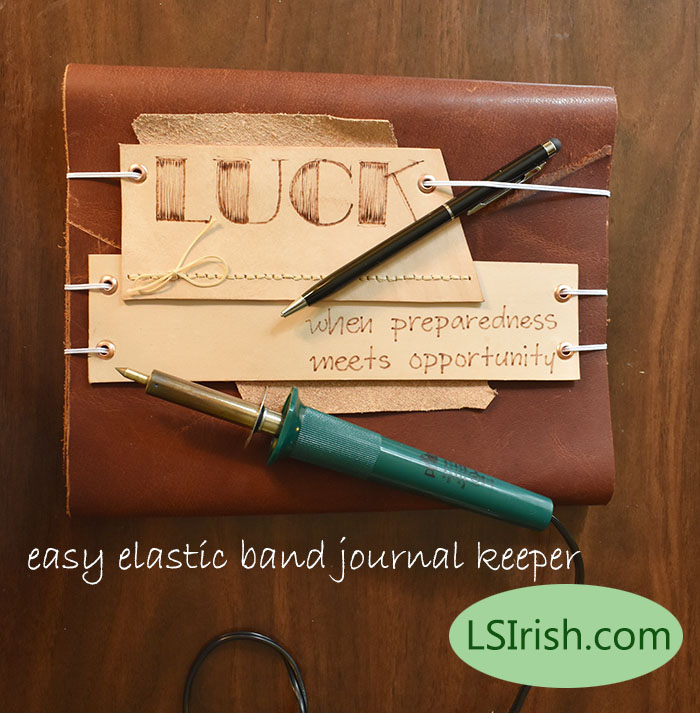
Number three is also a journal keeper made from scrap leather and with elastic cord.
The wide cone tip is so much fun to use it lead to this wood flower journal cover – number four.
And number five is this easy leather journal that has the front cover cut open to show the burning on the inside flap.
My whole weekend got eaten up by a Plaid One Temperature, Low Temperature, Interchangeable Tip Wood Burning Tool … grin!
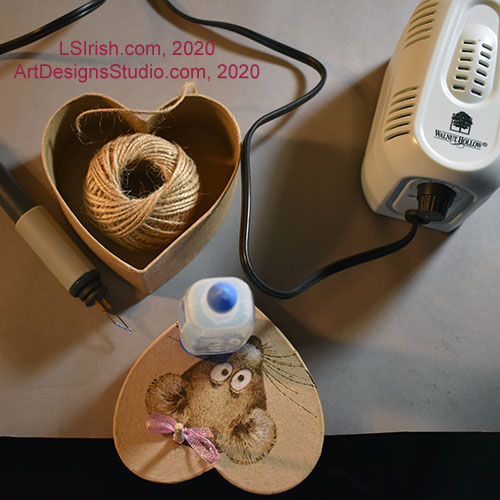
I use little bits and scraps of twine all the time in the studio. But after an hour of searching for my current twine ball I decided it was time to make something specific just to keep that bit of string easy to locate.
A few ovals as my guidelines, made with a #4 soft pencil, create my mouse’s face and ears. Working with my ball-tip pen and as hot a setting as the Walnut Hallow will take I began the burn. Paper, especially paper mache, needs a high setting to burn both the paper and the glue content of the mache.
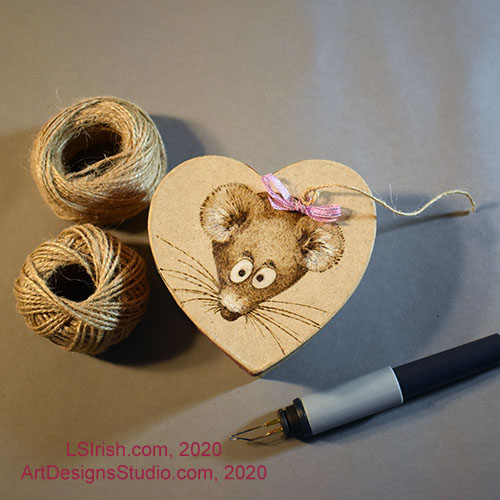
White colored pencil highlights her eyes, nose, and a few of the long hairs inside her ears.
After the burn was complete I used my bench knife to cut a small 1/8″ diameter, hole just above her ear, through the heart box lid. Next, using my ball-tip pen on its highest setting I cleaned the sides of the hole by burning around the cut edge.
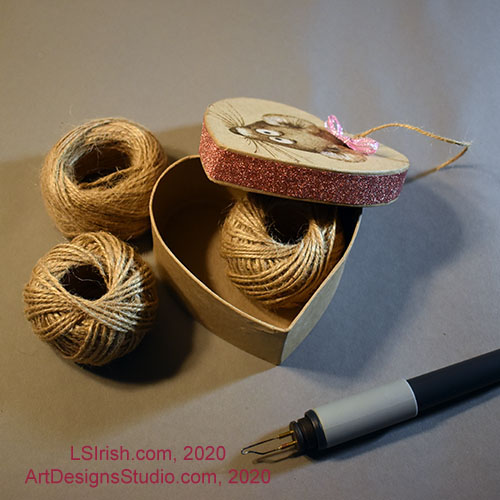
Now I grabbed a bamboo skewer that fits the hole I just created. I wrapped a 1/4″ ribbon into a bow around the skewer, added a little glue to just the ribbon, and drop the skewer into the box lid hole. The skewer holds the ribbon in place while the glue sets. While that is drying you can add a 1/2″ wide ribbon along the outside edge of the box lid to add a little more sparkle.
After the glue on your ribbon has dried, gently remove the skewer. Put your twine ball inside the box. Thread the edge of the twine through the box lid hole, leaving about a 6″ tail. Loosely tie the tail twine in a simple knot and move the knot against the box bow.
Your twine end will stay in place, and be ready to give you that next piece of twine scrap that you need.
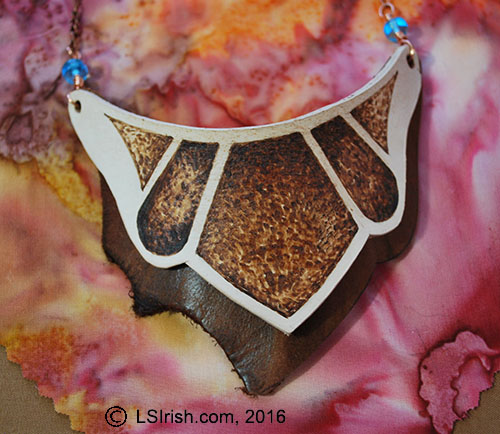
SUPPLIES 5” X 3” (14 cm x 7.5 cm) vegetable-tanned leather 2 – 6” lengths of copper chain for necklace 1 – 5” length of copper chain for top hanging chain 1 – 7” length of copper chain for middle hanging chain 1 – 4” length of copper chain for beaded chain 4 – 6 mm round adventurite beads 2 – 6 mm split rings 1 – lobster claw latch 18” – 20-gauge or 18-gauge copper wire
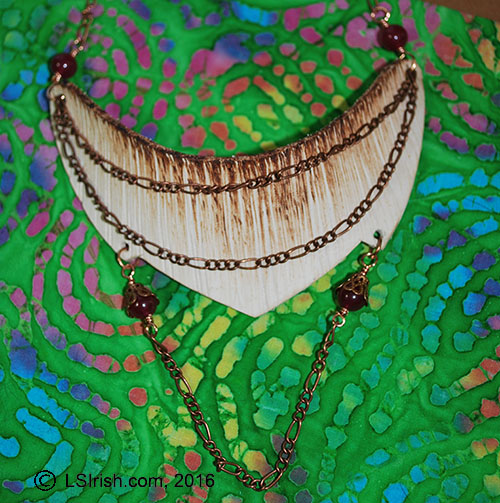
Using your loop-tip, or ball-tip, burn thin, straight lines onto the leather shape. Begin the lines at the top edge of the leather and pull the lines to the center area of the leather. Work several layers of burned lines, beginning on a medium heat setting and working towards a hot temperature setting. Use a v-gouge to cut vertical lines in the leather, creating white lines through the burned areas.
Navajo Nation
SUPPLIES 1 – 5 1/2” x 3 1/2” (14 cm x 9 cm) medium weight, vegetable-tanned leather 1 – 5 1/2” x 4” (14 cm x 10.25 cm) medium weight, dark brown scrap leather 2 – 7 1/2” (19 cm) lengths of copper chain 18” length of 20- or 18-gauge copper wire 2 – 8 mm turquoise glass crow roller beads 2 – 6 mm split rings1 – lobster claw latch
Trace the pattern to your vegetable-dyed leather. Using a loop-tip or ball-tip burning pen, fill in each area with a medium temperature burn. Increase the temperature setting slightly and burn a second layer of strokes to the top half of each area. Increase the temperature again to a hot setting and following the photo burn in the black-toned areas of the design. The round end loop of the turquoise glass bead link is worked through both layers of leather.
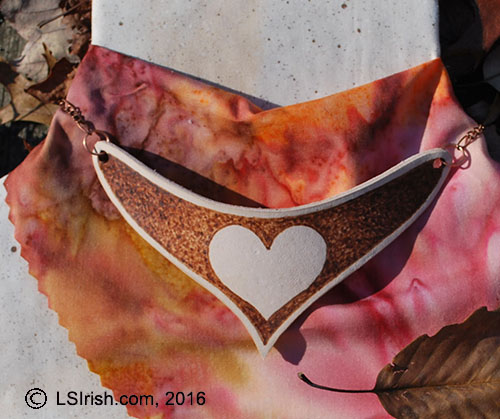
Forever Yours
SUPPLIES 1 – 5 1/2” x 3” (14 cm x 7.5 cm) medium weight, vegetable-tanned leather 2 – 10 mm copper jump rings 2 – 6 mm copper split rings 2 – 7” (17.75 mm) lengths of copper chain 1 – lobster claw latch
Trace your pattern to the vegetable-tanned leather. With your pyrography unit set on a medium temperature setting, using a ball-tip or shader-tip pen, begin filling the areas of the pattern outside of the heart design with a medium-light tonal value. Use any fill or texture pattern that you like. Work a second layer of burning on a slightly hotter temperature setting at the center point of the leather necklace and in the outer half of each side. A third burning at a still slightly hotter setting is worked in the outer one-third of each side of the necklace.
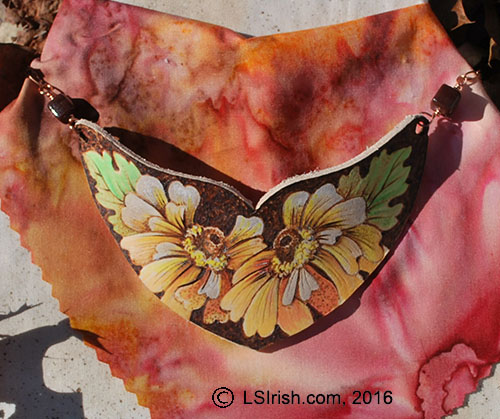
Summer Dreams
SUPPLIES 5 1/2” x 3 1/2” (14 cm x 9 cm ) medium weight vegetable-tanned leather 2 – 8 mm square glass beads 2 – 7” ( 18 cm ) long copper chain 2 – 6 mm split rings1 – lobster claw latch 18” – 20-gauge or 18-gauge copper wire
You can add color to your leather burned jewelry by using artist quality colored pencils. Begin this project by tracing your pattern to the cut leather. With your finest line pen, outline the entire pattern to a dark tonal value. Add shading in the petals and leaves using your shader-tip on a medium hot setting. Work the background in a solid dark tone. When the burning is complete begin adding your color in thin, light layers of pencil work. Use one color over another to create new hues. When the burning is complete begin adding your color in thin, light layers of pencil work. Use one color over another to create new hues. When the coloring is complete give your necklace one to two coats of brush-on acrylic finish.
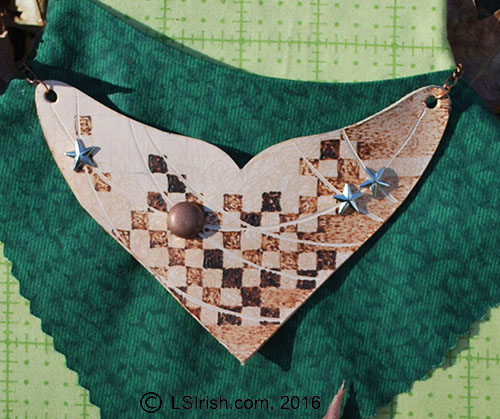
Steamed
SUPPLIES 5 1/2” x 4” (14 cm x 10.25 cm) medium weight vegetable-tanned leather 2 – 7” ( 18 cm ) long copper chain 2 – 6 mm split rings 1 – lobster claw latch 18” – 20-gauge or 18-gauge copper wire Assorted leather brads and decorative rivets
With a pencil, create a 1/4” grid on the face of your leather necklace. Fill the grid squares in a checkerboard pattern, varying the tonal values. Fill the right side of the necklace squares with this medium setting tonal value to make the larger block areas. With a low temperature fill the un-worked squares in the central area with a fill texture. Place a small ceramic plate face-down onto your leather and mark a pencil line. With a craft knife cut along the line, on both sides, to open a groove. Add your decorative brads and rivets.
I love combining my crafts and hobbies, and in this project we will be working on a quick, fun design that uses leather working, jewelry making, and, of course, pyrography. Today we will get together the supplies, cut out our leather necklace shape, and do the pyrography steps.
In the next post you will find the steps for creating the copper, wire-bent jewelry. Then on day three of this mini-project I will show you how to create 10 quick necklaces out of one pyrography burning that is perfect if you are a craft seller or need a group of Holiday presents this years.
So … let’s get started!
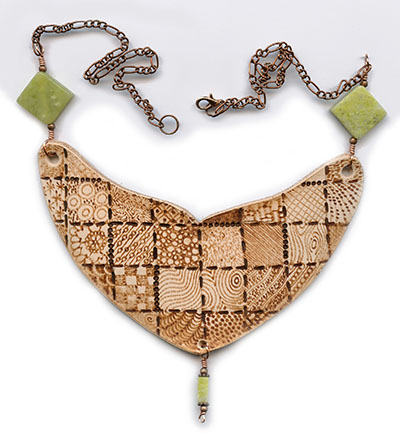
Quilted Jade Necklace Supplies: 5 1/2” x 3 1/2” (14 cm x 9 cm ) medium weight vegetable-tanned leather bench knife or craft knife leather hole punch cotton swab applicators gum tragacanth edge finish wooden edge slicker #4 – #8 soft pencil for tracing pyrography pen tips – ball, loop, or micro writing tip white artist eraser 2 – 16 mm square yellow jade beads 1 – 5 mm x 8 mm yellow jade rectangle bead 6 – 3 mm antique copper round beads 2 – 4 mm copper rosettes 2 – 7” ( 18 cm ) long copper chain 2 – 6 mm split rings 1 – lobster claw latch 18” – 20-gauge or 18-gauge copper wire satin brush-on leather finish
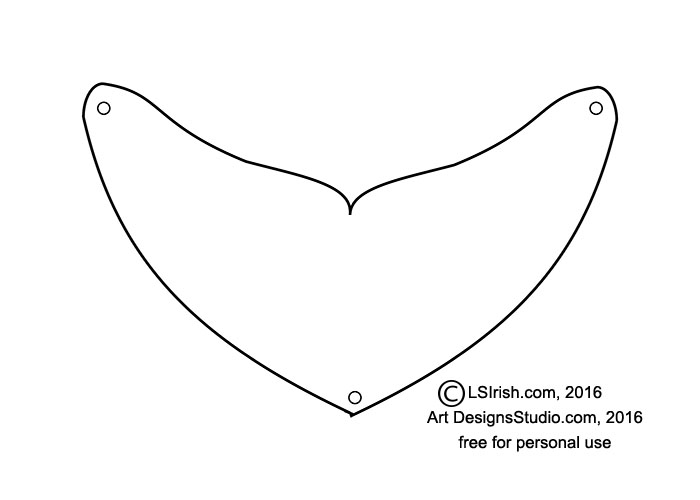
Tracing the pattern
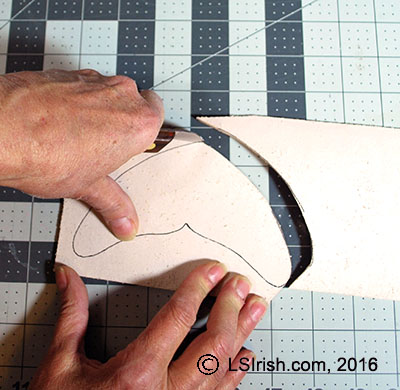
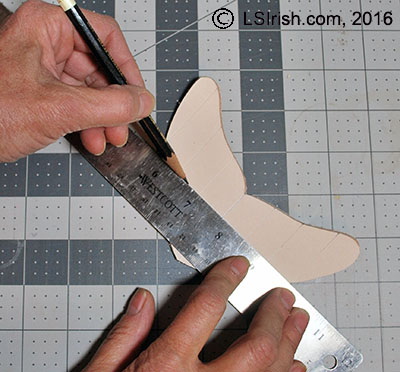
1 Make a printed copy of the pattern for the Quilted Jade Necklace. Cut the pattern out using scissors. Lay the paper pattern on the raw-hide side of the leather scrap. Using a soft, #4 – #8 pencil, trace around the outside edge of the paper pattern.
Working the leather
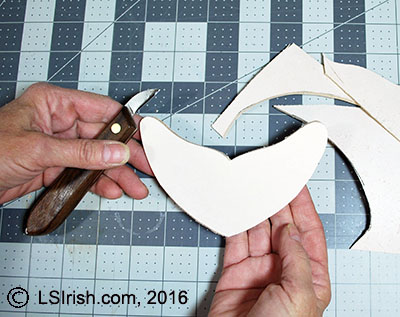
2 Place the leather on a cutting mat with the raw-hide side up. Using a craft knife or bench knife, cut the necklace free from the scrap leather. Save the extra scraps from the cut leather block for smaller bracelet shapes and earrings.
3 With a white artist eraser, remove any remaining pencil guidelines from the raw-hide side of the leather necklace.
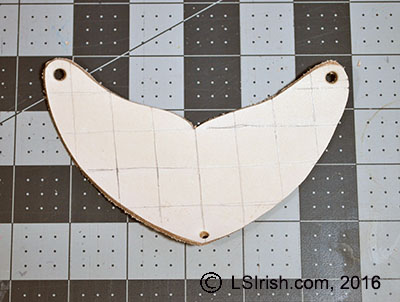
Creating the grid lines
4 Using the cutting mat ruler marks as your guidelines, create a diagonal 1” square grid on the tanned side of the leather with a soft, #4 – #8 pencil.
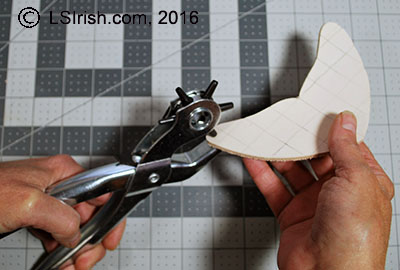
5 – 6 With a leather hole punch, cut a 3/16” or 1/4” hole in each side of the necklace to receive the jewelry chain and beads. Create one hole at the center point of the bottom edge of the leather necklace to receive a bead dangle.
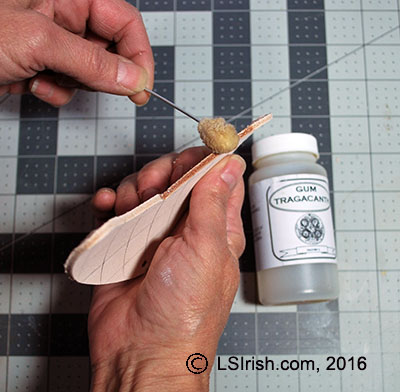
Finishing the raw edges
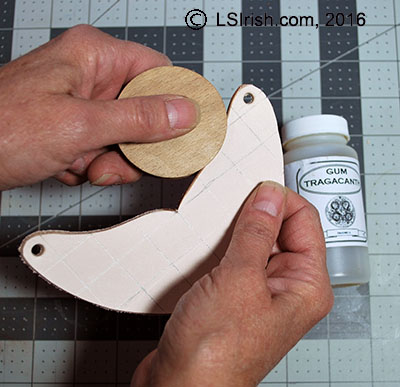
7 With a cotton or wool swab applicator, apply one coat of gum tragacanth along one edge of the leather necklace.
8 Briskly rub the damp edge with a wooden edge slicker. The handle of a large wooden spoon works well in place of a slicker. The gum tragacanth and slicker will polish and round the raw cut edge of your necklace.
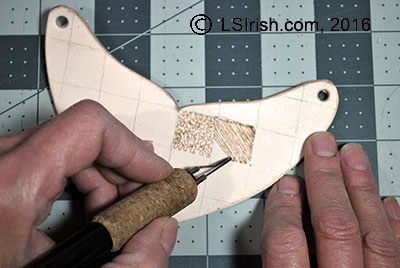
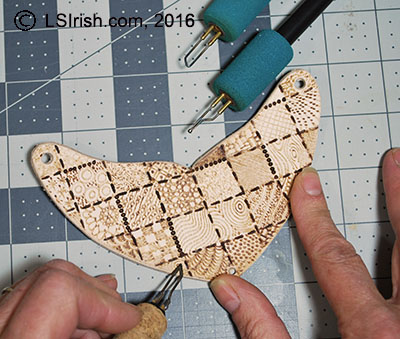
Burning the fill textures
9 The pyrography burning for this project is worked as a texture and fill practice board, where each 1” square is filled with a different, small pattern. Have fun creating your own fill patterns or refer to the Fill Pattern Chart with our Mushroom Doodle Pyrography Project.
10 As you work each 1” square, vary the temperature setting of your pyrography pen to create some squares with pale tonal values, some with medium values, and some with dark toned values.
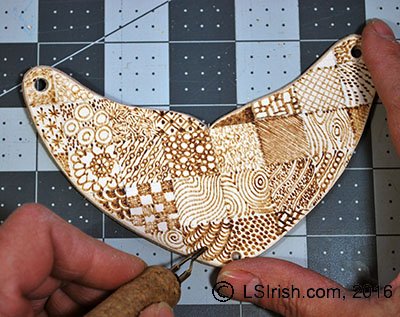
Adding borders
11 With a ball-tip or loop-tip pen, on a hot temperature setting, work along some of the pencil grid lines with a series of evenly spaced, small dots. With the straight edge of a shading pen tip, work the remaining grid lines with evenly spaced, short dash lines.
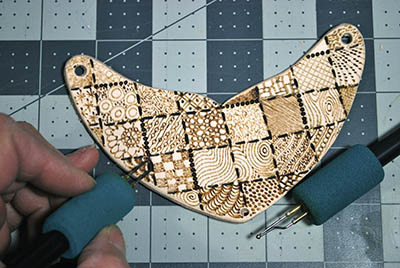
Shading the lower edge
12 You can add a little touch of shading along the bottom edge of your leather necklace using a shader-tip and a medium temperature setting. Work this layer of shading right over the fill and texture patterns that you have already burned. Rub a white artist’s eraser over your burned surface to remove any dirt, oil, or remaining pencil lines from the leather. Dust with a dry cloth.
Pyrography close-up
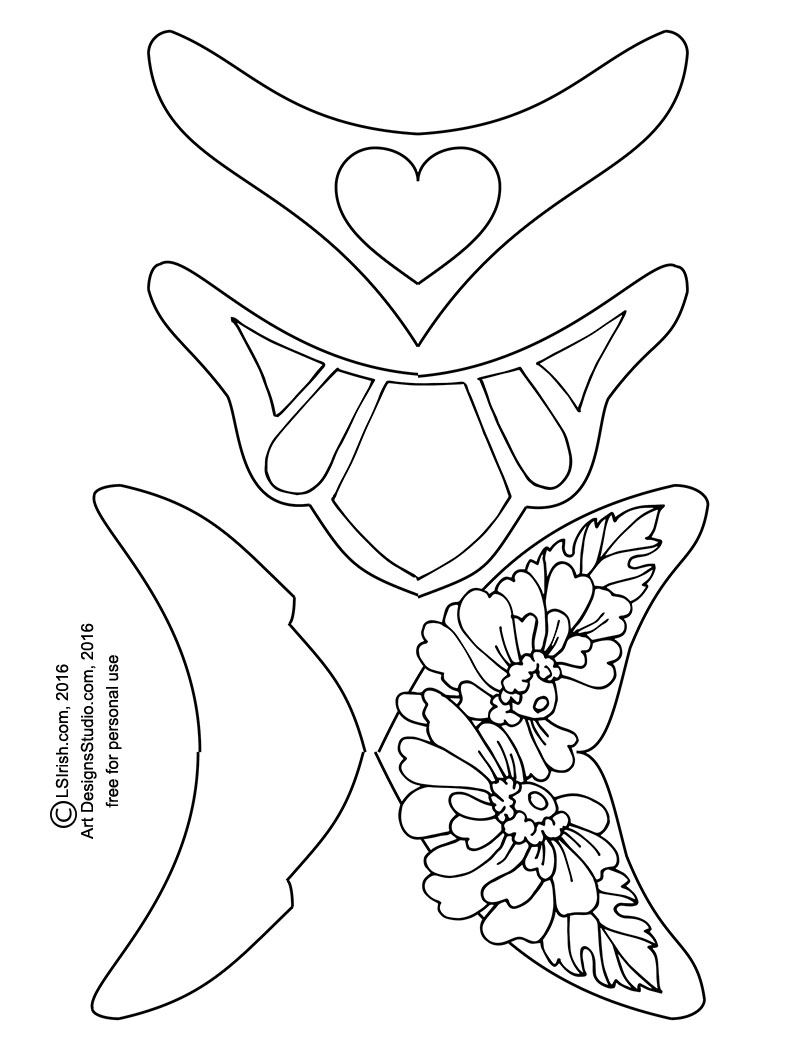
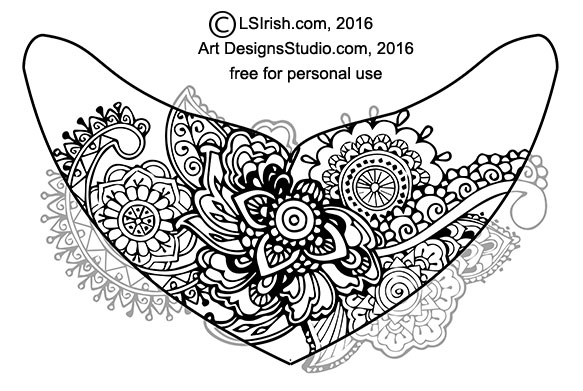
Click on the leather cutting patterns below for a full-sized pattern.
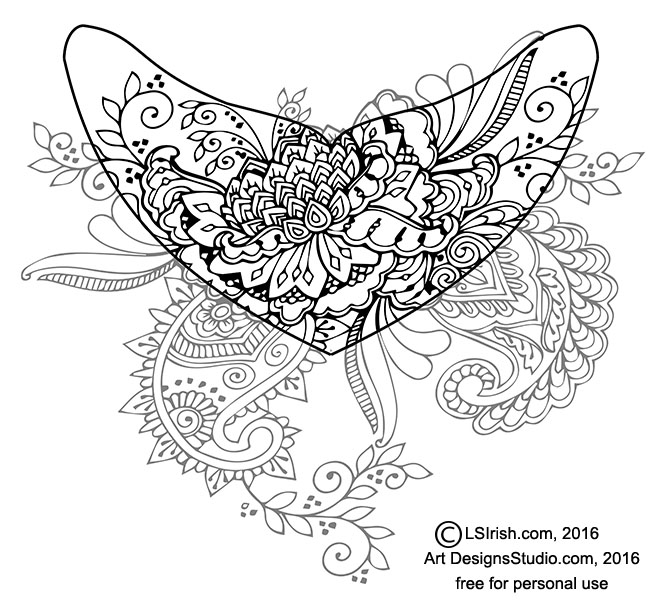
Here are two more ideas for your leather burned jewelry necklace, worked with patterns from our Henna Tattoo Pattern Pack.
And, this one!
In the next post I will be showing you how to add your jewelry chain, bead dangles, and copper findings. So, check back soon!