 Step 11: Burnishing the Edge
Gum Tragacanth is applied along the edge of the belt leather using a cotton swab. Briskly rub the dampened side with an edge slicker to burnish the leather. Gum Tragacanth polishes the edge, and slicks the fine leather fibers to the side.

 Step 12: Checking the Fit of the Buckle
Slide the buckle latch through the buckle slot in the leather. The latch bar of the buckle rests on the back side of the belt blank.
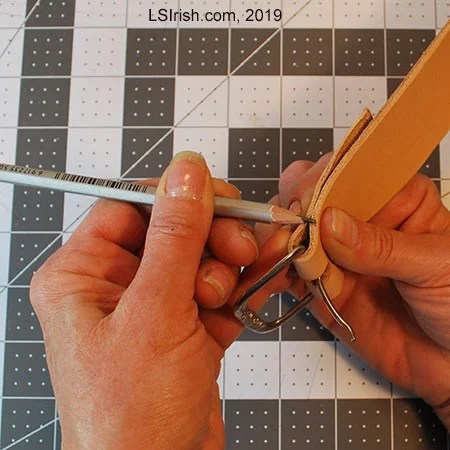 Roll the leather end over the latch to the back of the boot belt. With a pencil mark the edge of both pieces of leather as a guideline to where you will fold and score the turn for the buckle.
Hope you enjoying this free, online pyrography leather project. For more fun please visit:
Leather Purse Pyrography, Greenman
Leather Purse Pyrography, Double-Needle Stitching
For more boot belt pyrography pattern ideas, pleases visit our pattern website at ArtDesignsStudio.com
 Step 13: Dampening the Leather
Heavy weight leathers may need to be lightly dampened with water to fold the leather at the buckle latch bar easily. Avoid soaking the leather in water. This can cause the leather to stain and develop a watermark line where it was drenched.
Dampen your sponge with water, wring out as much water as possible, and then lightly pat the sponge across the raw hide side of the leather. Gently fold the leather to the back of the belt blank to set the center fold line at the buckle slot.
 Step 14:Creating a Score Line with an Awl
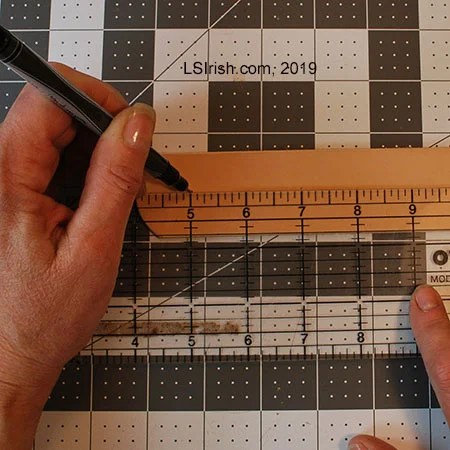
Open the folded end and align a transparent quilting ruler on the front side of the leather belt. Create one indent line about 3/8” (10mm) from each the side of the buckle slot. Create a second indent line on both sides of the buckle slot 1 ½” (38mm) to 1 ¾” (44.5mm) from the slot edge.
With the ruler still in place along the indented guidelines, hold your awl upright to the leather and lightly push the awl into the leather to create shallow stitch guide marks at 3/16” (5mm) to ¼” (6mm) intervals along the line. Use the interval measurement that best fits the width of your belt and the leather weight of the blank. Light weight leathers, 4 to 6 ounce, take a stitching interval around 3/16” (5mm) apart. Heavier weight leather, 6 ounces and up, takes a stitching interval of ¼” (6mm).
 Step 15: Creating the Stitching Holes
Lay your belt on a thick cork board or poly board. Hold the awl upright to the leather with the point set into the guide holes. Push the awl into the leather to create your stitching holes.
 Side Bar: Working with Rivets
Rivets can be used to secure your buckle into the folded leather belt blank. Measure and mark the center point across the width of your belt blank on both sides of the buckle slot 1 ½” (38mm) to 1 ¾” (44.5mm) from the slot edge. Cut a hole at each center guide mark using a rotary punch set to the punch that fits the width of your rivet post.
Single capped and double capped rivets come in two parts. The female part sets into the hole on the tanned side of the leather. The male part is inserts into the hole on the raw hide side of the leather, and then set into the hole in the female part. Rest the female part in the rivet anvil. The raw hide side and male rivet part will face up. Place the rivet setter into the opening of the male rivet part and with the flat side of a ball peen hammer set the rivet.
 Step 16: Double Stitching
We have posted an in-depth step-by-step project on double stitching leather. Leather Purse Pyrography, Double-Needle Stitching
Cut a 20” (508mm) length of waxed linen stitching thread. Thread a harness needle on each end of the thread. Double-needle stitch the stitching line at the base of the buckle.
 Step 17: Double Stitch Threading
End your stitching on the back side of the belt by sliding the needle through the back layer of leather. Cut the thread, allowing about ½” (13mm) of extra cord. Tuck the extra cord under the back flap. Repeat for the second double stitching thread.
 Step 18: Adding the Belt Keeper
Slide the belt keeper onto the belt and center it between the two buckle stitching awl lines. You can purchase metal belt keepers that match your buckle, or you can cut and stitch your own using the same leather as your belt. Using waxed linen thread, double stitch along the second stitching line.
You can create your own belt keeper with a ¼” (6mm) to 3/16” (5mm) wide strip of your belt leather by the width measurement of your belt plus 3/8” (10mm) and use a belt keeper staple to join the cut ends.
 Step 19: Marking the Buckle Latch Holes
With a transparent ruler, mark the buckle latch holes on the belt end. Space the holes between ½” (17mm) for wrist bands and 1” (25mm) apart for boot and pants belts.
 Step 20: Rotary Punch the Belt End Holes
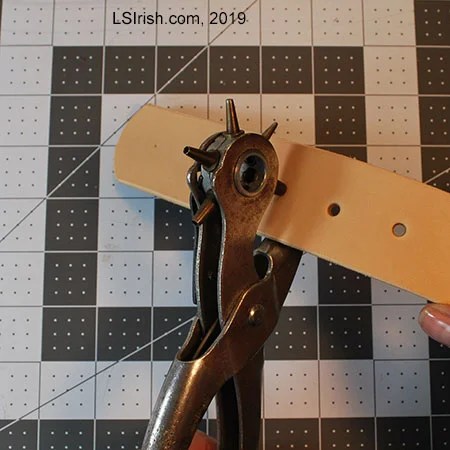
Set your rotary punch to the size that matches the buckle latch. Punch the latch holes.
 Step 21: Completed Boot Belt
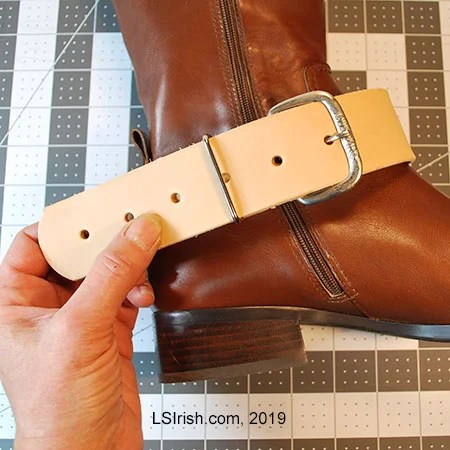
Your boot belt or wrist band is ready to move to your pyrography table.
Hope you enjoyed this free, online pyrography leather project. For more fun please visit:
Leather Purse Pyrography, Greenman
Leather Purse Pyrography, Double-Needle Stitching
