What’s Happening at ADS

Lora Irish Free Projects


Our pattern site, ArtDesignsStudio.com,

Since Mike and I came to the web in 1997 I have posted a free, online, step-by-step seminar each year. Many of those seminars are posted right here on our blog at LSIrish.com, and some were posted to other wood carving, wood burning community forums.  I thought you would enjoy a list with links to some of our favorite past projects.


This year’s free, online seminar links:
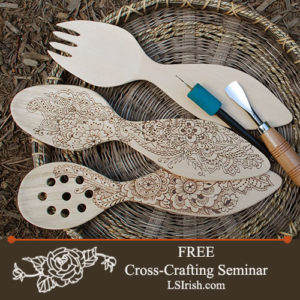
Cross Crafting Wood Carving. Pyrography, and Scroll Saw Free ProjectCross-Crafting Seminar Introduction
Cross-Crafting Seminar Supply List
Cross-Crafting Seminar Free Patterns
Cross-Crafting Seminar, Scroll Saw Basics
Cross-Crafting Seminar, Setting Up Your Scroll Saw
Cross-Crafting Seminar, Scroll Sawing the Wood Spirit Face

Cross-Crafting Seminar, Wood Burning the Wood Spirit Face
Cross-Crafting Seminar, Colored Pencils for the Wood Spirit Face


Posted here at LSIrish.com
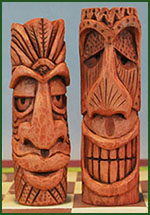
irish_tiki_0002Whittle Tiki Chess Set – Wood Carving
This beginner’s wood carving project will guide you through the cutting strokes that create those wonderfully expressive Tiki faces. Includes the free patterns to make your own chess set.

Basics to Painting – Painting your Wood Carving and Wood Burning
Have fun exploring the numerous techniques you can use to add coloring to your wood burnings, wood carvings, and scroll saw projects.

Postage Stamp Pyrography – Pyrography and wood burning
Have a little fun tonight working through how easy it is to wood burning Celtic interlocking lines and knots.
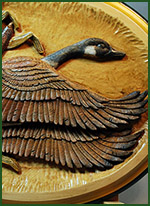
Canada GooseRelief Canada Goose Carving Seminar – Relief wood carving, pyrography, and painting
Explore the basic techniques used in relief wood carving, including working in layers and levels, undercutting, and smoothing the background. Then add fine detailing using your wood burning tool. Finish this step-by-step project by creating realistic coloring using the dry brushing technique.

Whittle Fish Seminar – Wood carving
Ice fishing decoys are quick, easy, and extremely fun to carve. All you need is a bench knife, a few pieces of basswood, some scrap leather or copper sheeting, and some imagination. Since these are primitive art, anything goes when carving fish decoys.
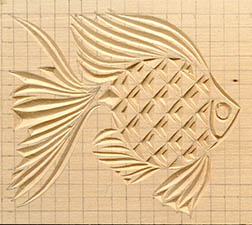
LSIrish_chip0009Chip Carving Seminar – Chip Carving, wood carving
Chip carving is a specialty area in wood carving. With the use of a short-bladed chip carving knife, small triangular cuts create intrigue motifs and designs. Includes a full-sized sampler pattern.

Celtic Dragon Plaque – Relief wood carving
This is an entry-level carving project for both relief carving and for working the interlocking patterns of the Celtic Knot

Wood Spirit Carving – Wood carving, cane and walking stick carving
Carving a human face into your next walking stick or cane is quite easy when you follow the step-by-step cuts shown in Carving the Planes of the Human Face.
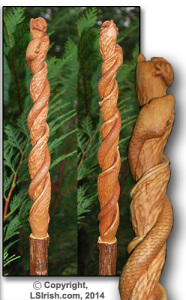
Free Lora IRish Cane Carving ProjectTwistie Snake Carving – Wood carving, cane and walking stick carving
Not all of us are blessed to have a backyard wood lot where we can cultivate sassafras trees and honeysuckle vines for twistie stick canes. So in this in-depth tutorial learn how to carve that twisted stick pattern using a bench knife, a few small gouges, and basswood.

Pyrography Doodles – Pyrography and wood burning
If you have the burning desire to try your hand at the zen doodle craze or modern tribal tattoo look, you will want to read through this step-by-step wood burning project that uses textures, line designs, and fill patterns to create the finished mushroom design.
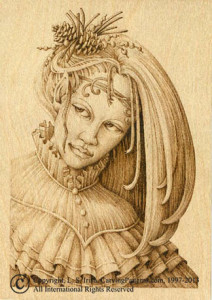
 

Irish_pixie_13Pyrography Steps to Portrait Burning – Wood burning and pyrography
Learn how to create realistic shadows and highlights in the human face in your next wood burning project.

Cougar Pyrography Project – Wood burning and pyrography
Learn how to create the fine fur in an animal portrait that incorporates realistic shading and shape to the animal’s face.
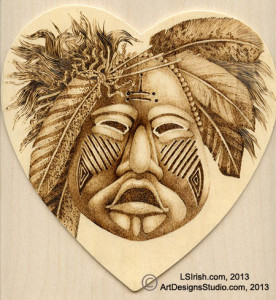


Pyrography Mask Project by IrishCeremonial Mask Pyrography – Pyrography and wood burning
This step-by-step project uses lots and lots of photos to guide you through an in-depth design created for first-time wood burners.

Pyrography Leather Burning – Leather burning and leather pyrography
Want to try your hand at leather burning? Then this tutorial is just what you are looking for. Includes not only the step-by-step photo instructions but also includes the binding steps for making your own leather artist journal.
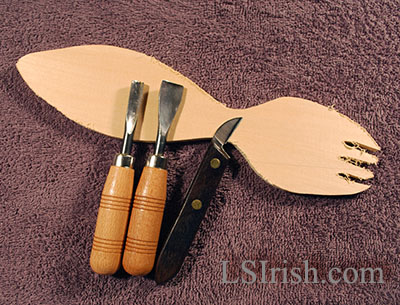
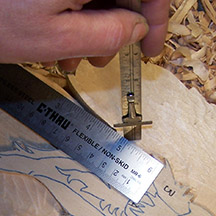
wood carving a wooden spoonCross-Crafting Seminar Introduction – Step by Step Instructions for your first wooden spoon carving from scroll saw cutting to adding the oil finish


Leather Burned Jewelry, Project One – Discover how much fun wood burning leather scraps into wire-wrapped jewelry can be.


Posted on Other Message Boards or Forums

Please note that the following free L S Irish seminars and in-depth projects were posted by me, and hosted on other forums  – Wood Carving Illustrated Message Board, WoodWorkingChat.com, Woodcarvers Gazette, FamilyWoodworking.org Forum, WOM – Woodcarver Online Magazine.

Please note that you will need to sign-up as a member of these forums to have access to the photos included in each of the tutorials.

If you have questions about these projects please contact me directly, here at LSIrish.com or on my Facebook account, as I can not reply to you on this forum. If you do reply of any of these free tutorial, it will bring these threads to the front of the message board where other members may answer you.
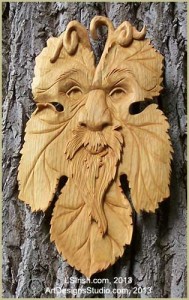
freen man relief carving by Lora IrishRelief Carving Wood Spirit Grape Man WIP – Over 250 detailed, close-up photos with step-by-step instructions of relief carving the wood spirit, green man face. This thread has had over 69,000 views!

Levels in Relief – Learn how to break you carving pattern into levels for easy carving. This project will teach you how to identify the sky, background, mid-ground, and foreground of any design.

Burning your carvings – Pyrography can be an important technique for your wood carving. So learn how to use your wood burner to clean-up fine wood fibers, add detailing, and even add fine shaping to your next wood carving project.

African Mask Low Relief Carving – The African Mask project focuses on how to establish the levels of a relief wood carving during the rough-out stage of work.

Irish Pyrography Seminar – This in-depth pyrography project shows over 250 detailed, close-up photos, step-by-step instructions, and in-depth explanations of texturing, shadings, and fine line work used to create the Advertising Barn landscape.

Walnut Hollow Versa-Tool – Looking for that first wood burning tool, then take a few moments and read through this tutorial for an in-depth review of the Walnut Hollow Versa-Tool used to wood burn a Toucan Family.

Winter Birdhouse Wood Burning Tutorial – This in-depth, step-by-step project focuses on a winter bird house wood burning scene. The project takes you from the initial tracing of the design to the final coloring steps.

Lora Irish Free Projects Read More »

how to paint your wood carvings

Wood carvings can be left in their natural wood coloring by using polyurethane, varnish, or oil finishes.  But by adding coloration with oil, watercolors, or acrylic paintings can bring a new dimension to your finished work.

Our Hen and Rooster relief wood carving is a great beginner’s carving project as it uses simple layers and rounded over edges.  Because it pattern, Hens and Rooster Pattern Package at ArtDesignsStudio.com, is a stylized design you can add both fine and deep detailing using the stop cut or a v-gouge cut.  To bring the detail of the carving to the forefront I dry brushed this carving with acrylic paints over an oil stain.  To learn more about how to paint your wood carving, please visit any of the links below, posted here on our blog.

Hen and Rooster Relief Wood CarvingPainting & Coloring
Coloring Your Project
Adding Skin Colors
Basics to Painting
Acrylics over a Primer
China Painting with Acrylics
Dry Brushed Acrylics
Marbling & Splatter Painting
Simple Dry Brushing
Vintage Painting
Painting Supplies
Paint Kit Supplies for Painting
Steps to Success, Painting
Burnishing Your Wood Carving
Simple Blending Acrylic Paints
Techniques for Painting
Basics to Painting
Painting Eyes
Watercolors & Wood Burning
The Color Wheel
Dry Brushing

 Discount Alert
Art Designs Studio
3/07 through 3/15, 2015

Use our discount code this week is  facebook  at ArtDesignsStudio.com for $5 off that can be used for each Cane, Walking Stick, and Wizard Wands Pattern Packs or E-Projects above.  Save up to $20 on your next wood spirit carving project! Good through March 15, 2015.

Learn how to whittle fish decoys
For our Facebook friends that are stopping by the blog, folk art fish decoy carving is a great first carving project.  Wood Carving Fish Decoys  will take you through the easy step-by-step process of whittling your very first folk art fish decoy.

Read More »

Lora S. Irish
is celebrating 17 months of being back on the web with a huge
Halloween Pattern Sale!
The Complete Pattern Collection
(every pattern and pack in our web store)

Only $149.95

LET’S DO THE MATH

NOW 2513 original L. S. Irish patterns at less than 6 cents each!
NOW 134 pattern packages at only $1.12 each!
18 new packages available nowhere else on the web!

399 new patterns
available nowhere else!

300 pyrography fill and texture patterns, available nowhere else!
All at a price too good to resist!

If you work just one pattern every day,
that’s only 6 3/4 years of daily fun!!!

L S Irish

Oct. 20, 2014

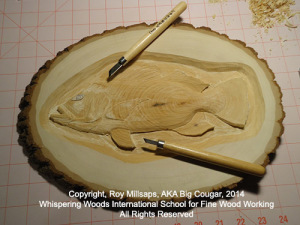
We wanted to share that Roy Millsaps, AKA Big Couger,
Whispering Woods International School for Fine Wood Working,

is sharing an online, step-by-step tutorial at
WoodWorkingChat.com
An online forum where you can indulge your love of carving

and at

FamilyWoodWorking.org
A great online message board for woodworkers and wood carvers!

Look for the Carving Class by thread under Carving
for
both Message Boards. He is just beginning the
shaping steps to a realistic fish carving plaque.

Sign up for both forums today
Join in, Post your pictures and Comments

Roy Millsaps Carving Class
Posted with Permission by Roy Millsaps

Forums and Message Boards are like potato chips for
wood carvers – you can’t join Just One!

Read More »

DIY Eclectic Primitive Pallet Dresser

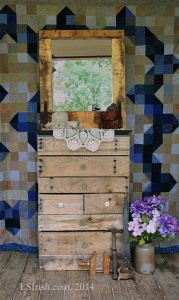
DIY Pallet Wood DresserEclectic means to derive an idea, style, or taste from a broad and diverse range of sources. In this case, my primitive bureau is a conglomeration of some of the many ‘someday’ bits, pieces, boards, and hardware that have accumulated in the shop over the years. You probably have boxes of them, those little parts that you know someday you will need or want.

Over the many years of wood carving and wood working I have enjoyed trying my hand at a smattering of furniture projects. Our woodworking shop is well equipped with the basic power tools, as well as many fun specialty tools that are used to create precision cuts and glass smooth finishes. Unfortunately with my husband’s illness and my Mom’s advanced age I seldom can take the time away from the family to dedicate to the hours of work that it takes to produce a classic piece of furniture.

But I will admit that I have missed that part of wood working tremendously. So this weekend I decided to indulge myself in a little back porch wood butchery … grin!

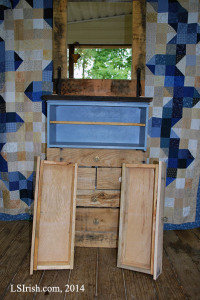
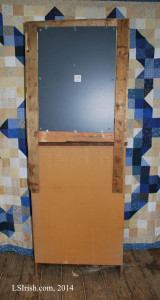
This all began with a Friday afternoon yard sale purchase of a 24” wide, 36” high, 8” deep used, battered bookcase. It was painted wedgewood blue, with lots of scratches and dents, and had a broken kick board (toe board). I knew I didn’t need another bookcase when I bought it, but it is solid wood and priced at only $5.

DIY Pallet Wood DresserSunday morning came and I headed to the shop to grab a board to replace the kick board … that seemed a good place to start. Passing the tractor shed, which is an add-on to the workshop, I noticed a bunch of old pallets that I had picked up somewhere for one of those ‘someday’ projects. I stopped, looked the pallets over carefully, and made the decision that today was that someday! That yard sale bookcase did not have to stay a bookcase, it could become the carcass for a set of dresser drawers made out of the pallet wood.

Since I really couldn’t hide out in the wood shop this weekend I grabbed up the zaw-zaw, the jig saw, and the disc sander. With a few hand tools – dovetail saw, rough cut saw, screw drivers, that sort of thing – I turned the back porch into a weekend work area where I could be close at hand for the family while doing some fun wood butchering.

DIY Pallet Wood DresserThe first goal was to convert the bookcase into a chest of drawers without purchasing anything – I wanted to use the wood and hardware that I had on hand. My second goal was to accept that this would not be perfect – I knew that using the tools that I could carry to the porch I would not be making precise, accurate cuts or joints.   So this project started out as an eclectic primitive project.


  1. Using the zaw-zaw, hammer, and a crow bar, I cut the pallets apart. A nail set and hammer removed the cut nails from the boards. A light sanding with 80-grit paper removed the worst of the splinters and fuzz bunnies.
  2. I decided that I wanted a series of small drawers, so I used some ½” x 1” framing strips to make the drawer supports.   These strips were left-overs from a repair for a door frame. The bookcase has three shelves, so I divided each shelf area into space for two drawers. Some wood glue and a few screws secured the drawer supports to the inside of the bookcase.
  3. The drawers are just simple butt-joint boxes with ¼” plywood floors. I made each box ½” less wide than the inside width of the shelf and ½” shorter than the height of the drawer area. No two drawer areas turned out to be the same. The drawer sides were made out of pallet wood and the plywood was left-over from my pyrography projects.
  4. The drawer fronts were cut from pallet wood at the full width of the bookcase and tall enough to cover the ½” of the shelf support. I tried to allow about ¼” air space between each drawer. The fronts were attached with screws, working from the inside of the box.
  5. Because pallet boards are often cracked, split, or broken, I quickly realized I would not have enough boards to create six 24” wide drawer fronts. But going through the cut pieces left from the first several drawers I did have enough to turn one large drawer area into two small drawers.
  6. DIY Pallet Wood DresserI removed the broken kick board and replaced it with pallet wood.
  7. I needed drawer pulls, so while rooting through my someday boxes I came across five old glass knobs from Mike’s father’s woodworking days. Two ceramic knobs turned up in one of my Dad’s boxes.
  8. The top of the bookcase was in very bad condition, so I cut a new top from an old walnut table leaf. The table was long gone, but I had held onto the extension leaf for years. The top is held in place with screws working from the inside of the bookcase – dresser carcass.
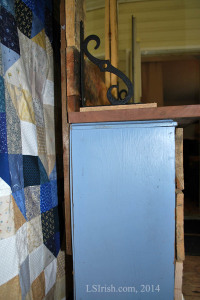
  9. While looking for drawer knobs I stumbled across an old, discarded bathroom mirror and then found a pair of wrought iron shelf brackets. The brackets were so old the plastic packaging had turned yellow, and cracked. A simple butt-joint frame made from pallet wood scraps became the mirror support. Two long pallet boards were mounted to the back of the frame to attach the mirror to the back of the case. For a little added pizzazz I used the iron shelf brackets on the top of the dresser to also attach the mirror.

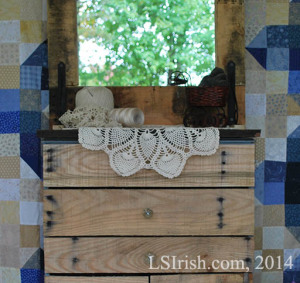
So … the photos show you where I am. The woodworking is done except to sand off a few really rough areas. I know that I am going to paint over the wedgewood blue with first a medium tan and then black. With sandpaper I will rough up the corners and edges to let all three paint colors show.

Pallet Wood Dresser Pineapple CrochetThe whole family has become involved in this project. Mom would like to see me paint lettering to the pallet boards – fragile, this side up, or even hazardous waste. I am thinking adding luggage stickers or packing slips to the boards, then roughing them up so it looks as if the dresser is made from antique shipping crates. Mike, my beloved hubby, wants me to remove the glass knobs and carve wood spirit faces as my drawer pulls and he wants it for his knife collection storage. All my son will say is, “Gee, that will look awfully good in the corner of my room!” I’ll let you know when we decide where this project goes from here.

I just may keep this one for me.  Whosits!  A gal needs some special place to store her doily crochet books, hooks, and pineapple work.

In the meantime, have some fun this coming weekend doing your own eclectic primitive pallet wood project! Oh, and the total cost of this project was $5 for the bookcase and a full day of absolute fun, plus the joy of putting some of those ‘someday’ bits and pieces to work.


DIY Eclectic Primitive Pallet Dresser Read More »

New Tutorials Posted

New Tutorials Posted Read More »

Scroll to Top