How to Convert a Linear Pattern into a Circle Design

Free Pattern Celtic Crown of Thorns Motif
This is a five part series that will be expanding over the next few days.
Part 1, How to create and divide your circle grid
Part 2, Sample Circular and Square Grids, ready to print and use in your pattern work
Part 3, How to convert a linear pattern into a circular design
Part 4, Four free circular Celtic Patterns
Part 5, Sample single Celtic pattern motifs to trace
Linear patterns can be transformed into round designs by using a circular grid.
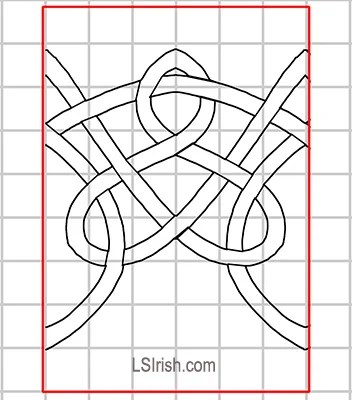
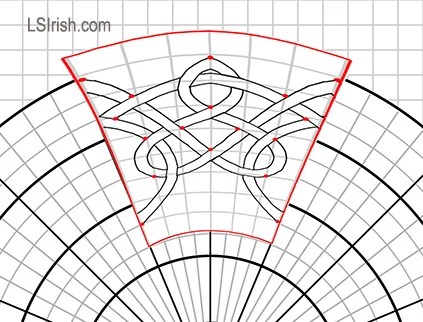
1. Begin by isolating the individual motif of your line design. It is far easier to adjust one motif and then repeat that adjustment around the circle then to try and adjust an entire line of motifs.
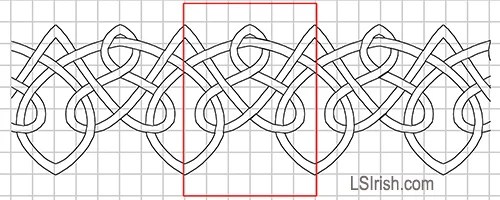
Isolate one linear motif to use as your template for your circular design. Center the motif onto the top center of the circle grid.
Center that motif onto the circular gird at the top of the circle.
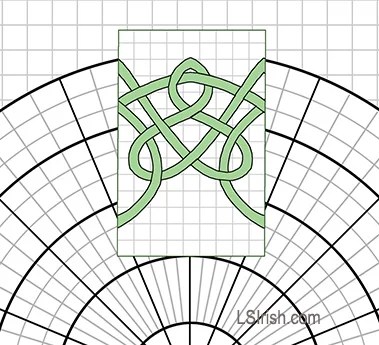
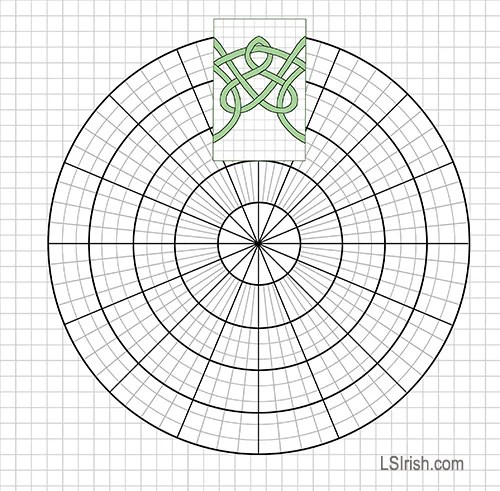
For this sample the circle has been divided into twelve equal parts, with the motif overlaid on two parts.
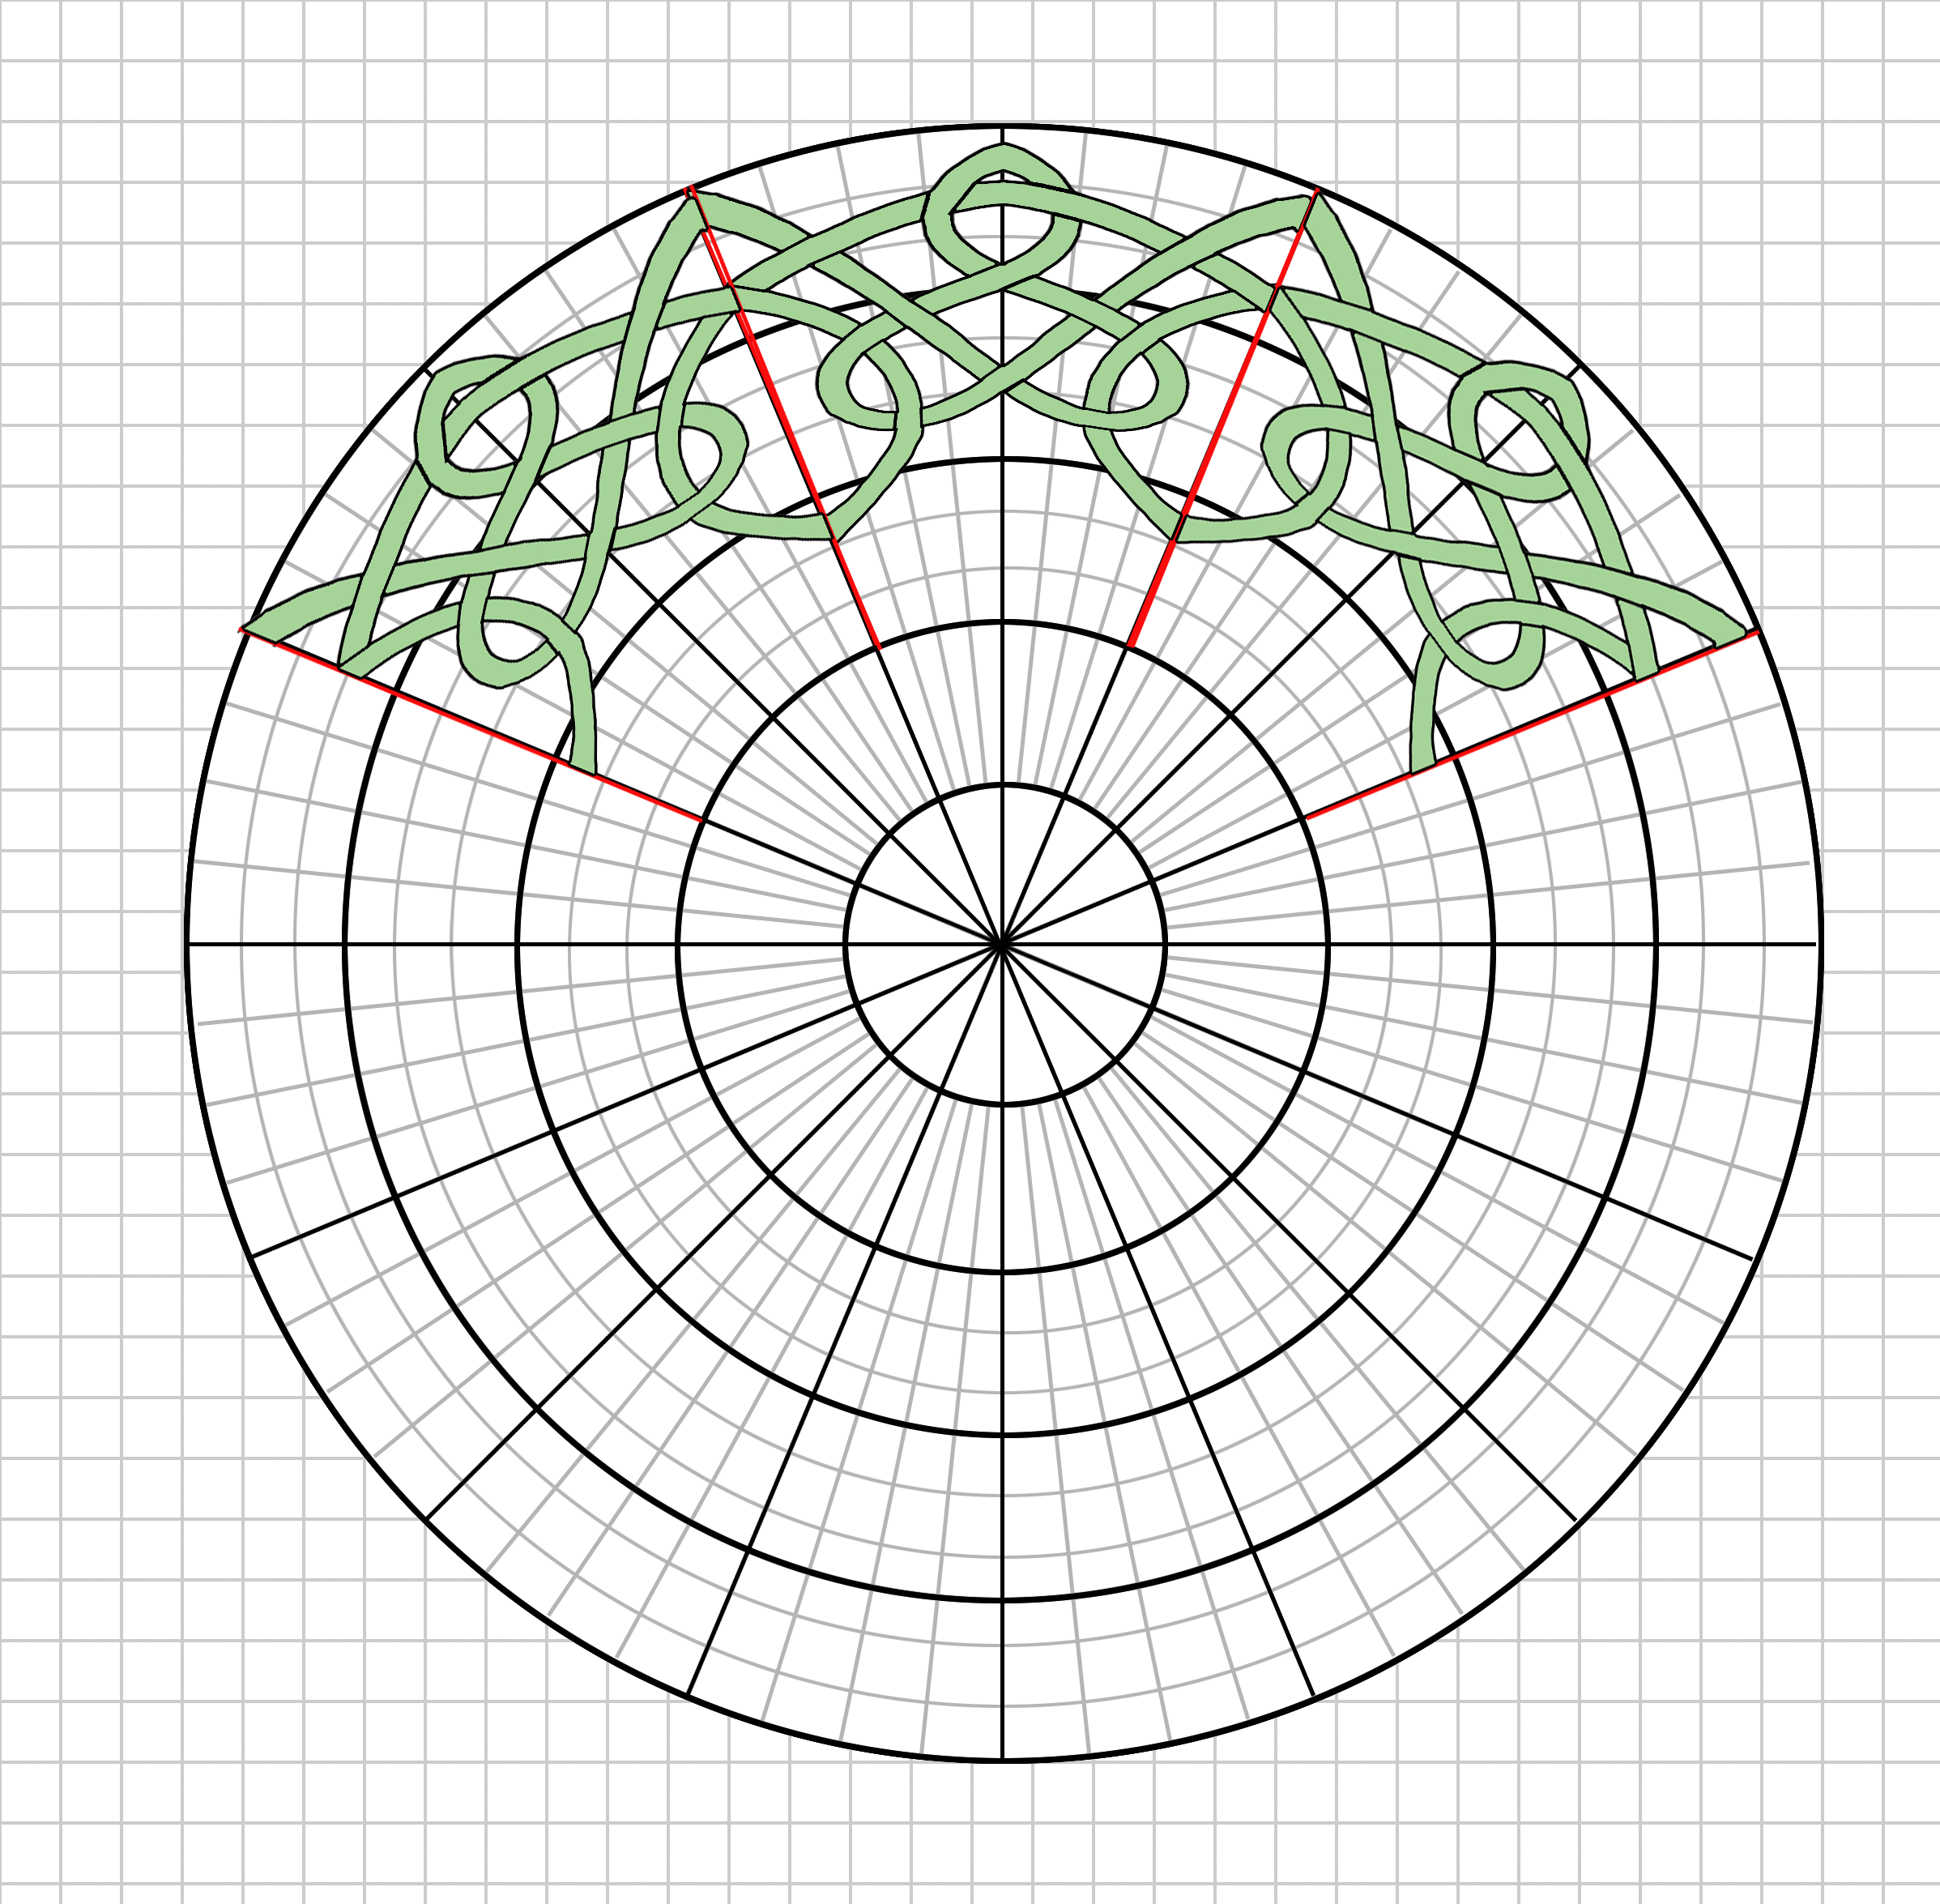
2. Chart your motif exactly as you would any other pattern. Note that because the circle is wider along the outer edges but narrower at the inner area, the units are not the same size.
As your transfer your motif the outer edge of the design will become stretched while the inner area becomes compressed.
The graphed pattern will automatically adjust to the shape of the two pie sections as you work the graphing steps.
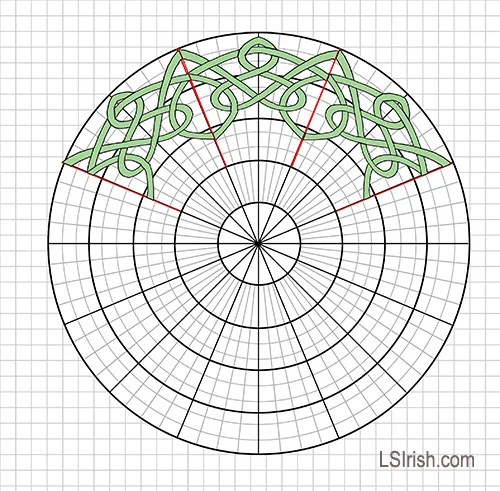
Now trace the newly graphed motif into the next set of two pie shaped sections.
3. When the first motif has been graphed you can trace that graphed pattern into the next two sections of your circular grid.
If your home print also has scanning capacities, you can scan your first motif onto your computer. Next print multiple copies of that scan.
Cut out the motif from each printer page and tape them into the circular pattern. Now you have a quickly made design, ready for tracing.
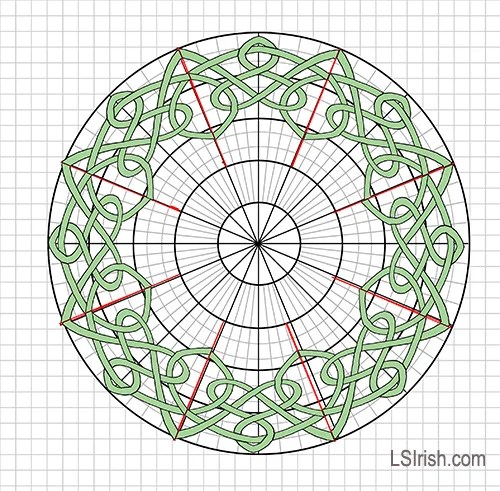
Adjust your two section motifs as necessary to insure that each edge touches correctly to the adjacent tracings.
4. If you are working your circle with paper and pen, the completed tracing may need some minor adjustments. Check that the edges of one motif aligns with the edges of the next motif.
5. Determine how thick you want your knot lines to be, and mark the pattern accordingly.
Establish the one-over-one under knot line pattern.
6. Your finished design is ready for tracing.
 Free Pattern Circular Celtic Crown of Thorns Pattern
Five complete pattern packs, over 100 designs and motifs, for the low price of only $22.95

