What tools do you need to start carving?
This common question is very hard to answer because the tools and knives you may be using one year from now could well be very different than those that I suggest for a newbie carver.
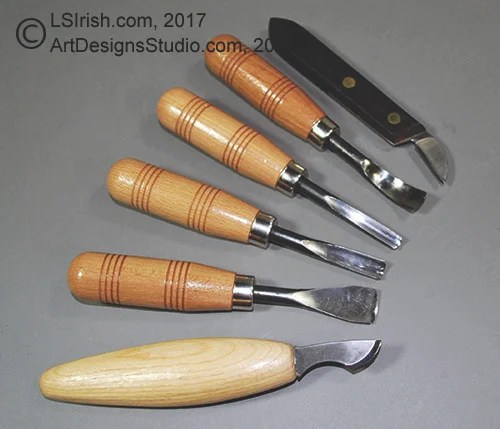
Shown right is a set of spoon carving tools that include several sizes and profiles of round gouges.
Relief Carving Workshop: Techniques, Projects &
Patterns for the Beginner (Fox Chapel Publishing)
Comprehensive Guidebook from Lora S. Irish with Easy-to-Learn Step-by-Step Instructions & Exercises
Paperback – Illustrated, March 1, 2013

 Your First Carving Tools
If you are just starting wood carving I strongly suggest a simple set of carving tools. Sets are available in 6 to 12 tools, and often come with a storage box or cloth roll. Select a medium-sized tool profile set of 1/2″ wide or less that includes at least a straight chisel, skew chisel, large round gouge, small round gouge, and a v-gouge.
A mid-quality beginner’s tool set of five to six tools will cost between $40 to $75.
To this set add the best bench knife or large chip knife that you can afford. Your bench knife is your primary tool in carving and the better quality steel makes all the difference in how easy your carving flows through the cuts. A high-quality bench knife often runs around $35 to $60.
Interchangeable blade sets are also excellent for the new carve. As an example I use the FlexCut 11 piece Interchangeable set all the time for whittling, relief, and cane carving. This set has every tool profile that a new carver needs while keeps your initial costs low. I also have used the same Ramelson Beginner’s Set for nearly twenty years with great success.
You will also need a sharpening set to keep the edge of your new tools crisp. Sharpening tools can include ceramic stones, a leather strop, honing compound, and a slipstrop. Estimate another $50 to $75 for your sharpening set.
All of these tools are explored in Beginner’s Whittling and Relief Carving Tool Kit.
What I do not recommend for the beginning carver!
1. I don’t use any sets that are available from the large arts and crafts box stores. These sets are very inexpensive because they are not manufactured from high quality steel. Often they come un-sharpened or only partially sharpened, which means that you must conquer sharpening techniques before you ever put a knife into the wood.
2. I don’t recommend high-end, extra-high quality tools for a beginner. I know, those sets are just beyond beautiful and the very best you can buy. And I know that I just told you to buy the best bench knife you can afford … But … neither you nor I know whether you will love wood carving with the intensity that I do at this point in your new hobby. We also can not predict what style of carving you will finally chose.
These tools can be purchases after you discover that you are addicted to carving! You can purchase high-end tools individually which means you can add to you beginner’s set one tool at a time.
So, at this time, save that money to purchase wood.
3. While I do list utility knives as a possible starting tool kit I do not recommend them. Utility knives are made to be disposable and do not have the steel strength that true wood carving tools do. Utility knife blades can crack, split, and pop at any moment, and create a danger of injury.
 Carving Styles
There are many different styles of wood carving and each has its own set of specialty tools. In the next year, as a new carver, I strongly recommend that you give all of these carving styles a try. Most long-time carvers work several different styles on a regular bases.
Whittling is often done with one medium-length bench knife or pocket knife. A few extra tools may be in your whittling kit and could include a small v-gouge, a small u-gouge, and perhaps a medium or large round gouge.
Chip Carving uses a set of three short blade knives, often set on a slight angle from the handle. I personally use a large chip carving knife as my primary bench knife.
Paperback – Illustrated, July 1, 2013

Hardwood Old World style carving uses heavy handled, large bladed tools that are moved through the wood using a leather or wood mallet. The straight chisel, skew chisel, round gouge, and v-gouge are the main tools used.
3-D Carving uses a basic set of tools that include chisels, round gouges, v-gouges, and a pocket knife, bench knife, or utility knife.
Relief Carving uses a very similar set of tools to 3-D carving with the addition of bent-back gouges, dog-leg gouges, and the bull nose chisel.
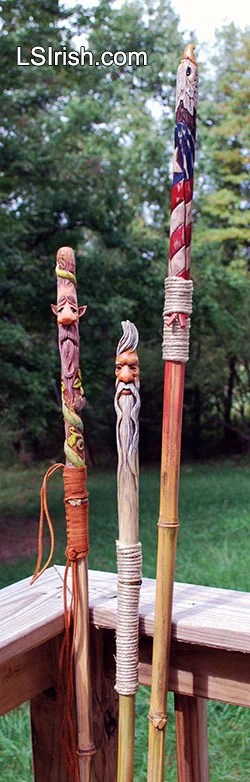
Cane Carving, as relief and 3-D, uses a basic tool set with the inclusion of a draw knife, dowel sets, and clamps.
Paperback – December 10, 2018

Power Carving is a style that uses rotary tools with diamond, steel, or ruby bits to do the basic work. A basic 3-D or Relief Carving set of tools is then used to dress out the carving.
 Beginner’s Whittling and Relief Carving Tool Kit
This in-depth tutorial explores all the tools, knives, and carving aids that I have accumulated over twenty years of wood carving.
Some were inherited from my father, who was a gun stock carver. Some are sets that I have purchased and used over the years. Of course, some are just fun specialty tools that I have added to my kit.
While you may need to purchase your bench knife, chip knife, and carving tool set to begin your new hobby, many of the tools listed in this tutorial you may already own in your woodworking or craft supplies.
Browse through the tutorial, consider what you already have on hand, and then make your selection.
Paperback
– Illustrated, August 15, 2017
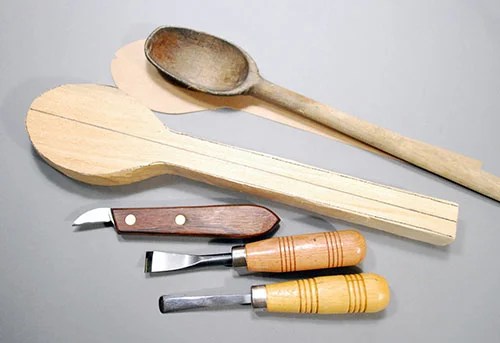
A selection of mix-and-match patterns offer suggestions for creating dozens of
unique designs for spoons and other implements — forks, ladles, dippers, spatulas,
knives, pie servers, and scoops. In addition to clear, detailed directions accompanied by
helpful drawings, inspiring photographs illustrate decorative ideas for using the carved spoons
in kitchen wreaths, centerpieces, and other ornaments