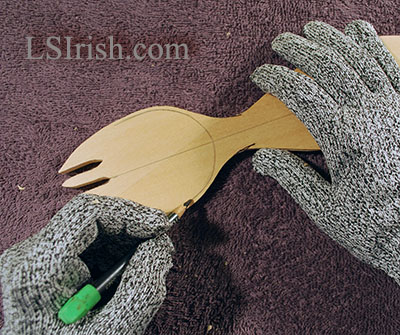
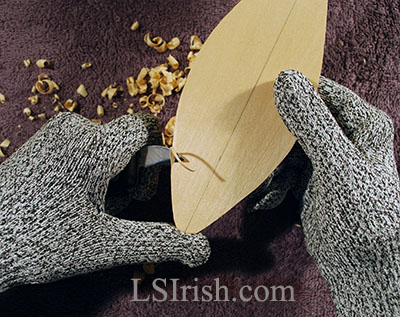
Step 8: Mark a guideline along the bowl.
Working on the front of the fork, use a pencil to mark a line along the top edge of the fork’s bowl, about 1/16″ to 1/8″ from the edge. This is your guideline for the start of each round gouge cut that you will make to shape the bowl into its curve.
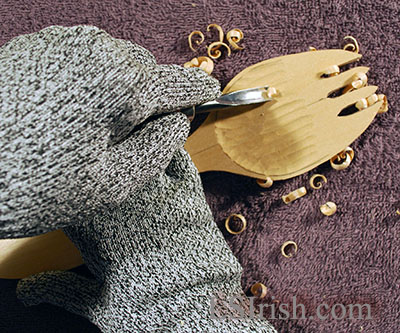
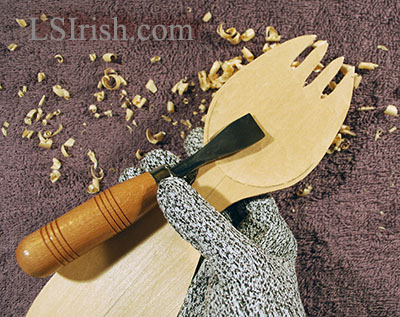
Step 9: Use a large round gouge to begin shaping the bowl.
A large round gouge will nicely shape a shallow bowl to your spoon, as the one we are carving here. For deeper spoon bowls you will want a wide sweep gouge or a bent-shaft large round gouge. Work the round gouge cuts as a push stroke, working the edge of the gouge away from your holding and cutting hand.
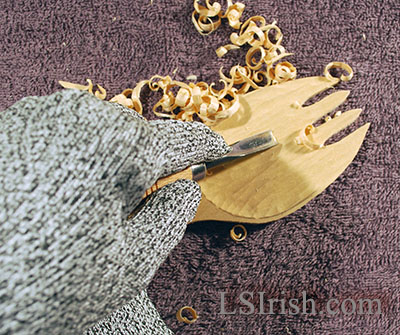
Step 10: Thin the tine-end of the fork.
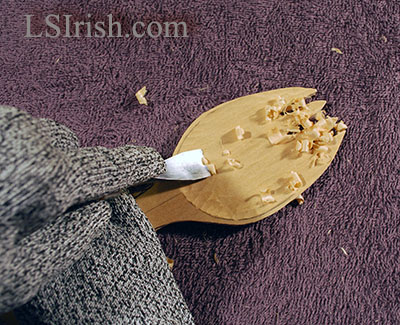
Step 11: Using a wide sweep gouge to smooth the bowl.
Step 12: Finished bowl.
The bowl area of the fork is finished and has a fairly even, smooth surface.
Step 13: Round over the edges of the fork’s bowl and handle.
Following the same process you used to round over the edges of the back of the fork, shape the edges of the bowl and handle on the front of your fork.
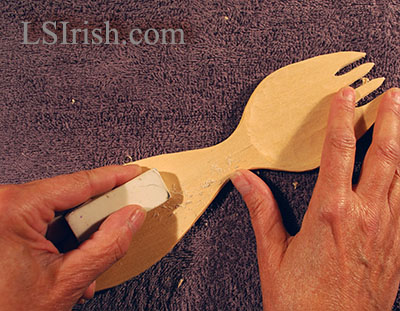
Step 14: Remove any pencil guidelines with an eraser.
Use a white eraser to remove any remaining pencil guidelines. The eraser also lifts those little, loose wood fibers left from the rough cutting steps as well as any dirt or oil from your hands.
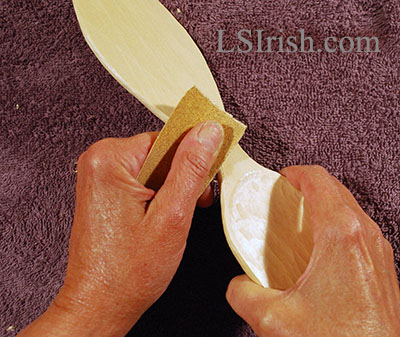
Step 16: Sand the fork.
You can leave your fork as is with the small flat plains of your cut strokes to give the fork a rustic finish. You can also sand your fork to give is a smooth, even surface. If you will be wood burning a design, as we will in the next post, you will want to sand at least the areas where you will be burning. Work the sand paper in the direction of the wood grain. Heavy-grit sand papers do leave thin incised lines in basswood. Working the paper with the grain hides those lines. Begin with a heavy-grit paper – 100- to 150-grit for hardwoods or 200-grit for soft woods. Sand over the first sanding using a finer grit paper – 220-grit. Work a third sanding using extremely fine paper at 320-grit. Remove any sanding dust using a dry, clean cloth.
Remember to sand between the tines of the fork to remove any remaining scroll saw blade lines. Lightly round the edges of the tines using your finer-grit sand papers. You can roll sandpaper around a nail file or small bamboo skewer to sand inside of the tines.
Finish your sanding steps by crumbling a 6″ or larger square of brown paper bag. Rub the crumbled paper bag over the fork, working with the direction of the wood grain. That paper bag sanding will polish and burnish the wood, creating a pristine surface for wood burning.
OK … just one more step in this Cross-Crafting Seminar! Tomorrow we will work on our wood burned pattern and the oil finish for our set of hand-crafted wooden spoons. See ya’ there.
Page: 1 2
Is it too early to be talking about the Fourth of July?!? https://lsirish.com/woodcarving-tutorials/woodcarving-projects/beginner-projects/wood-carving-fish-decoys/4/ https://lsirish.com/woodcarving-tutorials/woodcarving-projects/beginner-projects/ice-fishing-fish-decoy-gallery/…
I have found over the years that I often have the desire to create something…
Gourd Art at LSIrish.com Gourds make a wonderful base for many of our favorite crafts…
Two free E-Projects, for your download, are posted on my pattern website - ArtDesignsStudio.com.…
Free Winter 2023 Tribal Celtic Pattern Pack Go to my pattern website for your free …
What do you do with that old fish tank that has been hidden in the…