Cross-Crafting Seminar Introduction
Cross-Crafting Seminar Supply List
Cross-Crafting Seminar Free Patterns
Cross-Crafting Seminar, Scroll Saw Basics
Cross-Crafting Seminar, Setting Up Your Scroll Saw
Cross-Crafting Seminar, Scroll Sawing the Wood Spirit Face
Cross-Crafting Seminar, Wood Burning the Wood Spirit Face
Cross-Crafting Seminar, Colored Pencils for the Wood Spirit Face
Cross-Crafting Seminar, Cutting a Wooden Spoon
Supplies:
Scroll Saw with a 15 tooth, regular cutting blade
1 – 3″ x 12″ x 3/8″ piece of basswood for each spoon
220-grit sandpaper, tack cloth
graphite tracing paper
safety glasses
Step 1: Choosing how to rough-cut your spoon blank
There are many ways to remove the waste wood from any wood carving blank. For our seminar I am using my Ryobi Scroll Saw and a 15 tooth per inch, regular cutting blade.
The most simple option is to use your bench knife in either a push or paring stroke to slowly cut away long slivers of wood from the blank. A coping saw or hand-held, u-shaped framed saw and a vise or clamps can also be used. If you plan to make a series of wooden spoons you might want to purchase a small 5″ curved-blade draw knife or 3″ straight-blade draw knife will make the rough-put work quick and easy, especially on thicker blanks.
Step 2: Preparations
Lightly sand your basswood board, both front and back side, using 220-grit sandpaper, remove any sanding dust with a dry, clean cloth. A smooth surface on the wood allows your blank to move easily through the scroll saw cuts. Trace your pattern to the basswood using graphite paper.
Note: If you will be making more than one spoon, trace the pattern to the inside surface of an empty cereal box. Cut the spoon pattern out with scissor and use the cardboard cut-out as a template, tracing along the edges of the cardboard. Save the cardboard template, it can be used over and over again.
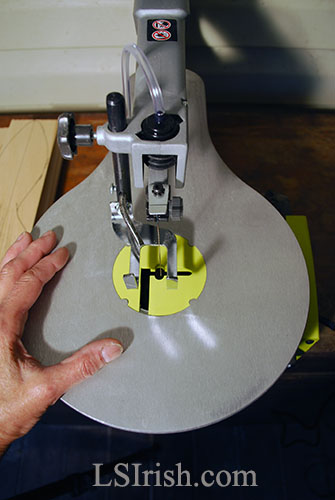
Release the Drop Foot and slide your basswood blank under the foot. Reset the Drop Foot knob.
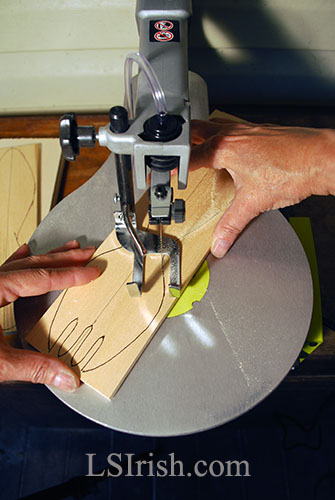
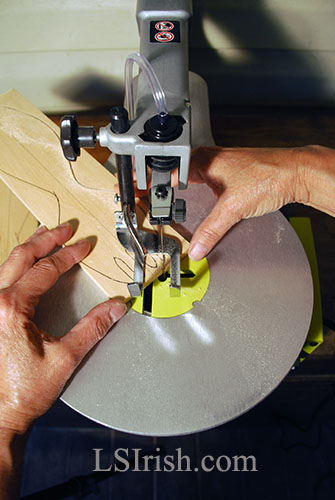
Step 3: Cutting the basic outline
Begin by cutting along the basic outline of your spoon pattern.
Work one side of the spoon at a time, fully releasing and freeing that side of waste wood.
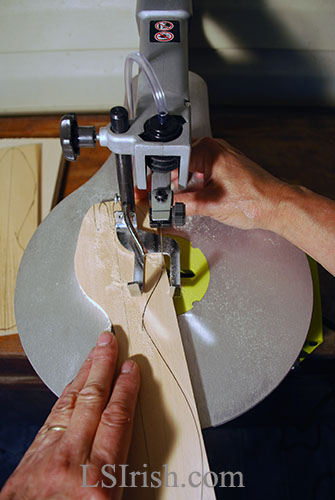
Step 4: Cut the second side of your spoon
Continue your scroll saw cutting to completely remove the waste wood on the second side of your spoon blank.
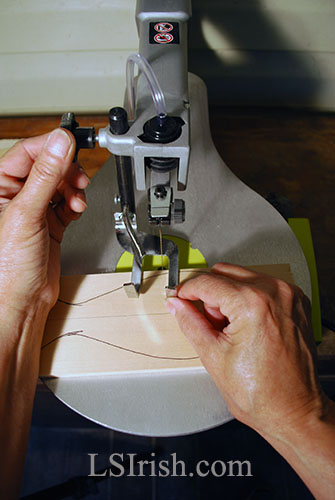
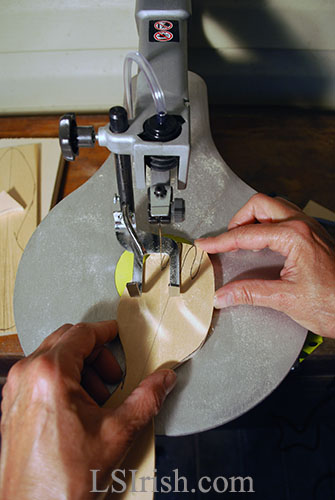
Step 5: Cutting the fork tines
The fork tines are cut in two strokes, each worked from the end of the fork into the opening between the tines. Stop the first cut when you reach the center point of the opening.
Back the saw blade out of the wood and cut the second side of the opening. This two-cut step will free the waste wood between the tines.
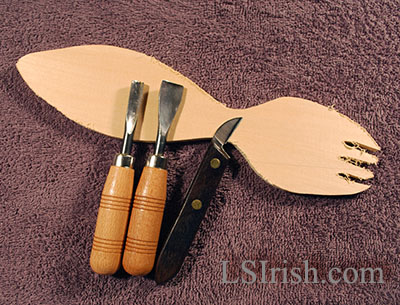
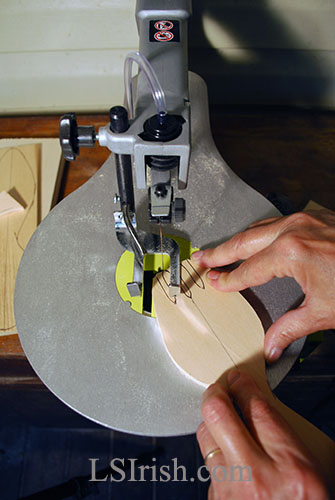
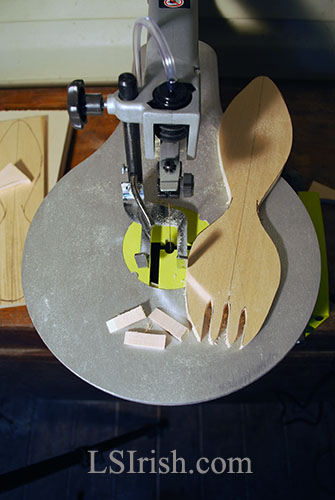
Step 6: The completed scroll saw cut spoon blank
This wooden fork blank took about 15 minutes to cut out on the scroll saw – quick, easy, and super fast!
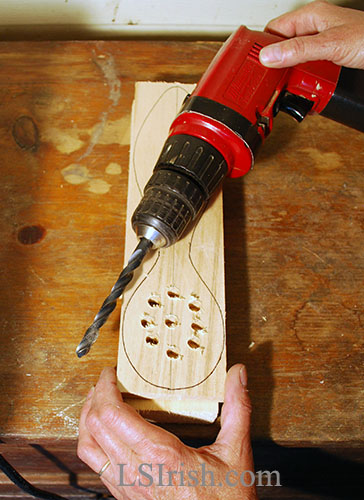
Step 7: Drilling the holes for a slotted spoon
Using a 1/4″ or 3/8″ drill bit drill the holes into your slotted spoon before you do the scroll saw steps. I prefer to drill from the back of the spoon towards the spoon’s front face. Because I will be carving the front face of the spoon into a bowl shape, if I chip-out any of the holes during the drilling process, those chip-outs will be carved away later in the work.
Basswood chips easily because it is a soft wood. To avoid excessive chip-outs use a new, sharp drill bit and an even medium speed with your drill. Clamp your spoon blank to a piece of scrap wood. This clamps and secures the back grain fibers and reduces chipping. You can also use masking tape on the bottom of your spoon to help hold the grain fibers in place.
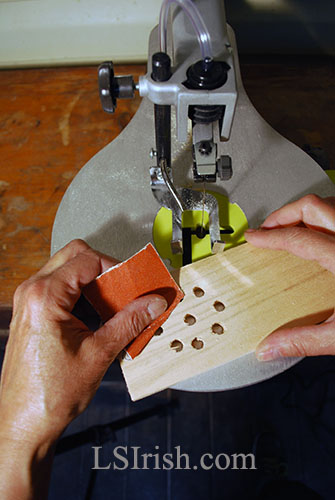
Step 8: Sand the drilled holes before you do the scroll saw cutting
Remove any loose or chipped-out wood from your drilled holes, on both sides of the wood blank, before you move onto the scroll saw with sand paper. Those chip-outs can cause your blank to drag, or hang-up on the scroll saw cutting table.
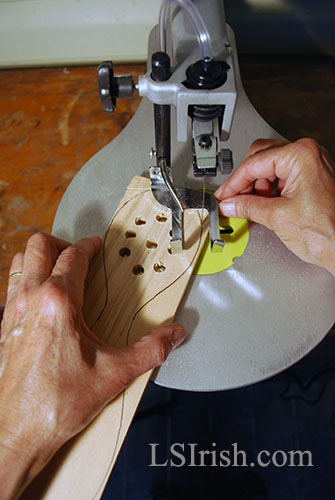
Step 9: Cutting a slotted spoon blank
The slotted spoon is now ready for scroll sawing.
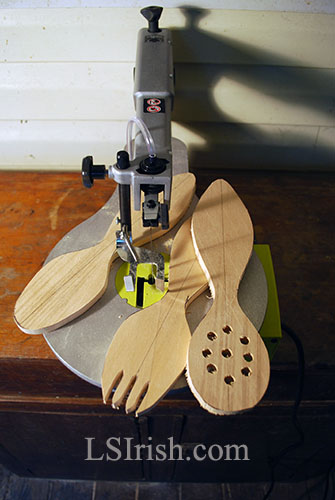
Step 10: Finished wooden spoon blanks
Now that the three wooden spoon blanks have cut out we are ready to move into the wood carving steps of our project. See ya’ there!
Gourd Art at LSIrish.com Gourds make a wonderful base for many of our favorite crafts…
Two free E-Projects, for your download, are posted on my pattern website - ArtDesignsStudio.com.…
Free Winter 2023 Tribal Celtic Pattern Pack Go to my pattern website for your free …
What do you do with that old fish tank that has been hidden in the…
Snow Gnome Pyrography Have a little free pyrography fun with this step-by-step PDF. Our Best…
June 8th, 2023 My free Wood Spirit.pdf has been updated! Please download Version 2.0 with…