 Step: 23: Rounding over the body, neck, and head.
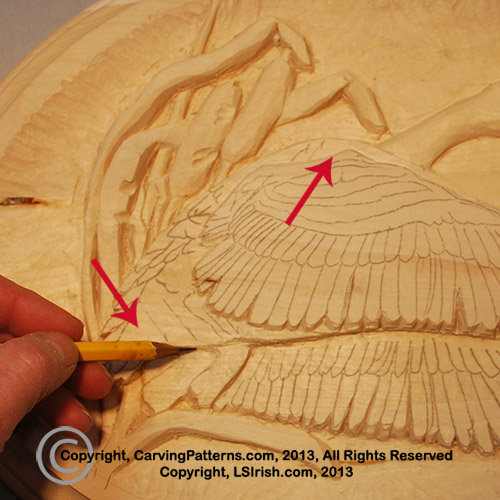
Begin this step using your bench knife, straight chisel, or bull nose chisel to create a simple rolled over edge along the sides of the neck and head of your goose. Round over the top edge of the shoulder area, the space between the front wing and neck. Slope the shoulder towards the top edge of your plaque.
As we work through this project you will see that I have left all of my outer edges of the goose and grass proud to the original tracing lines. You can see in this photo along the front wing tips that there is extra wood at the pattern line and that I have sloped my chip cuts away from the pattern line, leaving even more wood near the background area. Extra wood gives extra control during the shaping and detailing steps.
With this project the one area that I seemed to ‘fuss’ the most was the final size of the goose’s head. There will be several photos where I trim, then re-trim, and even trim again to get the head down to a more proportionate size.
 Step 24: Sloping the belly and body section of the tail.
I want the belly of the goose to slope down then roll over along the edge. It will tuck it under the front wing. But before I begin shaping this area I need to free the front leg and taper that leg smoothly into the front foot.
 | 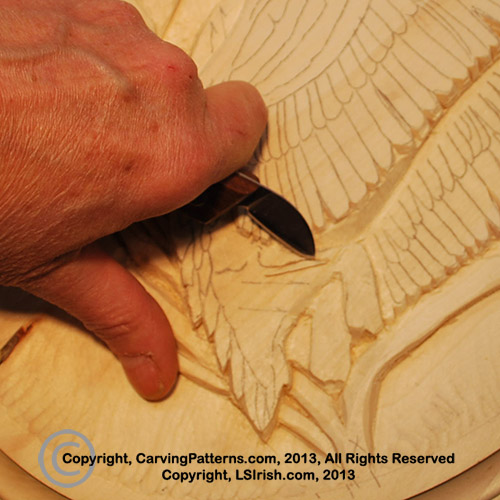 |
I do that by using a bench knife or chip knife to create a stop cut v-trough line in the belly area following the leg pattern line. The first stroke of this cut is made about 1/16″ away from the leg line with the point of the bench knife slanted towards the leg. Flip the board and cut a second bench knife line, slanted towards the first. This will lift a long v-shape line at the leg’s pattern line. Lower and shape the belly area at the front leg using a straight chisel or bull nose chisel. AS you work the left side of the belly needs to drop in level to match the right side belly under the wing.
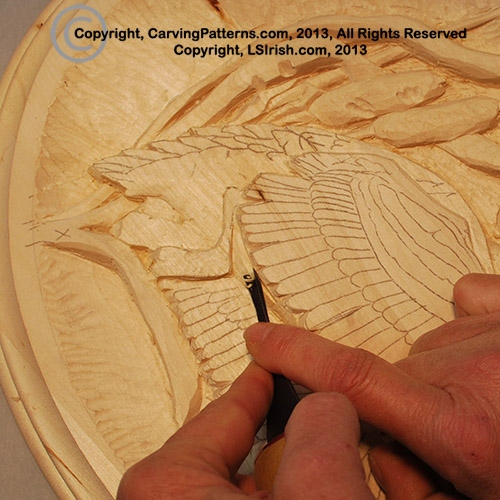 |  |
I am working both sides of the belly as the same time, so at this point I can run my v-gouge along the under-edge of the front wing to smooth out this joint line.
As a relief carver matching the depths of two sides on one element that lies below another element is one of the small tricks that takes your project from good to great! In this area matching both sides of the belly where they meet under the leg shows that extra attention to detail that is so important.
When the belly is shaped I used my straight chisel to work the leg and foot into one smooth, flowing section or element.
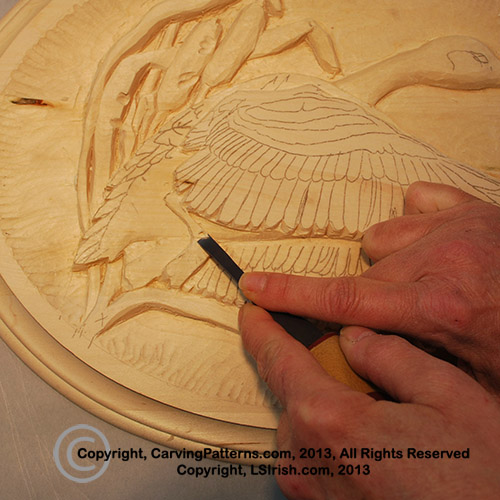
While we are talking about small things that make a big difference in your relief carving I want to note that I use a two-handed grip on all of my cuts and knife strokes. While a few photos here show only one hand that is because my other hand at the moment was taking the picture – the cut being photographed was already made. My cuts are primarily made with a push force or pushing movement, working away from my body. The natural swing of a push stroke is in an upward arch so there is always the chance that the edge of the knife will literally roll up and out of the wood. My left hand is above the wood – no part of this hand is in contact with wood or table.
The two-handed grip easily controls this. In the photo my left hand (lower) holds the chisel and controls the direction of the cut. My right hand rests on top of the tool with a slight downward pressure, keeping the tool edge against the wood. The knuckle of my small finger on the right hand rests against the wood. It is my anchor point for the movement of both hands.