Introduction of Dramatic Shadows
Undercutting Technique for Dramatic Shadows
Level Changes and Free Floating Elements for Dramatic Shadows
Dramatic Shadows Pattern Work
Click here for a close up of the full carving.
Click here for a full sized printable pattern of the barn.

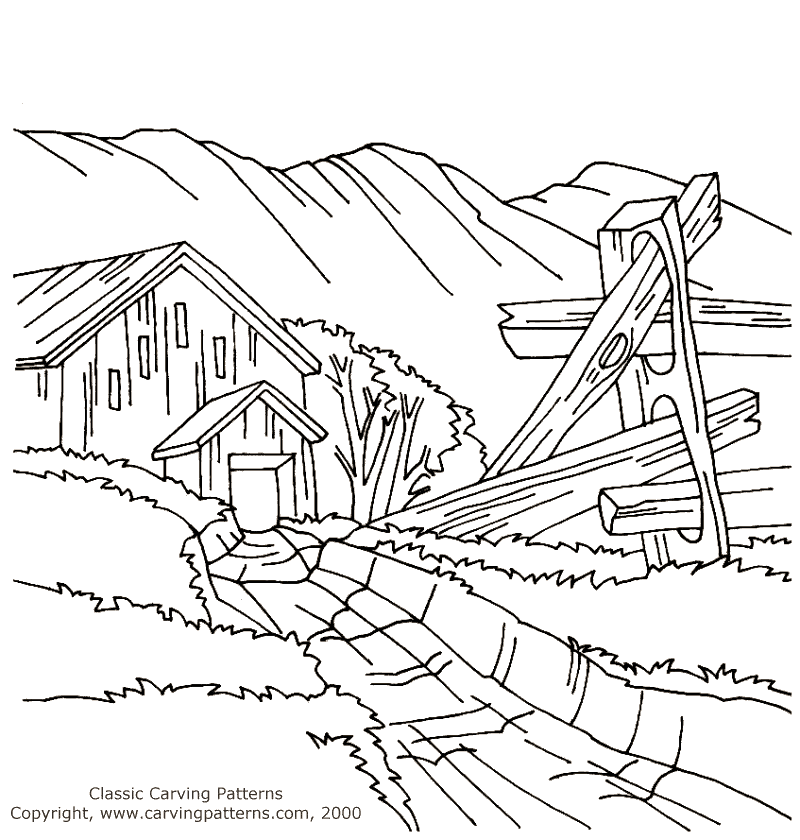
In this section of the barn carving there is a split rail fence that lies in front of the mountain range. The fence line creates a break between the foreground scenery and the background skyline. This is an excellent place in the pattern to add undercutting.
Undercutting is the carving technique where you angle the knife cuts behind the element to hide the joint line where that element meets the surrounding background elements in the design.

In the photo to the right you will see my carving knife laid against the project. In the second photo you can see where I have slid the same knife into the space created from the undercutting. This will offer an idea of how deeply the cutting of the joint line goes underneath the fence rails.
Using your bench knife or chip knife cut along the patterns guide line for that element, in this case the boards that make up the fence line. The round gouge or flat chisel will be used to remove the excess wood from the area surrounding the fence rails … that wood between where your mountains will be and the board.

When you have the general contouring finished you can begin undercutting. I like to work an undercut out in several stages, it gives me more control over the depth and shadowing than one deep cut would.
Recut the elements edge line, but this time begin reaching the point of the knife at an angle underneath the top surface of the element. Slide your chisel along the background area into that undercut to remove the wood slice.

In the photos to the right you can see how the side profiles of the fence rails are deeply angled away from the viewer. The top rail and bottom rail have been undercut, the central rail is a simple rounded over edge. The red arrows will give you a sense of the angle of the bench knife. The top and bottom rail will cast very dark shadows, the central rail will not. However, since the center rail is in such a tight spot it is easier for the carver to simply round over this one fence board.
Once the undercut is created tease out any loose wood fibers. Dental picks are excellent tools for this process. They come with a variety of profiles and bends that can reach into the toughest corners. When I have created a very dramatic angle I will use a piece of fine grade sand paper, 220 grit or higher, to dress out the undersides and joint area to remove those last few “fuzz bunnies”.
Below, the carving has been turned upside down to let you see into the edge work along the barn roof. Again, this is a very good area for undercutting. Since the barn lies well in front of the mountains and skyline the dark shadows you create will push the barn away from the background. Note in this photo how the undercutting also lowers the wood in the mountain range area behind the barn roof. In essence the background gets “tucked in” underneath the foreground elements.

