Simplifying a Pattern into Basic Areas in Relief Wood Carving
Please click on any of these images for a large, printable image.
 Most of the patterns that you find for relief carving are full of fine details for you to carve. In working with patterns, simplifying the design into general areas will help to guide you in the early stages of the work. When a design is made up of a repeating element, as the feathers on the Macaw, a carver will use contour shading to group areas of that element together.
Trying to plan the placement of several layers of individual feathers can be overwhelming. By grouping areas of feathers into one unit makes the early carving stages much easier.
Many carving patterns contain unrelated elements as a landscape scene. Here the pattern contains trees, fence posts, road beds, and building. For patterns that have multiple unrelated elements in the pattern the use of levels is more appropriate for simplifying the design. Please see our article “Northwest Adventurer”.
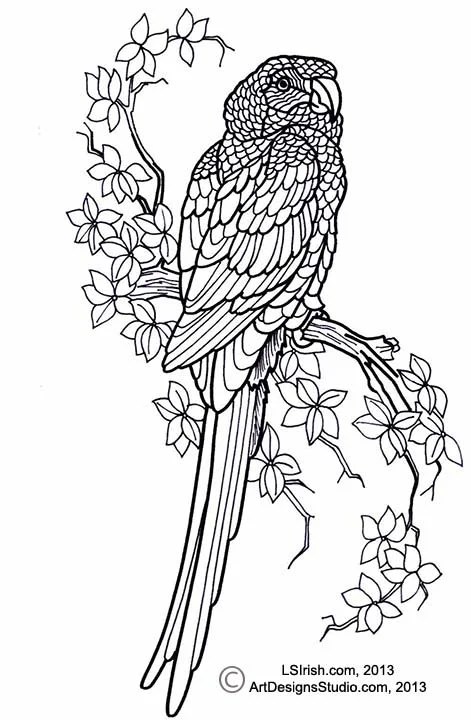 Begin this wood article by printing a copy of our Macaw Practice pattern. As you read through the steps here you will be able to refer to that pattern as your reference point.
Trace only those lines that you need to shape an area as a whole unit.
Tracing every line of a new pattern at the beginning of your carving is both time consuming and pointless. Many of those lines will be removed long before the detail they represent are carved. Instead, with just a little work on a pattern before you ever get to the wood will reduce the number of lines to be drawn as well as clarify separate areas of contour or layers.
Group small areas into larger, easy to handle units.
 In the macaw design above you will note that all of the feathering is shown. By grouping the feathers, as shown in the outline pattern to the right, into related areas you can reduce the pattern from individual feathers into larger, easier to carve units.
Determine the carving depth for the large, simplified units.
 These contour areas determine the general shape of the macaw. With a pencil begin shading the design to establish the different levels in the work. Note that the back wing is shaded darker than the forward full wing, indicating that it will lie lower into the wood than the full wing.
This shading can be “quick and dirty” notations on the pattern. It is just a chance for you to visually relate one area to another, what lies over and what lie under each area.
Work a shaded drawing onto the pattern as a reference guide.
 After the shading is applied make any notes on the pattern that might help you in later work. Here the macaw has been marked as to what each contour area represents – front wing section, breast area, upper front tail, etc.
Plan which areas will far into the foreground, mid-ground, and background.
 Establish the depth of each area of the simplified pattern into high foreground areas, mid-ground or mid-level areas, background elements, and far background space. Colored pencils can be used to fill in your paper patterns as a reference guide while you work your carving
Once the pattern has been simplified it is ready for tracing. Note in the samples below that the contour areas have been carved and developed. In the second sample the feathers and detail are now laid into each section.


Sample of the simplified units after the shaping steps, and the detailed carving steps.
