Adding Drama through Shadows
Pattern Work
By L. S. Irish
In this online article we are exploring how shadows can add an illusion of depth to your work. Let’s see how that can be planned during the pattern stages of wood carving.
Introduction of Dramatic Shadows
Undercutting Technique
Level Changes and Free Floating Elements
Pattern Work for this Tutorial
Click on any of the images below for a full sized printable pattern.
The pattern work begins with the basic outline design. This particular barn scene has an unusual focus point for the perspective layout. All of the perspective lines in the pattern join at a point in the center of the barn door. This allows the fence line to be very large without overpowering the barn itself. Note the flow of the lines within the design and how they lead your eye to that barn door.
Please see Enlarging and Reducing Your Pattern to resize your project design for your wood blank.
The pattern has been divided into levels for easy carving in the early stages of work. This pattern has five distinct levels: the skyline, the mountains, the barn and brush line, the split rail fence with some grass, and the foreground grass and road bed. I have carved the skyline level, mountain level, and barn level very shallow to allow extra space in the wood blank for the fence line.
Working on a 1″ basswood blank these first three levels take up 1/2″ of wood thickness. The remaining two levels, the split rail fence and the foreground grass, are carved into the other 1/2″; most of that space is dedicated to the fencing.
Please see Simplifying Your Pattern Into Basic Areas, Macaw Practice Pattern for more information on working with detailed patterns in your relief wood carving.
Once I have an idea where the levels will be in the pattern I like to use color pencil to fill in each area. This makes a quick visual reference as I work.
Please see Working With Levels in Wood Carving, North West Adventure Pattern for more information on working with levels and layers.
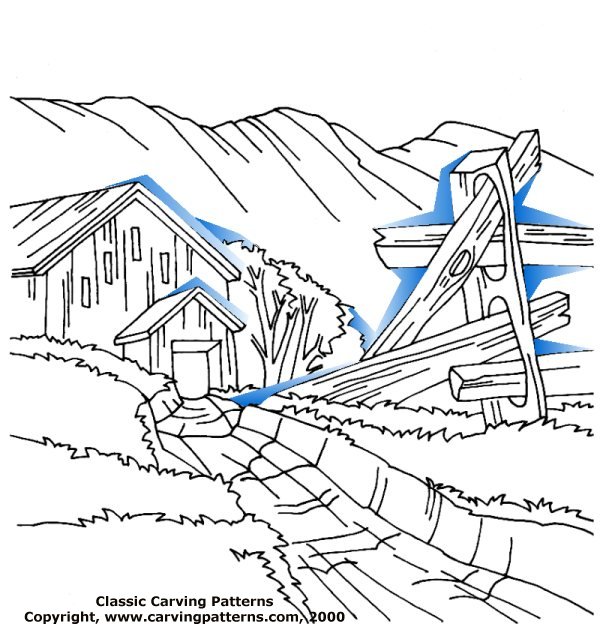
Once the levels have been cut the contouring work begins. At this stage I need to plan where those dramatic shadows that we have been discussing will fall in the carving. For this design I have marked in colored pencil where the undercut work needs to be. The areas around the fence rails, the back side of fence post, the roof line of the barn and barn addition, and the edges of the brush line all lend themselves to shadow work.
Please see Adding Drama through Shadows, Undercutting Technique for more information on using undercuts in your relief wood carving.
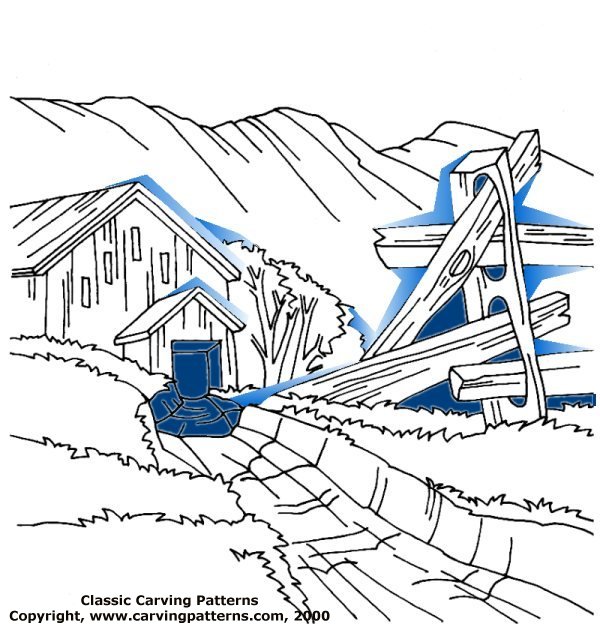
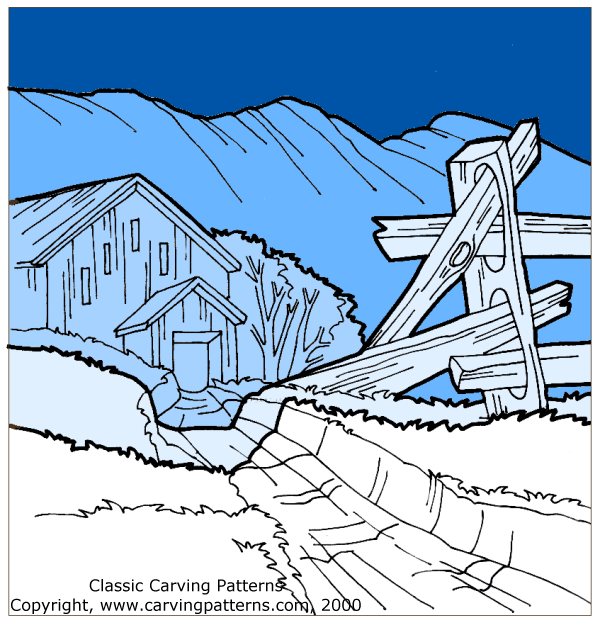
There are two wonderful areas in this pattern where you can make a dramatic drop in the levels to create dark shadows. One is surrounding the fence post. The post lies in level four but the areas of air trapped between the post and rails can be carved down deeply to the sky level. These areas are shown in dark blue. The second is the door way to the barn. This area reaches deeply into the wood and is surrounded by the grassy banks along the road bed.
This quick change in depth, going from a very high area in the carving, the surface of the fence rail and post down to a very deep area, the air space, makes these spots almost black in shadow tone.
Please see Adding Drama through Shadows, Level Changes and Free Floating Elements for more information of level changes.
When you have your Split Rail Fence carving completed please drop us an e-mail. We would love to see what you have created!
If you have enjoyed this online carving article you may wish to read:
Adding Drama Through Shadows, Introduction
Adding Drama through Shadows, Undercutting Technique
Adding Drama through Shadows, Level Changes and Free Floating Elements
Adding Drama Through Shadows – Pattern Work
Working with Contour Areas – Macaw Practice Pattern
Working with Levels in Wood Carving – Northwest Adventure Pattern
Pingback: Wood Carving Free Projects, Lora Irish Books | LSIrish.com