 Click on any image for a full-sized photo.
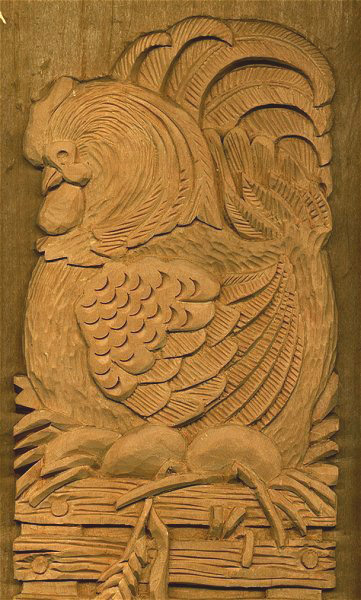
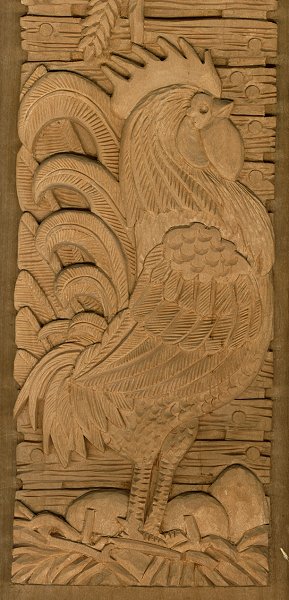
The pattern has been carved with simple rounded over levels and layers. Each area of the carving was then detailed with either the v-gouge or round gouge to create as much texture as possible.
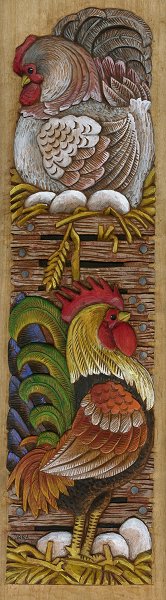
Since this is a fun design with a country style pattern I have allowed many of my gouge and chisel marks to remain in the final carving stage for accents. The work is done on 3/4″ basswood and has a 1/2″ rough cut hen house frame made of red cedar.
This free online wood carving project by Lora Irish will take you through the simple steps of adding a stained dry bushed finish to your carvings.
Working a water based acrylic paint over an oil based sealer or stain sound counterproductive. Everyone knows that water and oil don’t mix so the the acrylic can never adhere to the oil , but it does when it comes to painting wood carvings.
In this Hen and Rooster project I am using acrylic craft paints over two oil steps – one sealer step and one antiquing step. As I add the acrylics they take on an oil paint look.
If you are new to relief wood carving, or just want to brush up on your skills, please visit the techique, project, and tutorial pages below that are offered here on our blog, LSIrish.com.
 Rounding Over – Simple Relief Wood Carving
Relief Carving Techniques
Background Treatments
Basic Cuts and Carving Tips
Stop Cut in Relief
Low Relief Carving
High Relief Carving
Smoothing the Background
Laminating
Using a Depth Gauge
Smoothing Backgrounds
Working with the Grain
Adding Drama through Shadows
Relief Carving
Levels in Relief Wood Carving
Dramatic Shadows
Undercutting Technique
Level Changes, Elements
Dramatic Shadows Pattern
 Oil Staining the Background

Once the carving is completed and any detailed sanding or riffle work is complete the piece is ready for coloring.
1. Mix 2 parts of Danish Oil Finish with 1 part of Linseed Oil, stir well. Apply one coat over the entire face of the carving. Allow to set for about 15 minutes then wipe lightly with a clean cloth to remove excess oil. The Linseed Oil thickens the Danish Oil slightly and keeps the oil mix from setting up to quickly.
2. Repeat this oiling for a second coating. I will usually flip the piece around for the second coat to insure that any areas that might have been missed the first time are now oiled. After 15 minutes wipe off any excess oil.
3. Spot stain the carving with an oil stain, I used Minwax Woodfinish Stain, Early American. Apply one coat just to the designs area, no stain is applied to the surrounding background areas. Paint the stain to small areas at a time and wipe immediately with a clean cloth.
4. Allow the carving to dry overnight.
Dry Brushing Acrylics
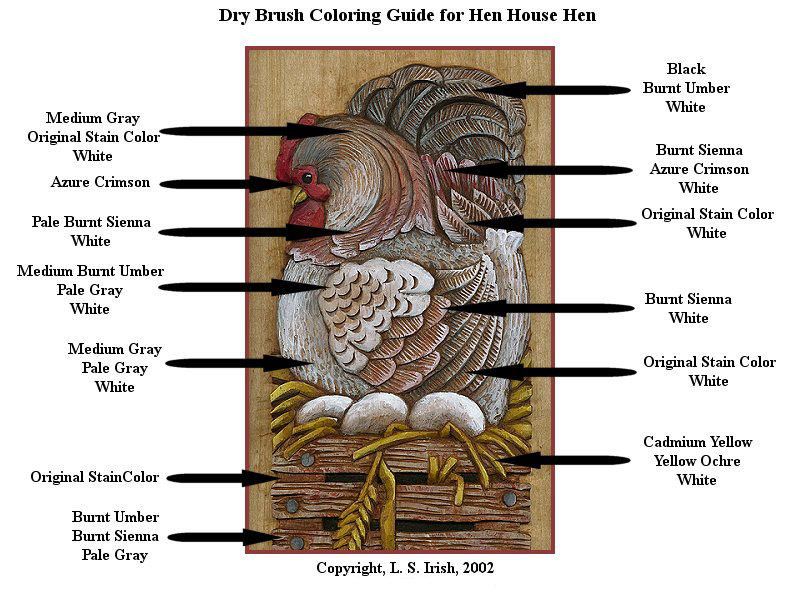
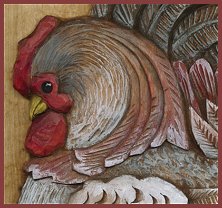
 Dry brushing is applying coloring in very thin layers only to the high areas of your design. Colors are applied in gradually lighter shades to create variation in the areas toning. Note on the hen’s head the medium brown tones of the oil stain with accents of medium gray, pale gray, and white to give her the final coloration.
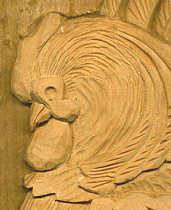
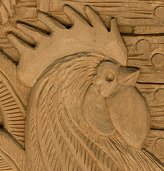
Note in the two photos, right, how the dry brush technique lays color on the high ridges of your carving details.
1. On a clean tile or dinner plate place a small amount of each acrylic color that you will be using. You will also need clean water and soft flat shader brushes.
 2. Wet a soft flat shader with water, then blot off the excess water on a paper towel. The brush should barely be damp. Now pick up a small amount of the darkest shade of color for the area that you are working. Work the color into the brush so that your bristle show. You want just a very small amount of paint on the brush. Drag the brush across the grain of the carving details. The high areas will receive color but the deep incised areas will not. It takes just a little practice to learn how much color to load into your brush.
3. Do a base dry brushing of the darkest colors first, painting each area of the carving. Now repeat the dry brushing using a medium shade of color for each area. Don’t cover up all of your first dark layer.
4. Repeat the dry brushing again with your palest coloring layer applying less coloring than you did for the medium shade. You can use as many layers of coloration as you want, generally it is a three layer process. A hair dryer comes in very handy for small projects to dry each layer quickly before applying the next.
 5. Paint the eyes and areas between the crate slates with lamp black. Sign the piece with your name and the date on one of the bottom crate slates in black.
5. Allow to dry well, then apply one coat of Danish Oil Finish to the entire piece.
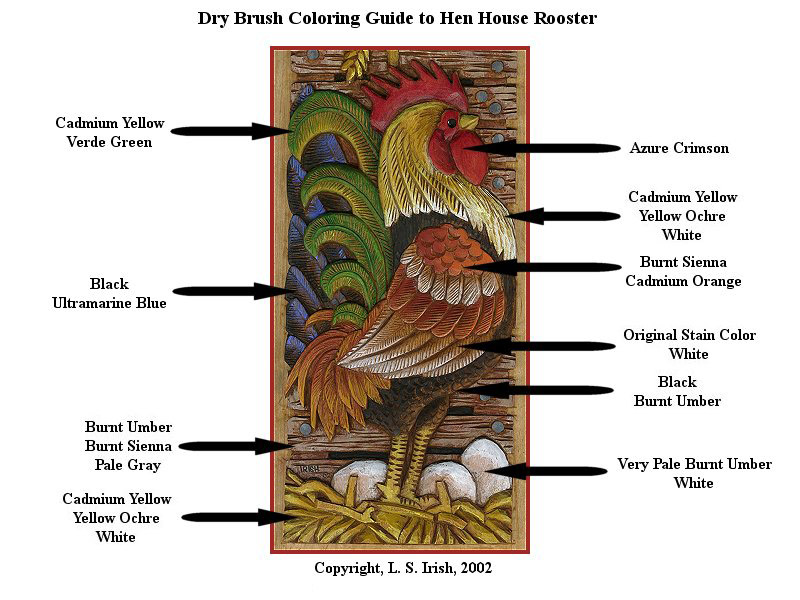
Coloring Guides
Note that each area lists the colors used from top to bottom by darkest to lightest.