For our final session in this in-depth, step by step seminar on Chip Carving, we will look at a classic carving layout for a needle-arts styled Sampler layout. This layout can easily be adapted to use any border, line, or motif chip carving pattern.
Chip Carving Seminar by Lora Irish
 Chip Carving Seminar
Chip Carving Supplies
Chip Carving Graphed Patterns
Chip Carving Hand Positions and Grips
Chip Carving – Triangles and Square Chips
Chip Carving – Straight-Wall Chips
Chip Caved Game and Chess Board
Chip Carving Sampler Pattern Layout
Chip Carving Common Mistakes
Chip Carved Shortbread Cookies
Creating a Progression Practice Board
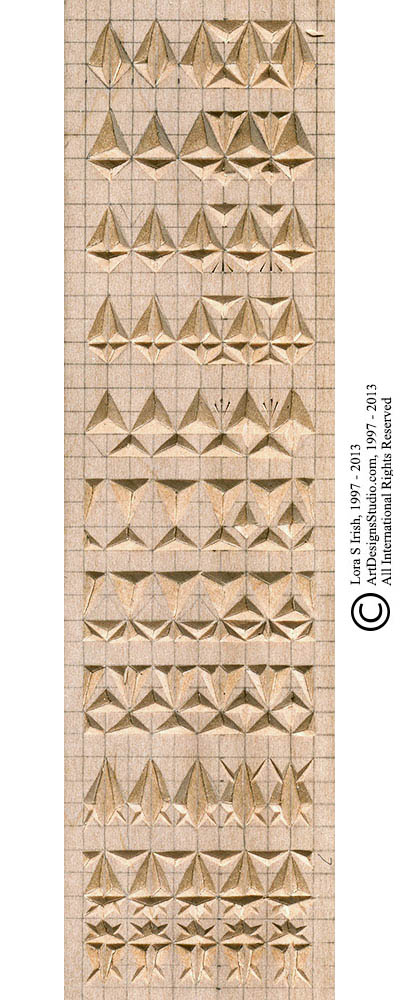
There are several ways to learn and practice your chip carving. The first is through the use of practice boards. We have discussed this idea several times during this seminar, but it is worthy of one more look. In the sample board to the right I have worked a series of progressions using the simple 3×2 grid diamond motif that has been shown throughout these pages.
The grid pattern was penciled directly to the basswood practice board using 1/4″ squares. Each 3×2 grid motif was marked using a darker pencil line. As I worked each row of the practice board I treated that basic 3×2 diamond differently in how many times I divided the diamond into triangles, the style of cut, in the positive and negative space, and in the addition of accents.
As you look at the photo sample you will see that the first two diamonds in each row show just the cuts used to create the diamond. The last two diamonds show the accent chips and cuts that can be used. This creates 9 variations of the 3×2 diamond and 9 possible borders.
Our Chip Carving Pattern Package contains four patterns which show 36 variations of just the 3×2 diamond motif that can be used to change, alter, and vary any of the larger pattern layouts using both triangle, and straight-wall cuts, as well as negative space.
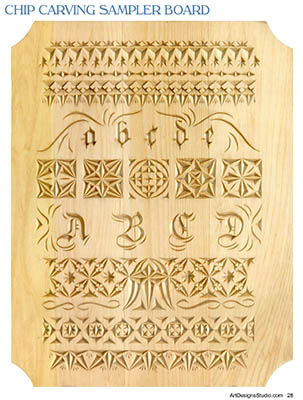
Classic Needle-Arts Sampler Layout
The sample shown right is a finished carving from our Chip Carving Pattern package, available at Art Designs Studio. It is also available in our Chip Carving E-Project, a 37-page PDF file e-book and 110 chip carving chip variations and patterns.
Beginning in the 15th century needlework samplers became a way in which young women could show their skills with a needle and thread. Small patterns, motifs, and borders decorated the linen cloth as a record for future use. In essence, a needlework or needle-arts sample is similar to the practice boards we create for our wood burning, wood carving, and in this lesson our chip carving.
The layout pattern is very simple and perfect to practice and experiment with small chip carving patterns. The top rows will be small border patterns. The central area of the sample is used for larger, individual designs or rows of similar sized motifs. The bottom rows return to the border patterns. This places the largest visual units at the center of the layout and the small designs at the top and bottom areas finished work.

 Sampler Layout Chip Carving Pattern
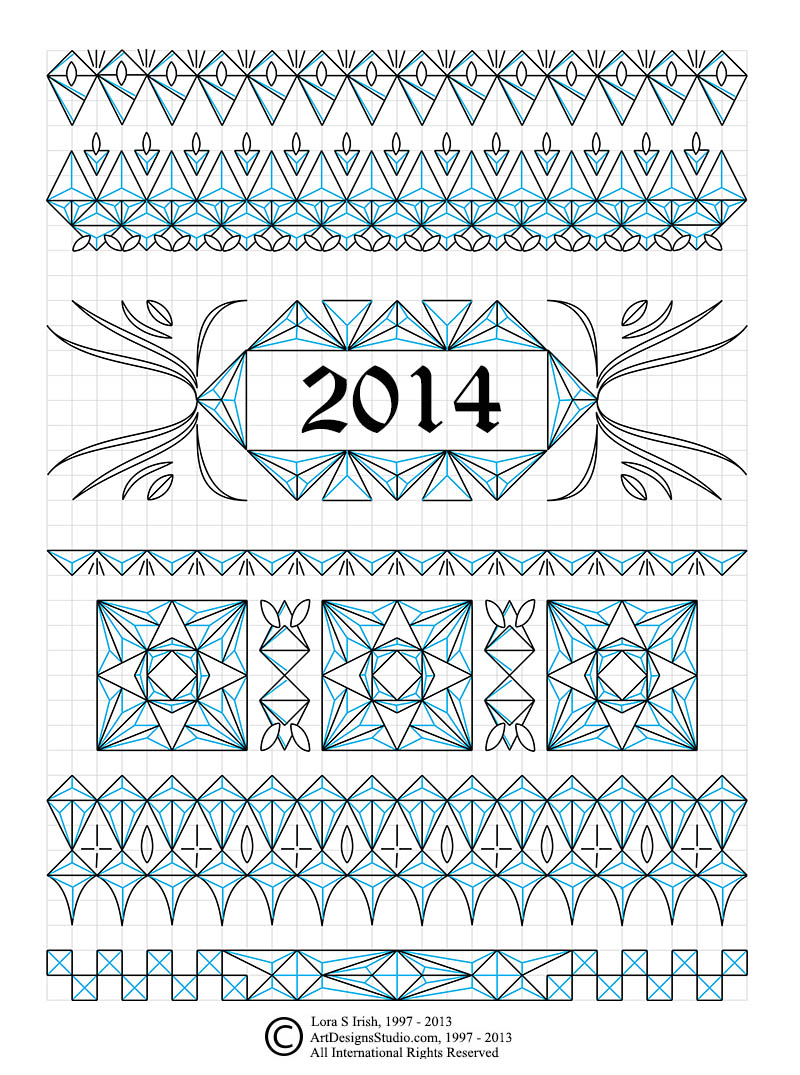
The Sampler Chip Carving Pattern, shown right, uses the needle-arts layout. Please click on the image for a full-sized, printable pattern.
The top row uses double straight-walled chips with stab knife accents.
The second row uses the classic triangle chip cut with small oval free-form chips worked from the 3×2 motifs into the un-carved background space.
The third row shows the first large motif area and uses both free-from long line work as well as large triangle chip cuts. The central rectangle area can be used for a name, date, special event, or for a small free-from pattern.
A thin, small border line of triangle chips with stab knife accents fills row four.
A 6×6 square motif is used in row five and separated with a small mirror-image 3×2 straight-wall chip cut.
Row six uses curve-edged chips along the bottom edge of the border pattern. It also makes use of negative space, captured between the 3×2 motifs as well as both cut oval and stab knife accents
The last row, number seven, combines a simple alternating square chips border with a triangle chips motif. It shows on the two sides of the triangle motif how easy it is to adjust the triangle chip sizes to fit into a specific space.
I hope that you have enjoyed this free, online Chip Carving Seminar. Please feel free to drop me an email note if you have any questions.
Pingback: Wood Carving Free Projects, Lora Irish Books | LSIrish.com
Pingback: Seminars - Chip Carving, Pyrography, Spoon Carving. | LSIrish.com