Roughing out the background
Throughout the work I am using a small Chip Knife as my bench knife and a set of Long Handled Japanese Carving Tools. I also have on the work bench my sharpening stones, strop, and some fine grit sandpaper.
With a wide round chisel begin dropping the background area. Taper the work from the sides of the blank into the depths along the main design. Since I am working on a 3/4″ thick board my deepest area is about 3/8″ from the original surface.
On any carving I try to keep the deepest areas at one half the thickness of the board. This helps to reduce cupping and warping after the carving is completed.
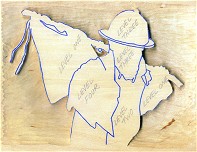
Level one
Working from the farthest point in the carving to the highest point. Begin by rouging in the main shape and depth of Level One. Note in the image to the left that an area within the flag has been left proud as has the far side of the Fireman’s hand. Use a Stop Cut along the outline edge then taper the area of Level One where it comes into contact with the body deeply.
Proud: to leave an area higher than it’s surrounding area or at the original level of the wood.
I am using both the wide round gouge and the large bull nose chisel for this work.

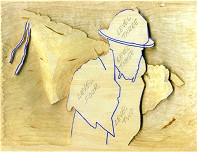
 Level two
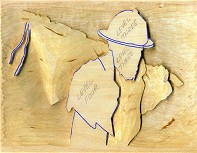
The shirt and belly area become our second level. It lies in front of the flag and hand but behind the shoulder and face. Round this area over so that he literally bellies out along the center area of the shirt.
Pingback: Wood Carving Techniques | LSIrish.com