Fold-over Flapped Pocket
The flap of a fold-over flapped pocket can be cut on the straight, diagonal, or in a centered v-shape. This type of flap is excellent for leather pieces that have uncut, ragged edges.
With the raw leather sides together, place the long edge of the flap under the top edge of the pocket. Overlap the two pieces of leather by 3/8”.
Mark and awl your stitching holes 1/4” from the top edge of the pocket, working through both layers of leather at the same time.
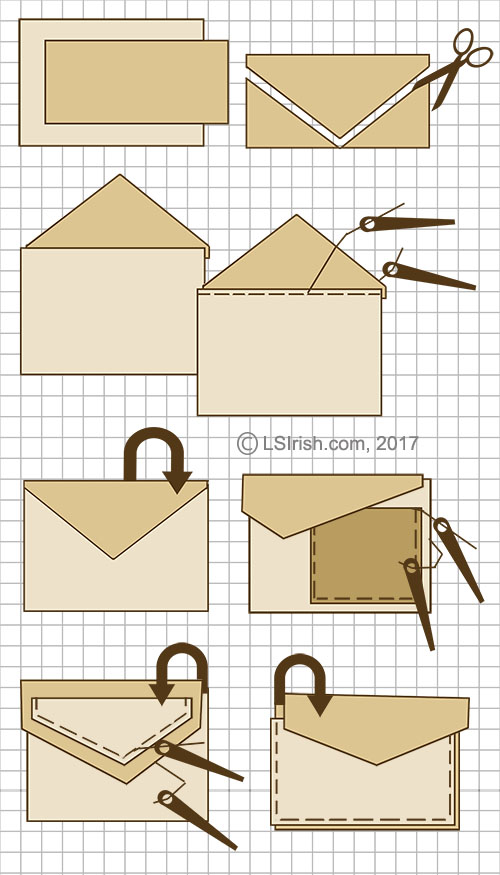
Use the double needle stitching pattern to secure the two pieces of leather together. You can now fold the flap to the front of the pocket, hiding your stitch line.
Adding Variety
You can add small pockets to the front of larger pockets and to the outside of either simple, lay-over flaps or fold-over flaps. In the samples to the left you will see an idea for a small, half-sized added pocket, a small flap pocket, and a half-tall front pocket.
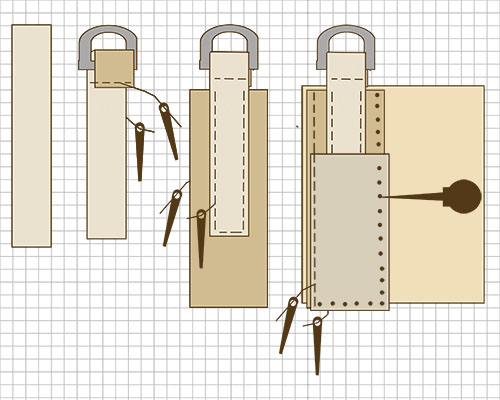
Shoulder Straps & D-Rings
The d-ring that holds the shoulder straps is added to the side pieces of the main purse.
Begin by folding one edge of the shoulder strap holder leather over to create a 1” flap on the raw leather side.
Mark a stitching line 1/4” from the edge of the flap, and open the holes with an awl.
Slide your d-ring into the fold of the flapped area. Stitch the flap to the front of the leather strap holder using the double needle stitching pattern.
This secures the d-ring to the strap, while allowing the ring to move and adjust inside of the flap area.
Center the strap holder over one purse side, sliding the lower edge of the fold down to touch the top edge of the side.
Mark a stitching line 1/4” from the edge of the strap holder, and open the holes with an awl. Stitch the strap holder to the purse side using the double needle stitching pattern.
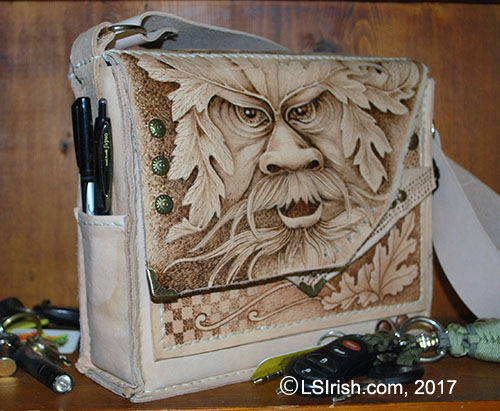
Key Pocket
I added a small key pocket to my purse sides when I stitched the side pieces to the front and back of the purse. In this section of work, I was stitching through three layers of leather with each stitch.
That small pocket gives me a place to stash my pencil or ink pen, while hiding the bottom edge of the strap holder.
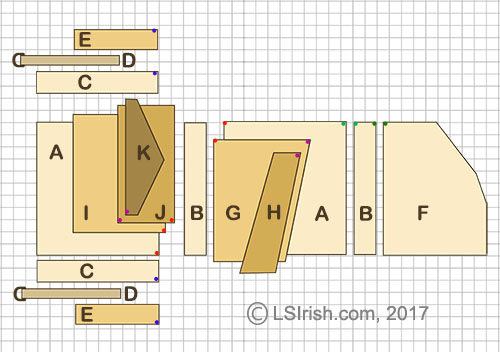
General Construction Layout
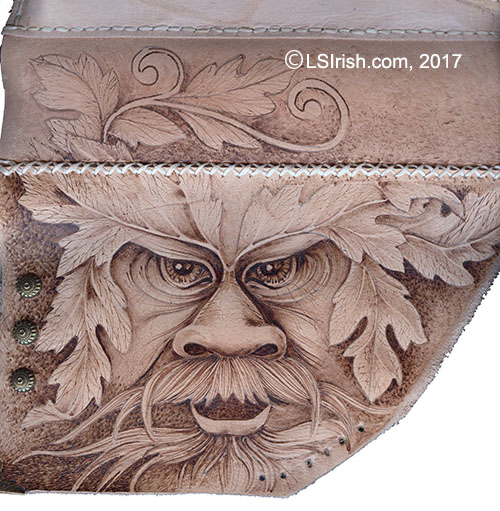
Pre-Construction Pyrography Burning
I find that it is much easier to do my pyrography before the entire purse is constructed.
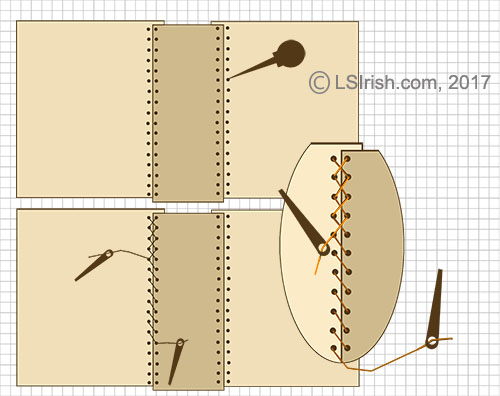
For this project, stitch the purse back, roll over, and front flap together. Use the basic double-needle stitch for the back and roll over seam, and a cross-stitch pattern for the front and roll over seam.
This allows you to work through all of the pyrography steps for the Greenman face while this section of the purse is flat and easy to manipulate.