Step 1: The basic skin color coating
For a Pale skin tone, as in the sample, mix 2 parts Cadmium Yellow, 1 part Cadmium Red Medium, and 1 part Raw Sienna. (more yellow)

For Medium skin tones make the base coat 2 parts Cadmium Yellow, 2 parts Cadmium Red, and 1 part Raw Sienna. (equal yellow and red)
For Dark skin tones make the base coat 1 part Cadmium Yellow, 2 parts Cadmium Red, and 1 part Raw Sienna. (more red)
Thin the color mix with water until you can barely see the coloring. Apply one coating to the entire skin area.

Step 2: Define the shadow side of the face
Note which side of your face is to be highlighted and which will be shadowed. In this sample the side to your right is the shadow side, on your left is the highlight side. Apply a second coat of the basic skin color to the shadow areas of the face.
The lower lip is done is this coloring. Lips are neither pink nor red unless your subject is wearing lipstick!
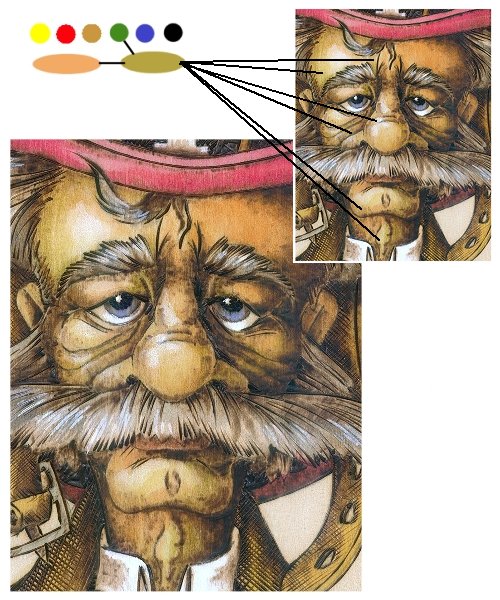
Step 3: Create shadow areas
To your basic skin color add 1 part of Verdi Green, this is a medium green hue. Your mixed color should now be a greenish-brown tone. Use this to establish specific shadows in the face as under the wrinkle lines, along the edge of the nose, in the corners of the eye areas, and along the lower mouth where the chin touches.
Although it does not show in this sample project the upper lip is done in this coloring since it is shadowed beneath the nose.
Pingback: Painting Wood Carvings and Wood Burning | LSIrish.com