Twistie Stick Snake Cane Carving, Day 3
 Day 1 Twistie Stick Snake Cane Carving
Day 2 Twistie Stick Snake Cane Carving
Day 3 Twistie Stick Snake Cane Carving
Day 4 Twistie Stick Snake Cane Carving
Day 5 Twistie Stick Snake Cane Carving
Walking Stick Joinery
Walking Stick Wood Species – Harvesting Your Sticks
Walking Stick – Adding Extras
Walking Stick – How to Clamp Your Handle
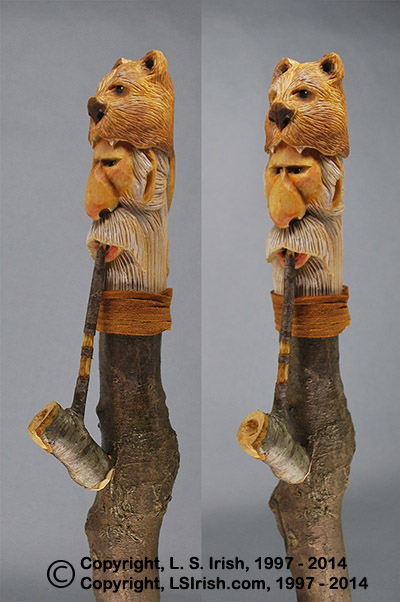
Free Mountain Man Cane Carving Pattern
Good Morning!
Today we will be creating the path and twist in the sassafras branch.
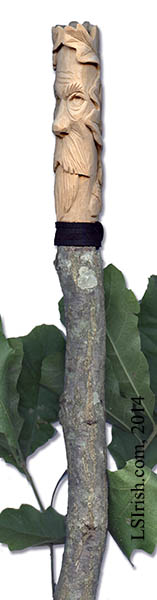
And, Lora Irish has a extra free pattern for you this morning – Free Mountain Man Cane Carving Pattern
 A twisted sassafras stick is caused by honeysuckle vine curling around the trunk when the tree is still a year or two-year sapling. As the tree grows, so does the vine, reaching higher into the tree and thickening the width of the vine. Over the years that vine begins to straggle the sassafras trunk, forcing the tree to grow around the imbedded vine.
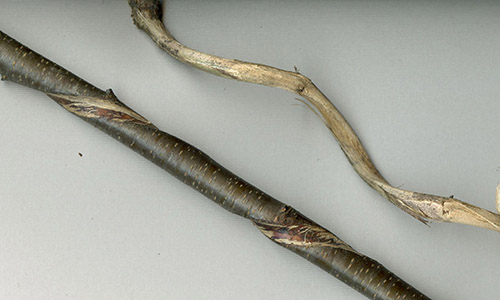
You will see in the photo that this process affects both plants. The sample is a wild cherry sapling that is already developing a deep, spiral scar. The honeysuckle develops a flattened side where it directly contacts the sapling.
Sassafras, wold cherry, dogwoods, and even young black walnuts are common twistie sticks as they share the same environment as honeysuckle – abandoned road sides and old fence rows.
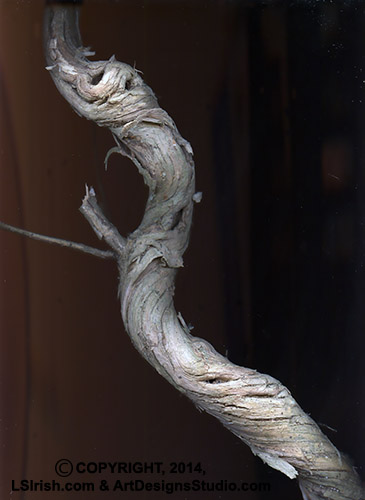 The second photo shared here is a very old piece of wild grape vine – approximately 1 1/2″ thick. The vine has been dead for several years because of tree trimming by the power company, so it was ready to harvest. You can see the power and strength of the twist in this grapevine as it literally brought down the farm fence on which it grew.
A side note here, and just my personal preferences. I don’t cut twistie sticks in the wild, All of the common twistie stick trees are also the same trees that are so important to our local wildlife. Dogwood and cherry are major food sources for birds, rabbits, and deer. Black walnuts, of course, help feed our grey squirrel population throughout the year. And most importantly, sassafras is the only food source for the swallowtail butterfly during its egg, larva, and caterpillar stages of life.
Because I especially want those butterflies in my perennial flower gardens I am extremely protective of any sassafras that graces our fence lines and forest edge.
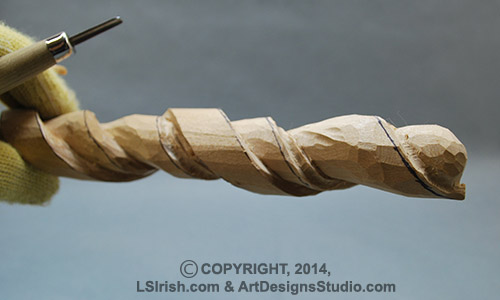
Step 7: Using a marking pen or pencil draw a line in the center of the area between the snake’s body twists. This will be the path of the top edge of the twisted stick curls. On my cane I had one area between the snake body curls that allows for two twists. Draw a second guideline 1/4″ below the first. This 1/4″ area, between the two guidelines, will become the honeysuckle vine area on the twist.
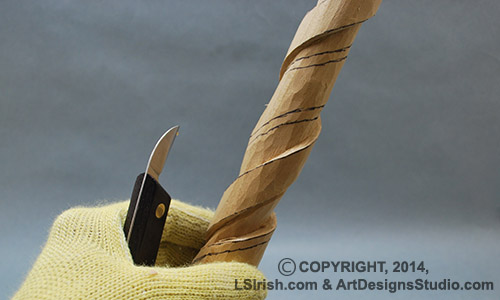
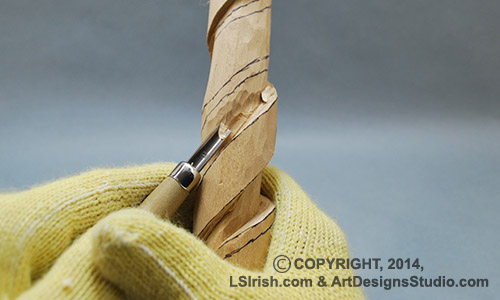
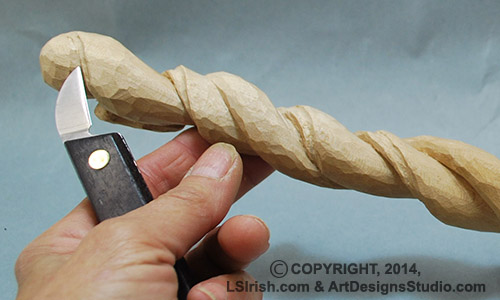
Work a stop cut, using your bench knife, along the top twistie guideline, in the background wood area. In the photo, my cane is held upside down.

The second stroke of the stop cut lowers the background area at the top edge of the twist.
Step 8: Everything between the snake’s body twists is sassafras wood. So the stop cuts in step 7 tapers that wood area into a cone shape that points down and into the top edge of the twist below it.
To emphasize the tape of the twist you can also use your large or small round gouge for the second stroke of the stop cut, instead of the bench knife.
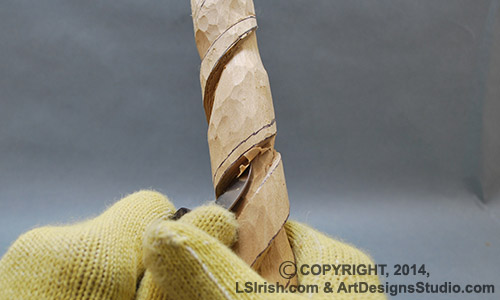
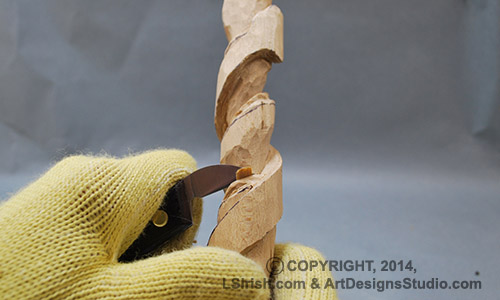
Step 9: Using the bench knife, round over the top edge of the twistie curls – rolling the edge over to reach the second guideline mark.
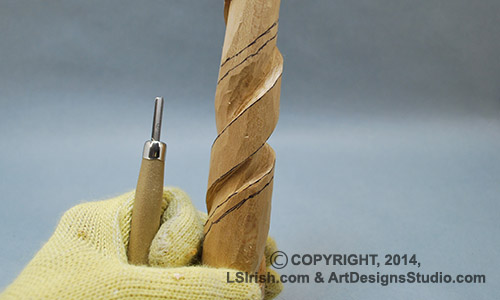
The honeysuckle sits down and into the sassafras wood, so create a half-circle trough using your small round gouge along the rounded-over top edge of the twist.

Cut this trough several times, slowly lowering it into the wood. In the photo you can see the depth of the round gouge cuts in the second, right hand twist.
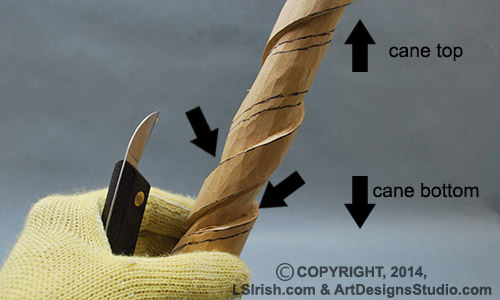
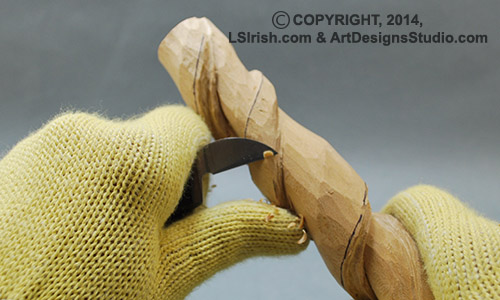
Step 10: With your bench knife return to tapering the bottom section of each twist. Smooth each area of twist so that the taper moves evenly from thick at the top edge of the twist to thin at the bottom.
As I am working my tapering I have begun undercutting the bottom edge of each twist. This is done by angling the first stroke of the stop cut behind the inside edge of the top of the next twist. When you make the second stroke, it will pop out a small v-shaped chip, leaving a narrow cut behind the twist’s inside edge.
Canada Goose, Part 2, page 4 has more in-depth instructions of the undercut …. and, better photos! – undercut.jpg

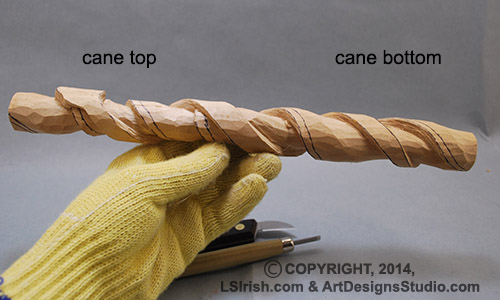
Step 11: Begin shaping the snake’s body, head, and tail, using your bench knife to roll-over the sides.
When the body has been shaped, the rough-out stage of this cane carving is complete. At this point you have established the curve and shape of the snake and the curve, tapering, and shape of the sassafras twisties.
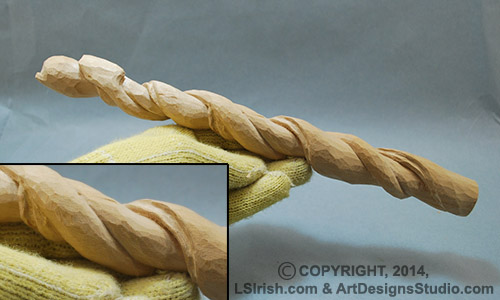
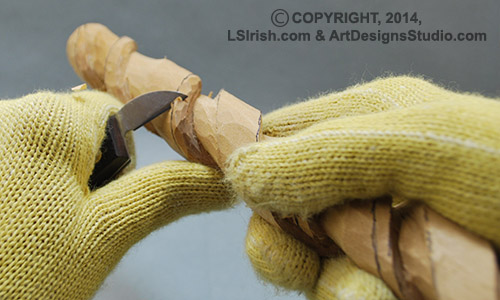
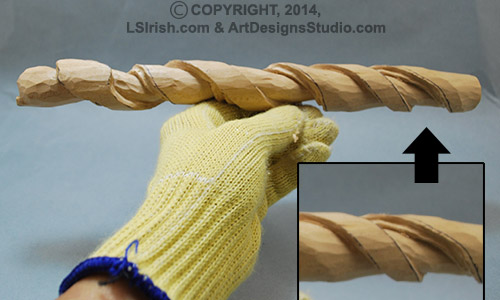
Step 12: After the rough-out stage is done I like to do a general smoothing to any project, whether relief or 3-D. This is done by re-cutting all of the areas you have worked with your bench knife. Drop the angle of the knife blade low to the wood – the blunt or back side of the blade is just 5 or 6 sheets of paper high off the wood. Lightly glide the knife across the wood, taking very small, shallow strokes.
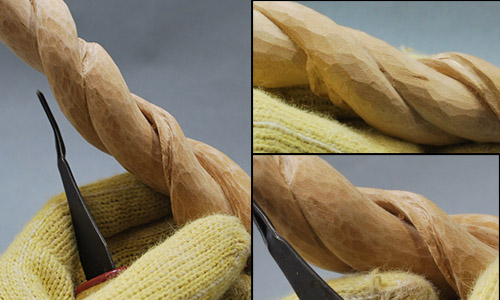
The top right image shows the cane’s surface before the shaving step and the bottom right shows the shaving step completed. You can see that very fine, small cuts that smooth out the shape of the cane.
OK … Tomorrow we will work on texturing the wood bark, working the honeysuckle indent, and carving the little frog that sits on top of this stick. In the mean time if you have any questions, please post them now!
Thank you for reading today and for spending time with me at my carving table !!!!