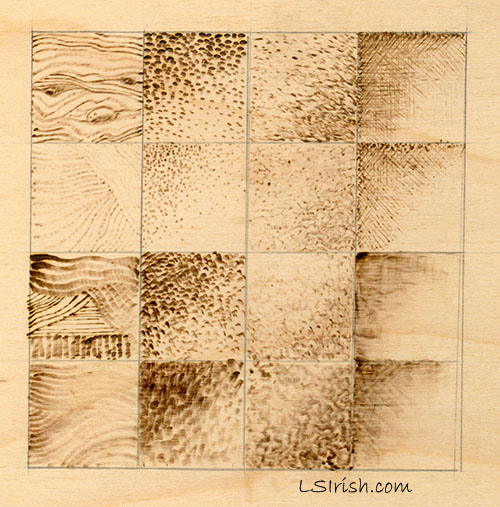
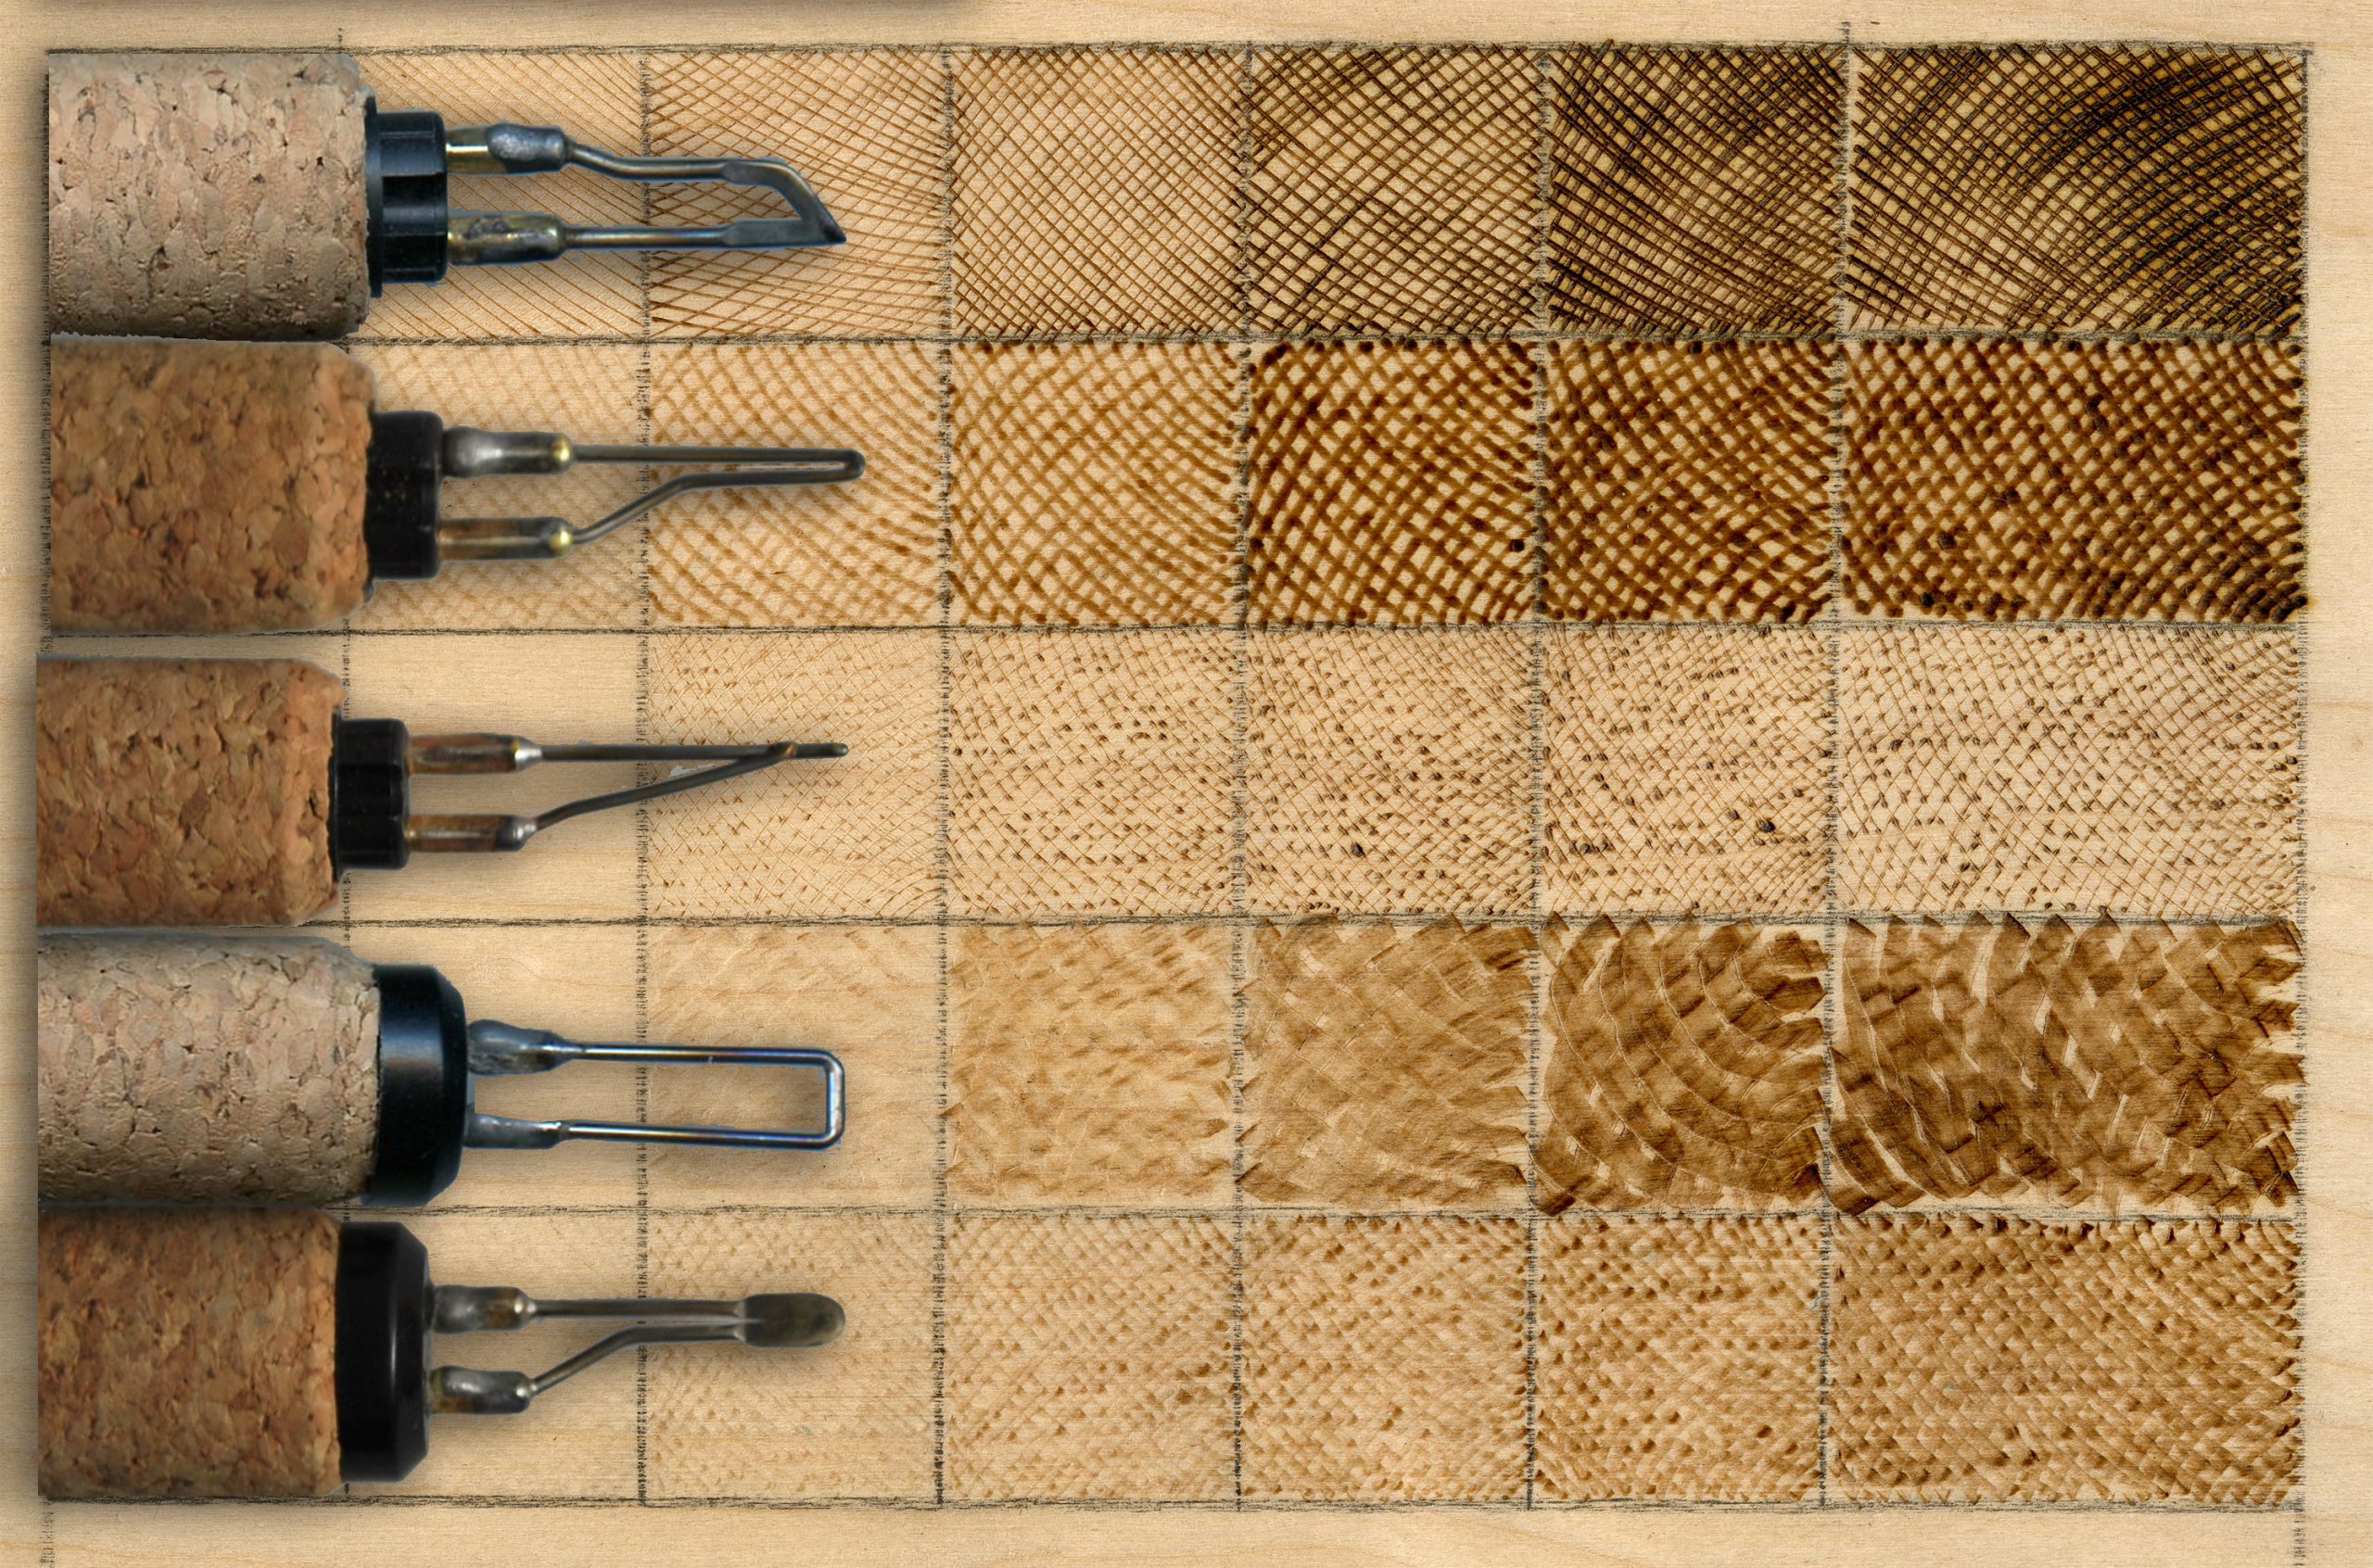
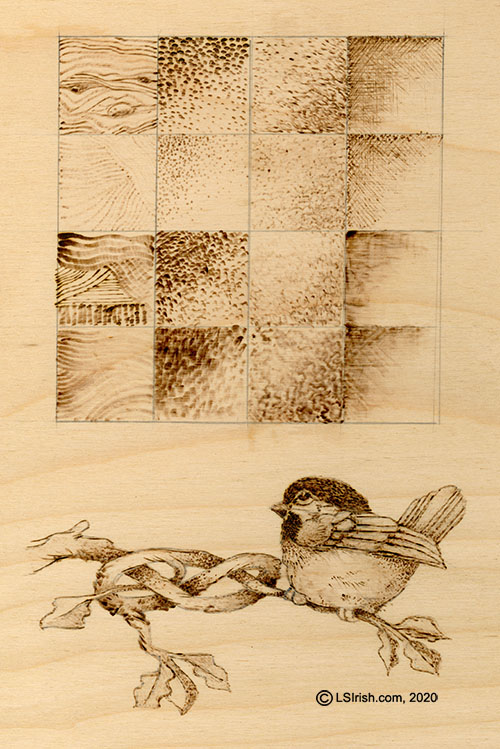
This is a practice board burning using the same burn stroke patterns worked through each pen tip of my Creative Woodburner Tool.
The stroke styles are from left to right: fine lines, dot patterns, scrubbie patterns, and cross-hatching.
The tool tips used from top row to bottom row: loop tip, ball tip, spear shader, and spoon shader. My practice board is worked on 12” x 12” x 1/4” birch plywood and divided into 1” squares for each of the burned samples. I can refer to this board at any time during a burning session to determine which tool tip and which burning stroke will work best on my project.
Since my practice board is large in physical size I can experiment and explore new textures, burning strokes, and ways to treat my detailing before I actually do the work on the main project. I can practice and I can make mistakes as I learn without worry of damaging my primary work.
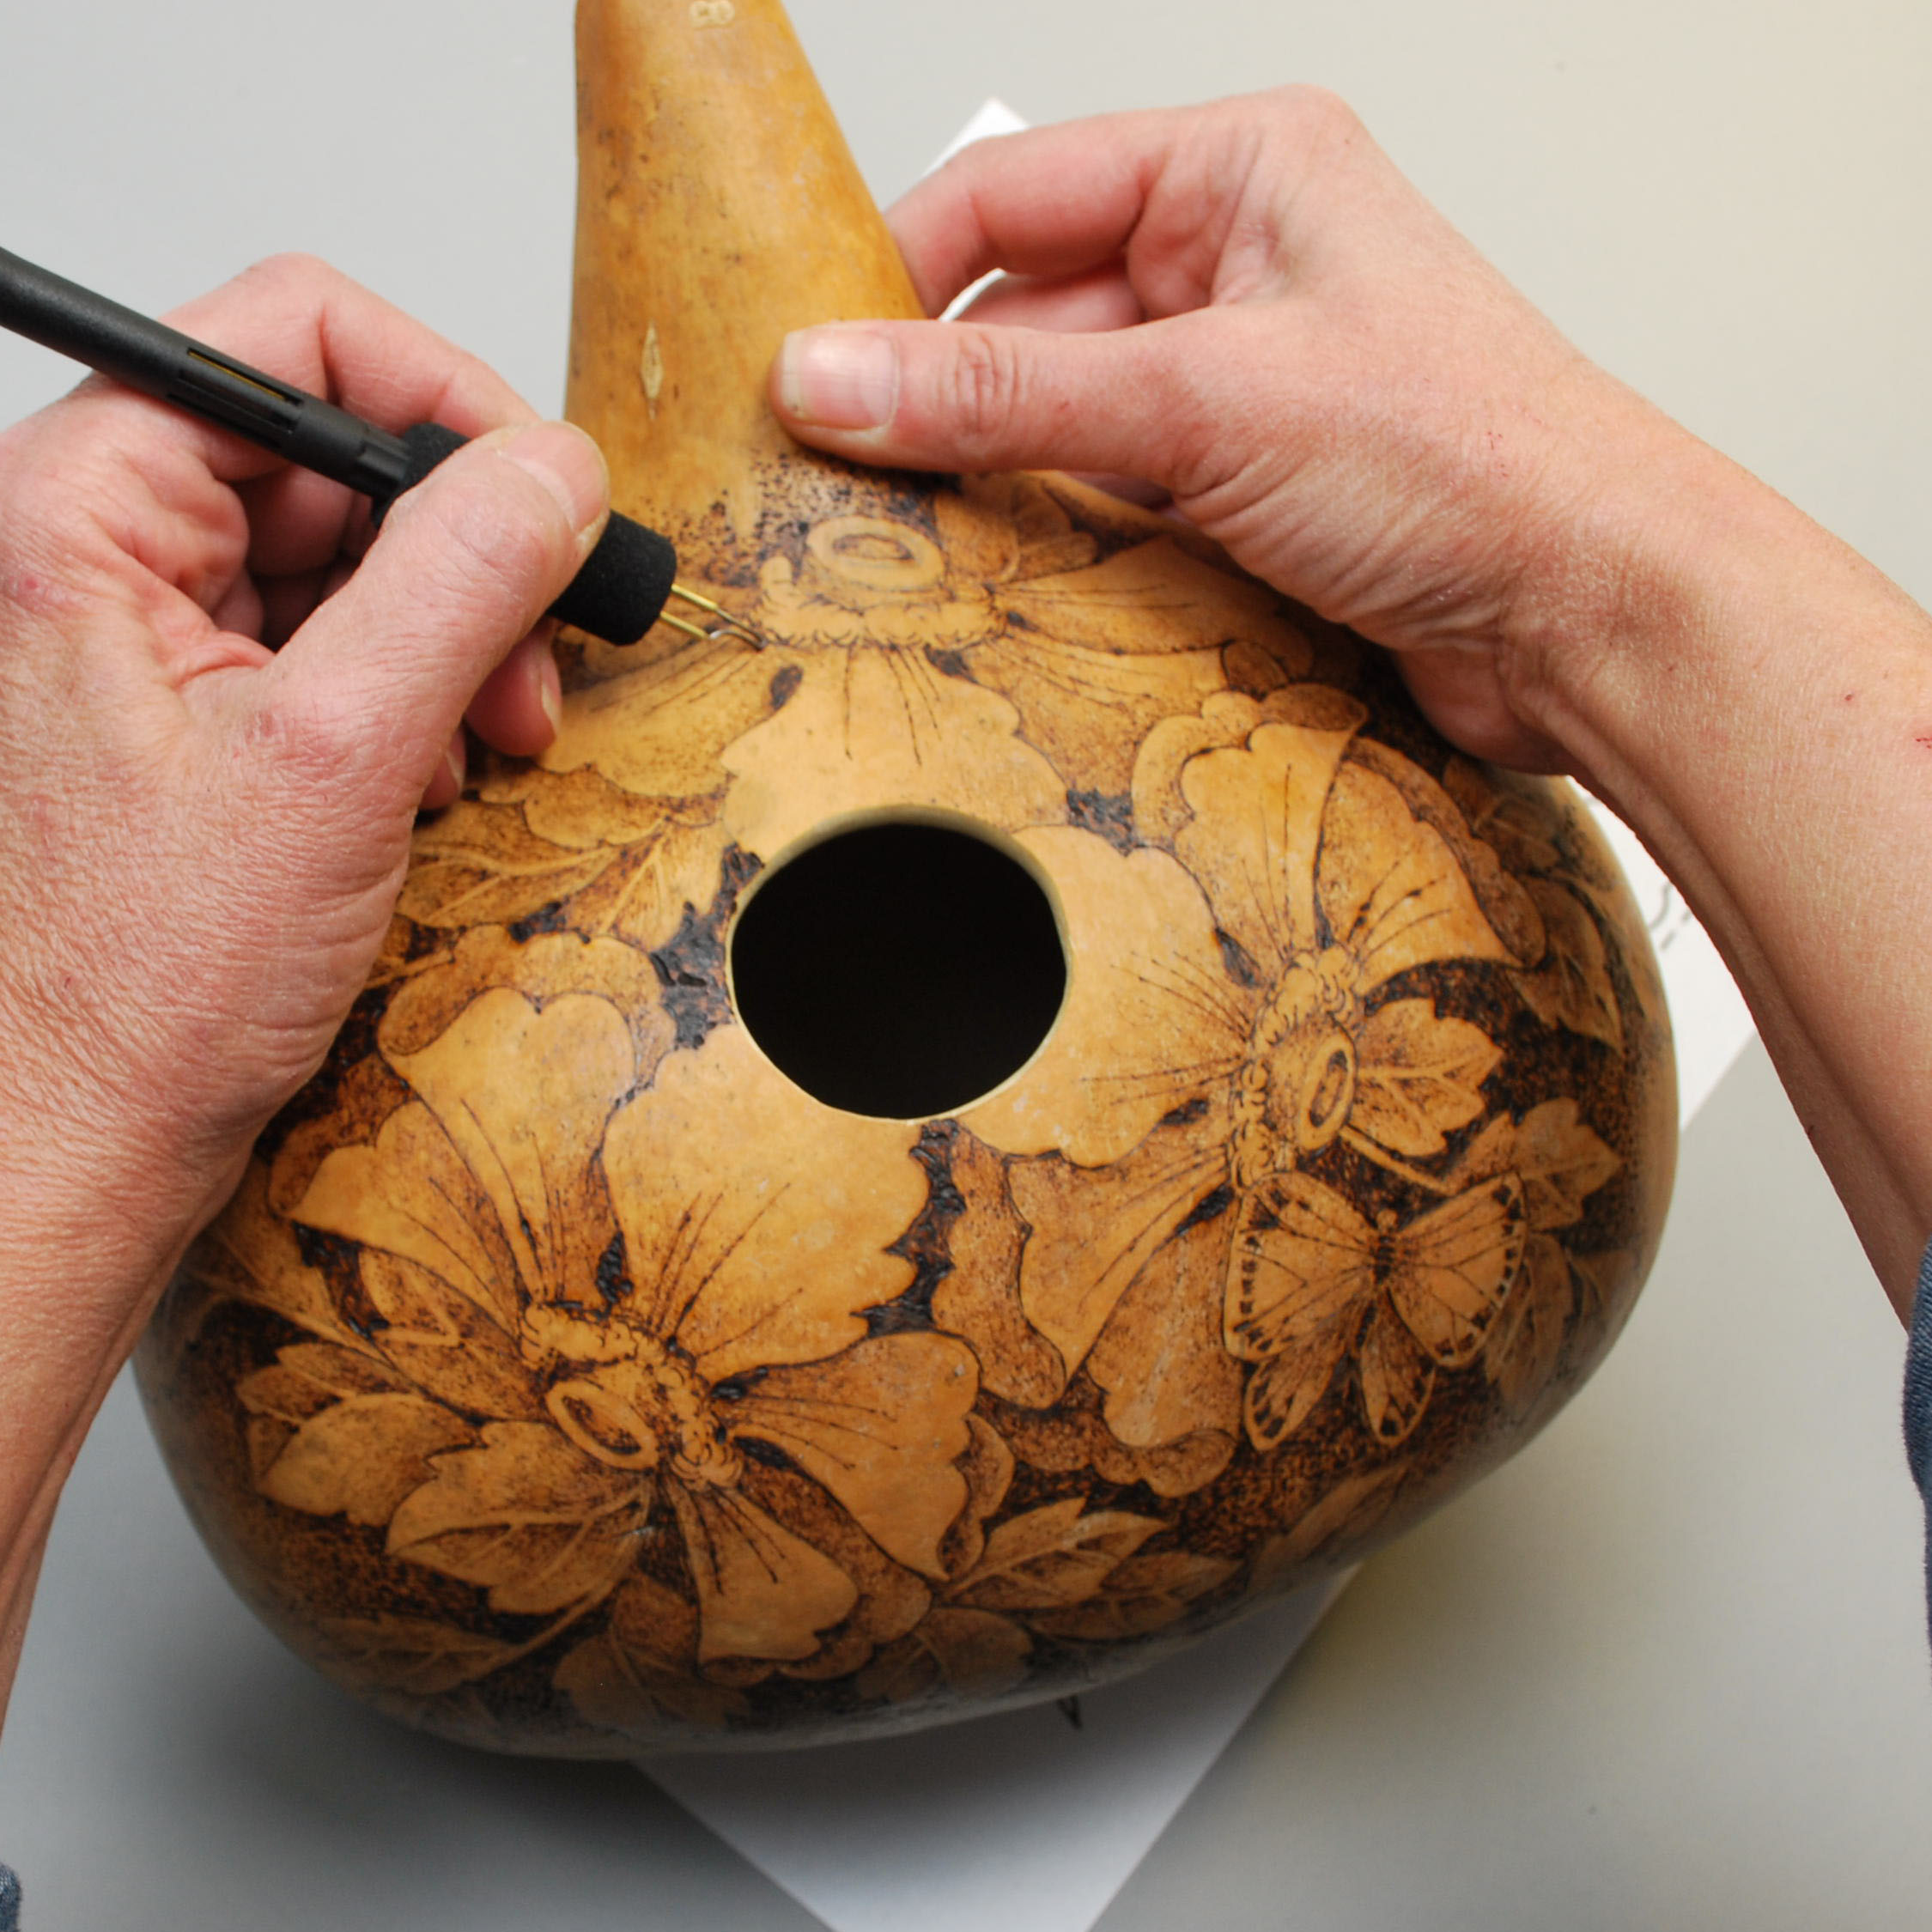
Your grip on your burning pen is similar to your hand grip on any writing tool as pen or pencil. The pen is held below the burning tip between the thumb and index finger with a loose, comfortable pressure. The back of the pen handle rests on your third finger which is slightly bent.
The four-point grip, with your thumb and first two fingers holding the pen and your smallest finger balanced on the board, is used on your pen whether you are using the side of your pen tip of the point. Only the angle of your hand to the wood changes to lift the pen tip to its finest point.
Lift your hand from the wood, don’t rest the side of your palm directly on the wood as this limits your ability to move smoothly over the pattern. Extend you small fingertip to lightly touch the wood, using it as a depth guide and steadying point against your board.
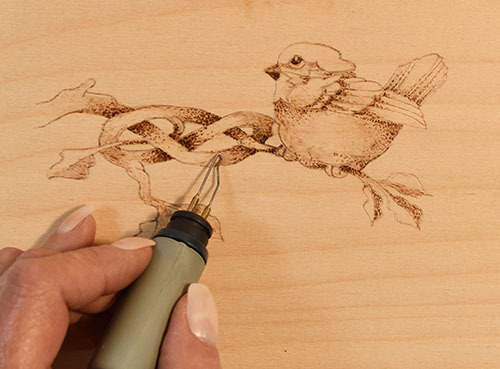
Keep the side of your arm and elbow off the table. This lets your entire arm move during long strokes. This is a four-point grip – thumb and index finger to hold, third finger to rest the pen, and small finger to anchor the hand on the wood.
One-temperature and rheostat burning pens have a much thicker handle because that handle houses the burning unit. Although your fingers are wider apart then when using a variable-temperature pen, you use the same four-point grip.
Do not over grip or heavy-hand your pen. A light finger pressure is all that is needed to keep the pen in place and moving freely. If your hand becomes tired or sore as you work you are probably over-gripping the pen.
Tips comes in many shapes and bends from the tight bend used in the standard writing tips to half circles that can create fish scales and even square tubes that make a textured pattern on your board.
BASIC PEN
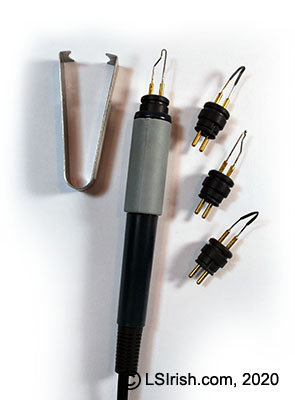
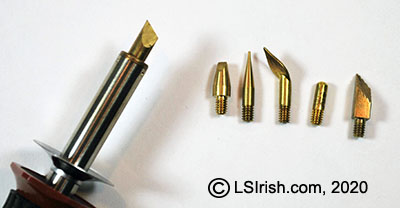
I use four basic tools throughout this book – the loop-tip, ball-tip, spear shader, and spoon shader. These are the four snap-in interchangeable tips that comes with the Walnut Hollow Creative Tool – shown below.
Each pen tip creates its own width and shape of line burn, and therefore is more suitable for specific textures. Thin edged spear or curved shader tip cut thin, deep lines. Loop and ball tip pens burn thick, shallow lines. A basic beginner’s set of tips may include a tightly bent loop writing tip , a ball point writing tip, a flat spoon-shaped shader, a curved-edge spear shader. These tips will burn any pattern or project in this e-book. Specialty tips can be added as you discover your style of burning.
INTERCHANGEABLE V. FIXED TIP PENS
Tip shapes and names vary, depending on the manufacturer of your burning unit and are often offered in several sizes. Please check the website for your unit for more specific tips that are available for your use. Variable temperature pens come in two varieties – fixed tip pens and interchangeable tip pens. A fixed tip pen has the burning wire permanently set in the pen. Some manufacturers create a interchangeable pen that allows different styles of tip to be inserted into the end of the pen.
All of my Optima 1 pens are fixed tip pens.
Interchangeable pens often allow you to purchase a wider variety of burning tips, a great advantage to the new pyrographer.
Each manufacturer creates their pens to specifically fit the electric voltage, wire, and connections used in their wood burning units. Although some manufacturers do sell conversion kits that allow you to use pens manufacturer by other companies on their units I do not recommend this practice.
Using another companies pens can void your warranty and can damage both your pens and your burning unit. When you purchase your variable temperature unit consider not only the power features of the unit but also the pen construction, how the pens connect to the unit, the guard grip construction, and the variety of tip profiles available for your unit.
The photo, above, shows five of my Colwood Detailer tips. The top three are permanent fixed tip pens while the bottom two are interchangeable tips.
We will take a closer look at the burn strokes each pen tip creates in just a few pages.
A wood burning is created with five elements – the wood burning unit, the pen tips, the media on which you are working, the pattern or design you will burn, and the art style you will use to create the design. Lets look at the pyrography systems first. There are three styles of wood burning units: one-temperature tools, rheostat-controlled tools, and variable-temperature tools. Which you chose depends on both your interest in this craft, your pyrography budget, and the media on which you will be working.
The one temperature tool has the heating elements inside of the handle of the tool and comes with a variety of brass interchangeable tips that are placed in a threaded receptacle at the end of the tool. Tool tips for this style of burning system include the universal tip, calligraphy tip, cone tip, large ball shader and large flat shading tip.
Once plugged into an electrical outlet the tool quickly reaches an even but high temperature so the tonal value work in your project must be controlled through the textures or strokes that you use and the speed of the stroke. Very pale tonal values are burned by using a light pressure to the tip against the wood and moving the tool tip quickly through the burn stroke. Darker tones use a medium pressure and slower motion.
One temperature burning tools are inexpensive, readily available at your local craft or hobby store and excellent for first time wood burners to give our craft a try. I began wood burning twenty-five years ago with this style of tool. Several years ago I purchased a new one temperature unit so I would have two tools on the table, each with a different tip, ready for use in my projects. Today, although I now have two variable temperature systems I still find that I use my one temperature system on a regular bases.
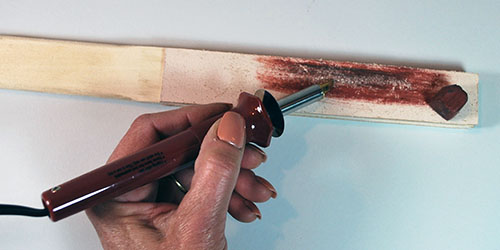
A low-temperature, one-temperature tool is perfect for your leather, and cloth burnings.
A full range of tonal values can be burned using a one temperature tool. Burn your pale tones as the tool tip begins to heat and save your darkest tones for when the tool tip has reached its full setting.
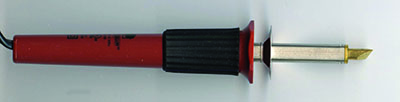
This inexpensive beginner’s wood burning pen has a rheostat on the power cord which allows you to control the temperature of the burning tip. It allows you full control over the pen tip’s heat setting. The sample rheostat burner, shown below, uses the same interchangeable brass tips as the one temperature tool.
The screw-in brass burning tips shown here fit both the one-temperature burning unit and the rheostat unit. From left to right are shown a calligraphy tip, cone tip, flat shader tip, large ball tip, and a texturing tip. The universal writing tip is inserted in the burning pen. Brass tips can take quite a bit of pressure and abuse at very hot temperature settings which make them perfect for wide, thick black line work on heavily sapped woods as white pine, sugar pine and cedar.
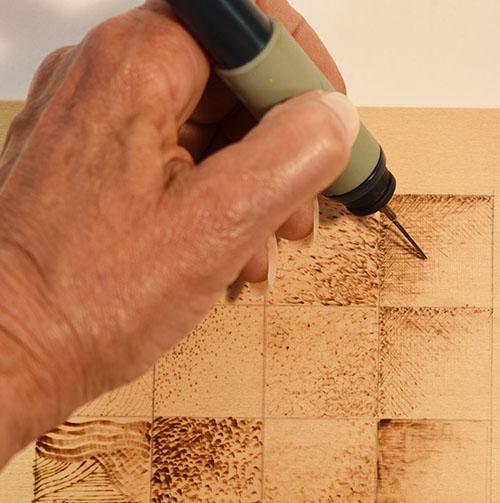
The tonal values in the practice board are worked by controlling the pressure of the tip on the wood, the speed of the stroke, and the density of the lines burned as well as by adjusting the rheostat temperature settings.
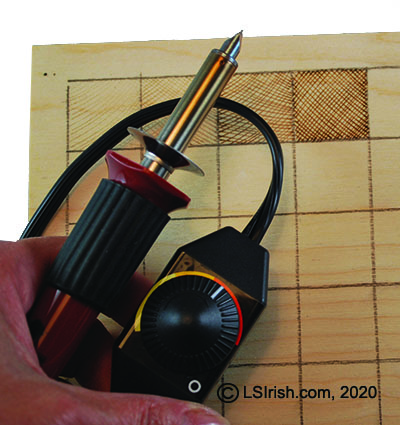
For the projects and practice board shown in this book I am using the Walnut Hollow Creative tool – a variable-temperature tool with four interchangeable pen tips.
Variable temperature systems have a dial thermostat that allows you to control how cool or hot your tip is. You can adjust the temperature setting quickly making it easy to control your tonal values in your project. This style has two types of pens – the fixed tip pen where the tip is permanently set in the hand grip and the interchangeable pen where different wire tips can be used with the hand grip.
Because the temperature controls for variable-temperature tools are located in an independent case from the burning pen, the pen handle shapes are much thinner, light-weight, and easier to grip for long term burnings. A long cord from the control unit to the pen gives you free movement of your pen as you work your burning strokes.
HIGHEST QUALITY WOOD BURNING TOOLS
The high end, high quality wood burning units available to our craft have fixed-tip pens that transfer the heat of the unit through the pen tip uniformly. There is little or no variation in temperature burn settings between one project and the next. So when you need a medium-high tonal value of 5 you can rely on these units to give you the same tonal value time after time.
My tow favorites are shown below and both have been put through extremely hard use for over ten years. Both have preformed outstandingly.
The second high-quality wood burning unit that I purchased was a Colwood Detailer. This one burning tool has been used to create over ten years of pyrography pleasure and in the writing of five pyrography books. I highly recommend any Colwood product.
Optima 1 Dual Pen System The third high-quality tool that I added to my kit is the Optima 1 with a duel pen system. This unit has given years of hard work and was used in my latest two publications of pyrography. You can’t go wrong with an Optima.
I will note here that my first high-quality wood burning tool was a RazorTip that I used in the creation of my first pyrography book, The Great Book of Wood Burning. Personally, I find that RazorTip’s pen tip wires are not as durable or long lasting as those of the Optima or Colwood units.
This free, online pyrography book will take you, step-by-step, through the basic techniques of pyrography, also called wood burning. Over the next few days it will be posted in the order of the Table of Contents below.
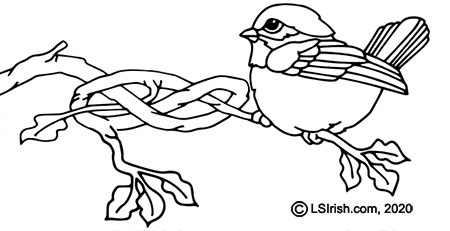
So, please bookmark LSIrish.com so that you can enjoy this free e-project and work along with me as we create a wood burning practice board, explore wood burning tools, pyrography tips, and do two complete Celtic Knot Pyrography burns.
Pyrography is the art of creating simple line designs, highly detailed renderings, and shaded drawings using a hot tipped pen on natural, wood or wood-like surfaces. As the hot tipped pen is pulled across the surface of the media the tip literally burns the media to create pale through dark tonal value lines. The pattern of lines and shading strokes that you use in your wood burning work determines the art style of the finished project. Any pattern can be worked in any art style or in a combination of styles.
SAFETY
Let’s take a moment and consider a few simple safety precautions. 1. Your project media should be an untreated, unpainted, and unfinished natural surface. Paints, polyurethane sealers, varnishes, and chemicals used in treating wood can release toxic fumes during the burning process. 2. Do an Internet search on the media that you will be burning to discover if it has any toxic properties, there are several excellent data bases available. 3. Work in a well ventilated area. A small fan, set on your table that points toward your work, will move the smoke and fume away from your face. Whenever possible work near an open window. 4. Avoid laying your project in your lap during the burning steps. This places your face directly above the fumes, which increases your chances of inhaling the smoke. 5. Unplug your burning unit from the wall socket whenever you are not working. An unattended hot pen tip can cause fires. 6. While working, set your pens either on the pen stand provided by the manufacturer or on a tile ceramic tile.
During this free, online pyrography project I will be using Walnut Hollow’s Creative Tool. Available on Amazon.com at under $100 USD. It is an excellent entry-level, variable temperature tool that comes with the four interchangeable tips – ball-tip, loop-tip, spear-shader, and spoon-shader.
COPYRIGHT Your First Pyrography Project, a free for personal use online publication, is an original work, first published in 2020 by Lora S. Irish and Art Designs Studio and fully copyrighted, All International Rights Reserved and may not be distributed in any manner. The patterns contained herein are copyrighted by the author. Readers may make copies of these patterns for personal use. The patterns themselves, however, are not to be duplicated for resale or distribution under any circumstances. Any such copying is a violation of copyright law.
To discover more line art patterns and detailed drawings to use with your next pyrography project visit us at Art Designs Studio, Lora S. Irish’s online original craft, carving, and pyrography pattern site. For free, online craft projects visit us at our blog, LSIrish.com.
Because making the artwork shown in this book using craft, woodworking, or other materials inherently includes the risk of injury and damage, this book can not guarantee that creating the projects in this book is safe for everyone. For this reason, this book is sold without warranties or guarantees, of any kind, expressed or implied, and the publisher and author disclaim any liability for any injuries, losses, or damages caused in any way by the content of this book or the reader’s use of the tools needed to complete the projects presented here. The publisher and the author urge all artist to thoroughly review each project and to understand the use of all tools before beginning any project.


