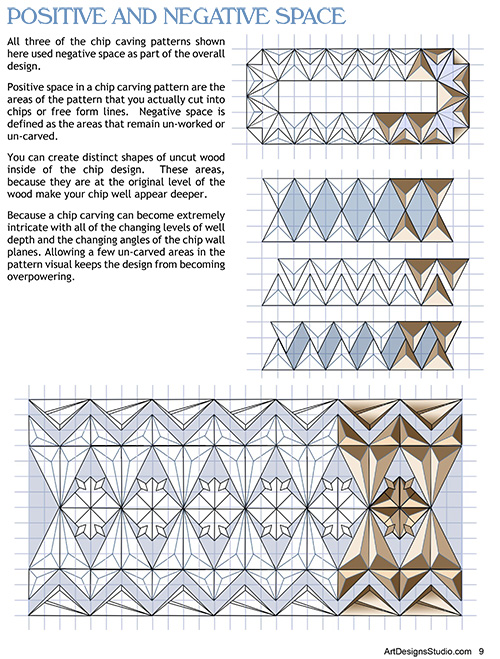
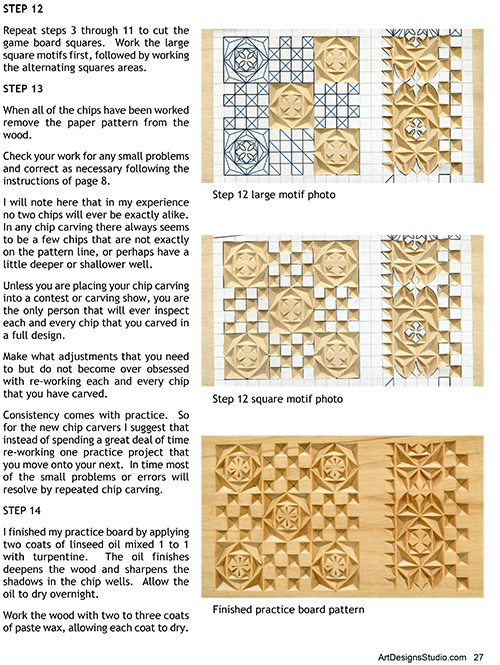
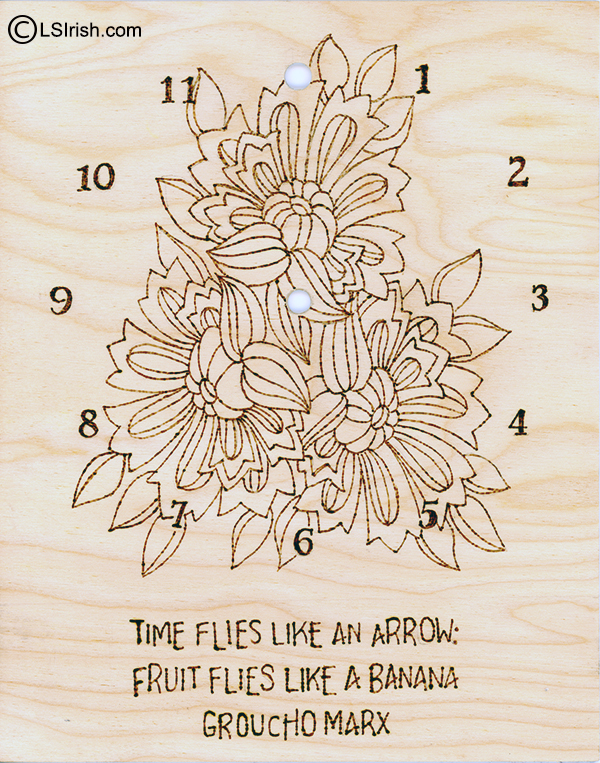
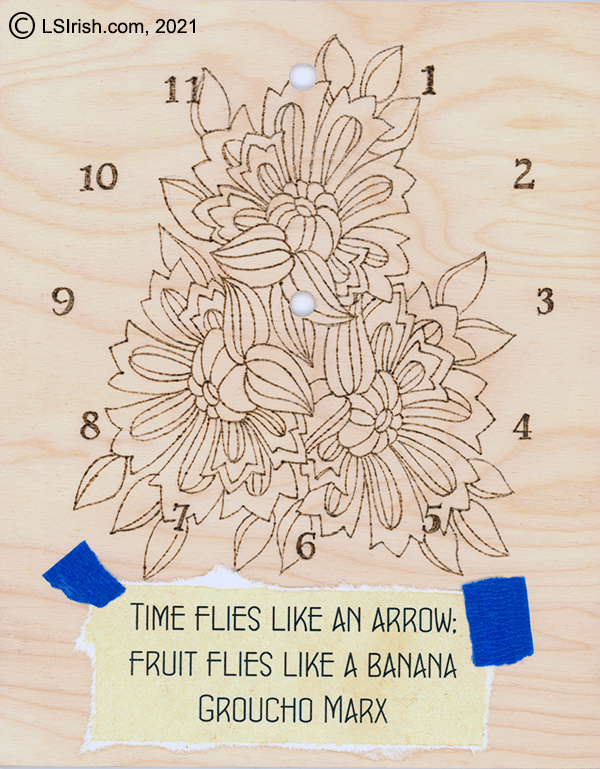
Free Pyrography Clock Pattern
Even though the 1/8″thick plywood can warp with high-heat burning or high-humidity conditions, it is so light weight that the small quartz battery clock hanger fully supports the project – you can hang this anywhere.
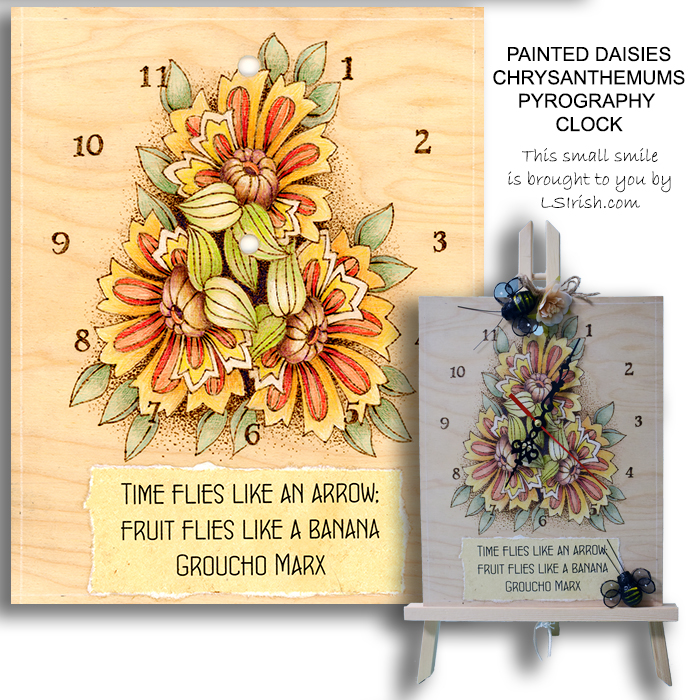
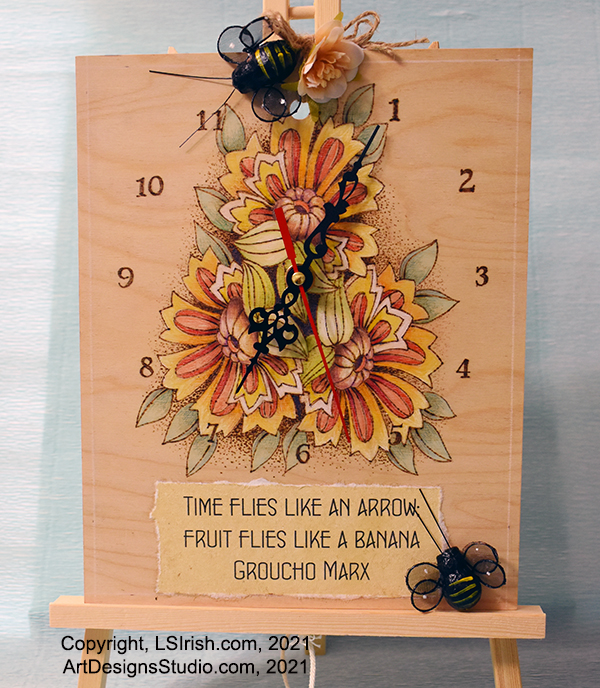
My finished painted daisies pyrography clock is show displayed on a small wood easel and, while meant to go into my kitchen is still sitting on my computer desk.
Your free Lora S. Irish pattern is just below the supply list.
Supply list: Amazon.com links
Walnut Hollow Creative Woodburner Wire Tip Wood Burning Tool
(Note – this Amazon link shows the Creative tool on sale at 42% off as on Feb. 11, 2021)
8″ x 10″ x 1/8″ basswood plywood
(This link offers a 15 sheet pack of 12″ x 12″ x 1/8″ sheets)
Saral 12″ x12′ Graphite Transfer Paper
Quartz Clock Movements with Black Hands
Handmade Antique Deckle Edge Blank Paper – A4 Size Package of 50
Scotch Quick Drying Tacky Glue
Zenacolor, 120 Watercolor Pencils, Numbered, with Brush and Case
2 – black bumble bee picks (I found mine at Michaels.)
Easel Tabletop Painting Easel with Canvas Sets(4 Packs) Wooden Art Table Easel Stand
The featured quote:
Time flies like an arrow: fruit flies like a banana. ~ Groucho Marx
Free for Personal Use Pattern:

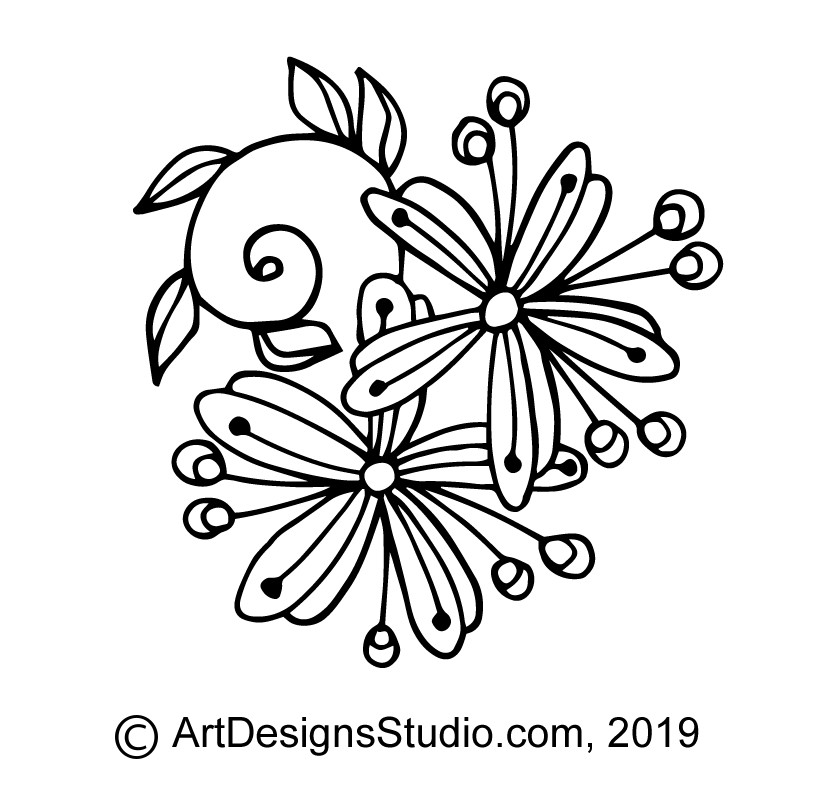
For more floral clock ideas please visit ArtDesignsStudio.com, my pattern website.
Henna Tattoo Patterns 1
Step 1: Prepare your wood plaque by lightly sanding the wood with 220- to 320-grit sandpaper, working the sanding strokes with the grain of the wood. Remove all sanding dust. Using graphite paper, trace your pattern. Using the ball-tip pen and my Walnut Hollow Creative tool, I burned the general outlines of the daisy pattern, numbers, and quote onto my wood plaque. I used a medium-hot setting of 6 – 8.
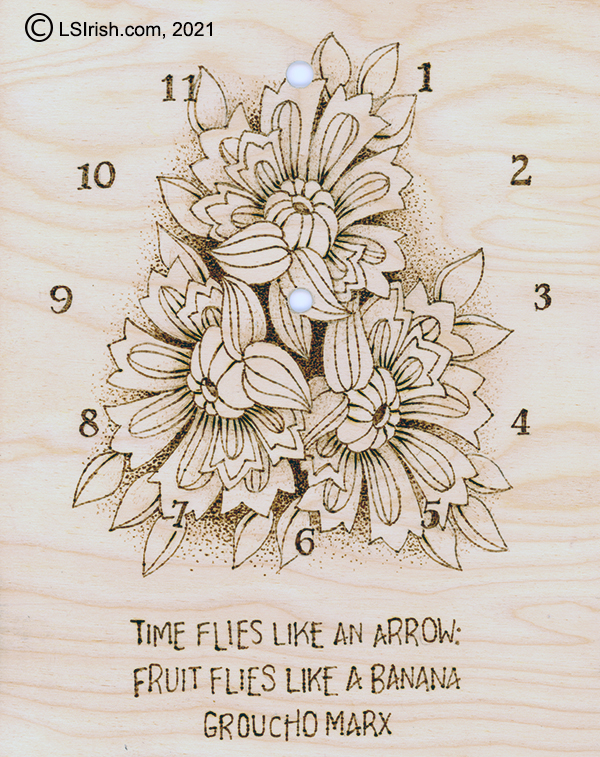
When the outline is completed, erase any graphite lines or pencil lines that remain from the pattern tracing step.
 Step 1
Step 2: I was not happy with my lettering burn, but very pleased with my outline work. My solution was to create a collage paper piece to add to the plywood that would carry my quote while covering up my wood burned letters. I chose a heavy, yet flexible antique paper that easily went through my home computer printer. You can see that collage piece temporarily placed over the burned letter.
 Step 2
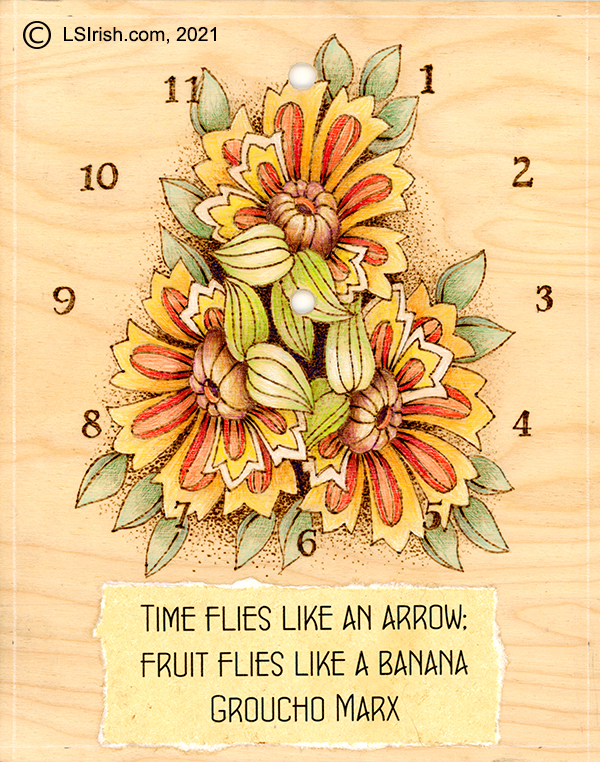
Step 3: Still using the ball-tip pen and a medium heat setting of 4 – 6, I have added shading to the background area of the pattern. Lowering the temperature a bit more to the 3 – 4 heat level, I then worked light shading into the flowers and leaves.
 Step 3
Step 4: When your burning is done its time to get out your favorite artist-quality colored pencil set. Do a quick google image search under ‘painted daisy chrysanthemums’ for coloring ideas.
I used tones of yellow through bright red for the petals, yellow greens for the inner flower leaves, and green teals for the background leaves. Tones of sienna, golden brown, and chocolate make up the flower centers.
Both white colored pencil and white chalk pastel pencil was used to brighten the highlights of the work.
Lay several thin lines of quick-dry tacky glue to the back of your collage paper. Use a stiff piece of card stock to evenly spread the glue. Position your quote to your plaque and press lightly into place. Place a heavy book on top of the quote to press the paper evenly to the wood and let dry.
Several light coats of matte spray sealer. The sealer protects your raw wood, colored pencil work, and collage paper.
 Step 4
Step 5: Here’s my finished clock with the quartz clock movement inserted, bees in place, and just one fun silk flower.
Hope you have fun creating your own pyrography clock! Thanks for stopping by my blob ~ Lora