Chip Carving Supplies
In this free online Chip Carving Seminar session, by Lora S. Irish, we will first take a look at the basic supplies that you will need.
Chip Carving Seminar by Lora Irish
 Chip Carving Seminar
Chip Carving Supplies
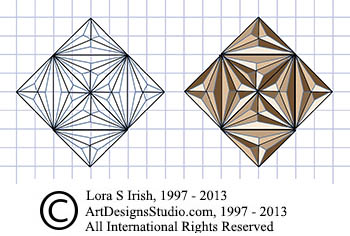
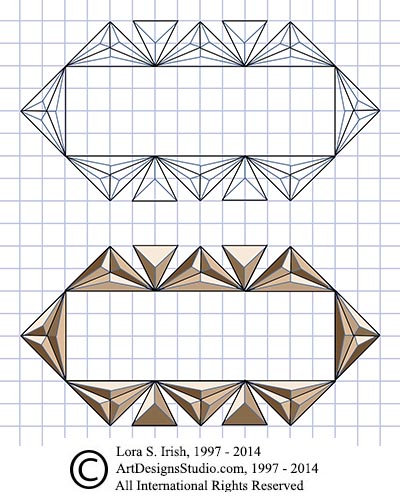
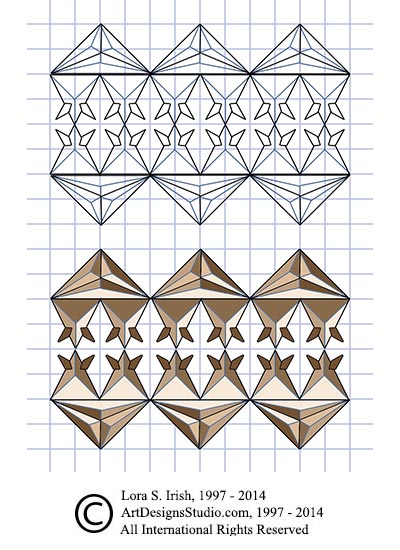
Chip Carving Graphed Patterns
Chip Carving Hand Positions and Grips
Chip Carving – Triangles and Square Chips
Chip Carving – Straight-Wall Chips
Chip Caved Game and Chess Board
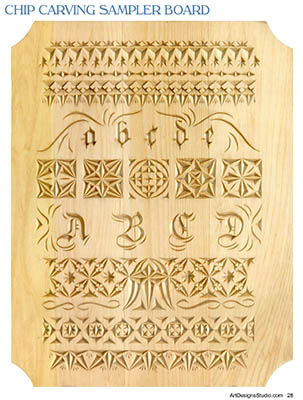
Chip Carving Sampler Pattern Layout
Chip Carving Common Mistakes
Chip Carved Shortbread Cookies
For more about Chip Carving please visit Chip Carving.
 basswood practice boards – 3″ to 4″ wide x 18″ long, 1/4″
basswood is available at most hardware stores
11″ x 14″ basswood plaque – needlepoint sampler pattern
14″ x 14″ basswood plaque – chess game board pattern
large chip carving knife
stab chip carving knife
detail wood carving bench knife
sharpening stones and leather strop
graph paper
removable spray adhesive
pencil
320-grit sandpaper
white artist eraser
linseed oil
turpentine
paste wax finish
Chip Knives
For more about wood carving tools, please visit Basic Wood Carving Tool Kit.
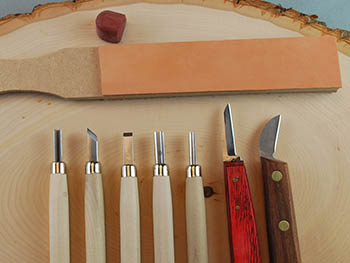
For this seminar you will need a chip knife, stab knife, and detail bench knife.

 Chip Carving Knives

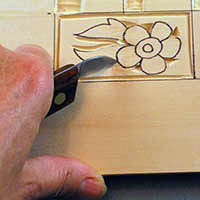
The chip carving knife is your primary cutting tool. It has a short blade as compared to wood carving bench and detail knives, or whittling pocket knives, which places your carving hand closer to the actual cuts in the wood. The blade is angled slightly from the handle, placing the point and cutting edge in the correct position for the push cut used to angle the inner walls of the chip.
Chip knives are available in large and small sizes, with wooden or ergonomic resin handles. My personal preference is the large, wood handled knife which can also be used as a bench knife in my relief carving.

 Stab Chip Carving Knife

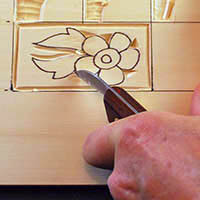
The stab knife also comes in two varieties. This is a straight-edged blade made to be pushed into the wood that makes thin, straight line accent cuts in the negative space of the chip pattern. If the tip of the stab knife is sharpened along with the straight edge of the blade and at the point, this knife can be used to cut the walls of your chips.
 Detail Bench Knife

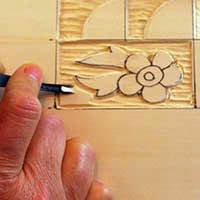
Detail bench knives, used in wood carving, are excellent for your chip carving. The long, narrow blade can be used to cut the walls of the chip and can reach deeply into the sloped floor of a straight-wall chip. For chip carving you want a detail bench knife with a short blade to keep your cutting hand close to the wood.
Utility, Craft, and Pocket Knives
Although utility and craft knives are readily available and very inexpensive but I do not recommend them for either wood carving or chip carving. The steel in the blades are very thin and not the high quality found in specific wood carving knives. The tips of these blades can snap easily, creating the potential for you to end up cut. Please also avoid using straight-edged razor blades for the same reasons.
There are some excellent quality steel pocket knives available today that are perfect for whittling wood carving projects. I do not, however, recommend them for chip carving. The thickness of a pocket knife blade can cause problems when you are cutting small-sized chips. Thick blades tend to push against the wood as it cuts, compressing the wood outside the chip. That compressed area then causes cutting problems as you cut an adjacent chip.
Sharpening Tools
For more about sharpening, please visit Sharpening Your Wood Carving Tools, and Sharpening Your Chip Knives.
For this seminar you will need a coarse sharpening stone, a fine sharpening stone, a leather strop and rouging compound, emery cloth 1500-grit sandpaper, and several sheets of newspaper. My personal preference, especially for new carvers, are ceramic stones. These are reasonably prices, small enough to keep right in my carving kit, do not require either water or oil, and last a life time.
Coarse 1000-grit Sharpening Stones
The coarse sharpening stone creates the angle of the knife blade bevel. If you are wood carving hardwoods and using a mallet you want a wide bevel on the edge of your cutting tool, up to 25 degrees. If you are relief carving you want to drop the bevel angle, bringing the bevel down to around 20 degrees. For chip carving you want a very narrow bevel, below the 20 degrees.
A sharpening jig that allows you to set the exact degree of the bevel takes the guess-work out of knife sharpening. If like most carvers you sharpen by eye, place the blade of your knife flat against the coarse stone. Raise the back – blunt – edge of the blade slightly, just high enough to slide 3 to 4 sheets of paper under the back edge. This sets the knife blade at a very shallow angle to the stone, perfect for chip carving.
Pull your knife across the stone to create the cutting edge bevel. Work both sides of your knife.

 Fine 6000-grit Sharpening Stones

Fine stones have a high grit number, ranging from 6000- to 8000-grits. This stone sharpens the cutting edge. Place your knife onto the stone as the same bevel angle or ever so slightly higher. Pull the knife blade across the stone until you have developed a bright edge.
The fine stone work will create a very thin strip of steel along the cutting edge of the blade. You can not see this strip, but if you run your finger from the back of the knife towards the edge you will be able to feel a thin, rough tin edge.
Emery Cloth Sandpaper
There is a wonderful version of sandpaper, called emery cloth, that is specifically made use with metal. Emery cloth comes in many grades, I use 500-, 1000-, and 15oo-grit. I use my finest grit emery cloth before I move to my strop to insecure that I have established and then released the tin edge. Many carvers use emery cloth exclusively for sharpening.
In relief carving you can wrap emery cloth around a dowel for sharpening the inside cutting edges of your round gouges.
Leather Strop and Rouge
Stropping, pulling a carving knife across a leather strop, removes the tin edge developed on the fine sharpening stone and brightens the cutting edge. The leather strop has two sides – one raw leather and one tanned leather. A rouging compound or sharpening compound is rubbed over the raw leather side of your strop. Place the blade, at the same bevel angle that you have been working, against the strop and pull the knife in long strokes across the compound. Work both sides of your knife.
There are several stropping or rouging compounds available, and each wood carver seems to have their favorite. I use red oxide in a stick form and aluminum oxide power.
 Newspaper

Select several sheets of newspaper that are heavily printed. You can also print a sheet of condensed text using your computer printer for this step. Paper has a very fine grit and the printing ink acts as a rouging compound. Fold the paper into quarters and place it at the edge of your work table. Lay you knife blade flat against the paper and pull the knife across the paper several times.
This final paper stropping will polish the cutting edge.
Measuring Tools
 Chip carving patterns can be printed and then glued to your wood using removable spray adhesive, which for this seminar I will refer to as gluing, or they can be graphed directly to the wood. Printing and gluing the pattern insures that you are working from a pattern that has perfectly straight cutting lines, but unless you have a graphic image editing program you are constrained to working the pattern at the size of the printed paper.
You can, using a small t-square, compass, and straight edge, create a pencil graph directly onto the wood. I use a #2 soft pencil to create the grid and use light pressure on the pencil to avoid leaving thin, indented lines in the basswood. You can also use a pale brown colored watercolor pencil for this step. When the chip carving is finished, using a white artist eraser the pencil graph and chip outlines can be removed. With watercolor pencil the board is wiped with a slightly damp cloth.
Basswood Practice and Project Boards
For this seminar I would strongly suggest that you begin with basswood practice boards. Chip carving needs precise, strong cuts to create the wonderfully intricate geometric chips. Precision comes with practice!
You can find 3″ to 4″ wide by 1/4″ thick by 18″ to 24″ long basswood craft boards at most local hardware stores which are perfect for your practice work. Check each board carefully to insecure that it has even, straight grain, and a clear unblemished coloring. These basswood boards are not the high quality found in the finished project plaques that are available through Walnut Hollow and other companies, but quite fine enough to use for learning, experimenting, and practice motifs.
Tomorrow we will look at how to prepare the wood for your chip carving. Thank you for reading!