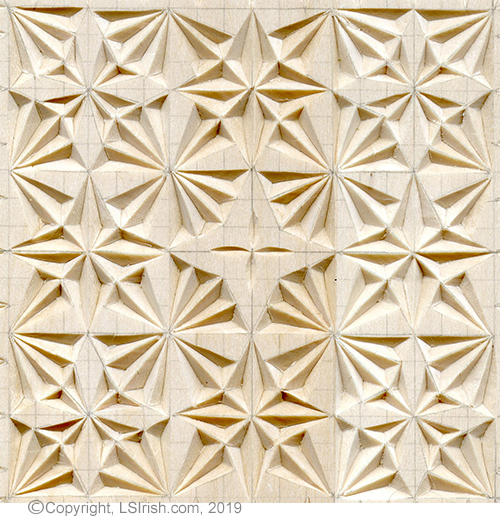
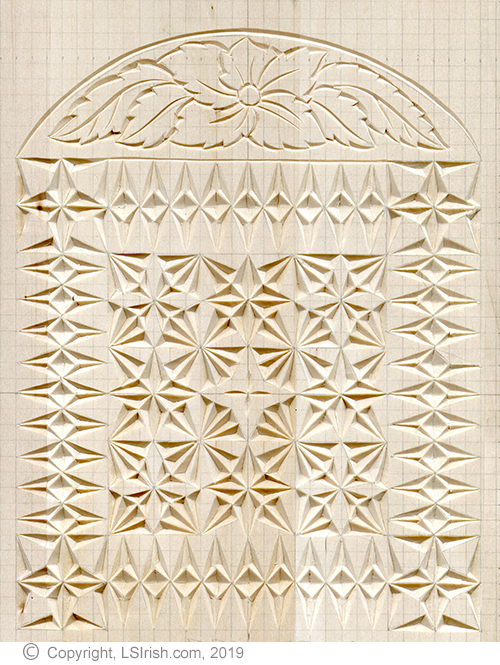
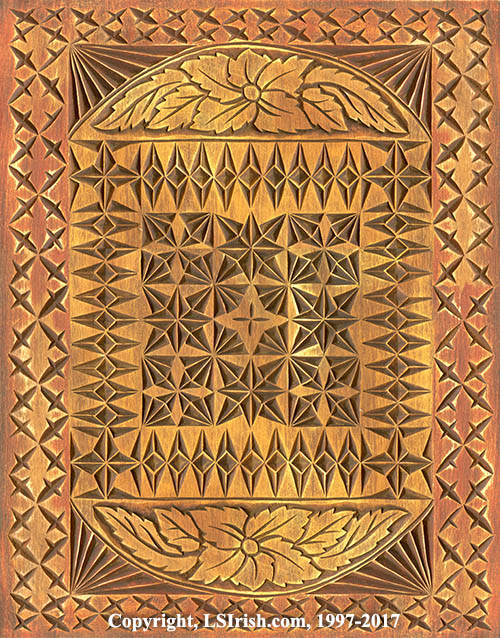
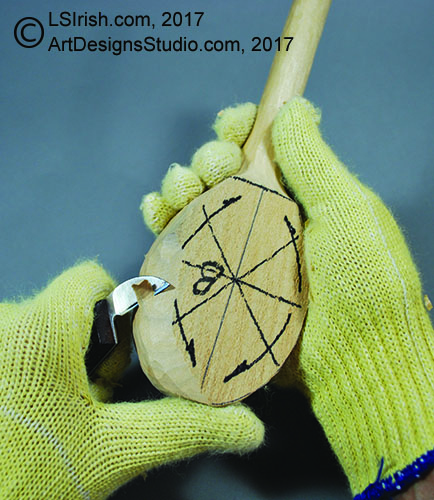
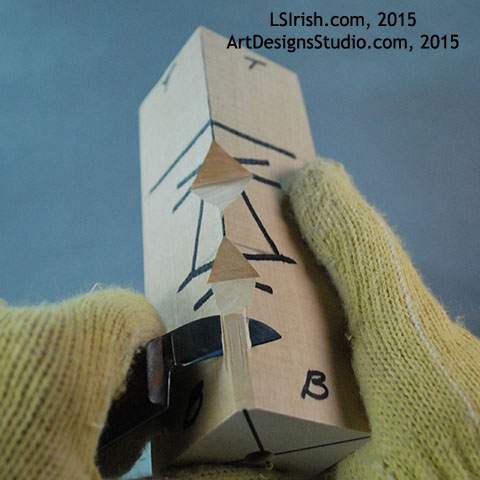
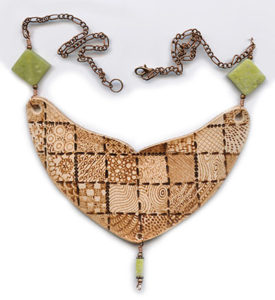
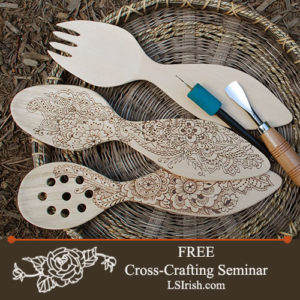
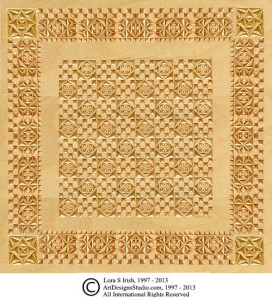
Let’s take an in-depth look at the chip carving technique by creating several chip carving practice boards, and working a classic needlepoint sampler layout, shown above, that you can use to carve multiple chip carved projects. The pattern and photo sampler for this Needlepoint Layout is available in both our Chip Carving Pattern Package and in the Chip Carving E-Project.
Here is the link list to our Chip Carving Seminar by Lora Irish.
Supplies needed for chip carving Creating basswood chip carving practice boards Wood preparations Knife sharpening Transferring a chip pattern to your board Knife angle Common problems Positive and negative space How to cut the different styles of chips Learn triangles, square, straight-wall, curve-edge, free form, and accent chips Using chip styles in your patterns Work a set of chip progressions How to turn a corner
Learn how to prepare your wood board, three methods to transfer your pattern, and how to set up a chip carving practice board.
Please stop by Art Designs Studio, (a.k.a. CarvingPatterns.com) Lora Irish’s wood carving, pyrography, and chip carving pattern website.
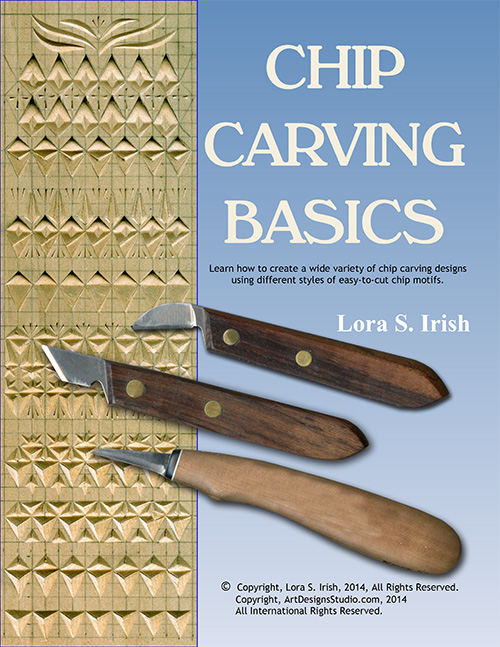
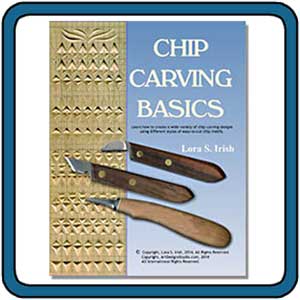
Chip Carving Basics E-Project, Everything from this Chip Carving Seminar and more! Learn how to create a wide variety of chip carving designs using different styles of easy-to-cut chip motifs, by Lora S. Irish. 37 page, PDF file format, easy to print e-project and the full cp015 Chip Carving Pattern package with 110 ready to print chip carving patterns.
In an Amazon review a reader was distressed that I don’t teach spoon carving using a Sloyd knife, a very traditional knife used in this craft. I believe this is a fair and honest question that I could address here.
There are many different styles and shapes for the straight cutting knife that we often group under the name of ‘bench knives’. Some bench knives have long blades that may extend up to 4″ from the handle, others as chip knives may only have a 1″ long blade. Some blades are flat – straight – along the cutting edge from handle to knife tip while others may have a curve at the top 1/3 of the blade. Some are sharpened on one side only while others are sharpened on both sides.
While Sloyd knives are a traditional, Old World technique tool for spoon carving, why don’t I use or recommend them … because they don’t fit my hand! More at the bottom of this page ….
What is important in your choice of bench knives?
There are two specific aspects to your bench knife that determine which is best for you.
1. The quality of steel which determines the quality of the sharpened edge that you can achieve and keep during a carving session.
Cheap steep will never sharpen to a bright, clean edge and if you do achieve a usable sharpened edge that edge will not last very long during any carving session. Be prepared to pay about the same amount for one good bench knife as you would a full 5 to 6 piece beginner’s carving set.
2. The fit of the handle inside of your hand.
No knife, no matter how wonderful the steel, who manufactured it, how sharp an edge it keeps, or how it has been traditionally used in wood carving is worth a tin dime if it doesn’t properly rest inside your hand.
Notice here that I did not mention the piece or project that you are carving or the length of the bench knife blade. A good bench knife, one with high quality steel and a proper fit, will carve about 90% of the straight cuts that you need for any project. While many wood carvers have a variety of bench knives in their kits, most return over and over again to just one or two favorite tools.
What length of bench knife do you need?
For most carving projects today your bench knife only needs to make a clean slice of wood 1/2″ or less wide. If you need to take larger slices then you most likely need to move to a draw knife. Today’s carvers are working with milled wood that has been kiln dried. The bark has already been removed and the heartwood cut away from the blank. Few of us need to rough cut a split piece of bark wood that needs to be dressed down to a flat, squarish shape before we begin carving either of which could require a longer blade length.
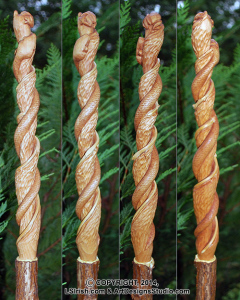
Let’s return for a moment to the discussion about using a Sloyd knife as compared to a standard bench knife or chip carving knife. A Sloyd knife is wonderful if you are de-barking a long walking stick that you have cut from a sapling. The extra long blade does allow you to glide the cutting edge down the sapling, releasing very long strips of bark. This is very important if you are removing the bark after the stick has dried.
You can also debark while the stick is green using a shorter bladed knife by lifting the top edge of the bark and pulling the bark off the stick.
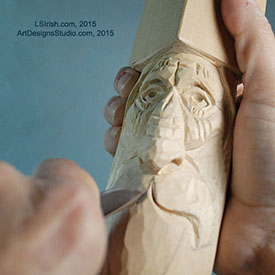
If I am carving details in my work, as shaping the side of a spoon bowl or cutting the facial planes of a wood spirit that long blade on the Sloyd pushes my hand several inches away from where I am cutting. A short blade, as a 1″ chip blade, places my hand, and therefore my control of the cut, right at the point of the cut.
Does it fit your hand?
For me this is as important as the quality of the steel. If a knife does not properly fit your hand I will guarantee that it will spend most of your carving life in the box of your tool kit … quietly rusting away!!
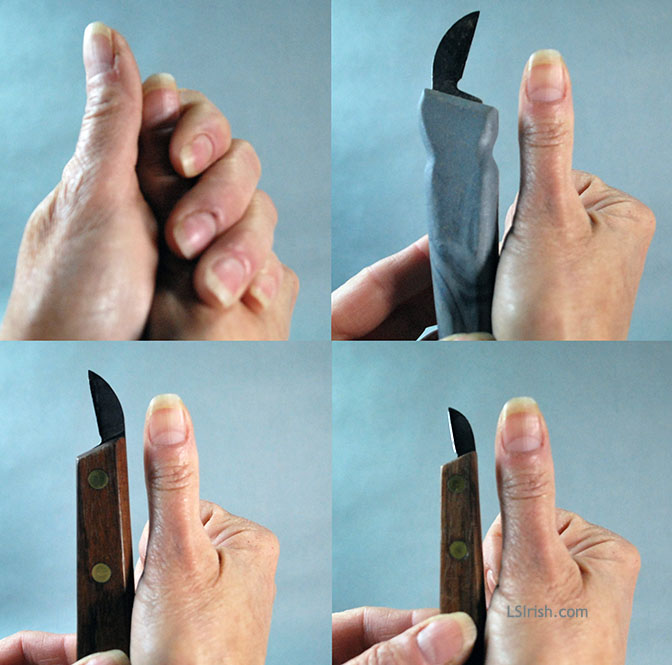
A well-fitting knife handle lays across your palm between the major fold wrinkle of the fingers and the major fold wrinkle of the thumb palm. The fattest part of your thumb rests nicely into this space, which means that the fattest width of your thumb is an excellent gauge for the thickness of your bench knife handle.
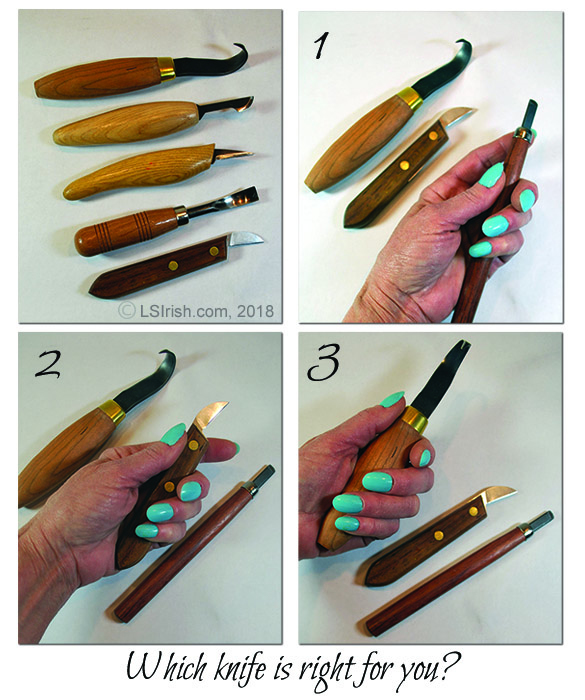
In the photo, right, the bottom left knife handle is the most appropriate for the size of my hand. The top right shows a handle that is too wide, and the bottom right one that is too narrow.
When you roll your hand around the handle, the tips of your long and ring finger should just lie about 1/4″ away or just against the side of the thumb palm. This fit lets you have free motion of your fingers, your thumb, and your wrist during any cut – not too tight, and not too open. Your fingers hold the knife handle to the palm without the need of excess pressure.
Too narrow or to thin a handle and your finger tips will need to curve into a clenched shape to hold the knife steady. That clench causes extra tension in the hand which over time becomes tiring.
Too wide a handle and your finger tips will not touch the thumb palm area. With this grip you need extra pressure to steady the knife through the cuts. Again, this can cause fatigue and stress on your hands.
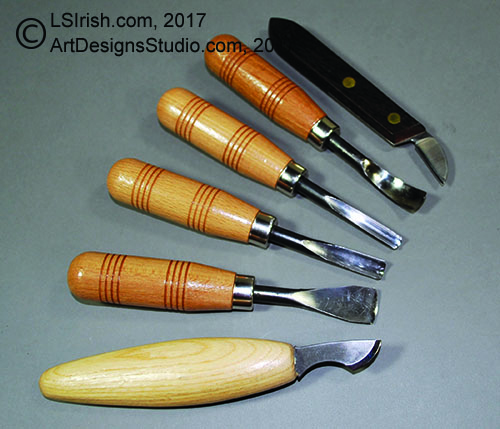
Looking at the first photo on this post.
Upper left shows five different tools and knives that are commonly used in spoon carving. From top to bottom are a FlexCut Carving Hook, a FlexCut hooked skew, a FlexCut bench knife, a wide bent round gouge, and a Moor Chip Carving knife.
1 Upper right – Shows a bull nose chisel with a narrow handle. The handle sets forward in my hand, allowing the fingers to move the tip of the blade through detailing work.
2 Lower left – Shows a Large chip carving knife that fits my hand perfectly. The finger roll completely around the handle without the need for extra tension to secure the handle in my palm.
3 Lower right – Shows a large handled carving hook which is too large for a good fitting grip for my hand. The handle has been pushed into the palm area and my finger need a tighter grip to secure the handle during use.
Old World v. Modern Day
Yes, sloyd knives, carving hooks, and scoops are traditionally used in the Old World style of spoon carving. Traditionally these knives and tools have extra wide handles as shown in the top three tools in the upper left photo above. Those wide handles were made to fit a medium to large man’s hand, because until about 100 years old traditionally woodworking and wood carving was done by men.
Today what is necessary is having and using a bench knife that fits your hand properly. Today it is reasonable to estimate that one half of all carvers are women, with smaller hands and therefore narrower grips than men.
While writing this and talking with my husband, a long time woodworker, we did a small comparison. His hand, a medium-sized man’s hand, measures 7 3/4″ long from the finger tip to the wrist bone of the thumb … mine measures 6 1/2″. His hand measures 3 3/8″ wide across the knuckles, mine measures 2 7/8″. While his hand is large enough to comfortable hold a Sloyd knife, mine simply isn’t.
Humans are a dimorphic species – males tend to be about 10% larger than females. Therefore in general what was used for centuries by a male population of woodworkers and wood carvers may not be appropriate for today’s mix of hobby carvers.
Conclusion
It’s not what knife you use, it’s not about a particular manufacturer’ or Old World style … it’s all about whether that knife fits YOUR hand.
PS … And that is why I never recommend ergonomic grip tool handles as they only fit one person’s hand, he who made the handle mold in the first place.
This common question is very hard to answer because the tools and knives you may be using one year from now could well be very different than those that I suggest for a newbie carver.
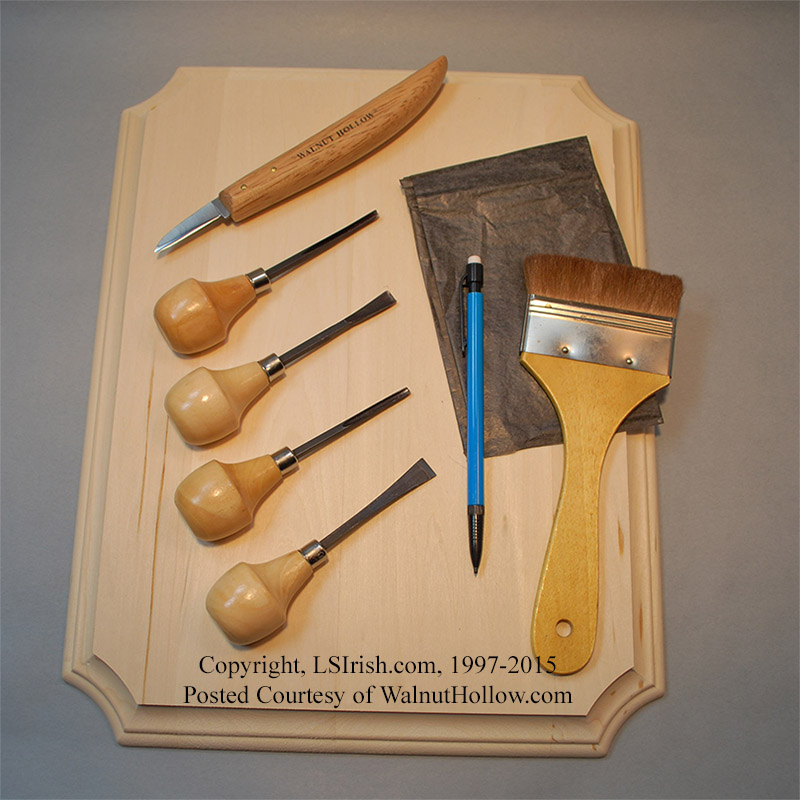
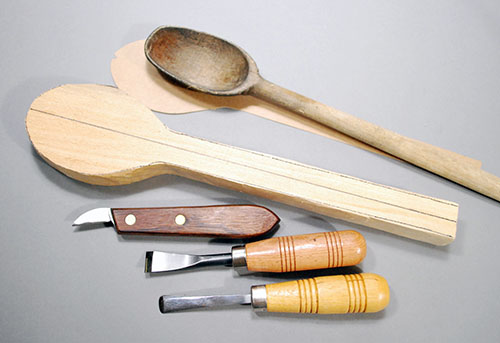
Shown right is a set of spoon carving tools that include several sizes and profiles of round gouges.
If you are just starting wood carving I strongly suggest a simple set of carving tools. Sets are available in 6 to 12 tools, and often come with a storage box or cloth roll. Select a medium-sized tool profile set of 1/2″ wide or less that includes at least a straight chisel, skew chisel, large round gouge, small round gouge, and a v-gouge.
A mid-quality beginner’s tool set of five to six tools will cost between $40 to $75.
To this set add the best bench knife or large chip knife that you can afford. Your bench knife is your primary tool in carving and the better quality steel makes all the difference in how easy your carving flows through the cuts. A high-quality bench knife often runs around $35 to $60.
Interchangeable blade sets are also excellent for the new carve. As an example I use the FlexCut 11 piece Interchangeable set all the time for whittling, relief, and cane carving. This set has every tool profile that a new carver needs while keeps your initial costs low. I also have used the same Ramelson Beginner’s Set for nearly twenty years with great success.
You will also need a sharpening set to keep the edge of your new tools crisp. Sharpening tools can include ceramic stones, a leather strop, honing compound, and a slipstrop. Estimate another $50 to $75 for your sharpening set.
1. I don’t use any sets that are available from the large arts and crafts box stores. These sets are very inexpensive because they are not manufactured from high quality steel. Often they come un-sharpened or only partially sharpened, which means that you must conquer sharpening techniques before you ever put a knife into the wood.
2. I don’t recommend high-end, extra-high quality tools for a beginner. I know, those sets are just beyond beautiful and the very best you can buy. And I know that I just told you to buy the best bench knife you can afford … But … neither you nor I know whether you will love wood carving with the intensity that I do at this point in your new hobby. We also can not predict what style of carving you will finally chose.
These tools can be purchases after you discover that you are addicted to carving! You can purchase high-end tools individually which means you can add to you beginner’s set one tool at a time.
So, at this time, save that money to purchase wood.
3. While I do list utility knives as a possible starting tool kit I do not recommend them. Utility knives are made to be disposable and do not have the steel strength that true wood carving tools do. Utility knife blades can crack, split, and pop at any moment, and create a danger of injury.
Carving Styles
There are many different styles of wood carving and each has its own set of specialty tools. In the next year, as a new carver, I strongly recommend that you give all of these carving styles a try. Most long-time carvers work several different styles on a regular bases.
Whittling is often done with one medium-length bench knife or pocket knife. A few extra tools may be in your whittling kit and could include a small v-gouge, a small u-gouge, and perhaps a medium or large round gouge.
Chip Carving uses a set of three short blade knives, often set on a slight angle from the handle. I personally use a large chip carving knife as my primary bench knife.
Hardwood Old World style carving uses heavy handled, large bladed tools that are moved through the wood using a leather or wood mallet. The straight chisel, skew chisel, round gouge, and v-gouge are the main tools used.
3-D Carving uses a basic set of tools that include chisels, round gouges, v-gouges, and a pocket knife, bench knife, or utility knife.
Relief Carving uses a very similar set of tools to 3-D carving with the addition of bent-back gouges, dog-leg gouges, and the bull nose chisel.
Cane Carving, as relief and 3-D, uses a basic tool set with the inclusion of a draw knife, dowel sets, and clamps.
Power Carving is a style that uses rotary tools with diamond, steel, or ruby bits to do the basic work. A basic 3-D or Relief Carving set of tools is then used to dress out the carving.
This in-depth tutorial explores all the tools, knives, and carving aids that I have accumulated over twenty years of wood carving.
Some were inherited from my father, who was a gun stock carver. Some are sets that I have purchased and used over the years. Of course, some are just fun specialty tools that I have added to my kit.
While you may need to purchase your bench knife, chip knife, and carving tool set to begin your new hobby, many of the tools listed in this tutorial you may already own in your woodworking or craft supplies.
Browse through the tutorial, consider what you already have on hand, and then make your selection.
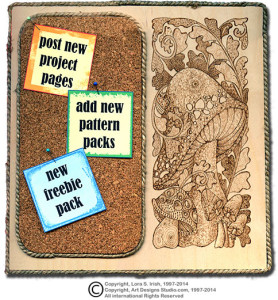
With a long, three-day weekend coming up in the US, you will have lots of time to fill with fun, new projects. Below are just a few of the ideas you will find here at LSIrish.com or at my carving-pyrography pattern website, ArtDesignsStudio.com.
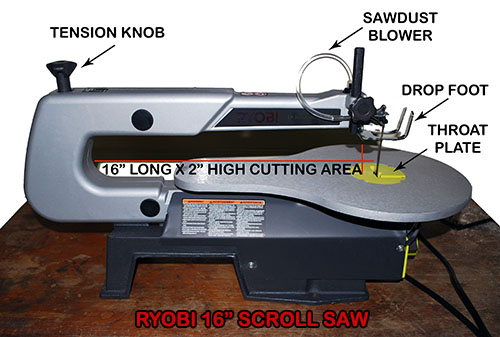
During this session we will take a quick look at the features of a basic scroll saw, and walk through the steps to changing your scroll saw blade. The scroll saw shown is a Ryobi 16″ variable speed.
Click on any image for a full-sized picture of that step.
Read Your Manual
Begin by reading the information and instruction manual that came with your particular scroll saw, especially the safety steps.
Wear safety glasses.
Use the correct blades made for your specific scroll saw.
Check the condition of your saw blade before you begin any working session.
Always know where your fingers are in relationship to the saw blade.
Unplug the saw and remove the Child’s Safety Plug when not in use.
Watch for physical and visual fatigue – take frequent breaks.
Scroll Saw Features
The Ryobi features a Tension Knob for quick and easy blade tension adjustments on the top back of the machine. The Sawdust Blower keeps the wood clean of sawdust in front of the saw blade. The Drop Foot holds the wood securely to the work table to reduce vibration and the Throat Plate gives you access to the bottom of the saw blade.
The On/Off Switch is on the lower front of the motor and also contains a Child’s Safety Plug that can be removed to prevent the machine from turning on.
The three pronged knob on the left front controls the tilt angle of the table, called the Bevel Scale. On the right side of the front is your variable speed control. For the Ryobi the speed range is from 550 r/min. to 1,650 r/min.
Scroll Saw Blades
Scroll saws use two styles of blades – pinned and unpinned. Pinned blades have a small metal cross bar at the top and bottom of the blade that slides and locks into the blade holders. This gives a strong, secure anchor for the blades.
Unpinned blades do not have the cross blades, and are simply straight at the top and bottom.
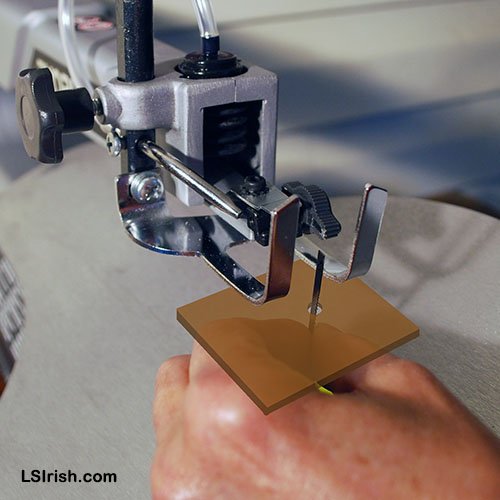
The unpinned blades are used in fretwork where you will be cutting holes into the design. Begin by drilling a small hole, just slightly larger than the width of your saw blade, inside of the shape that you will be cutting. Release the Tension Knob on the top of the machine. Release the top Blade Holder Knob. Remove the top of the blade from the scroll saw. Slide the wood over the top of the blade, threading it through the drilled hole. Secure the top of the blade by tightening the Blade Knob and Tension Knob.
Saw blades are sorted by the number of teeth per inch, TPI. The Ryobi Specialty Scroll Saw Blade Set gives you three sizes – 7 TPI Hook Tooth for thick widths of wood, 15 TPI Regular Tooth for general cutting, and 18.5 TPI Skip Tooth for fine and tight turned cutting. For our projects in this seminar I used the 15 TPI regular tooth, pinned blades.