
Toll Kit
You tool kit will need supplies for preparing the wood burning surface, transferring the pattern, your burning unit to create the project, sand papers or stropping compounds to clean the pen tips, and finishes to seal the wood. Many of these supplies are common household items.
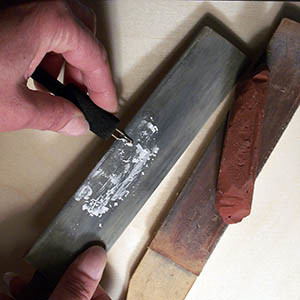
Tip Cleaning Supplies
As you work any pyrography project the pen tips will develop a thin layer of carbon build-up that reduces the heat to the tip and can cause blackening along the burn lines.
This build-up is visible as a darkening or blackening of the tip’s color. High temperature burns can leave a white-gray ash layer on your pen tips.
To remove the carbon layer and return the tip to a pristine finish you can use fine steel wool, 4000 grit emery cloth, or as shown in the photo above a leather strop and roughing compound.
Of these three methods the strop and rouge does the least damage to the pen while polishing the wire tip to a smooth, clean burning finishes.
Strops and rouging compound can be obtained through most wood working or wood carving stores.
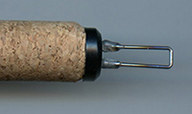
Tip Patina
With use pen tips take on a bluish black sheen on the burning tip wire and the wire is tempered by the heat.
During any cleaning steps work the tip back to this natural gun metal tone, removing only the black carbon build-up or gray ash layer.
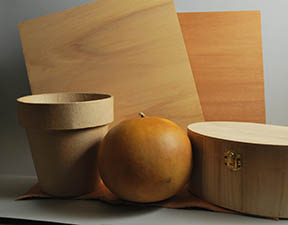
Pyrography Surfaces
Any natural surface can become a pyrography media including wood, gourds, cotton cloth or canvas, leather, rag content paper, and chipboard. The photo to the right shows two end grain basswood blanks with bark edges that are perfect for your pyrography work.
Favorite woods include basswood, birch, poplar, and butternut as all have fine, tight grain and clean pale coloring.
Any pyrography surface should be clean of dirt, paint, and finishes; work direct on the raw surface. Avoid unknown materials or old scrap wood to avoid toxic materials.Chipboard makes an excellent pyrography working surface. Available in white, tan, and golden yellow the compressed paper fibers burn easily at low temperature setting.
Safety Precautions
Since the very process of pyrography releases smoke into your environment there are some surfaces that should not be used as they can be toxin.
- Do not burn synthetic surfaces as plastic or Plexiglas.
- Do not work on wood surfaces that have an acrylic sealer, varnish, or paint layer.
- Check any natural surface, especially gourds, for mold and accumulated layers of dust.
- Do not burn woods on unknown species, check the Internet for listing of toxins found in wood.
- Always work in a well ventilated area.
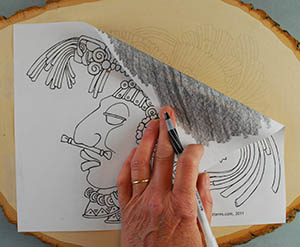
Tracing the Pattern
Two products that are used to transfer the design to your work surface are carbon paper and graphite paper.
Both of these products are laid under your paper pattern so that the transfer side is against your work surface. As you trace the lines of your pattern on the pattern paper the carbon or graphite paper leaves a fine line on your work surface.
Both of these tracing papers should be used carefully as they can not be easily removed from your work surface after the burning is complete. Graphite paper with its soft pale gray coloring is especially appropriate for gourds, paper mache and darker woods.
A preferred method is to blacken the pack of your pattern paper with a soft pencil, covering the back completely. Place the pattern onto your work surface and trace over the pattern lines. This will leave a fine line of pencil graphite on your work surface. The pencil lines can later be removed with a white artist eraser.
Burning Strokes and Textures
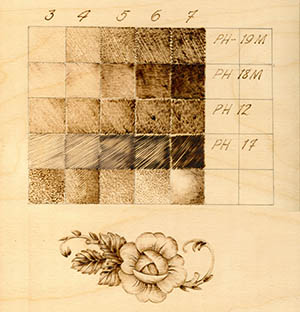
Any new design or pattern will present new challenges for you as a wood burner. Each working surface has its own texture, density, and color tone that effect the evenness and final look of each burn stroke. By working a small scrap of the same material you can experiment with your pyrography insure the best burn possible on your larger project.
Five factors determine the final look of any area of burning. As you work your practice board make note of each of these directly on your grid so that you can reproduce any of your textures or stroke fill patterns – working surface, tool tip profile, temperature setting, fill or texture pattern, and hand position.
Practice Board
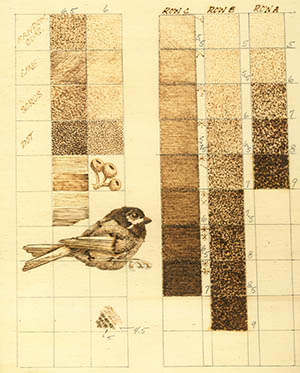 The practice board, right, has been worked on poplar plywood in preparation for the Winter Bird House.
The board was first marked into 1” squares using a soft #2 pencil. As I worked each square to create my graduated tonal value strip I adjusted how tightly the strokes were packed into the square and the temperature setting of the pen. The temp setting was marked in pencil on the right hand side of the square.
As I worked through the stages of the Winter Bird House I could refer to my practice board to find the exact setting and stroke that I wanted for the tonal value needed within the element.
Practice boards are excellent for experimenting with small sections of your pattern. On this board I have worked my wood grain, acorn caps, and one of my birds. Keep your practice boards with your tool kit. As you discover new texture strokes you can add them to your board. When you need inspiration for an area in your latest project you can refer back to your board for ideas, tonal values, and line work.
Pattern Placement
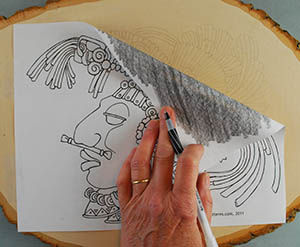 1. Prepare your wood plaque by giving it a light sanding using 220 grit or higher sand paper. Remove any dust using a soft, lint free cloth.
2. With a ruler and pencil mark the center horizontal line of the plaque. Measure and mark the center vertical line.
3. Rub the back of your pattern paper with a soft #2 to #6 pencil, coating the back with the pencil’s graphite.
4. Fold the pattern paper along the center horizontal line by matching the two side edges of the paper. Fold again matching the top and bottom edge.
5. Match the folds of the pattern paper with the pencil guidelines on your plaque. Use tape to secure the pattern paper into place.
6. With an ink pen trace over the main outlines for each element in the design. You do not need to trace the small detail lines at this time. Use a medium pressure with the pen; hard or extra firm pressure can indent the wood.
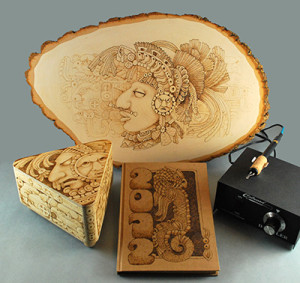 7. Before you remove the tape, lift one corner of the pattern paper at a time to check that all pattern lines have been transferred.
8. Using a soft #2 pencil you can strengthen any of the tracing lines.
 Try this tutorial using our Feathered Serpents Pattern Pack