 Step 2: Cutting Leather
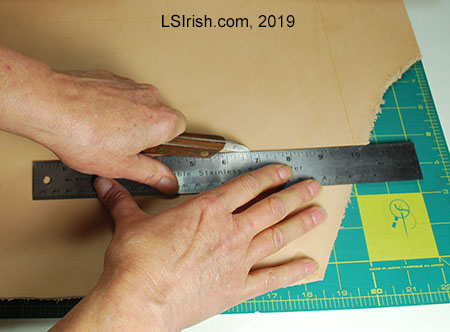
By working on a self-healing mat with a pre-printed grid you can ensure an accurate straight cut.
Leather can be cut using a sturdy craft knife, wood carving bench knife, or sewing rotary cutter. A non-skid, self-healing cutting mat is used to protect your crafting table and comes pre-printed with a measured grid work and common cutting angles.
The metal ruler, shown above, has a cork-back that keeps it secure to the leather. You can also use a T-square or right-angle square. Transparent quilting rulers also have a pre-printed grid work that allows you to see exactly where the straight edge of your ruler falls on the leather.
 Step 3: Leather Skiver
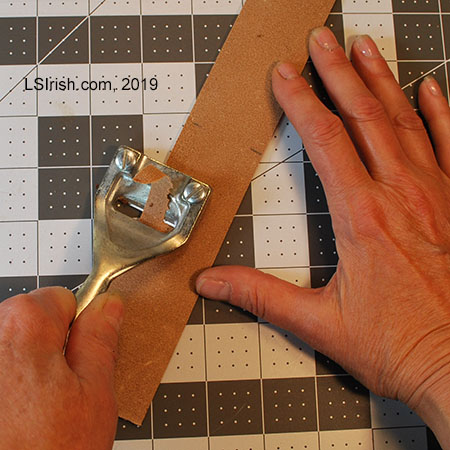
A skiver hold a razor-blade edge in a concave curve that removes thin slices of leather from the back edge of the piece. This thins the leather for cleaner edges and easier bending.
A skiver can be used along both outside edges of the buckle fold areas on the back of your belt blank from the buckle area towards the front end of the blank.
Skivers are used to thin the sides of purse and wallet inserts, purse or belt pocket sides, and any other area of construction that has multiple layers of leather stitched together.
 Step 4: Checking the Buckle Fold
In this photo you can see the original thickness of the belt blank and the new edge thickness of the buckle fold. The fold is now about two-thirds of the original leather thickness.
When the skiving is complete you can fold the belt blank along the buckle area to check your buckle placement and the thickness of the folded area that will secure the buckle in place.