Step 13: Yoke ruffles
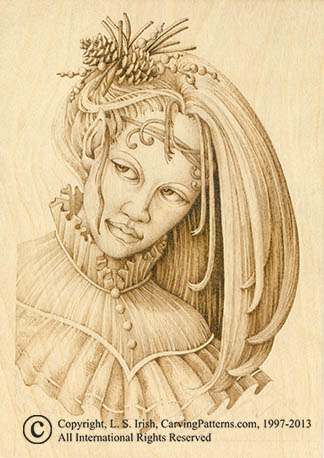
The yoke ruffles follow the same general shading pattern as the neck ruffles and yoke folds with the palest tones and white highlights falling on the left side of this area moving into deep mid-tones where the ruffles lie under the right side hair. Because these ruffles are much larger than the neck ruffles I have been more dramatic with the cross hatch lines to emphasis the texture of the fabric.
The two ribbons on her dress, at her neck and at the top of the large ruffles have been worked as I burned the hair strands to roll the ribbons into to small tubes.
Step 14: Finishing details
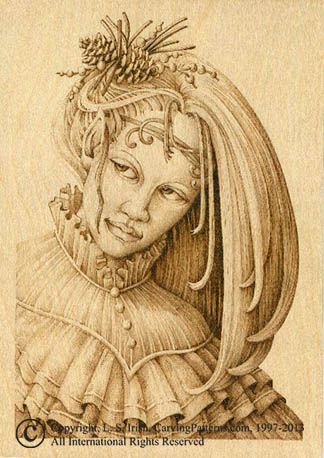
The second and third layer of yoke ruffles have been work with each layer slightly darker than the one above it. Each upper layer of ruffles casts a shadow onto the layer below it. This brings the underside of the ruffles into the black tonal values.
At this stage in the burning I can now add my fine dark detail lines in the hair and hair ornament to break the hair strands into individual hairs. Fine dark toned lines were worked into the background hair area on the right side to darken this area one more time. A few darker cross hatch accent lines throughout the fabric accents the dress texture.
A few random knife-cut white highlight lines in the hair are the last touch to this Pixie Queen portrait. Try to place these white highlight lines in the darker tonal areas for sharp contrast.
Step 15: Checking the contrast of tonal values
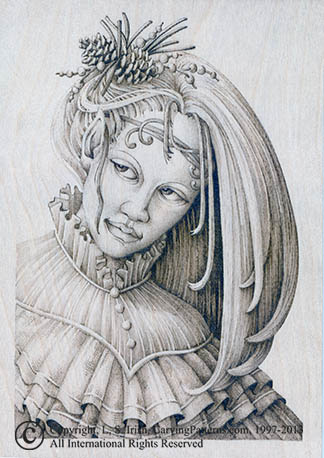
I have gray scaled the final burning to show the dramatic contrasts between the unburned white areas of the Pixie’s skin and the black tones of the hair, ruffle shadows and pine cone ornament. The hair next to her right side of her face, the right side of her neck and the shadows of the lower levels of yoke ruffles go as deep as black.
As I have worked through this portrait I have not outlined any portion of the design. Instead I have used pale tones in one area of the portrait next to darker tones in an adjacent area to create the divisions between each element.
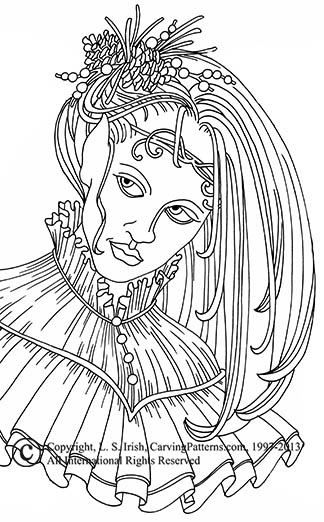 This pattern is offered courtesy of Art Designs Studio and for Personal Use Only.