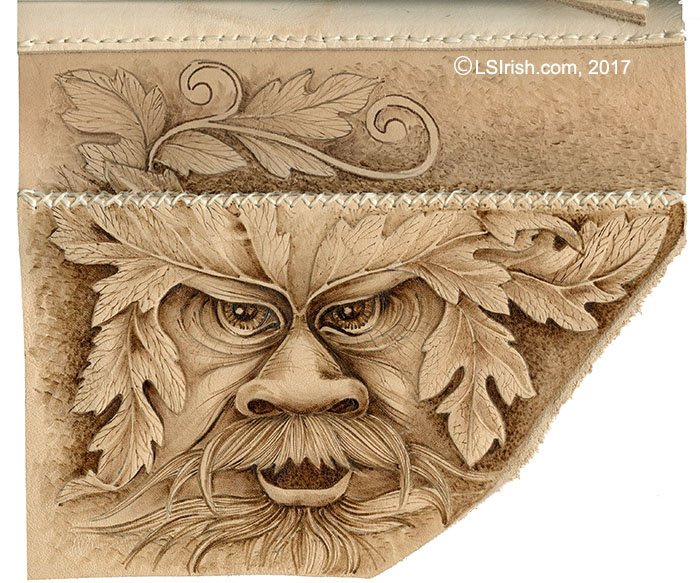
9 Using your flat shader and a medium-hot temperature setting create a textured fill pattern to the background of the pattern. I chose a simple touch-and-lift pattern using my square-end shading tip.
Darken the background areas where it touches the main pattern by working a second layer of fill pattern.
11 Use your looped writing tip, or ball-tip pen on a medium-hot setting to add fine line detailing to the beard and mustache area.
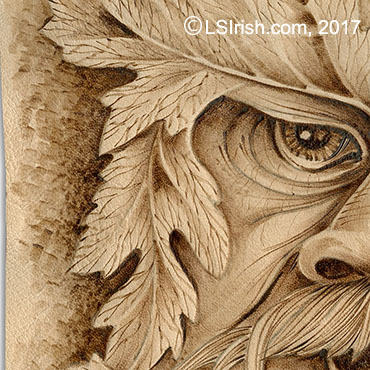
Take time to check your original shading steps, re-enforcing any area that does not give a strong, firm feeling to the shape of the face.
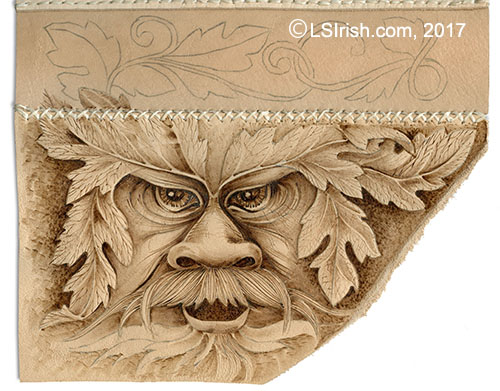
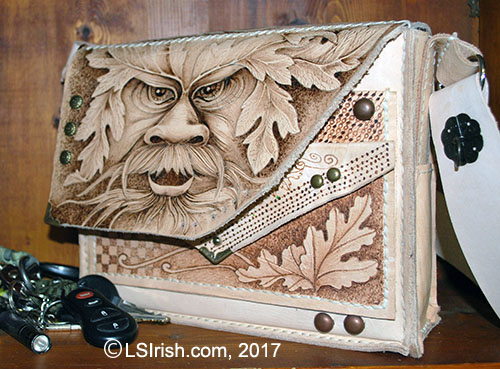
I chose to continue that Greenman pattern into the roll over of my purse by burning an added section of leaves. Eventually I will continue to add more and more small patterns, designs, and fill textures to the back of my purse.
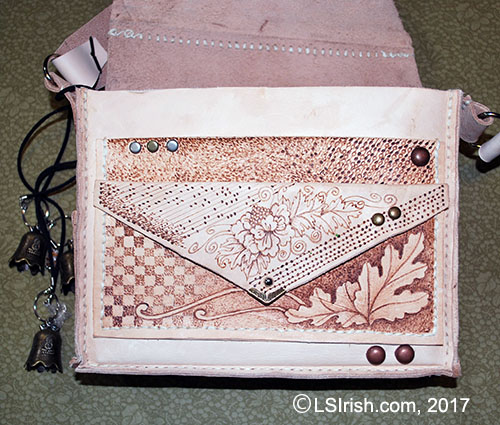
12 Since this entire purse project began as a practice board for my leather burning I continued to use the different sections of the purse to experiment with small fill patterns, shading strokes, and line designs.
On the front of the purse I have used each area of the two pockets as an individual area for more practice.
And since I was just having fun with this purse project I used it to experiment with some of my new leather brads and rivets!
Here’s a preview of my current leather pyrography purse project.
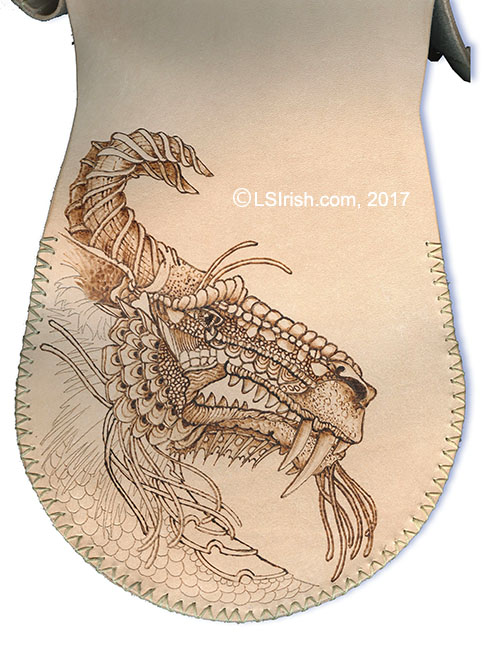
Horned Dragon Pill Box Purse