Creating a Sepia Value Scale
Very early photographs were not printed in black and white but instead they had many shades of brown. This range of brown values is called sepia. That is the range that wood burners use in creating our work.
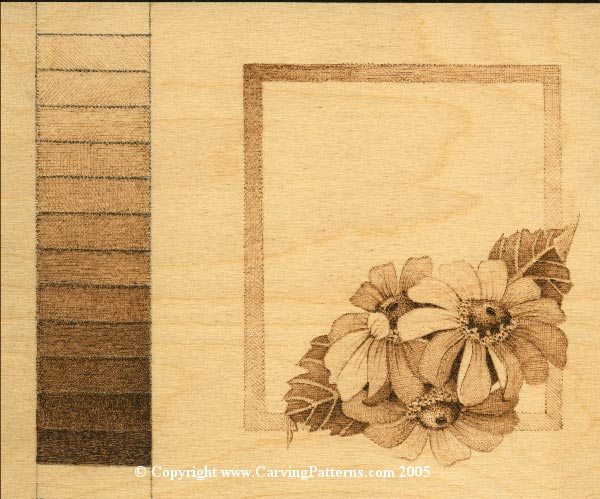
Start by creating a Sepia Value Scale. On a wood surface mark a test grid of squares or rectangles in which to burn each value tone. My sepia scale sample was worked on birch plywood. The test squares are 1 1/2″ long by 1/2″ high with 13 rectangles total.
I am using a variable temperature setting tool with the basic writing tip. The thermostat was set at a medium temperature throughout the burning of the sepia scale. Create your test on the wood that you most commonly wood burn.
The first or top rectangle was not burned. This is my palest sepia value, the original color of the wood surface. In the second rectangle I burned fine lines along the diagonal of the rectangle. For the third rectangle I burned that same pattern of diagonal lines then added a  second layer of burning using diagonal line going in the opposite direction. The fourth rectangle has both sets of diagonal lines then a third layer of burning was added by using horizontal lines. The fifth test pattern has the above three burnings and a fourth layer of vertical lines.
With each new rectangle a new layer of burning was added and worked in a new direction to those already done. Notice how with the addition of a new layer of burning the test sample rectangles slowly and gradually become darker in tonal value.

Layers of Wood Burning
In my test sample of the Sepia Value Scale I needed twelve rectangles to finally create a deep black chocolate tone. This is a very wide range of possible color tones that I can use in any design.
The texture that was used to create the test rectangles is called Cross Hatching. In the Daisy Corner burning you can see how that cross hatch pattern looks when used in a design.