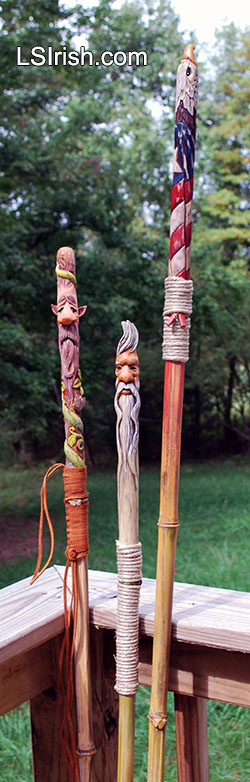
Walking Sticks and canes are a favorite wood carving project for both beginning carvers to the most advanced woodworker. This free, online project by Lora Irish will take you through the basic techniques used in choosing your wood staffs and sticks, wood carving cane toppers, cane construction, and finishing used for walking sticks. Learn how to use wood burning in your cane carving to clean the joint lines of your carving and add fine details. Explore the different steps you can use to add bright, bold painted coloring.
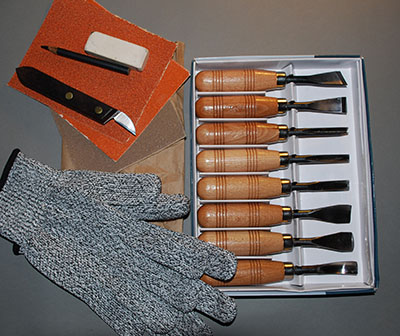
I have listed the tools that I used during this relief project. You do not need these exact brands or products. As this is a beginner’s level work, so please use what tools you already have. The manufacturers are listed in case you see a tool, tool set, or wood burner that you particularly like.
Below are either Amazon affiliate links or links directly to the manufacturer’s website.
Schaaf Wood Carving Tools: Set of 12 with Canvas Case – Full Size Gouges and Chisels for Beginners, Hobbyists and Professionals | Sharp, Quality-Tested CR-V 60 Steel Blades
Chipping Away: (I have used my Chipping Away Large knife for almost three decades … and it just performs perfectly every time.) Large chip carving knife white fine ceramic sharpening stone brown coarse ceramic sharpening stone leather strop and rouge
Ramelson Tools:(I began with Ramelson and still find myself reaching for their tools during every project) UJ Ramelson Basic Woodcarving Tool Set
Japanese Carving Sets: (This is a great set for almost all wood carving projects and the sets that I use for spoon carving as well as relief carving. The small hand set includes a bull nose chisel, one of my favorites.) WAYCOM 24PCS Wood Knife Kit Set Wood Carving Kit,Professional Chisel Set, including Small, Middle, Large size (24PCS)
Walnut Hollow Creative Woodburner:Wire Tip Wood Burning Tool (This is their variable temperature tool with interchangeable wire tips, perfect if you also do wood burning.)
Walnut Hollow Creative Versa Tool: with Variable Temperature Control for Woodburning, 11 Points (Tips), Original Version, Basic Pack (This is their one piece rheostat tool which is great if you are just starting in wood burning or if you will only be doing burned details on your carvings.)
Optima Wood Burner: small round shader tip, modified (ball) writing tip, coarse hair tip (Fantastic unit for advanced burners.)
Detailer Basic Woodburning Kit: ( FTC standard writing tip, FTD small round tip, FT Ball 3 round tip (Fantastic unit for advanced burners and it comes with Sue Walter’s Book, Pyrography Workbook!)
Flexcut Slipstrop: Sharpening Kit with Strop and Gold Polishing Compound
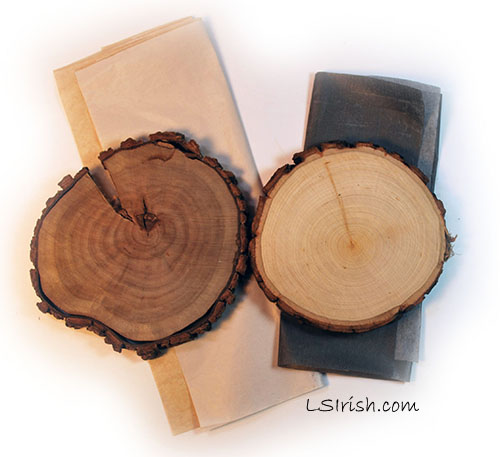
Saral Graphite Transfer Paper: (I like Saral because of its soft gray coloring. Its great for wood burning where you might not be able to remove all of your tracing lines.)
Set of Rifling Files:SE 10-Piece 7” Riffler File Set – 736RF (This is a small set of files that let’s you get into your undercuts and sharp joint lines)
ink pen for tracing pencil for marking the board compass file folder or index cards for depth gauges bracing board or bench hook:(DIY instructions here at LSIrish.com) non-skid rubber kitchen matt Minwax Water-Based Sanding Sealer assorted grits, including 220 grit sandpaper assorted sift ox hair brushes for dusting assorted oil paint/ox hair brushes for painting polyurethane spray sealer Acrylic craft paints: titanium white, medium earth red-brown, yellow ocher, Paynes gray, carbon black, hooker green Oil paint for antiquing: burnt umber, turpentine, linseed oil clean cotton t-shirt material for antiquing
Classic Carving Patterns – Our original wood carving, wood burning, and pattern website. Art Designs Studio – Original, exclusive, and new patterns and line art by Lora S. Irish LSIrish.com – Designs Online Since 1997! Free 0nline projects, tutorials, & step-by-steps
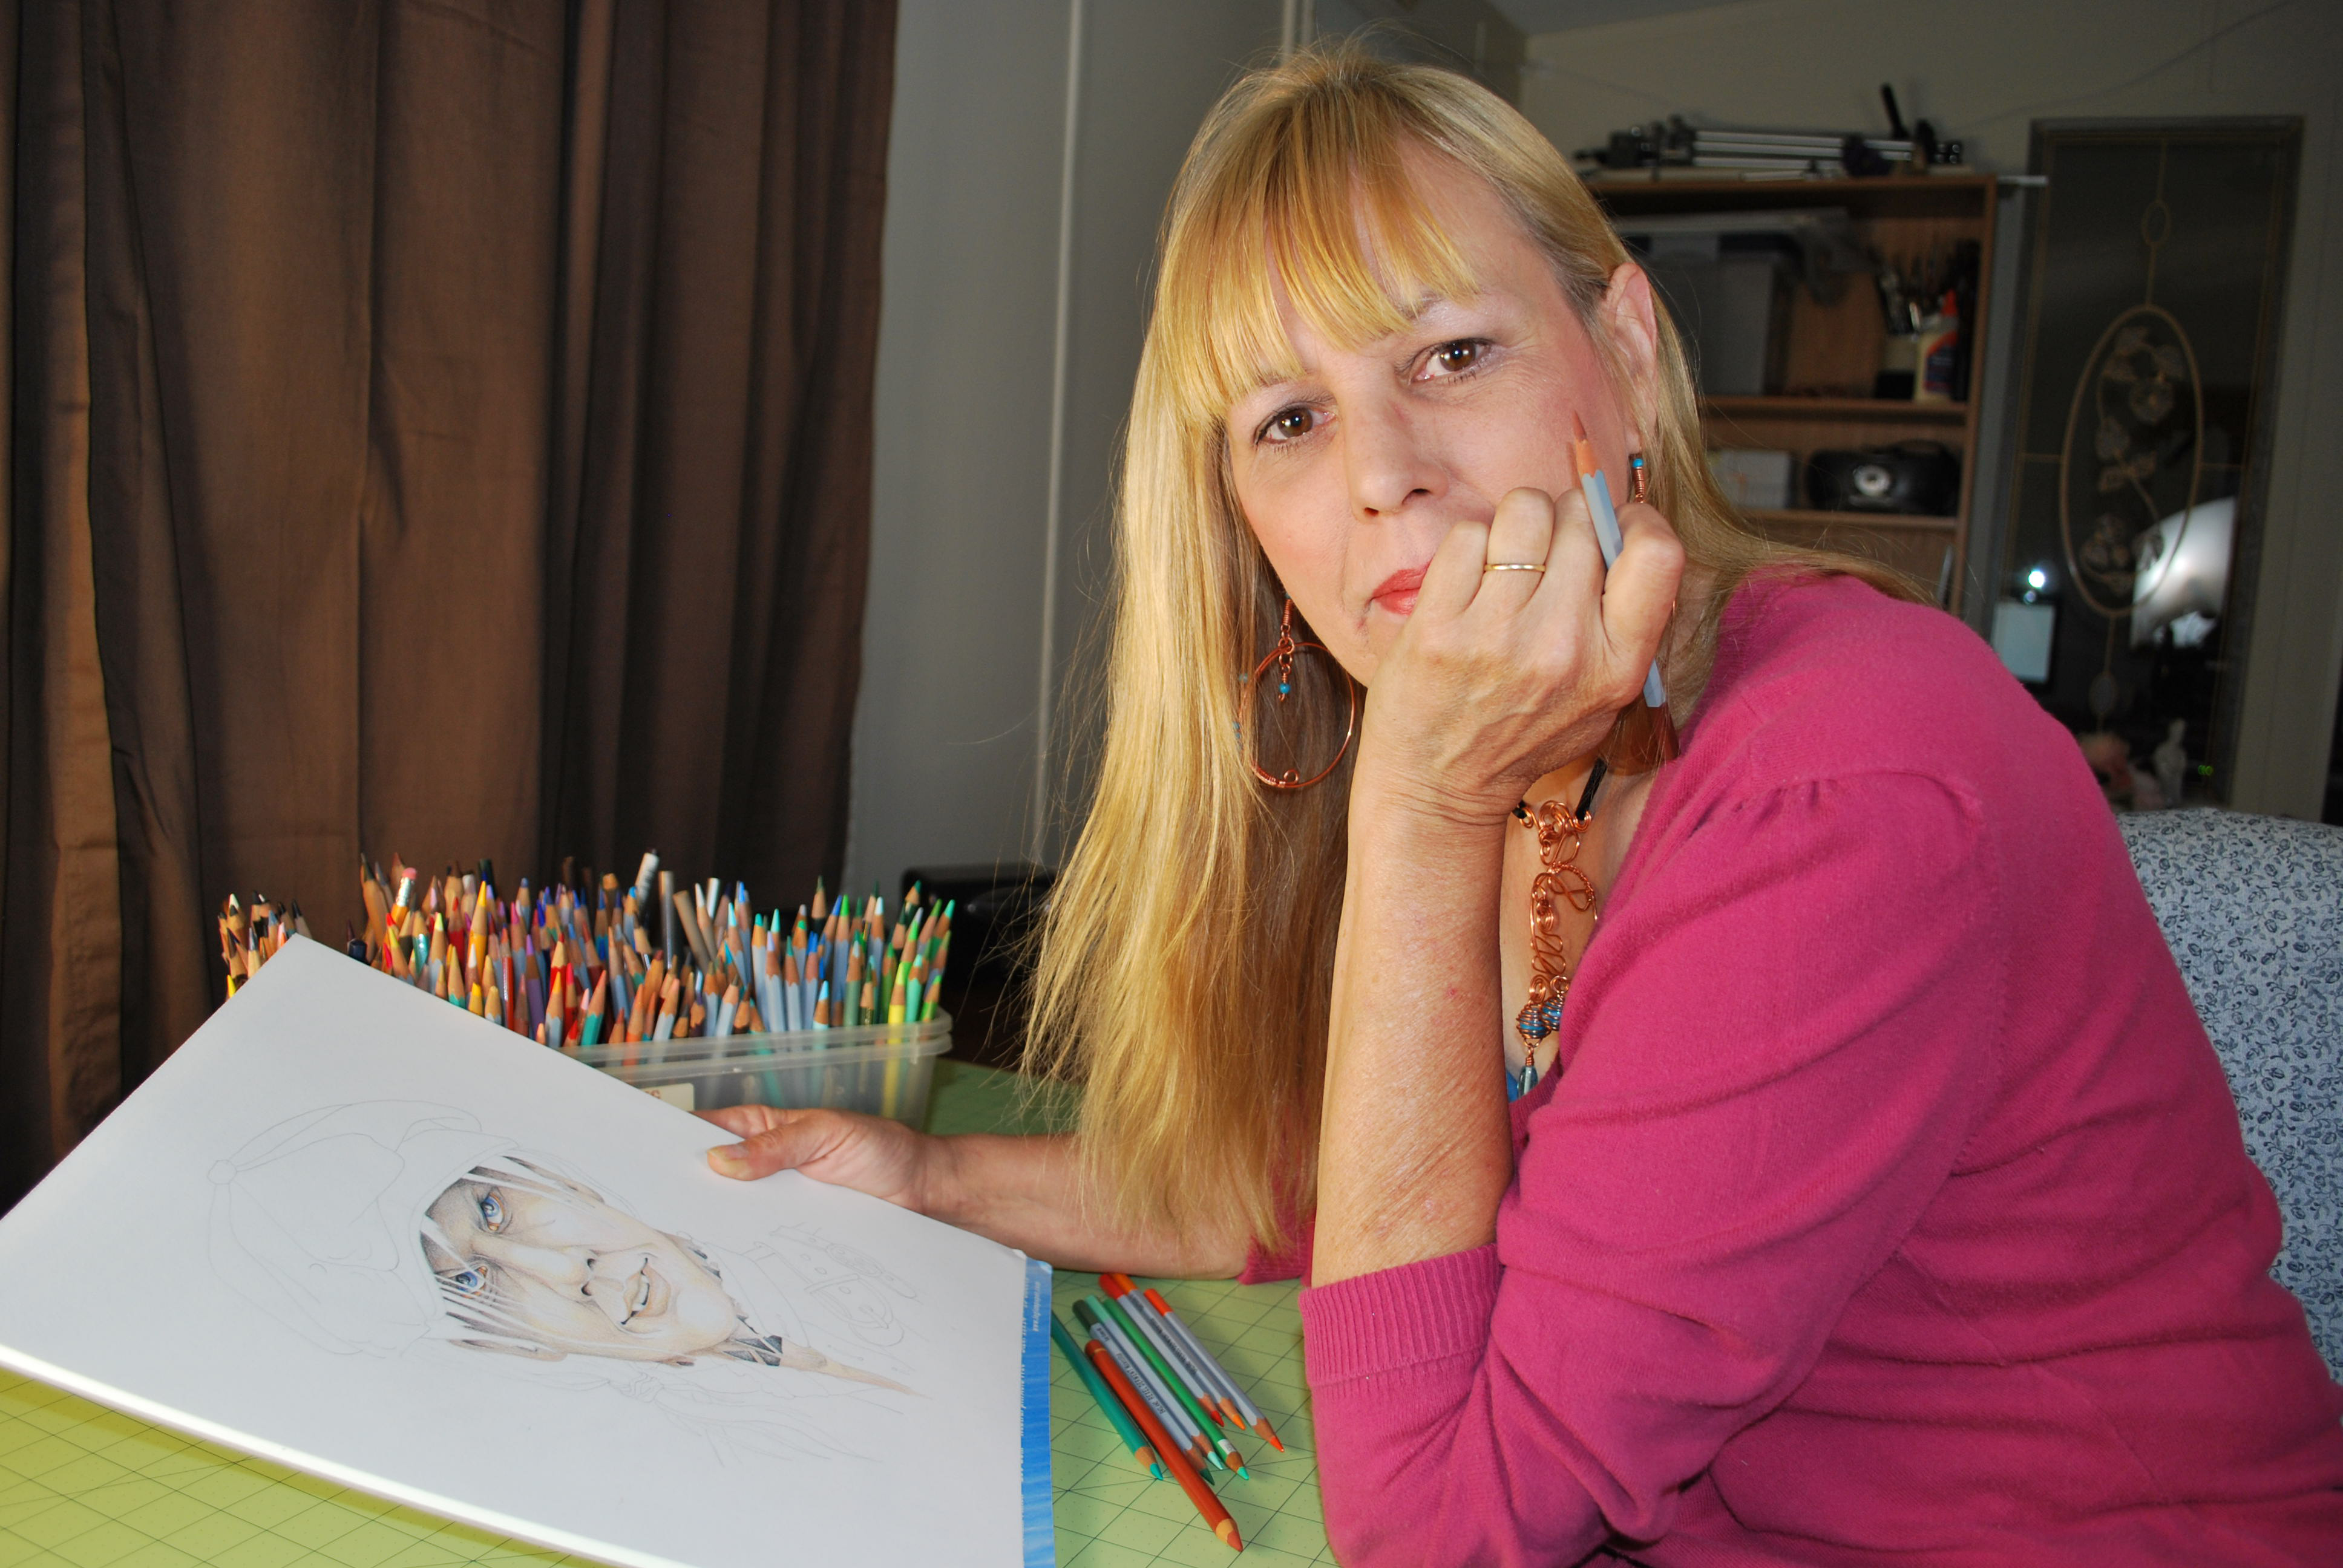
Trained as a Fine Artist at the University of Maryland, twelve of Lora Susan Irish’s pure breed dog oil paintings have been published as limited edition art prints. Her art has been featured on the front covers of “Doberman Quarterly” 1991, “Samoyed Quarterly” – all four issues of 1991, and “Shetland Sheepdog Quarterly” 1991 published by Hoflin Press.
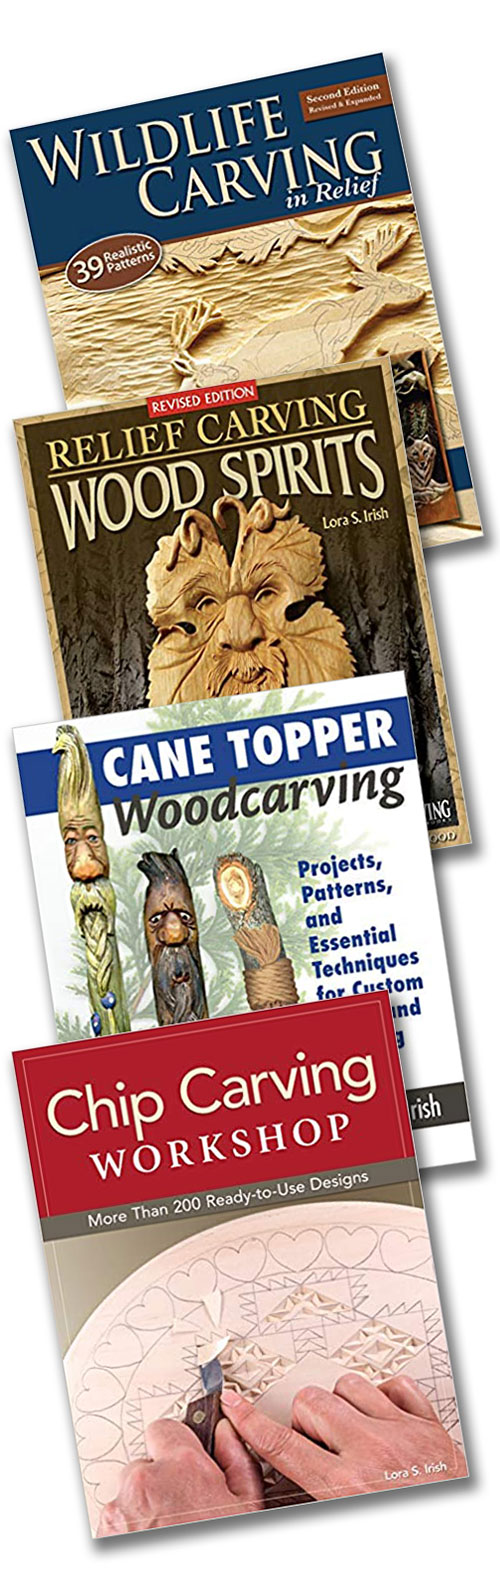
She is the author of a series of woodcarving, pyrography, and craft pattern books. Currently Lora has 32 publications in print.
L. S. Irish shared the Woodcarver of the Year – 2007 with Ed Gallenstein, editor and publisher of “Chip Chats Magazine”, for her support and teaching efforts in the wood carving community. Irish’s free online tutorials can be found here on her blog, LSIrish.com, full of in depth step by step, how to free lessons on wood carving, woodburning, pyrography, and other great crafts.
Lora and her husband, Michael, took their home based art studio, Art Designs Studio established in 1984, to the Internet by creating CarvingPatterns.com in 1997 and continue to hold the copyright on this domain and all of the Works which it contains. All images carrying the copyright of CarvingPatterns.com remain the sole property of Lora S. Irish.
Working from her rural mid-Maryland home studio, Lora S. Irish is currently exploring new crafts and hobbies including wire bent link jewelry, metal sheet jewelry, piece patch and applique quilting, gourd carving, gourd pyrography, and leather crafts.
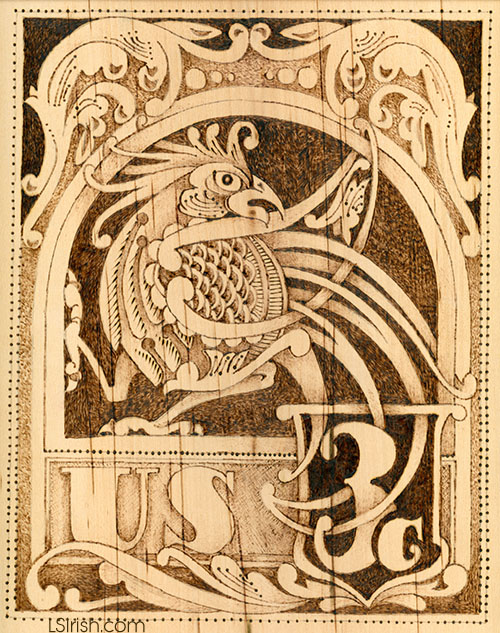
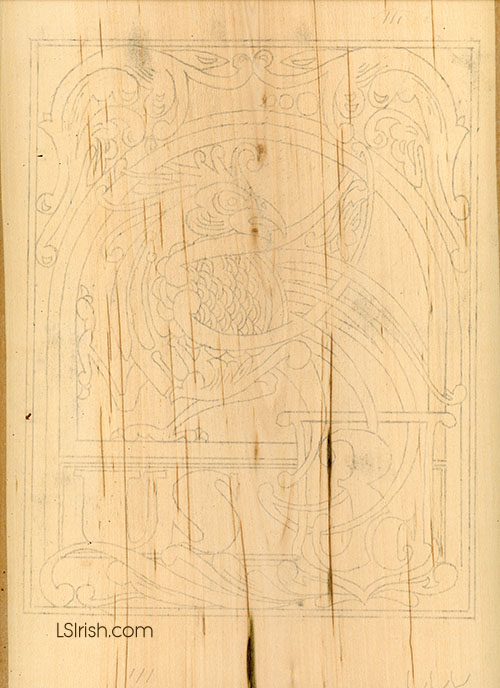
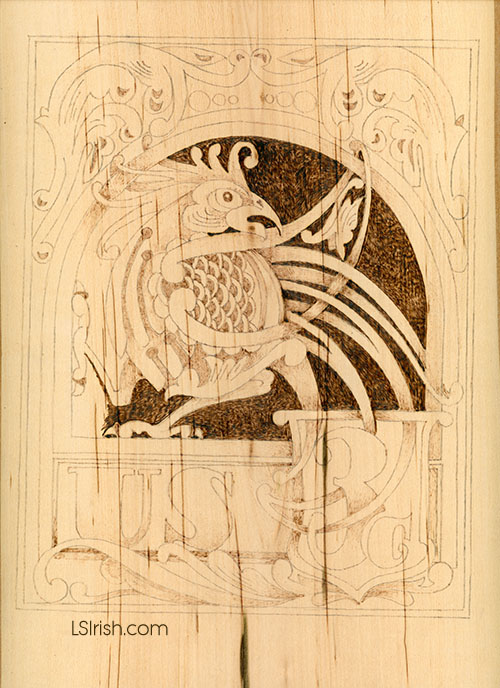
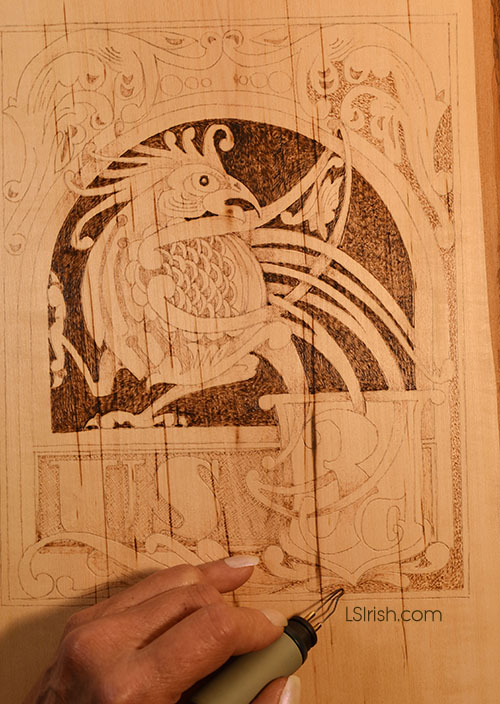
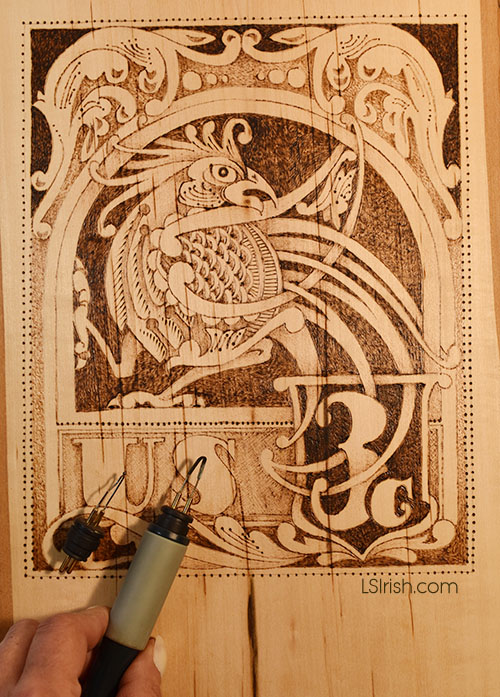
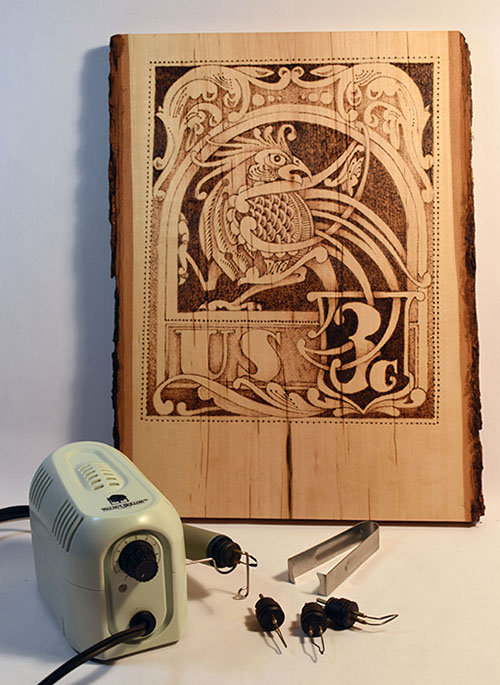
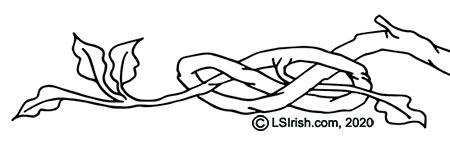
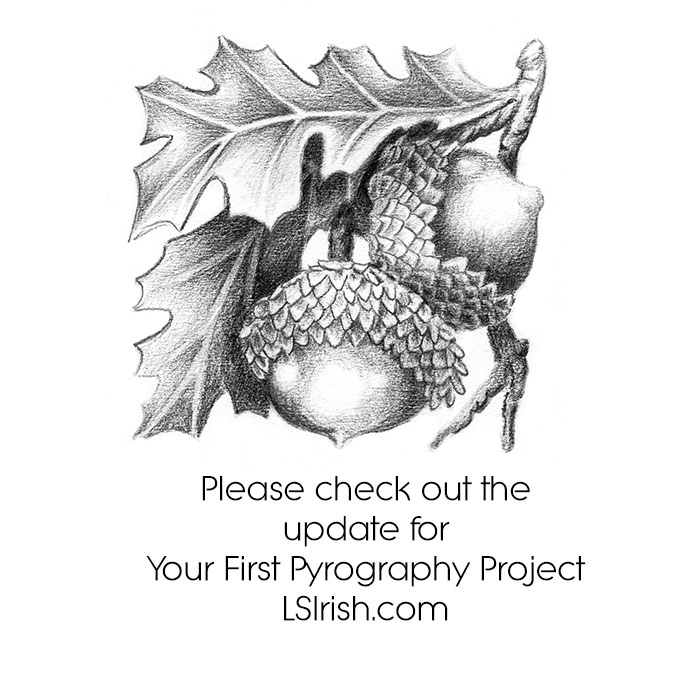
ROOSTER CELTIC KNOT COMPLETED BURN Worked as if it were an 1800’s American stamp, this Rooster Celtic Knot pattern will let us explore the basic steps used in most pyrography projects – Outlining, Mapping, Backgrounds and Voids, Texture, Strengthening, and Detailing
The pattern for this Rooster Celtic Knot is worked on a live-edge, basswood, 3/4” thick plaque that needs to be 9” x 12” or larger.
As shown in the Tracing Steps, I have allowed the extra room on the plaque to fall at the bottom of the wood, which will give me a space to add decorative cup hooks when the burn is complete.
Basswood is easy to obtain at most large craft stores. Although classified as a hardwood, this pure white, fine grain wood performs as a softwood, accepting very pale tonal values and extremely fine detail. At high temperatures and solid fills you can achieve solid black areas in your work.
The postage idea is a very forgiving subject for new pyrographers as the early 1800’s stamps, on which this is based, often were printed on coarse paper with somewhat ragged printed colors that could bleed into surrounding areas.
If your shading is a little uneven or your detail lines a little wobbly as you learn to control the wood, temperature setting, pen tip, and stroke, it will just add to the impression of an old collectable stamp.
So, relax and have fun!
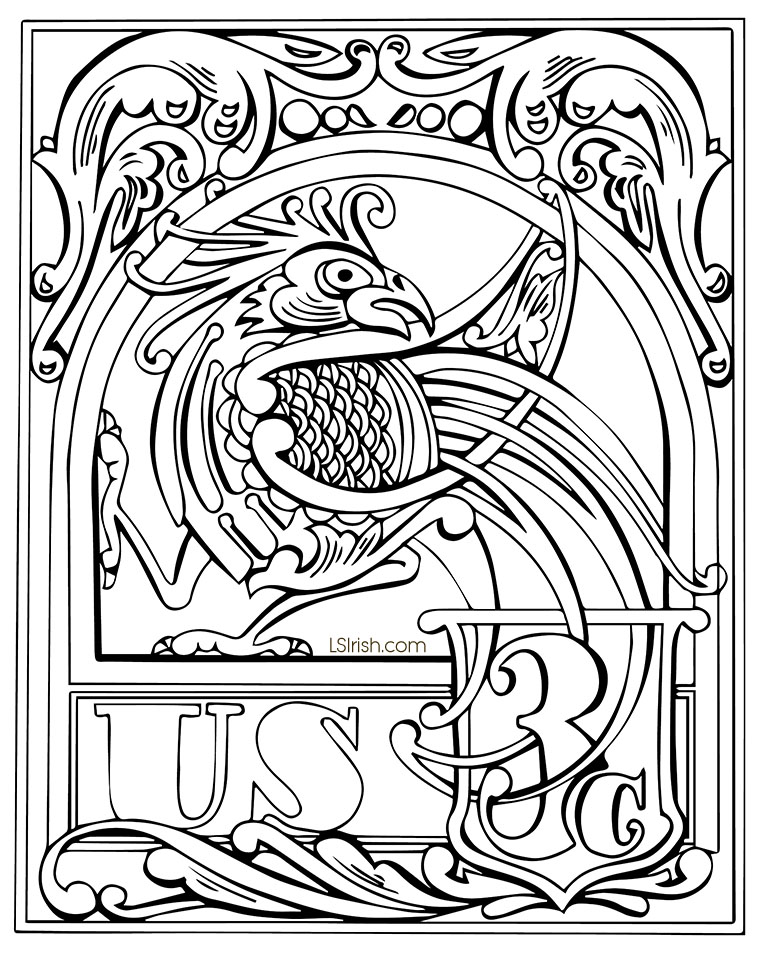
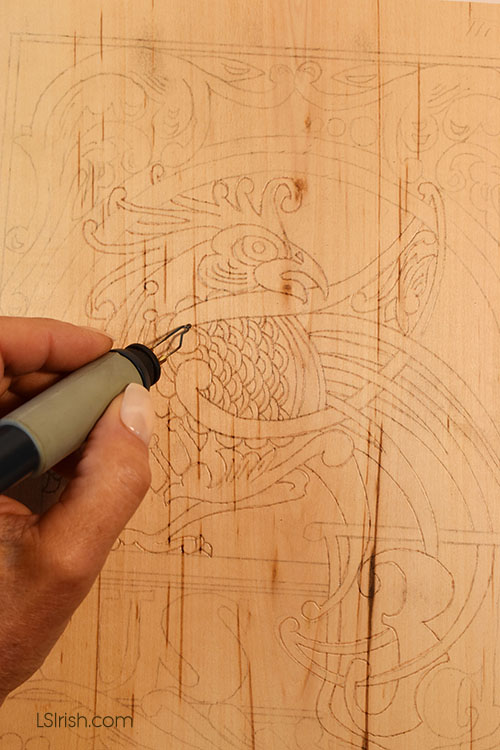
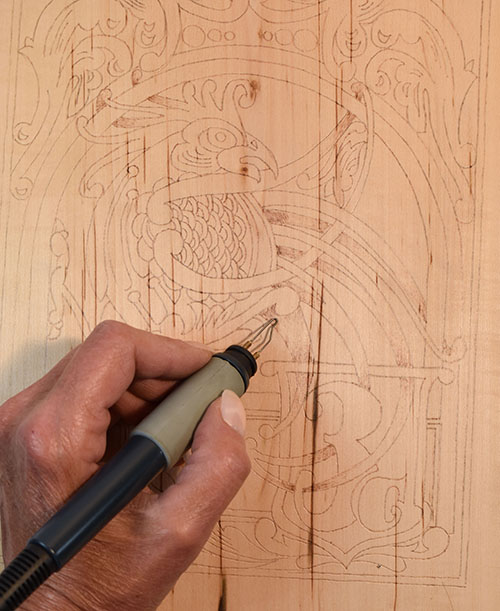
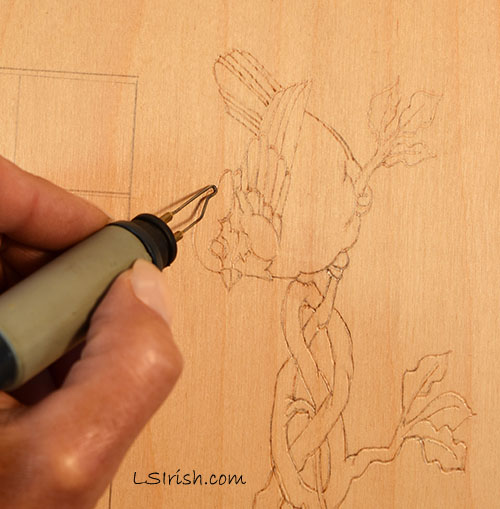
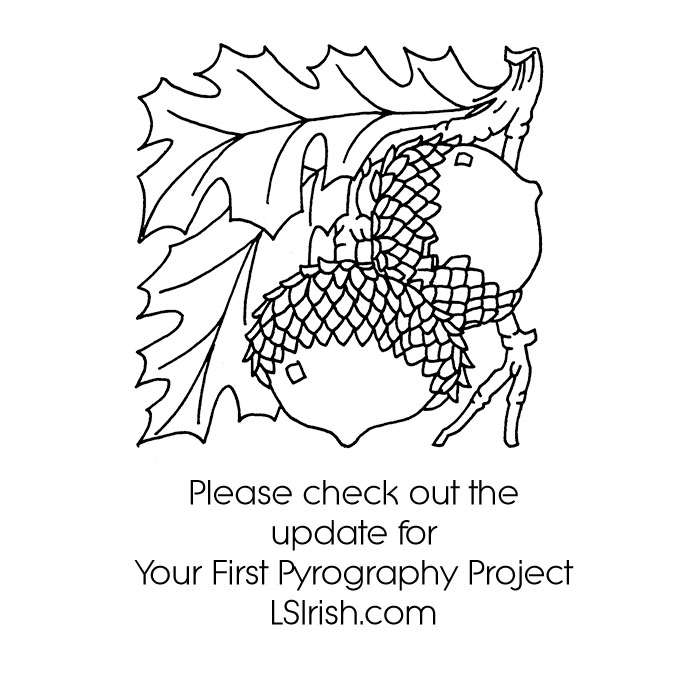
1. Sand the surface of the wood to create as smooth a burning surface as possible. Trace the pattern to the wood using a graphite pencil rub on the back of the pattern.
OUTLINE
2. Use the ball-tip pen on a low temperature setting of 4 to 5 for a very pale tonal value. Outline the tracing lines of the pattern. This light burning is to permanently set the pattern line so that your hand and work does not accidentally wipe away the graphite lines. This first outlining is not meant to be seen once the burning is complete, it is a guideline for you in your work.
Not all pattern tracings need to be outlined nor is it appropriate to do it for every burning theme. Obviously, clouds in a landscape scene do not have outlines nor do petals and leaves in a floral design. But as a beginner using a very pale outline step makes your first projects easier as you can’t lose the pattern as you work.
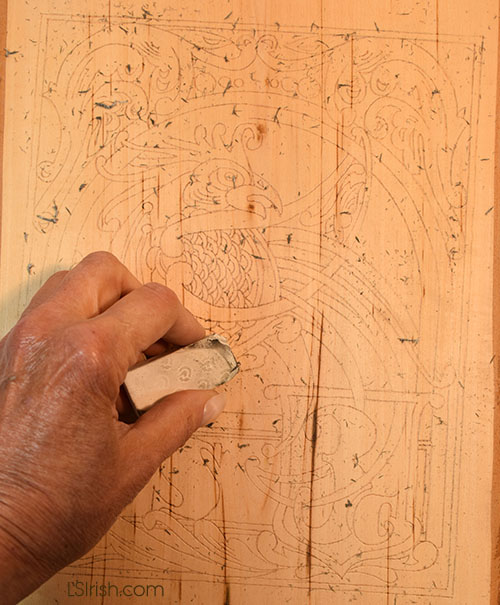
SAND, TRACE, & CLEAN
3. When you have completed the pale value outlining clean your entire piece of wood with an artist’s eraser, gum eraser, or architect’s eraser pad to remove any graphite left from the tracing steps.
Your hot tipped pen can permanently set those small graphite smudges or pattern lines into the work as you begin the burning. The outlining step just done (step 1) allows you to remove all that dirt before you begin your art.
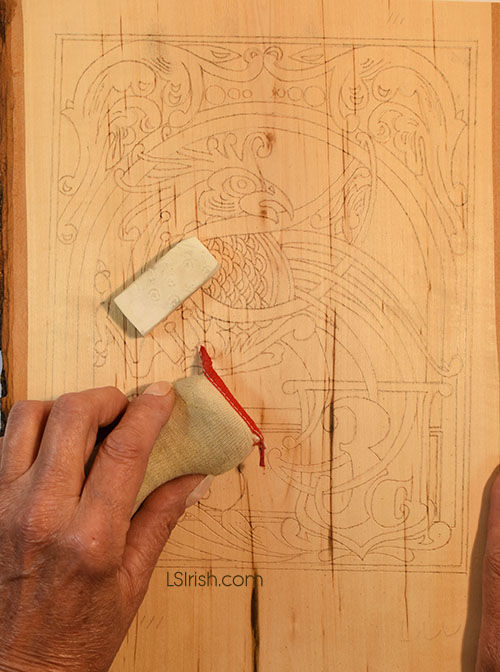
4. After cleaning the wood, remove the eraser dust with a dry, clean cloth.
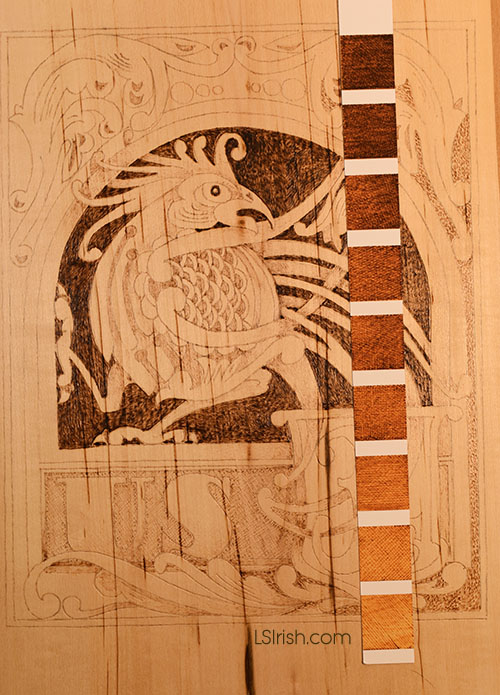
MAPPING THE SHADOWS AND SHADING
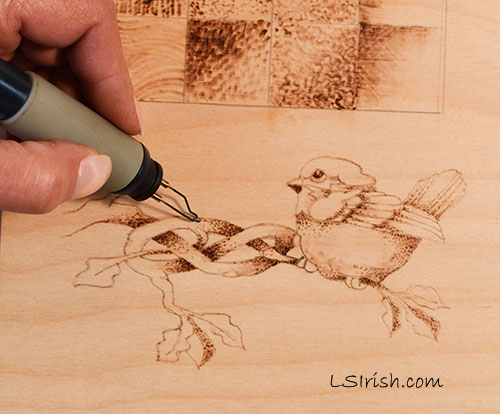
5. Mapping let’s you determine where you want your shading and shadows early in the work. Use the loop tip pen and a low temperature setting of 4 to 5, working the scrubbie stroke. Work a pale tonal value burn to those elements that lie underneath other elements. The tail feature beginning burned in the photo come from under the bird’s body. Next it tucks under the frame for the 3-cent area. Both of these areas are shaded. Where this same tail feather rolls forward and over the 3-cent frame it becomes the highlighted area that receives light, so you will be shading the frame as the underneath element.
These areas of pale value will be strengthened as you do further work on your art. This step let’s you think through where your shading will fall before you burn an area so dark that it can not be removed or altered.
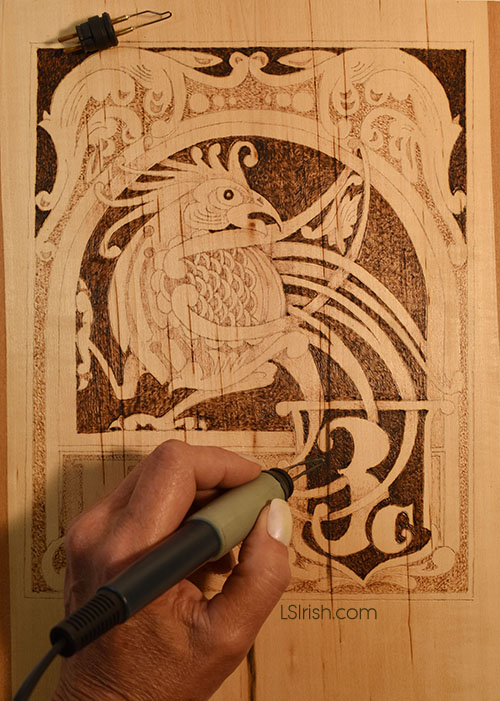
WORKING THE BACKGROUND AND VOIDS
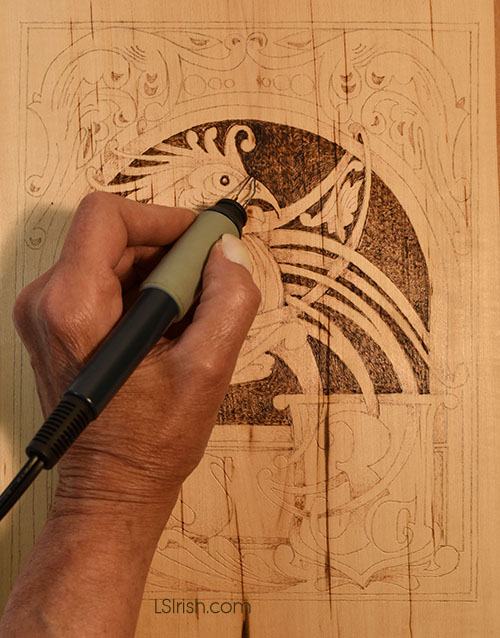
6. Use the loop tip tool on a medium-hot setting of 5 to 7, using a tight scrubbie stroke. Fill in the void behind the rooster that is inside the curved, top frame area.
Decide how you want to treat the background area of your pattern. Is that background part of the theme as mountains and sky behind a barn, or is it a void area – an area without design, pattern, or even importance to the work?
There are several options on how you treat your background and void spaces. A. Leave the area un-burned, un-worked, and in the raw wood coloration. This choice, in essence, ignores these areas totally as shown in the second stamp project we will be doing tomorrow. B. You can blacken the background with a solid, high temperature fill stroke. This also, in essence, ignores the area as part of the pattern but can push the pale and mid-tone value work of your design forward visually. C. You can chose to use a static texture, repeat texture, or dot pattern as is worked in pointillism, worked in a mid-range tone that contrasts to the main pattern elements. Step 6 uses option B by blackening the background to the rooster to a dark-medium tonal value.
ADDING INTEREST
7. Large solid fill areas do not need to be absolutely even in tonal value work. Allow some areas to develop a slightly darker tone or paler tone than other areas to add a little extra interest to the overall area. In our sample I am darkening the background around the rooster’s head fathers and along the left side of the area where it touches the frame. This is meant to be a work of art, so remember perfection can be boring.
CROSS HATCHING
8. Use cross hatching , worked with the spear shader, set of a medium-hot setting of 5 to 7 for the US frame background. By working the background of this lettered area with a defined texture of overlapping, crossing lines I can identify the area as a separate piece or element from the surrounding elements. The cross hatched US frame is an independent subject from the solid fill rooster area of the stamp.
MID-TONE VOIDS
9 There is a large void area that surrounds the outer scroll work of the stamp design. Use a medium-hot temperature setting of 5 to 7, and your loop tip pen to work an open dot pattern in this area.
SEPIA SCALE CHECK
10 At this point in the burning that most of the tonal values remain on the paler side of the sepia scale. You can always darken an area later as needed. You can’t easily lighten an area that you initially worked into a dark tone.
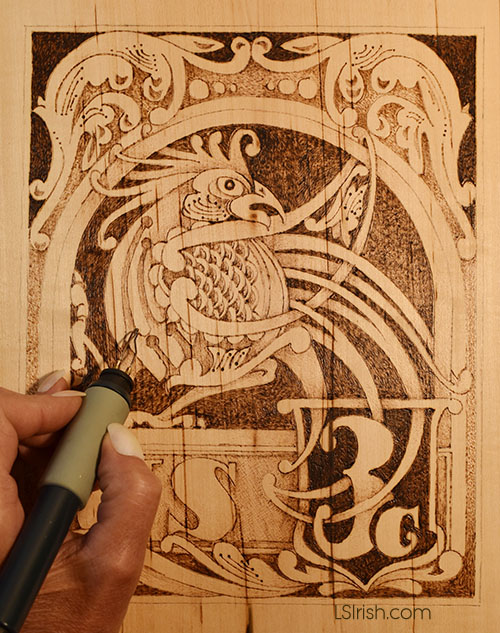
WIDEN THE TONAL VALUE RANGE
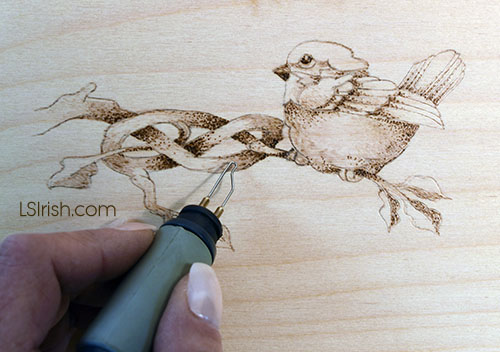
11 Widen your tonal value range by establishing several areas of solid fill black. Use your loop tool on a hot temperature setting of 8 to 10. Fill the areas with a tight scrubbie stroke. For our project these areas are the background to the 3 cent frame and the area above the top scroll design.
STRENGTHEN YOUR SHADING
12 At this point you have clearly created areas of un-burned pure white to solid fill black. Its time to strengthen your shadows and shading to fill in the mid-tone values. Working over the mapping areas worked in step 5 add more mid-tone shading to intensify your design. Note this shading still follows the simplest shadowing step of darkening an element that is underneath another element. The closer that area is to the under tuck the darker its tonal value. As you move away from the under tuck area the shading will move to paler values. Use the tool pen that you originally used for each area.
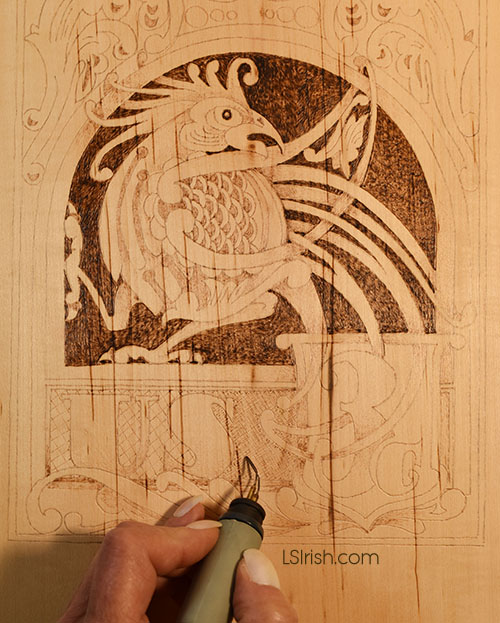
DETAILING
13 The final step in the burning of this Rooster Celtic Knot stamp pattern is to work the detailing of the design. The tonal value work that you have already done should have covered most of the outlining done in step 2. By detailing the pattern you establish crisp separation lines between elements, divide areas of similar tonal value, and give emphasis to particular parts of the pattern.
Don’t completely outline your original tracing lines. Instead work fine lines where one area needs more definition. Allow breaks in your detailing and allow changes in your tonal value so that some lines will be mid-tone while others near the black range.
For major line work, as the top of the 3 cent frame where the rooster feathers intersect, I use the ball tip pen on a hot setting of 8 to 10. The ball tip tool also is used to add the spaced dot pattern along the outer edge of the stamp pattern. For very fine, very dark, short lines as seen in the rooster’s feather work, use your spear shader on its edge in a touch and lift motion.
14 Clean your project with your white artist eraser or architect’s eraser pad to remove any hand dirt or oil. Remove the eraser dust with a clean, dry cloth. Seal the wood with several light coats of acrylic or polyurethane spray sealer.
General steps to any wood burning design. As we work through the main project we will look at each step in-depth.
1. Trace or draw your pattern. On a low temperature setting with a loop tip or ball tip pen, lightly outline the pattern lines. This is just to set the pattern lines so that you don’t accidentally erase them as your hand moves across the board.
2. Map your shadows. Again, working at low temperature to create pale tonal values, begin mapping where you want your shadows and shading to fall. In general an object that lies behind or under neath another object will carry a shadow cast from the top object.
3. Make a decision about your background, void space. Will your background be left un-burned in the palest tonal value, will you burn all of the surrounding area to the pattern to your darkest black tone, or will your background to the pattern hold more design burning as the distant mountains to a barn scene.
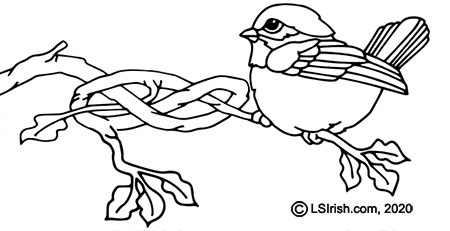
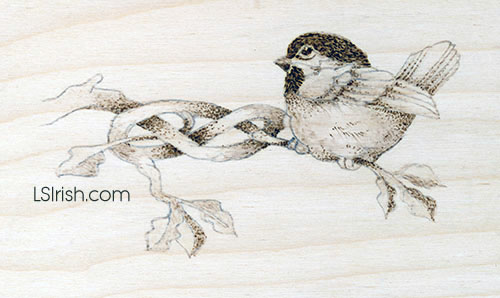
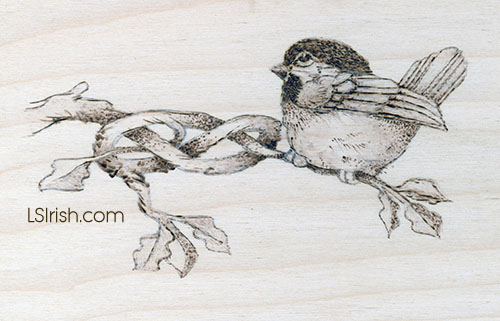
You background choice helps determine how dark you want your shading tones to be. For un-burned backgrounds as on our Celtic Branch Bird allows for very dark shading to be used directly in the design. The blackest tones are part of the burned pattern. With black backgrounds that background holds your darkest tonal value and all design work must be done in a lighter or paler value than the background. On your 1 to 10 sepia scale if your background is worked as a 10 then you pattern burning must be worked in a 9 or lower setting to it to show separately from that background.
4 Graduate the shading across a full value range. Graduated shading is worked net where some areas of your design will be burned in pale tones, some in medium tones, and some I the dark tonal value range. This is where you begin to develop the three-dimensional look of your design using the different pen tips and pen strokes. For our Celtic Branch Bird this includes a hot temperature, dot pattern burn on the branches using the ball tip pen. The belly area of the bird is worked in a pull stroke using the spoon shader, and the leaves have a soft, scrubbie stroke on a low temperature setting using the loop tip.
5 Create areas of contrast. As your design develops you will need to establish both extremely pale areas inside of the burning as well as the darkest tonal values. You only need a few spots of each white and black value to create a strong contrast. For our bird the white highlights are under the eye, the center tail feather, and the top of curve of wood in the knot patter. Our black tones are the eye, the cap and the deep underneath curves of the wood knot.
6 Add your details. Details are not outlines. They are small sections of an area that is re-enforces with a thin, fine line. Some areas of your burn may need no detailing as the tips of the tail feather for our bird. In other areas use a changing, thick to thin line as around the edges of the leaves. Allow a few areas of your design to have neither an outline or detail … just let the tonal value work stand on its own.
7. Clean and finish. This little practice project is complete in the burning steps and ready to have any tracing lines or hand dirt erased with an artist eraser, gum eraser, or architect’s pad. You can add coloring through the use of oil paints, water-thinned acrylic paints, or colored pencils to the work. Finish with either an oil finish or spray sealer finish, following the directions of the can.
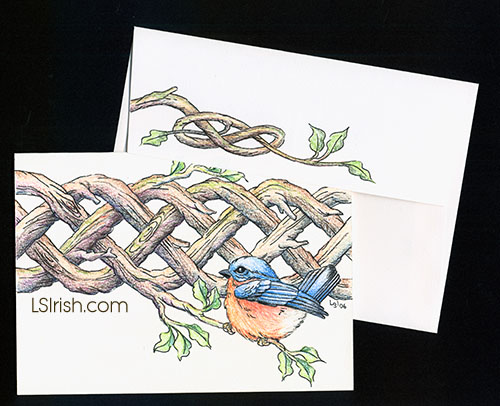
This is our the same Celtic Knot Blue Bird design that we have been exploring as a birch plywood burn. In this sample the burn was worked on heavy-weight art-quality writing paper and matching envelope. Color was added using colored pencils, and the work set with a light coat of matte spray sealer.
Any natural surface can be used for pyrography including wood, gourds, paper mache, cotton and linen cloth, watercolor paper, and vegetable tanned leather.
Avoid any material that has been chemically treated or painted as the high temperatures of the tool tips will release the chemical fumes of these materials during the burning process.
Avoid using any media of ‘unknown origins’ as palette wood or unidentified scrap wood as you have no knowledge to what treatments it may have been subjected.
Avoid any material that has evidence of mold, mildew, or water damage as all of these can cause health problems with contaminated fumes.
The natural coloring of your wood species will directly affect the range of tonal values you can burn.
WOOD
Soft woods as basswood and poplar develop dark tones at very low temperatures. So you do need to watch your temperature settings so that you do not go too quickly to very dark tones. Mahogany tends to burn at a medium temperature range and the birch and black walnut need hotter temps.
The natural color of the wood effects the color ranges that you will be able to see in your burning. Obviously the poplar and basswood, as both are white woods, are going to show a very wide range of pale value burns. The African mahogany and the black walnut probably will not show the burning until you reach a mid-tone or dark toned burning.
Pre-manufactured shape as wooden boxes, plaques or canisters can be purchased at the larger craft stores and supply houses. As your skill in wood burning grows you can also consider unfinished furniture as your work surface. Whichever wood or surface you chose please consider basic safety procedures. Do not burn any surface that has been painted, sealed or oiled. Safe wood burning is done on untreated, raw wood only.
LEATHER
Leather is an extremely versatile surface for any pyrography project. It can be cut into any shape, created into wallets, book covers, bags and even saddles. It can be molded and sculptured. Pre-cut kits leather kits that include tools, needles, lacing and instructions are available through leather work supply house. You can also purchase leather in half side hinds ready for you to cut into your own leather craft project.
There are several methods to tanning leather and vegetable tanning is the safest method for a piece to be used for wood burning. Avoid leathers that have distinct textures, brightly dyed colors or rough suede surfaces.
Leather burns quickly and easily at low temperature settings. In the higher temperature range you can develop strong dark tones and even use your wood burning tool tip to sculpture the leather surface creating a three dimensional look to your work.
GOURDS
Dried gourds with their densely packed wood-like fibers provide the burner with interesting shapes for their pattern decoration. Easily cut, the gourd can become a bowl, sand candle cup, vase, lamp and, of course, a delightful bird house.
Not all gourds come pre-cleaned and you may need to remove the skin from the outer surface. As the gourd dries the skin becomes black with mold. Wear a dust mask whenever working the preparation steps. Latex or rubber gloves will protect your skin for the dust. Soak the gourd in a warm water bath that has several tablespoons of Clorox added. Depending on how thick the skin layer is this bath may take up to one half hour. Roll the gourd often so that there is an even layer of water on its outside.
With a plastic kitchen scrubby gently work the skin off. I often find that I need to soak then scrub several times to remove this entire layer. When you have the shell area exposed, allow the gourd to dry well. You are ready to cut the gourd with a sharp bench knife, a wood carving tool, or with a strong utility knife and to scrap out the seeds from the inside area.
COTTON FABRIC
Cotton canvas items as totes, book bags and aprons can be added to your idea list when considering your next project. A fabric burning can create tonal values from very pale soft browns to rick dark russet tones. Any cotton fabric can be wood burned but the thickness of the canvas weave makes it the ideal fabric. Also consider working a wood burn design on pale colored cotton blue jeans.
Any fabric should be pre-washed first to remove any sizing or starch. Blot off the excess water with a thick towel so that your project is slightly damp. You can now stretch the fabric over several layers of cardboard, pinning it in place with long quilting pins. When the fabric completely dries it will have pulled taught to the cardboard making it easy to work.
ARTIST PAPER
Rag content artist papers come in several styles and weights. You can find papers with a very smooth toothed surface, light texture up to a deep pebbled texturing. For wood burning a smooth or light texture works well as the pebbling can distort your lines as you burn. Paper weight ranges from a light weight of 90 pounds to over 300 pounds; the higher the weight the thicker the paper.
Watercolor pads or blocks are perfect to use. The paper, up to 22” x 30”, is stacked then glued along the four outer edges making the stack into one strong board. As you work the paper can not buckle because of the heat of the pen. When the burning is finished the top paper that you have worked is cut free from the block and the next paper on the block is ready to use. You can also find pre-cut greeting cards and envelopes that make wonderful presents in watercolor rag content paper.
Paper mache is a favorite wood burning surface for me. Made from shredded craft paper and glue the paper mache can be pressed into a wide variety of shapes from flower pots, kitchen canisters, gift boxes and even scrap book covers. It is inexpensive and requires no preparation steps.
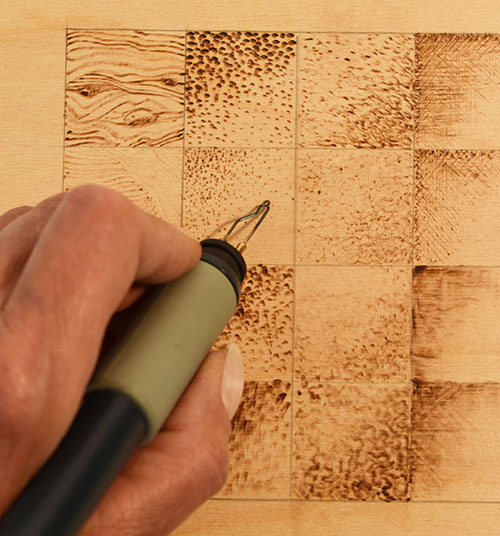
For outlining, wide line shading and texture work I use my loop-tip pen, also called a standard writing tip. By holding this pen in an upright position, 90 degrees from the working surface, fine detail lines can be pulled. To create wider lines in your texturing drop your grip to about 45 degrees from the wood. This lets the side of the wire touch the board giving you more metal to wood contact.
This classic burning pen tip is still a mainstay for any pyrography tool kit. The tightly bent loop at the point of the tip creates even, medium width lines and carries the heat for your burning unit well.
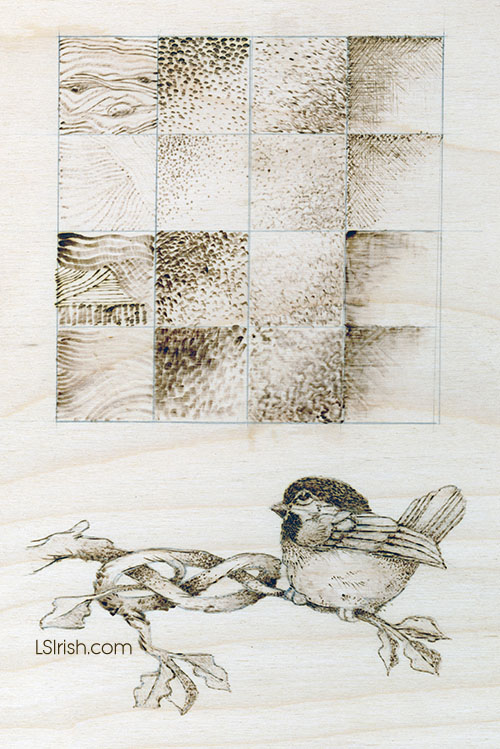
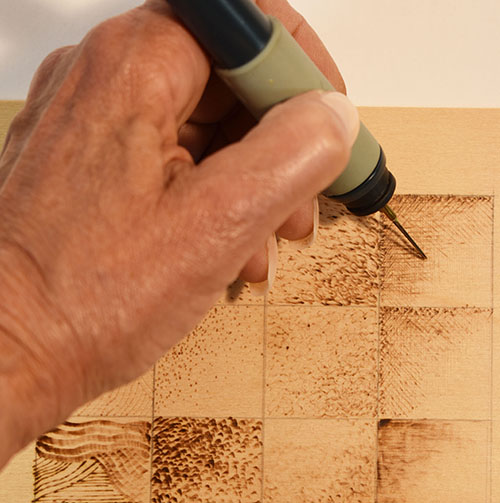
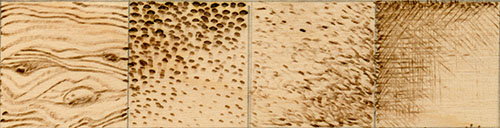
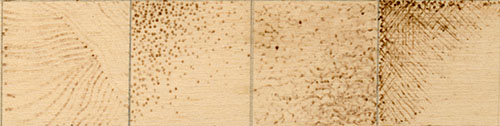
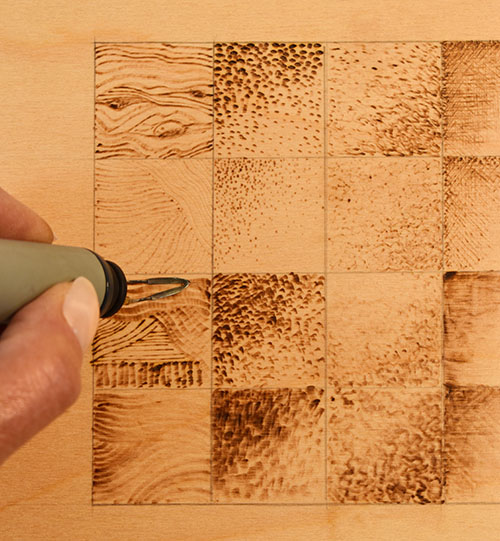
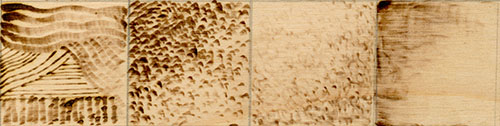
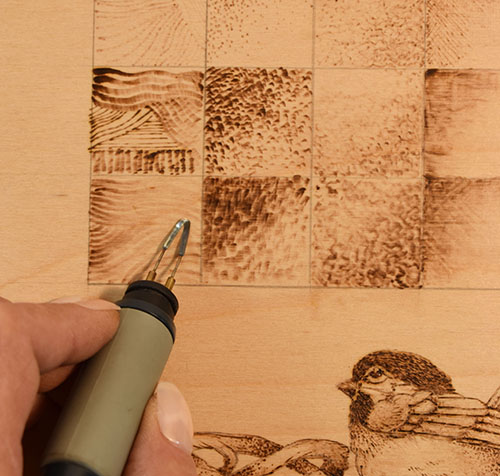
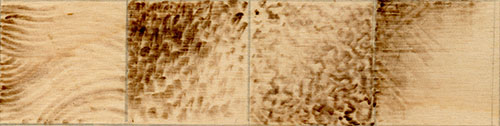
As shown below, in the far left sample square of this practice board, the loop tip pen makes a thick to thin line as you move the tip from its center point to the sides of the loop.
Square two shows the loop tip pens dot pattern, also called pointillism. The tip of the pen, touched and lifted from the wood, leaves a small, black oval shape to the burn. Scrubbie strikes, shown third, is a continuous curling or meandering line the fills an area with textured shading. The thick and thin effect from this pen tip adds to the texture of the scrubbie stroke.
The last, right hand, square is worked with the loop tip pen at a 90 degrees to the wood to burn the thinnest, fine lines as possible. By adding new layers of burned lines over previous work, each layer worked in a new direction, you can build up the burning into every deepening tonal values.
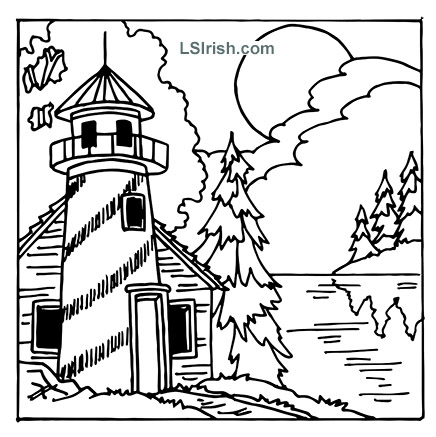
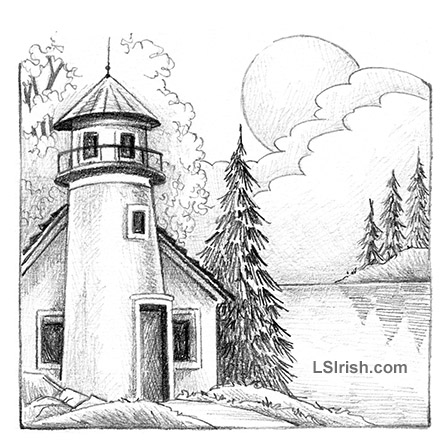
FINE LINE WORK Using any temperature setting and holding the tip upright to the wood you can make even lines for both shading, accent, and outline work. The higher you set your temperature the darker and thicker the lines will burn. In the photo, top right, the fine lines work has been used to shade under the roof overhang. By re-burning the lines the tonal value can be darkened.
TEXTURE PATTERNS Any texture pattern can be created using a loop writing tip. Simple random curls, tightly packed circles, and even cross hatched patterns are easily made using the fine line made by the loop. The more tightly you pack any texture line the denser and therefore darker tonal value that area will have.
SOLID FILL At high temperature settings you can use the loop writing tip to create tightly packed small ovals to bring an area into your darkest tonal value. In the bottom right photo this touch-and-lift stroke was used to establish the darkest shadows for the leaves.
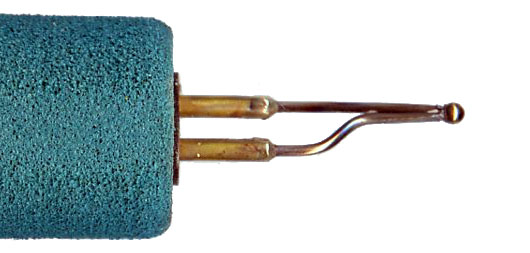
BALL-TIP PEN
This micro writing tools is manufactured using thinner wire and a tighter bend at the tip, or as in this sample, a small ball welded to the tip of the end. This means that little metal comes into direct contact to the working surface and gives very fine detailing lines. Very fine dense textures can be layered using this tool to burn an area into an even smooth tonal value.
Ball tipped pens comes in a variety of diameters with larger diameter tips creating wider lines and smaller diameters making thinner lines. They have three primary purposes – outlining, scrubbie shading, and solid fill work.
This small ball tipped pen makes a consistently even line or dot no matter how you position the angle of the pen to the wood. The thinness of your burned line remains the same throughout the outline strokes, dot patterns, scrubbie strokes, or cross-hatching work.
OUTLINING AND WRITING
You can outline all of your pattern lines to give your pyrography a cartoon or coloring book effect.Lightly outline the pattern using a cool temperature setting to set your lines. Next work each area with your chosen style or texture. When all of the shaded texture work is done re-work the outlines at a medium-high to high setting. Vary the width of the lines to give your outlining more interest. Not every project needs to be outlined. If you have worked your project using shaded tonal values, outlines will not be needed to visually separate one area from another. No object in nature comes with outlines, so for landscape scenes or animal portrait use as few accent lines as possible.
SCRUBBIE SHADING
Small, short scrubbie strokes can be made with a ball tipped pen to create evenly graduatedshading for your elements. Scrubbies are made in an slow, even back-and-forth motion or in a tight, random circular movement. Work several layers of scrubbie strokes to deepen the tonal value in any area.
FILL TEXTURES
Medium to medium-high temperature settings and a touch-and-lift stroke, using a ball tip pen will create your solid fill areas. The more tightly you pack the small, dark dots made by this texture the darker your area will be.
Avoid using a high temperature setting for this type of fill texture. To hot a setting will cause the dots to bleed or halo into the adjacent areas of the design.
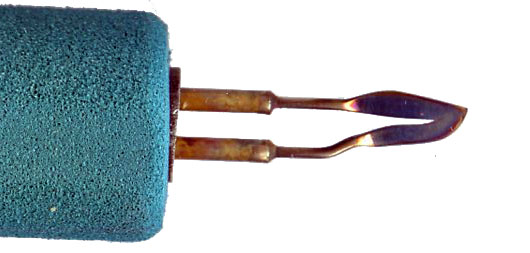
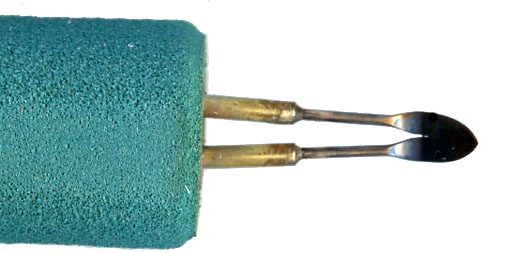
SPEAR SHADER
The curved-edge spear shader has a thinner metal body than the spoon shader, which allows it to create darker tonal values at lower temperature setting. The curved side lets you pull thin, even lines without a dark starting point spot as often happens with a ball tipped pen when you work the pen on its point.
The spear shader is used on all of its edges, each creating a different thickness or intensity of the stroke. Pull the spear shader with the point flat to the wood and you get a thick line. Lift the shader to work just the point or angle the shader so that you are burning along one of its curved edges and you create an extremely fine line. The touch and lift dot pattern of pointillism with this tip burns small triangles. For the far right sample board square the side of the spear shader is pulled so that the wide edge of the shader touches the board, creating a graduated, unlined shading effect.
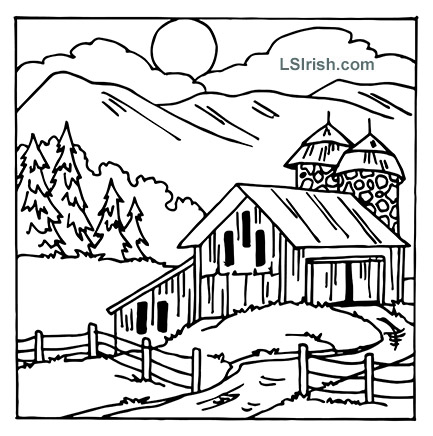
LONG SHADING STROKES Using the wide point in the curve – the belly – you can pull long, wide shading strokes. In the right hand, top photo those long strokes are used to create the dips and ruts in an old country road. This is a touch-and-slowly-pull movement.
FINE LINE WORK Leading with the point of the curved-edge shader and rolling into the belly creates extremely thin, fine burnt lines. On low temperature settings these lines are barely visible, on hotter setting the lines are perfect for engraving, cross hatching, and accent work.
TRIANGLES Because the curved-edge spear shader carries a large amount of heat, the tip of this shader can create small, evenly sized triangles in your designs. Set your thermostat on a medium or medium-hot setting and use a touch-and-lift stroke. The lower you hold the shader to the wood the larger your triangle will be.
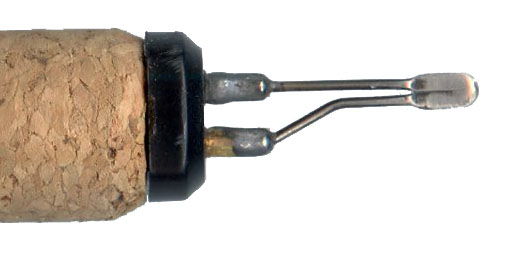
SPOON SHADER PEN
This small curved shader creates a wide path of smooth tonal values, excellent for general shading within your design. I find that a low-medium temperature and a circular motion quickly bring an area up to its color tone without obvious pen strokes or lines..
Spoon shaders have a flatten surface that may be rounded or pointed at the tip. The shaft of the tip is bent so that the bowl of the spoon lies against the wood when holding it in a general pencil hand grip position. This style tends to have a thicker metal tip than curved shader pen tips, so they may require a slightly higher temperature setting during use.
Spoon shader lines have graduated tonal values to their edges, not crisp, hard finishing lines. The spoon belly of the tip burns the center of the line to a slightly darker tonal value then where it rolls upward, away form the wood, along its side edges. Use for pointillism the spoon shader leaves a small square or triangle shape blur of burning. As with the dot pattern, a scrubbie stroke worked with the spoon shader is undefined. This is a great way to fill in or deepen small areas in your project where you want to even out another burned layer of work. Pulling your spoon shader in fine lines, alternating direction works a soft cross-hatch pattern to the wood. Because so little of the spoon area actually touches the wood, this stroke pattern can accent the grain line of your board.
SCRUBBIE SHADING
By setting the temperature setting to medium or medium-high, you can lay the flat of the shader against the wood and pull short, small touch strokes to create the scrubbie shading effect.
Lift the shader slightly to work the tip closer to the point or curved edge allows you to move in a random, circular motion for even shading. Add layers of shading strokes to graduate an area from a pale to dark tonal value.
LEADING EDGE LINES
The shader can be first laid flat against the wood and pulled in a long, straight line to give the general shape of the boards.
A second stroke can now be laid over the long, pull stroke to separate each board with a fine, thin, slightly darker tone by leaning the spoon shader’s side edge into the wood.
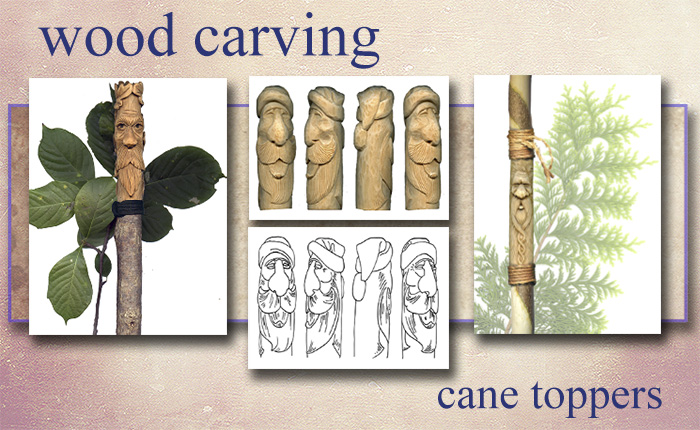


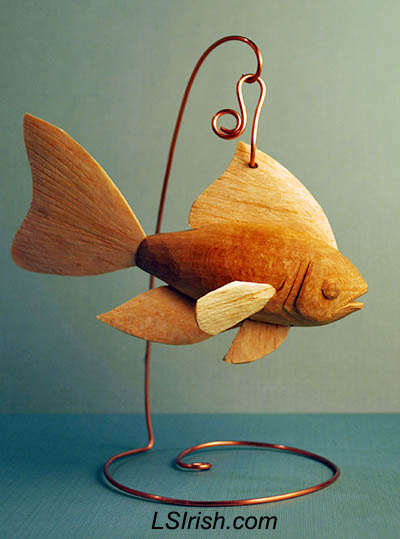
 Wood Carving Canes, Walking Sticks, Wizard Wands