Chip Carving E-Project at ArtDesignsStudio.com
FREE CHIP CARVING WOOD PROJECTS
Positive and Negative Space in Chip Carving
Chip Carving Seminar
Chip Carving Supplies
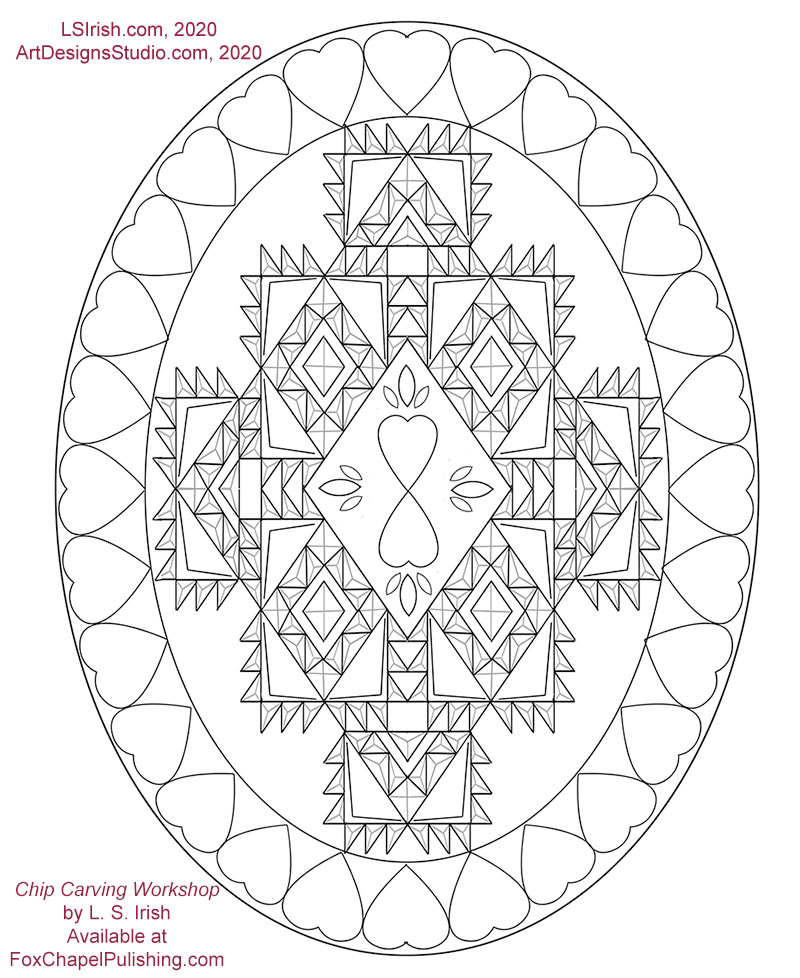
Chip Carving Graphed Patterns
Chip Carving Hand Positions and Grips
Chip Carving – Cutting Triangle and Square Chips
Chip Carving – Cutting Straight-Wall, Curve-Wall, Free Forms
Chip Carved Chess and Game Board
Chip Carving – Sampler Layout Pattern
Chip Carving Common Mistakes
Chip Carving Shortbread Cookies
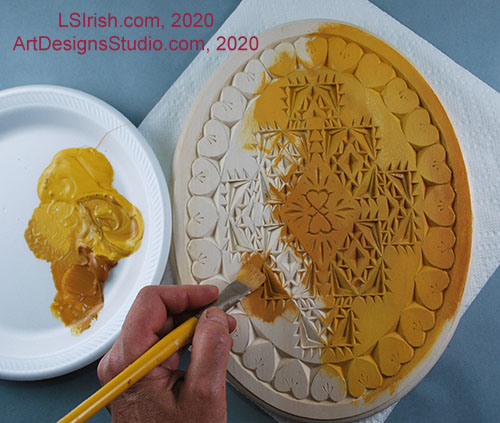
Individual motif areas of your chip carving can be painted in complementary colors to emphasis the change in the chip shapes, depth, and design. Again, note that since we want a vintage look I am not working towards a solid, opaque coloring anywhere on the chip carving plaque.
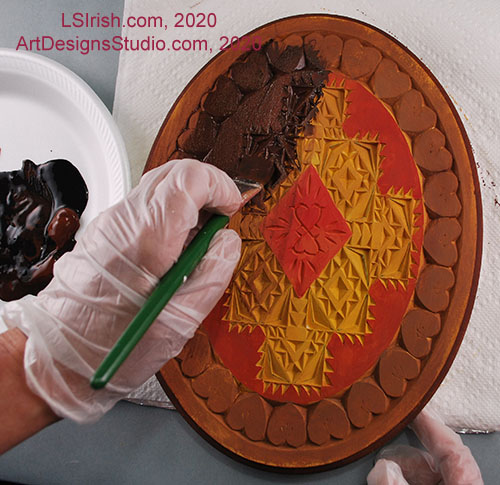
Allow the base acrylic color to dry thoroughly. You can at this point give your plaque several very light coats of spray sealer, which limits how much of the oil stain can grab into the wood. For my project I applied one coat of burnt umber oil paint mixed half and half with boiled linseed oil.
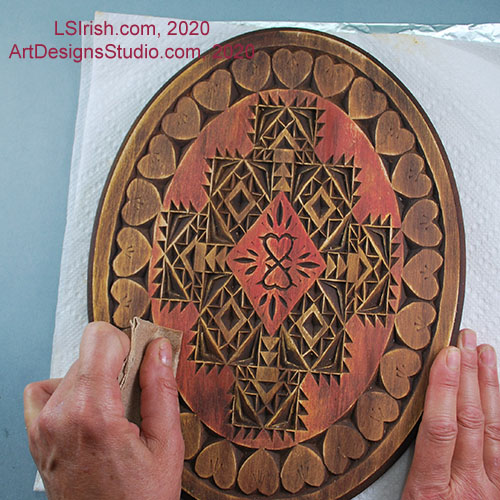
With a clean cloth, wipe off the oil stain working with the grain direction of your wood. You can dampen your cloth with turpentine to remove any excessively dark stain on the high areas of the chip carving.
Clean the sanding dust with a tach cloth and apply your favorite finish.
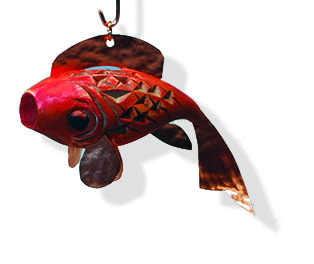
Whittle Fish Decoy Carving E-Project, and in
Finishing Techniques for Wood Crafters.
Gourd Art at LSIrish.com Gourds make a wonderful base for many of our favorite crafts…
Two free E-Projects, for your download, are posted on my pattern website - ArtDesignsStudio.com.…
Free Winter 2023 Tribal Celtic Pattern Pack Go to my pattern website for your free …
What do you do with that old fish tank that has been hidden in the…
Snow Gnome Pyrography Have a little free pyrography fun with this step-by-step PDF. Our Best…
June 8th, 2023 My free Wood Spirit.pdf has been updated! Please download Version 2.0 with…