
Doodle Days #12 – Wood Burn Spoons, Wood Carved Spoons, Leather Work, Free Lora S. Irish Patterns to Download, DIY Bookmaking, Bullet Journals, Scrap Booking, Card Making, Applique Quilting, Pyrography, Wood Carving
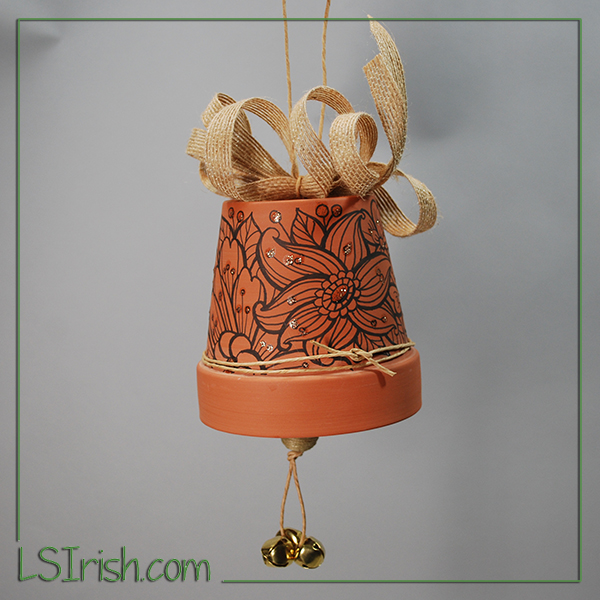
Doodle Days Clay Pot Wind Chimes
This wind chimes will add a touch of country delight to your back porch. Its quick, easy, and fun to make a large set using graduated sizes of clay pots.
Supplies:
3 1/2″ clay pot
2 1/2 yards of 1/2″ wide burlap ribbon
2 yards of thin gray-brown twine
3 1/2″ gold-colored bells
1 – 3/4″ twine bead
acrylic glue
1 – bamboo kitchen skewer
fine-point marking pen
gold glitter glue
Step 1: Download your free doodle patterns, here at LSIrish.com. To discover more free patterns type doodle into the search box in the header of this page.
Step 2: Using a fine-point permanent marking pen, doodle around the lower section of the outside of your clay pot. For contrast, leave the rim of the pot without decoration. Work over some of your pattern lines several times to create a thick-and-thin outline effect.
Step 3: Wrap the thin twin around the bottom edge of the rim three times. Tie the twine tightly. Use a few drops of acrylic glue to hold the knot and twine into place. Allow the glue to dry.
Step 4: Cut a 2 yard long piece of thin twine. Thread the three gold-colored bells onto the thread, and move them to the center point of the thread. Bring the two ends of the thread together, tie a knot with the two threads about 1 1/2″ above the bells.
Step 5: Slide one 3/4″ twine bead onto the two threads and position the bead above the knot made in step 4. Tie a knot in the threads that sits on top of the bead.
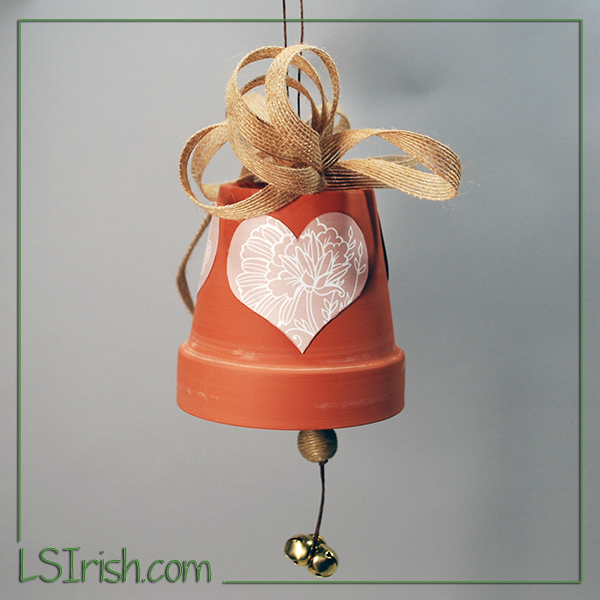 This wind chimes follows the same step-by-step instructions as
our Doodle Wind Chimes. The free doodles where printed
on card stock paper, cut, and double-stick taped into place.
This is a quick wedding decoration.
Step 6: Tie the two twine threads into a third knot the height of your clay pot away from the top of the bead. If your clay pot is 3 1/2″ tall, this third knot is made 3 1/2″ away from the bead.
Step 7: Cut two 1 1/4″ long pieces from the bamboo kitchen skewer. Tie one piece with a knot tightly above the third knot. Slide the twine, from the inside to the outside, through the hole in the bottom of the clay pot. Lay the second bamboo piece between the two twine ends, on the bottom of the pot, and secure with a tight knot. These two bamboo sticks hold the bell clapper in place.
Step 8: Hold one end of the burlap ribbon between your thumb and the side of your palm. Open your fingers as wide as possible. Wrap the ribbon over your fingers four to five times, leaving at least a 4″ long end.
Step 9: Carefully remove the wrapped burlap ribbon from your hand and place it, centered, between the two twine threads. Tie a tight knot in the twine to secure the burlap ribbons.
Step 10: Tie a knot in the twine threads 4″ to 5″ from what is now the top of your wind chime. Clip the ends to about 1/2″ long.
Step 11: Working one burlap ribbon loop at a time, turn each loop inside-out. This gives your ribbon that lovely curl.
Step 12: Use gold glitter glue to add little dots of bright, sparkling accents to your doodle pattern. Allow the glue to dry thoroughly, and your wind chime is ready to hang.


 Landscape Pyrography Techniques and Projects by Lora S Irish