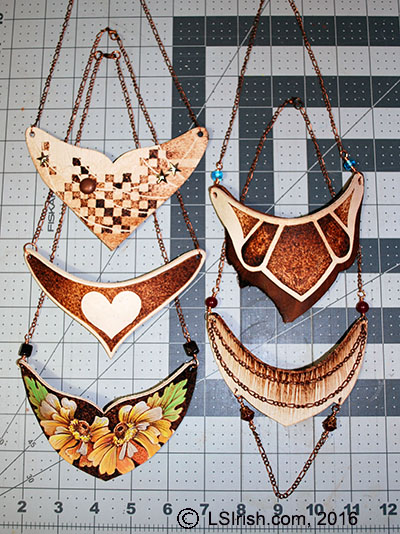
Art of Leather Burned Jewelry
Leather Burned Jewelry, Day One
Leather Burned Jewelry, Day Two
Leather Burned Jewelry, Day Three
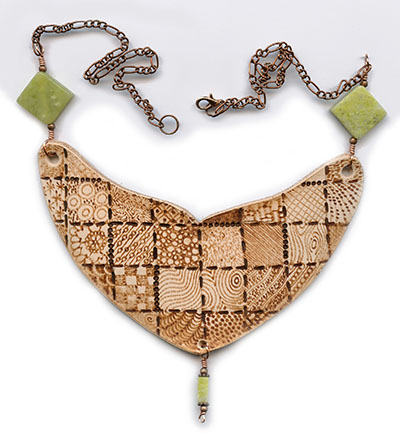
I love combining my crafts and hobbies, and in this project we will be working on a quick, fun design that uses leather working, jewelry making, and, of course, pyrography. Today we will get together the supplies, cut out our leather necklace shape, and do the pyrography steps.
In the next post you will find the steps for creating the copper, wire-bent jewelry. Then on day three of this mini-project I will show you how to create 10 quick necklaces out of one pyrography burning that is perfect if you are a craft seller or need a group of Holiday presents this years.
So … let’s get started!
5 1/2” x 3 1/2” (14 cm x 9 cm ) medium weight vegetable-tanned leather
bench knife or craft knife
leather hole punch
cotton swab applicators
gum tragacanth edge finish
wooden edge slicker
#4 – #8 soft pencil for tracing
pyrography pen tips – ball, loop, or micro writing tip
white artist eraser
2 – 16 mm square yellow jade beads
1 – 5 mm x 8 mm yellow jade rectangle bead
6 – 3 mm antique copper round beads
2 – 4 mm copper rosettes
2 – 7” ( 18 cm ) long copper chain
2 – 6 mm split rings
1 – lobster claw latch
18” – 20-gauge or 18-gauge copper wire
satin brush-on leather finish
Tracing the pattern
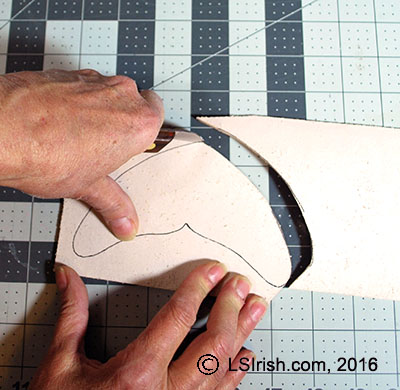
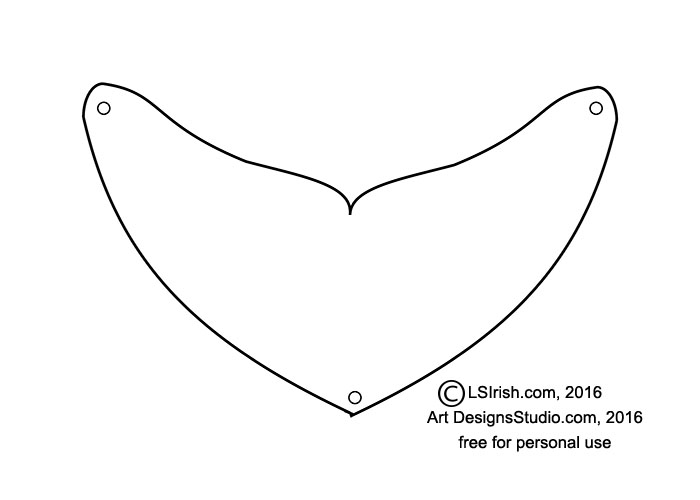
1 Make a printed copy of the pattern for the Quilted Jade Necklace. Cut the pattern out using scissors.
Lay the paper pattern on the raw-hide side of the leather scrap. Using a soft, #4 – #8 pencil, trace around the outside edge of the paper pattern.
Working the leather
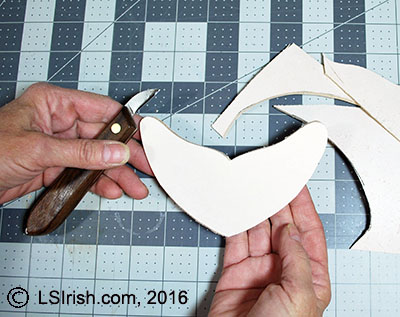
2 Place the leather on a cutting mat with the raw-hide side up. Using a craft knife or bench knife, cut the necklace free from the scrap leather. Save the extra scraps from the cut leather block for smaller bracelet shapes and earrings.
3 With a white artist eraser, remove any remaining pencil guidelines from the raw-hide side of the leather necklace.
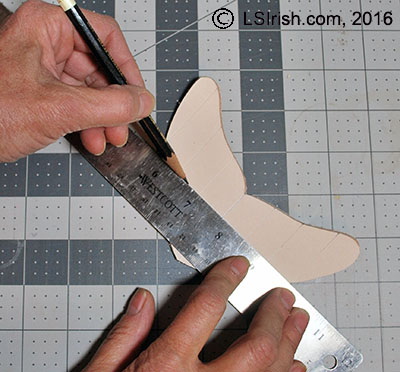
Creating the grid lines
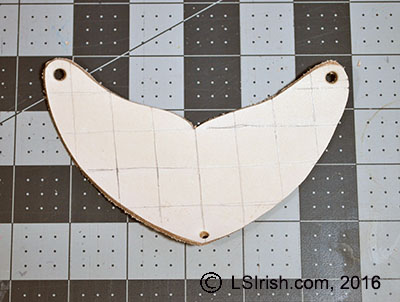
4 Using the cutting mat ruler marks as your guidelines, create a diagonal 1” square grid on the tanned side of the leather with a soft, #4 – #8 pencil.
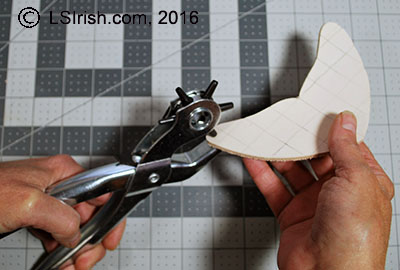
5 – 6 With a leather hole punch, cut a 3/16” or 1/4” hole in each side of the necklace to receive the jewelry chain and beads. Create one hole at the center point of the bottom edge of the leather necklace to receive a bead dangle.
Finishing the raw edges
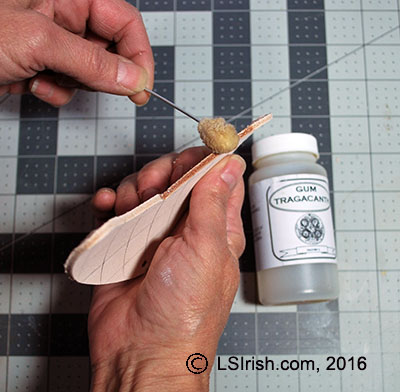
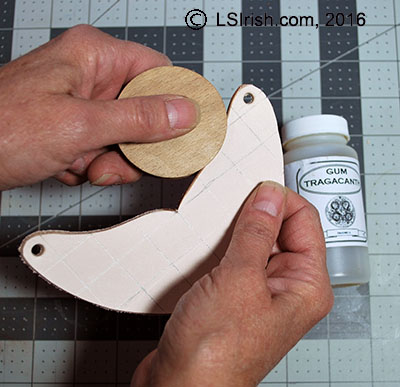
7 With a cotton or wool swab applicator, apply one coat of gum tragacanth along one edge of the leather necklace.
8 Briskly rub the damp edge with a wooden edge slicker. The handle of a large wooden spoon works well in place of a slicker. The gum tragacanth and slicker will polish and round the raw cut edge of your necklace.
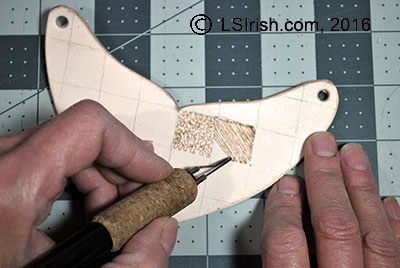
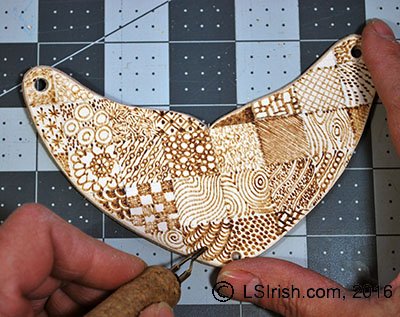
Burning the fill textures
9 The pyrography burning for this project is worked as a texture and fill practice board, where each 1” square is filled with a different, small pattern. Have fun creating your own fill patterns or refer to the Fill Pattern Chart with our Mushroom Doodle Pyrography Project.
10 As you work each 1” square, vary the temperature setting of your pyrography pen to create some squares with pale tonal values, some with medium values, and some with dark toned values.
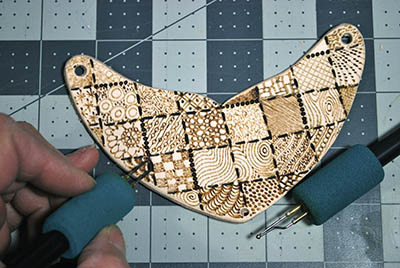
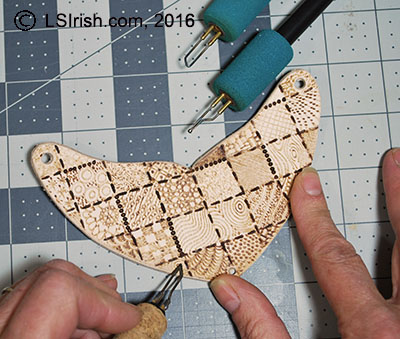
Adding borders
11 With a ball-tip or loop-tip pen, on a hot temperature setting, work along some of the pencil grid lines with a series of evenly spaced, small dots. With the straight edge of a shading pen tip, work the remaining grid lines with evenly spaced, short dash lines.
12 You can add a little touch of shading along the bottom edge of your leather necklace using a shader-tip and a medium temperature setting. Work this layer of shading right over the fill and texture patterns that you have already burned. Rub a white artist’s eraser over your burned surface to remove any dirt, oil, or remaining pencil lines from the leather. Dust with a dry cloth.
Pyrography close-up
And, this one!
In the next post I will be showing you how to add your jewelry chain, bead dangles, and copper findings. So, check back soon!
Gourd Art at LSIrish.com Gourds make a wonderful base for many of our favorite crafts…
Two free E-Projects, for your download, are posted on my pattern website - ArtDesignsStudio.com.…
Free Winter 2023 Tribal Celtic Pattern Pack Go to my pattern website for your free …
What do you do with that old fish tank that has been hidden in the…
Snow Gnome Pyrography Have a little free pyrography fun with this step-by-step PDF. Our Best…
June 8th, 2023 My free Wood Spirit.pdf has been updated! Please download Version 2.0 with…