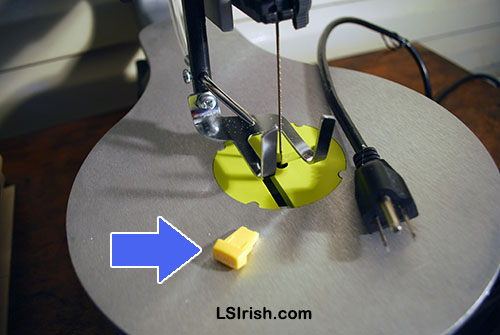
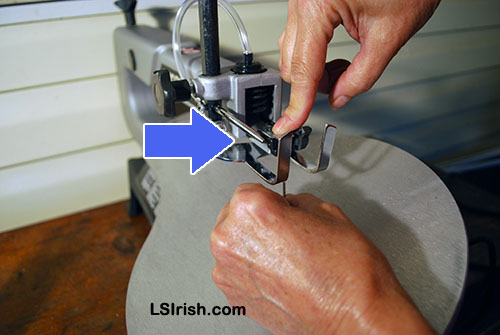
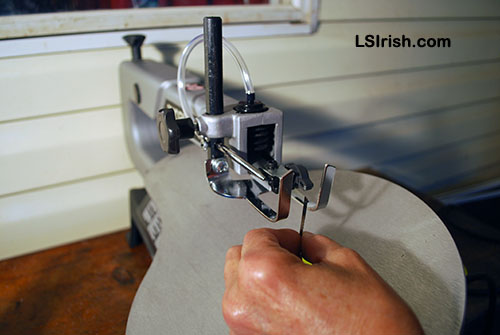
Changing Your Scroll Saw Blade
Cross-Crafting Seminar Introduction
Cross-Crafting Seminar Supply List
Cross-Crafting Seminar Free Patterns
Changing the saw blade on the Ryobi is a breeze compared to some of the scroll saws I have used over my career. So let’s take a few moments and walk through the steps. I assure you that it will take far longer to read these instructions then to actually change your blade!
Please read the instructions that came with your brand of scroll saw for specific steps to changing your own blade.
Note One – Saw blades become dull far sooner than you would expect! If you are cutting thicker woods, hardwoods, or plywood a blade may only last about one-half hour. For soft woods and thin woods your blade may remain sharp for up to an hour’s hard use. Always have extra blades on hand so that you can change out your blade and continue working.
Note Two – A dull blade makes itself known by dragging through the cuts. Instead of a smooth, steady flow you will be able to feel it hanging up on the wood grain.
Note Three – My Ryobi came with a saw blade installed. Before I changed out my first blade I took a few moments to test the tension sound of the factory installed blade. Just as I would pluck a guitar string, I plucked the saw blade several times, listening for the sound tone the blade made. The higher the pitch of the plucked blade the looser the tension, lower pitches come from tighter tension. By checking the sound pitch I was able to tighten my Tension Knob for the new blade to the same tension as the original blade.
Is it too early to be talking about the Fourth of July?!? https://lsirish.com/woodcarving-tutorials/woodcarving-projects/beginner-projects/wood-carving-fish-decoys/4/ https://lsirish.com/woodcarving-tutorials/woodcarving-projects/beginner-projects/ice-fishing-fish-decoy-gallery/…
I have found over the years that I often have the desire to create something…
Gourd Art at LSIrish.com Gourds make a wonderful base for many of our favorite crafts…
Two free E-Projects, for your download, are posted on my pattern website - ArtDesignsStudio.com.…
Free Winter 2023 Tribal Celtic Pattern Pack Go to my pattern website for your free …
What do you do with that old fish tank that has been hidden in the…