Day 2 Twistie Stick Snake Cane Carving
Day 3 Twistie Stick Snake Cane Carving
Day 4 Twistie Stick Snake Cane Carving
Day 5 Twistie Stick Snake Cane Carving
Walking Stick Joinery
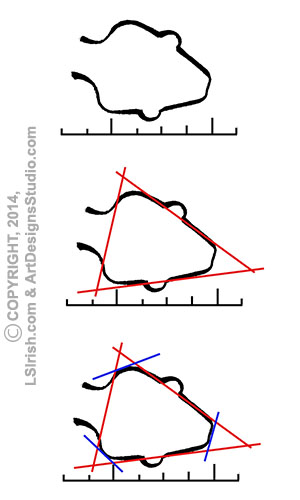
Walking Stick Wood Species – Harvesting Your Sticks
Walking Stick – Adding Extras
Walking Stick – How to Clamp Your Handle
Free Mountain Man Cane Carving Pattern
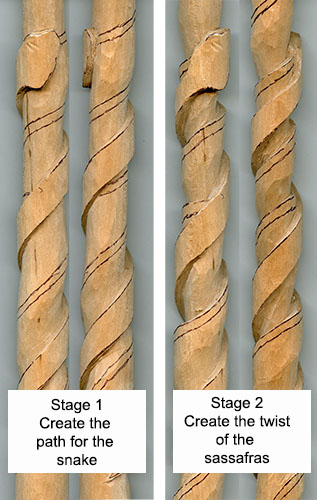
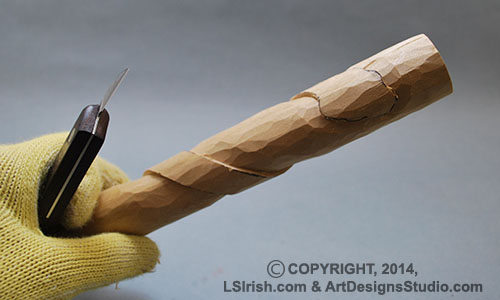
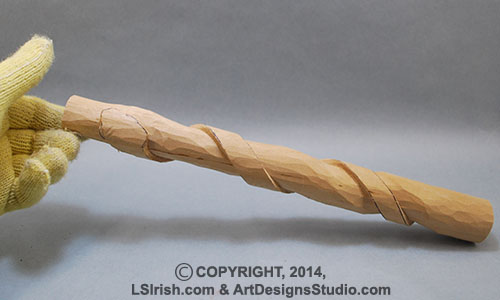
The first stage of this cane carving, today’s work, is to establish the general round shape of the design, determine the path for our snake, and to drop the background area of the cane around the snake. Then we will work to create the path of the twist in the sassafras branch on which he climbs.
Please remember – you can click on any post image for a large photo.
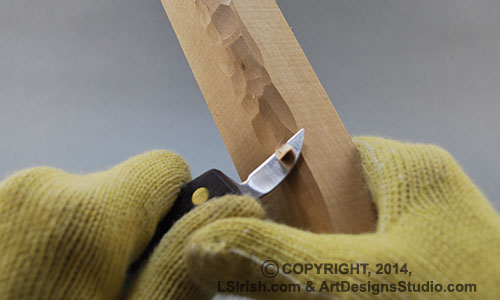
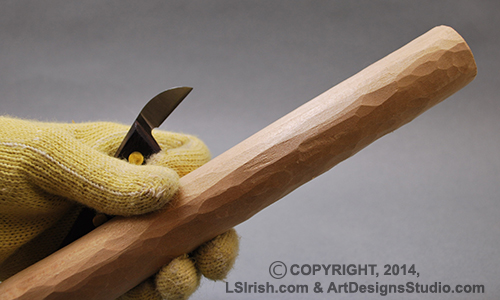
Step 1: Please double check the sharpness and honing of your bench knife. Remember, the most dangerous knife or tool in your kit is the dullest. Use your bench knife and a push stroke to round-over the edges of your basswood blank. Work the cuts from the sharp corner to the center of each flat face of the stick.
A well rounded stick will have all of the original surface area cut. Note in the photo that no area has been left un-worked.
Of note, whether you are a relief carver or 3-D carver, at some point in any carving you want to insecure that you have actually carved all the wood. The milled surface of your basswood blank has a very different texture than the areas that you have cut. After you have added your finish – oil, varnish, polyurethane – that difference will dramatically stand out, making the un-carved areas an eye sore.
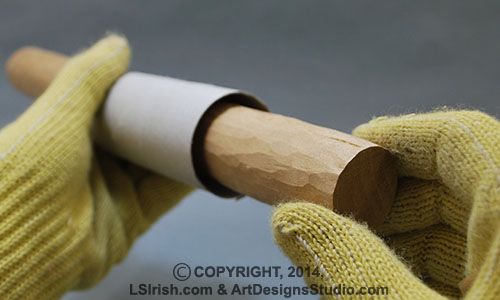
I like to double check my round by comparing the basswood blank to something that I know is a true circle, or close to a true circle. For this project that true circle is the inside of a toilet paper or paper towel roll cardboard tube. By sliding the blank inside the cardboard tube I can check for flat surfaces or planes that need a little more work.
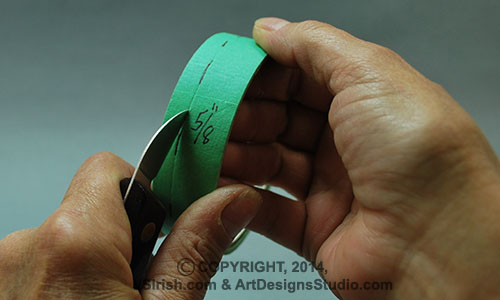
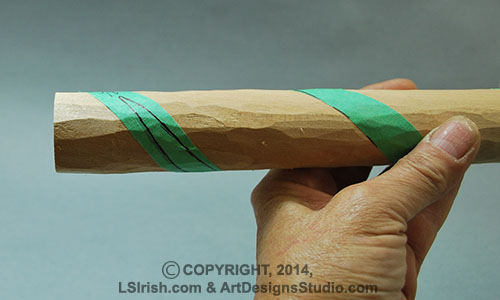
Step 2: To easily create the path of the snake around the basswood blank, I have marked a roll of painter’s tape at 5/8″. For this cane that will be the width of the snake’s body. With your bench knife cut the tape.
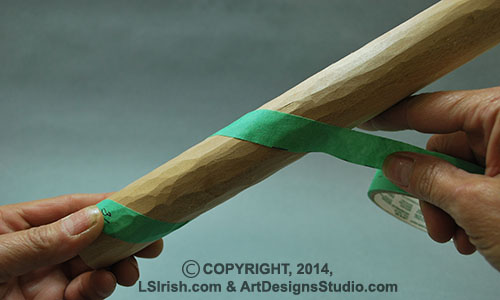
Secure one edge of the tape at the bottom of your stick, and roll the tape around the stick until you reach the top. My tape ran at about a 45 degree or less angle. Looking at the stick with the bottom edge of the tape facing me, I have four wraps, with the last wrap right at the top of the stick.
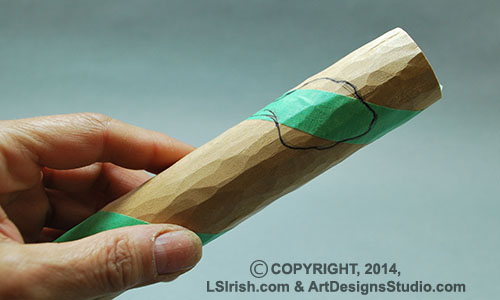
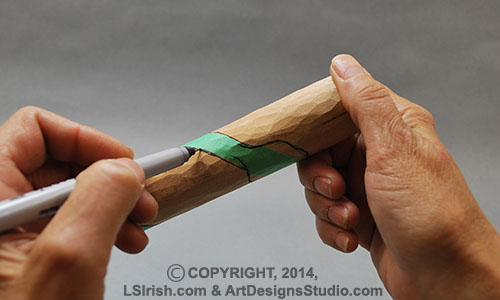
Step 3: Please see the Step 6 for the pattern for the snake head. Using a pencil or marking pen, draw or trace the pattern for the snake head about 1″ from the top of the stick.
Mark two tapered lines for the tip of the tail of the snake onto the tape. Begin the tail about 1″ above the bottom of the stick.
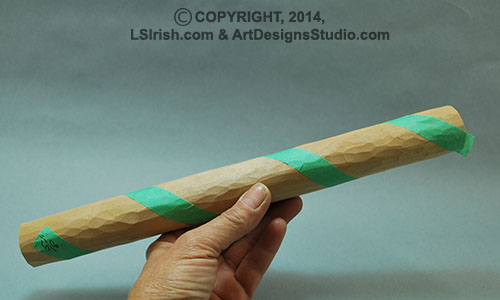
Using a pencil or marking pen, trace along the edges of the tape to mark on the wood the snake’s body lines.
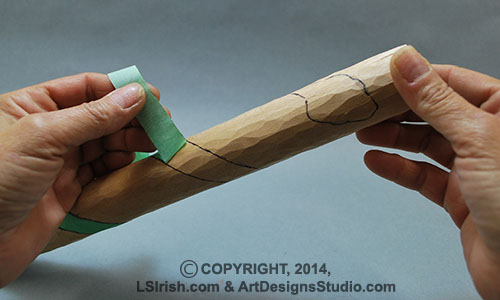
Step 4: Remove the tape. You can re-wrap painter’s tape to the roll and re-use it later for your next snake walking stick or for securing paper patterns and graphite paper to your relief carvings.
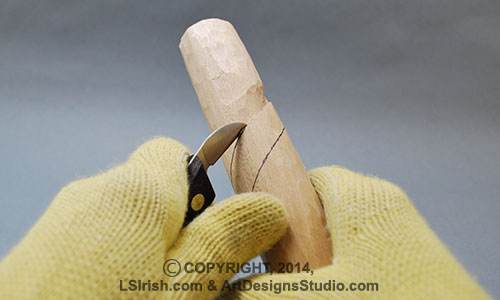
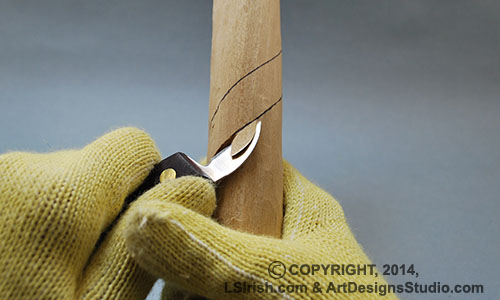
Create a stop cut along the outer edge of the snake body lines, cutting on the marking pen guidelines. A stop cut is made with your bench knife in two separate strokes. First, holding the knife at a 90 degree angle to the wood, cut along the line.
Make the second part of the stop cut by slicing into the first cut, moving from the background area towards the snake body.
I prefer to slowly drop the background wood in a stop cut area in thin layers or slivers at a time. As you work you can make the first cut slightly shallow, and then make the second background sliver into that cut. Then return to the snake body line and make a new, slightly deeper first cut. Again, work the second background sliver. This will slowly drop the background level of the wood, giving you more control over your depth of work.
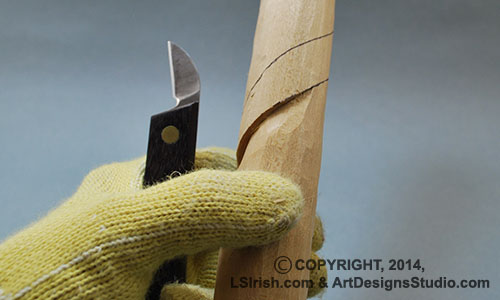
Step 5: Continue working the two strokes of the stop cut along both sides of the snake body. The stop cuts are worked about 3/8″ to 1/2″ away from the body lines of the snake. This leaves the center area of the space between the snake twists high or proud. Those areas will become our sassafras twists soon.
Work the stop cut around the snake’s head. Notice in the third photo for this step, below, that the snake’s body has been ‘freed’ from the background wood by dropping the background areas.
Step 6: Work the stop cuts along the snake body until you are about 1/4″ deep at the marked guidelines.
Using the wrapped tape method of creating the snake’s body path, you can quickly change the width of the snake by changing how thick or wide your tape is. The length of your snake also is easily adapted for either larger carving blanks or even short key chain sized blanks.
The snake head pattern is a simple to pencil mark directly to your wood. Begin with an equilateral triangle twice the size of the snake’s neck width.
Make a pencil line at each corner of the triangle to slice off the sharp edges. Now add a small half-circle just in front of the center point on each side of the triangle for your eyes. That’s it! Quick, easy, and fast.
Tomorrow we will establish the wrap of the sassafras twist and stop cut that area to create the second twist or wrap of the cane. Thank you for reading!!!! If you have any questions, now is a good time to sign up for one of the forums where you can chat directly with me.
– Lora
Gourd Art at LSIrish.com Gourds make a wonderful base for many of our favorite crafts…
Two free E-Projects, for your download, are posted on my pattern website - ArtDesignsStudio.com.…
Free Winter 2023 Tribal Celtic Pattern Pack Go to my pattern website for your free …
What do you do with that old fish tank that has been hidden in the…
Snow Gnome Pyrography Have a little free pyrography fun with this step-by-step PDF. Our Best…
June 8th, 2023 My free Wood Spirit.pdf has been updated! Please download Version 2.0 with…