Feathers, leather, and fur are common elements found in Native American folk art. In our Ceremonial Mask Pyrography Project will we work through the wood burning steps to shape, shade, and detail all three.
Ceremonial Mask Pyrography Project 1
Ceremonial Mask Pyrography Project 2
Ceremonial Mask Pyrography Project 3
Ceremonial Mask Pyrography Project 4
Ceremonial Mask Pyrography Project 5
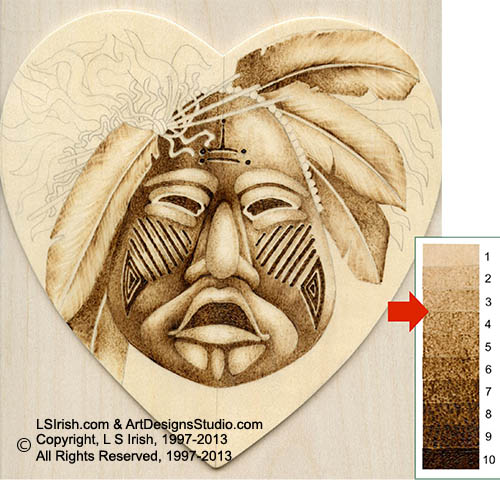
9. Spear Shade the Feathers
Map the shading areas of the feathers using the spear shader, the long pull lines stroke, and a tonal value setting between #3 medium-pale and #4 dark-pale.
I worked the each side of the feathers in two parts. The first shading began at the edge of the central feather shaft and was pulled towards the outer edge of the feather. In the second session I laid the spear shader at the outer edge of the feather and pulled towards the center.
This makes a pale central line down each side of the feather creating a rolled or curved impression.
Following the photo, work the background feathers slightly dark with more long pull strokes than the foreground feathers to tuck them under the higher feather.
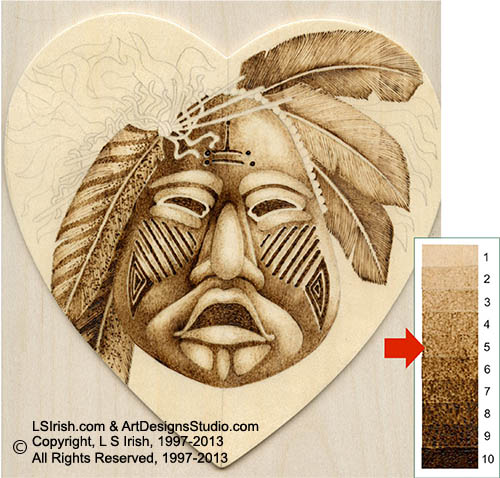
10. Scrubbie Stroke to Even the Feather Shading
Remaining on a temperature setting for a #3 medium-pale to #4 dark-pale tonal value, change over to your ball tip or looped tip pen.
Work several layers of tightly packed scrubbie strokes over the shaded areas of the feathers to create an even, smooth, and gradual shading for these areas.
11. Add Feather Detailing
Thin, tightly packed lines are worked into the sides of the feathers to show the individual feather lines. Work each line in a gentle curve that starts high at the central feather shaft and drops down towards the outer edge of the feather.
For this step you can use the ball or looped tips, with light hand pressure, and a quick pen movement across the wood.
The spear shader also creates thin, fine lines when you use this tip on its edge.
I used my curved shader, which not only burns extremely thin lines it literally cuts those lines into the wood.
Adjust your temperature setting for a #5 light-medium to #7 dark-medium setting, depending on the tip that you chose.
Tomorrow we will finish up by burning the hair clusters. Thanks for reading, Lora Irish.
Gourd Art at LSIrish.com Gourds make a wonderful base for many of our favorite crafts…
Two free E-Projects, for your download, are posted on my pattern website - ArtDesignsStudio.com.…
Free Winter 2023 Tribal Celtic Pattern Pack Go to my pattern website for your free …
What do you do with that old fish tank that has been hidden in the…
Snow Gnome Pyrography Have a little free pyrography fun with this step-by-step PDF. Our Best…
June 8th, 2023 My free Wood Spirit.pdf has been updated! Please download Version 2.0 with…