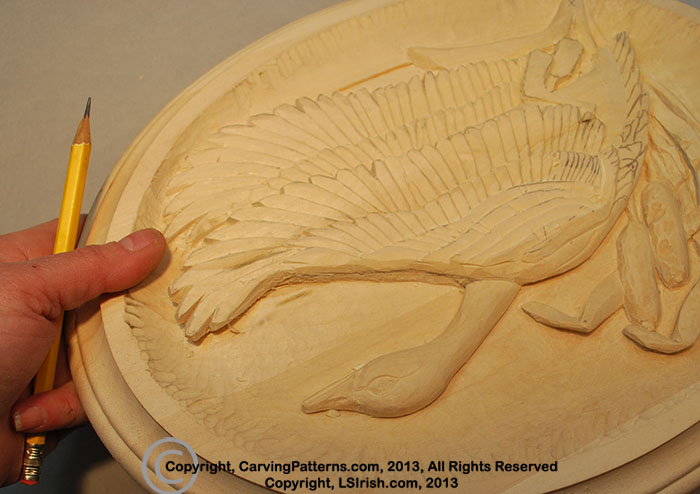
 Step 40 cont: A moment to see where we are headed.
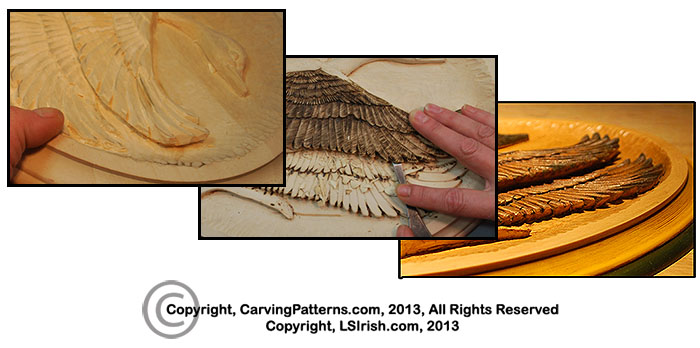
 Before we go through these last carving steps I want to show you what we will be doing during the burning steps along the wing tips. During our next steps we will be creating undercuts along the wing edges and along each of the individual wing feathers, as well as along the top edge of the front wing, and the back or left side of the body and tail.
In the carving stage I left the wing feathers fairly thick, and just released them from the background wood. These undercuts on the front wing are very narrow and deep. The feather tips of the back wing and shallow, there is little room in this area for deep undercuts – so work just enough on the back wing to tuck the joint line between the wing feathers and the background under the feathers.
This leaves lots of wood in the feathers for the wood burning stage of the work. When I did my feather lines, because the feather has a lot of wood, I could roll the burning tool right over the edge of each feather for a more realistic effect. Wood burning lines can go deep into the element, so I knew I had enough wood to take any extra deep burned lines. After the burning was completed I returned to those undercuts with my straight chisel and removed the excess wood from the bottom of each feather, making thin feather tips.
When working with undercuts to create dramatic shadows the thickness of the undercut element determines how dark and how free-floating a shadow it will cast. So thinning those feathers after the burning steps brings them right off the wood.
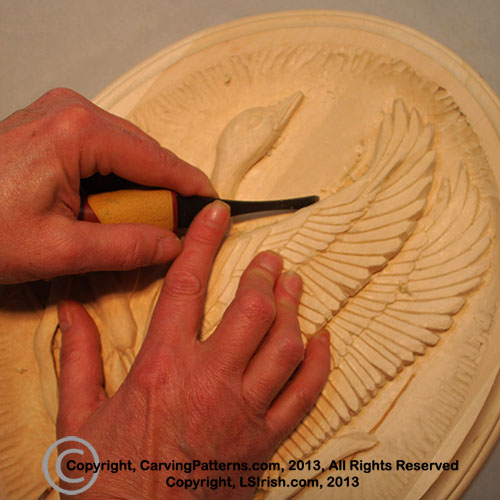
Step 41: Separating the feathers
 |  |
This step is worked in both the front and back wing. With a bench knife or your v-gouge cut along each of the feather pattern lines to separate each feathers. Using a straight chisel angle the feather to the left into and lower than the feather to its right. This will terrace the feathers.
 | 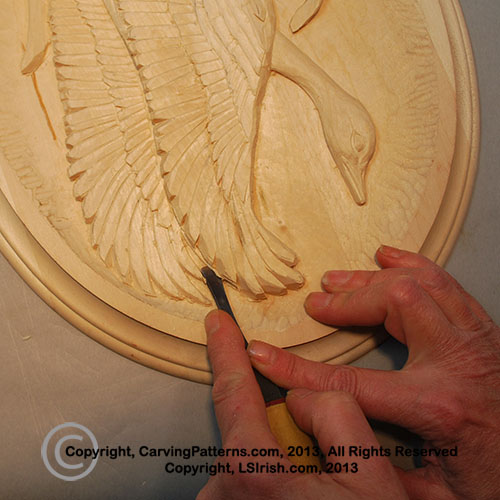 |
I strengthen the undercut along the lower edge of the front feathers, it seemed to need a bit more depth to my taste. Free the feather tips from the background wood. Work this area in several gentle steps between stop cutting with the bench knife then freeing a sliver with the round gouge or straight chisel until you reach the background wood level.
 |  |
Carry this undercut along the entire bottom edge of the front wing.
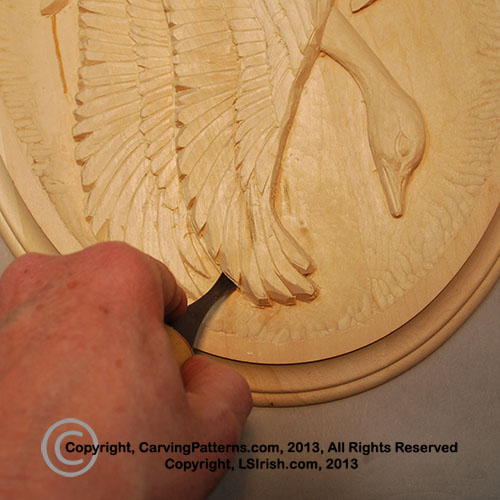
Step 42: Undercut the top edge of the front wing.
 | 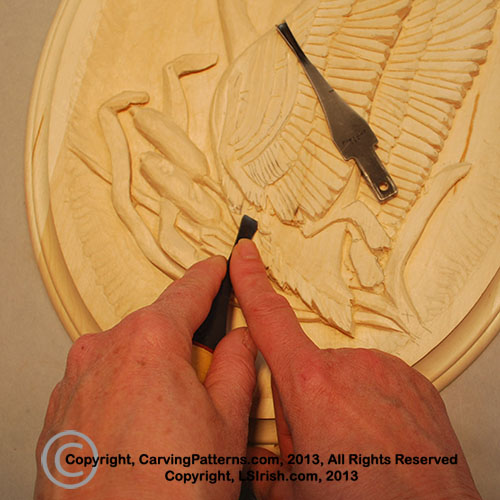 |
With a pencil mark a wedge shape along the top edge of your front wing where your undercut will go. Note – my pencil mark is shown stopping before the top feather. However, I did take this undercut right to the end of that feather.
WIth your bench knife and wide sweep gouge undercut along this top edge of the front feather. Taper the background wood into a smooth transition to the undercut.

Step 43: V-gouge shape the back body and tail feathers, undercut the left side of the body.
Treat the body feathers and tail feathers exactly as you did the individual wing feathers. Use your bench knife or v-gouge to separate each feather, then taper the next feather down to meet that first feather with your chisel. The slope for each of these feathers are in a downward direction.
With your bench knife and chisel undercut the left side of the body and tail, tucking the joint line behind the body.
As I am finishing up the carving steps for this goose I took a little time to re-cut the feather separations in both the front and back wings using a small v-gouge or u-gouge. I lost the tops of these separations when I was reworking the undercuts.
This is a good point for a light sanding with 220-grit sandpaper, and rifflers, and to clean up some of the undercuts with my straight chisel.
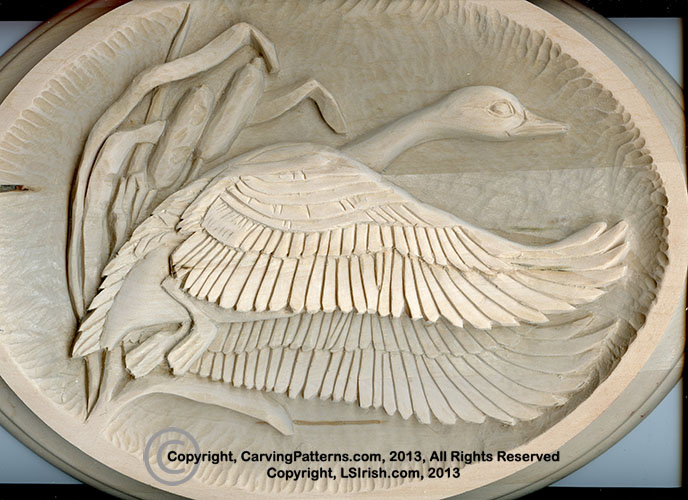 I am stopping my carving steps here. I could go back and re-work each area, refining each element and working towards as smooth a carving as possible. Once that was done I could even carve the fine lines in the feathers, body and cattails using a small v-gouge. Instead I am going to use my wood burning tools to do that work.
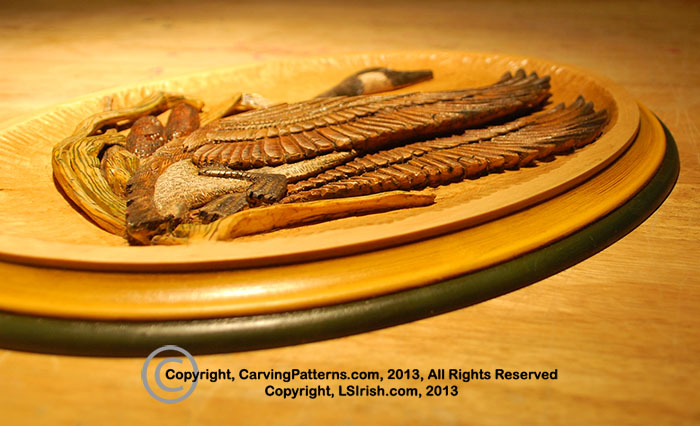
The next chapter to this project will focus on wood burning the details into the feather of our Canada Goose.
Relief Wood Carving Canada Goose, Part Three
 Favorite Birds Favorite BirdsQuail, Ringed Neck Pheasant, Turkey, Hawk, Ruffled Owl, Cardinal, Blue Jay, Robin, Rooster, Eagle in Flight, and two classic sign style eagles. |