Working with Patterns
Preparing the wood
Every carving project begins with a well prepared board. If you are working with planed wood do any cutting, glue-ups, and routing before you begin you carving steps. A smooth surface makes tracing your pattern easier and creates clearer traced lines.
Sand your board well using 220-grit sand paper to remove any fine lines, ridges, or rough areas left from the planing and routing stages. Remove any dust using a tack cloth.
Tracing your pattern
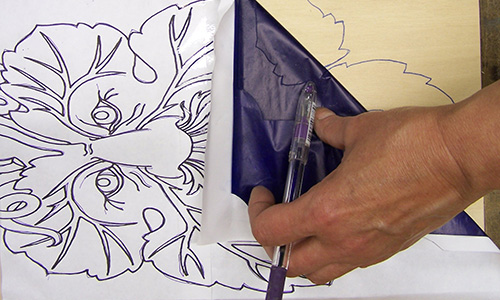
Center your pattern to the area on the wood where you want your carving. With several pieces of masking tape or transparent tape secure one side of the pattern paper.
Slide a sheet of transfer paper underneath the pattern paper. You can use typewriter carbon paper, NCR backed paper, and graphite paper for your transfer agent. Carbon paper will give you the strongest dark blue or black lines but can smudges as you move your hand across the wood surface. NCR paper (carbonless duplicating paper) makes fine but very pale blue lines. Graphite paper is my favorite with its thin medium gray lines and is available in sheets up to the size for a 4′ x 8′ piece of plywood.
Use a colored ink pen – red or purple – to trace along your pattern lines using a medium, even pressure. Excess pressure can score the wood. Trace only the basic outlines of your pattern. Any traced detailing lines will be lost almost immediately in the first rough out steps.
Pingback: Wood Carving Free Projects, Lora Irish Books | LSIrish.com