Sailboat Basic Carving Techniques Tutorial
By L. S. Irish
Introduction
LOW RELIEF SAILBOAT WOOD CARVING SCENE
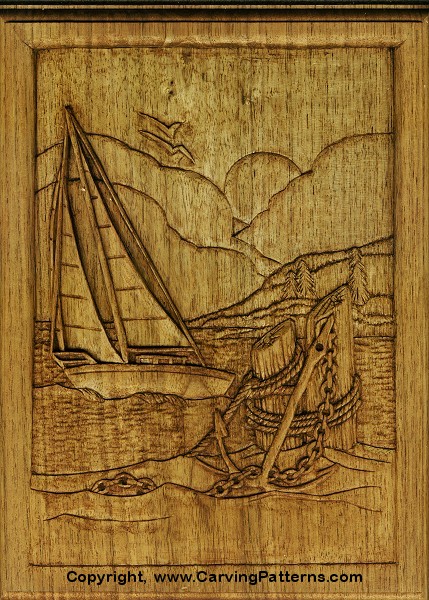
This low relief Sailboat scene in a great choice for a beginner’s wood carving project. It offers a new carver a chance to work with layers and levels inside the scene, smooth areas versus very detailed areas of work, to explore each of the basic wood carving tools, and see how the tools are used to create a variety of textures..
We will work together through this project so that you will be able to see the carving develop step by step. Within many of the text sections you will find a listing of links that will refer you to detailed information articles on our website concerning the step or technique that is being used in this tutorial.
Below the main text sections you will find pictures of the step on which we are working, along with close-ups and captions. So do scroll down through the entire page.
Pull up a chair, get out your carving apron, and let’s begin class. Oh … and please Bookmark this page so you can easily return to the tutorial as you work.
Hope you enjoy the project!
L. Susan Irish

Introduction to Sailboat Tutorial
- Table of Contents (You are here!)
- Tools and Materials Needed List
- Working With Your Pattern
- Working With a Levels Map
- Basic Carving Tool Set
- Tracing the Pattern
- Working with the Grain of Your Wood
- Basic Roughing Out Cuts

- General Level Carving Information
- Stop cuts and roughing out techniques.
- Carving a Fine Straight Line
- Cutting joint corners with the Chip Carving stroke.
- Using a v-gouge to create a joint trough.

- Cutting your pattern into level sections for easy re-tracing.
- Simple rolling over and tucking under technique to shaping.
- Using a veining tool and v-gouge to create simple texture.
- Squaring up your water lines.
- Cutting concave and convex curves.
- Making under cuts to create dark shadows.
- Using a round gouge to create half-circle cuts.
- Using a v-gouge for rope twists.
- Sanding and finishes.
I am taking woodcarving classes at our senior center with an excellent instructor. He is a retired occupational therapist and has been teaching carving for 40+ years.
I found your website while looking for my next carving project and have found several tutorials that are very interesting. My next project will be your sailboat tutorial. This is fitting since I have enjoyed sailing and am a Navy veteran. The tutorial is excellent, but very long. Is it possible to download the instructions and print them out? I am 81 and find it easier to work with instructions that have been printed.
I have found your web site to be very helpful and well set up. Thanks for your dedication to woodcarving.
Paul