Carving Session Preparation
by Lora S. Irish
Preparing to Carve
 Before you begin any relief carving project, make sure you do the following:
Remove jewelry. Remove all rings, bracelets, and long, hanging necklaces that could become caught on a tool tip before you begin carving.
Tie back long hair. If you have long hair, use a hairband to secure it. Long hair can easily block your view of the tool tip and cut.
Wear shoes. Dropped carving tools fall point down, and the top of your foot is the most likely object to be hit.
 Check your workspace. If you sit while carving check the seat of your chair for tools or interchangeable tool tips before you sit down again. Make it a habit to keep your tools on a nearby table or neatly laid beside your wood blank where they are always in view.
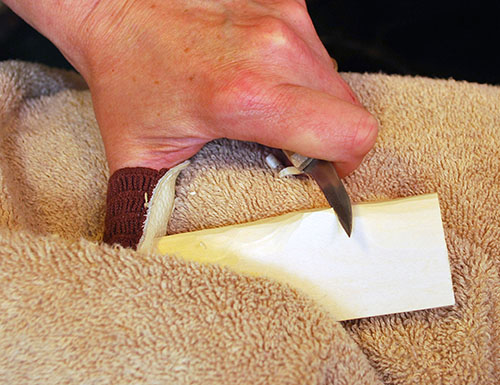
Secure the blank. Secure your carving blank using a terry cloth towel, nonslip matt, bench hook, or clamps. Well-secured blanks require less hand pressure to make cuts.
Lay out a towel. A terrycloth towel on your lap or on the floor will catch your waste chips. Check the towel for dropped tools before you dispose of the chips.
Take a tool inventory. Count your tools during any cleanup sessions to ensure that you do not accidentally lose one.
Make a kit. Create a carving kit with all of the common tools and supplies you will use for any type of carving—carving tools, tracing paper, scissors, ruler, masking tape, pencil, sharpening tools, and any other tools or supplies you feel you might need. Creating a kit means you’ll have everything you need on hand so you can spend your time carving instead of searching for a tool that may or may not have been misplaced .
Cover your nails. Long fingernails they can leave small dents in softer woods like basswood and butternut. A quilter’s plastic thimble can be used to protect both your nails and your project without interfering with your hand movements.